aloos-things github地址:https://github.com/alibaba/AliOS-Things
wiki地址:https://github.com/alibaba/AliOS-Things/wiki
关于如何配置aos的环境等问题,可以自觉查看wiki,写的很清楚,这里就不详细描述了。
接下来主要介绍如何编译代码模块以及aos在esp8266上的应用!
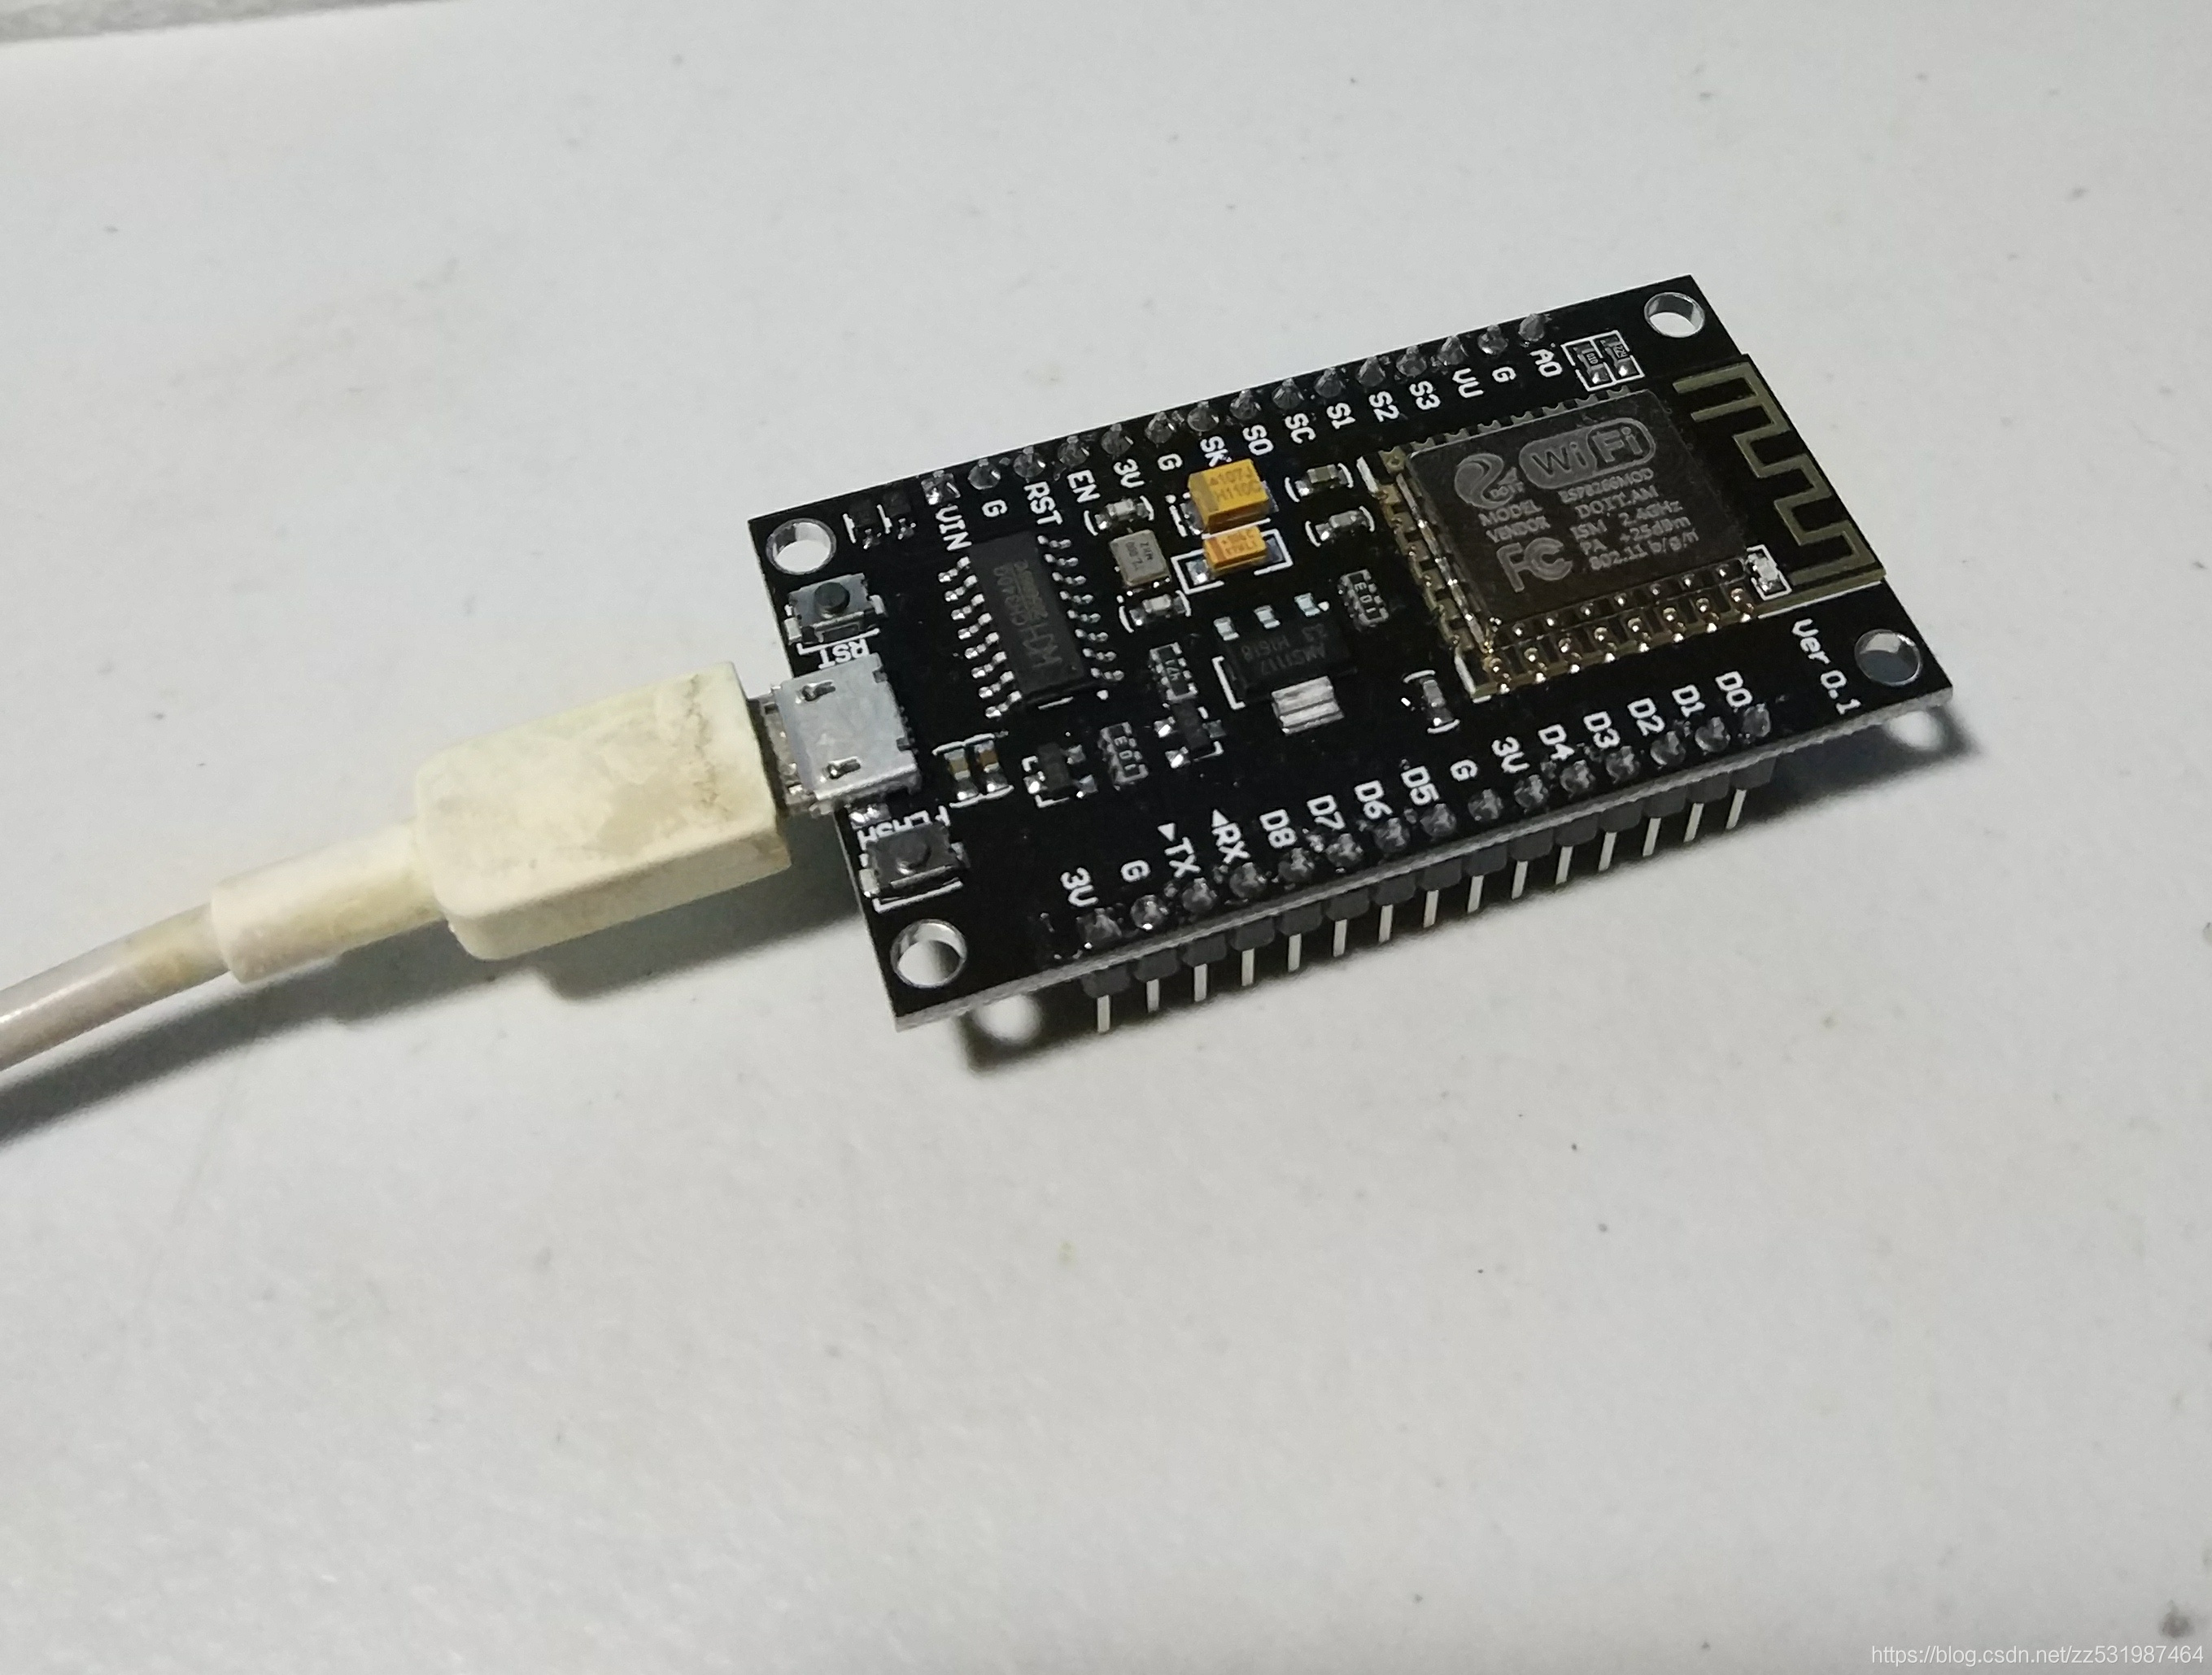
模块如下图所示:芯片为 esp8266-12F
首先修改aos代码文件,路径为: platform/mcu/esp8266/bsp/driver/uart.c中的
void uart_init_new(uart_dev_t *uart)函数最后添加 UART_SetBaudrate(UART0,115200);
添加该行是为了设置烧写完成防止乱码,我们手动设置串口默认的输出波特率为115200。
1.编译ubuntu版本的helloworld sample
cd AliOS-Things
aos make helloworld@linuxhost -c config && aos make
./out/helloworld@linuxhost/binary/[email protected]
执行可以看到系统不停的打印
hello world ! count 1
hello world ! count 2
hello world ! count 3
hello world ! count 4
...
2.编译esp8266版本的helloworld sample
aos make helloworld@esp8266 -c config && aos make接下来在out目录下生成一个helloworld@esp8266文件夹,里面生成了一些相关的文件,我们实际上需要烧写的镜像是out/helloworld@esp8266/binary目录下的[email protected]文件。接下来我们需要将编译出来的bin程序烧写到esp8266中。
3.烧写镜像到esp8266
首先我们需要到乐鑫的官网上下载一个烧写的工具
https://www.espressif.com/zh-hans/support/download/other-tools

找到如上图中点击右边的下载按钮下载,下载后打开 选择 ESP8266 DownloadTool
如下配置:
前面三个的bin文件位置均位于platform/mcu/esp8266/bsp目录下
| 文件名 |
烧录地址 |
| boot_v1.7_921600.bin |
0x0 |
| esp_init_data_default.bin |
0x3fc000 |
| blank.bin |
0x3fe000 |
| 0x1000 |
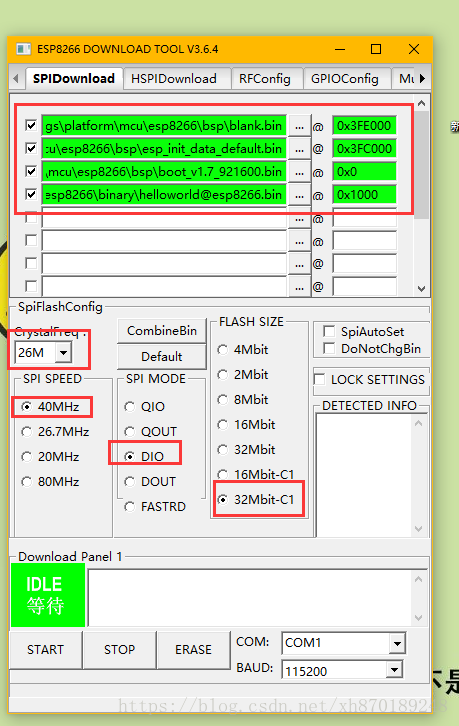
配置完成后点击START开始烧写,烧写完成后打开串口调试助手,设置串口波特率为115200,即可看到esp8266串口持续的输出
hello world,说明烧写成功!