版权声明:本文为博主原创文章,未经博主允许不得转载。 https://blog.csdn.net/zhanghui_hn/article/details/51027960
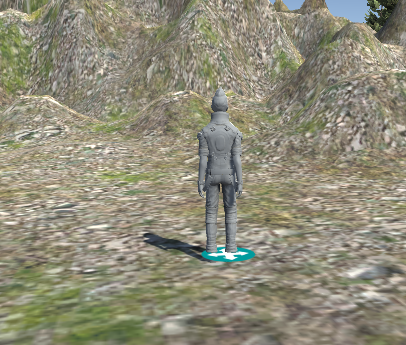
本文讲述的是:通过光标点,为NavMeshAgent设置destination,同时在点击处显示图标。
step1 烘焙地形
step2 添加AIThirdPersonController
step3 配置canvas
- 在场景中添加一个canvas,并将它的”Render Mode”设为”world space”
- 将canvas在X轴向旋转90度,这样canvas就会变成水平的。
- 在canvas下添加一个image,将这个image的源设为指示图标
step4 脚本
- 将navMeshAgent的属性autoBraking设为false
- 获取光标点击处与场景的交点
- 将navMeshAgent的destination设为光标的交点
- 将canvas的位置设为光标的交点
using UnityEngine;
using System.Collections;

public class Destination : MonoBehaviour
{
    public NavMeshAgent navMeshAgent = null;
    public Canvas canvas = null;

    // Use this for initialization
    void Start()
    {}

    // Update is called once per frame
    void Update()
    {
        if (Input.GetMouseButtonDown(0) && this.navMeshAgent != null)
        {
            this.navMeshAgent.autoBraking = false;
            RaycastHit hit;
            Ray ray = Camera.main.ScreenPointToRay(Input.mousePosition);
            if (Physics.Raycast(ray, out hit, 100.0f) && hit.transform != null)
            {
                this.navMeshAgent.SetDestination(hit.point);

                // canvas的位置要向上偏移一点,否则会出现闪烁的现象
                this.canvas.transform.position = new Vector3(hit.point.x
                        , hit.point.y + 0.1f, hit.point.z);
            }
        }
    }
}