在开发过程中使用一些工具会让工作更便捷,效率更高。
本文我们是在上一节完成后的项目基础上进行改进的;
一、使用 source map
当 webpack 打包源代码时,可能会很难追踪到错误和警告在源代码中的原始位置。例如,如果将三个源文件(a.js, b.js 和 c.js)打包到一个 bundle(bundle.js)中,而其中一个源文件包含一个错误,那么堆栈跟踪就会简单地指向到 bundle.js。这并通常没有太多帮助,因为你可能需要准确地知道错误来自于哪个源文件。
为了更容易地追踪错误和警告,JavaScript 提供了 source map 功能,将编译后的代码映射回原始源代码。如果一个错误来自于 b.js,source map 就会明确的告诉你。
source map 有很多不同的选项可用,请务必仔细阅读它们,以便可以根据需要进行配置。
本文使用的是 inline-source-map 选项。
(1)webpack.config.js:
const path = require('path');
const HtmlWebpackPlugin = require('html-webpack-plugin');
const CleanWebpackPlugin = require('clean-webpack-plugin');

module.exports = {
	entry:{
		app:'./src/index.js',
		print:'./src/print.js'
	},
	devtool: 'inline-source-map',
	plugins: [
		new CleanWebpackPlugin(['dist']),
		new HtmlWebpackPlugin({
			title:'Output Management'
		})
	],
	output:{
		filename:'[name].bundle.js',
		path:path.resolve(__dirname,'dist'),
	}
}
(2)src/print.js
export default function printMe() {
	cosnole.log('I get called from print.js!');
}
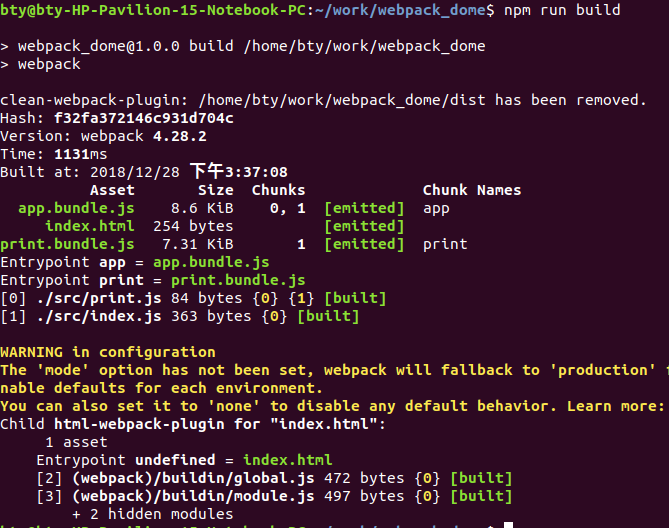
(3)运行 npm run build,就会编译为如下:
现在在浏览器打开最终生成的 index.html 文件,点击按钮,并且在控制台查看显示的错误:

二、自动编译代码的工具
每次要编译代码时,手动运行 npm run build 就会变得很麻烦。
webpack 中有几个不同的选项,可以帮助你在代码发生变化后自动编译代码:
- webpack’s Watch Mode
- webpack-dev-server
- webpack-dev-middleware
多数场景中,你可能需要使用 webpack-dev-server,但是不妨说说以上的所有选项。
1、使用webpack’s Watch Mode
你可以指示 webpack “watch” 依赖图中的所有文件以进行更改。如果其中一个文件被更新,代码将被重新编译,所以你不必手动运行整个构建。
(1)我们添加一个用于启动 webpack 的观察模式的 npm script 脚本:
package.json:
{
  "name": "webpack_dome",
  "version": "1.0.0",
  "description": "",
  "main": "index.js",
  "scripts": {
    "test": "echo \"Error: no test specified\" && exit 1",
    "watch": "webpack --watch",
    "build": "webpack"
  },
  "keywords": [],
  "author": "",
  "license": "ISC",
  "devDependencies": {
    "clean-webpack-plugin": "^1.0.0",
    "html-webpack-plugin": "^3.2.0",
    "webpack": "^4.28.2",
    "webpack-cli": "^3.1.2"
  }
}
(2)运行 npm run watch
现在我们在命令行中运行 npm run watch,就会看到 webpack 编译代码,然而却不会退出命令行。这是因为 script 脚本还在观察文件。
缺点:你需要刷新浏览器,才能看到修改后的实际效。
如果能够自动刷新浏览器就更好了,可以尝试使用 webpack-dev-server,恰好可以实现我们想要的功能。
2、使用 webpack-dev-server
webpack-dev-server 为你提供了一个简单的 web 服务器,并且能够实时重新加载(live reloading)
(1)安装
> sudo npm install --save-dev webpack-dev-server
(2)修改webpack.config.js,告诉开发服务器(dev server),在哪里查找文件:
webpack.config.js:
const path = require('path');
const HtmlWebpackPlugin = require('html-webpack-plugin');
const CleanWebpackPlugin = require('clean-webpack-plugin');

module.exports = {
	entry:{
		app:'./src/index.js',
		print:'./src/print.js'
	},
	devtool: 'inline-source-map',
	devServer: {
		contentBase: './dist'
	},
	plugins: [
		new CleanWebpackPlugin(['dist']),
		new HtmlWebpackPlugin({
			title:'Output Management'
		})
	],
	output:{
		filename:'[name].bundle.js',
		path:path.resolve(__dirname,'dist'),
	}
}
以上配置告知 webpack-dev-server,在 localhost:8080 (默认)下建立服务,将 dist 目录下的文件,作为可访问文件。
最简单的devServer配置项只有四个:
devServer:{
        //服务器基本运行路径,用于找到程序打包地址
        contentBase:path.resolve(__dirname,'dist'),

        //服务器的IP地址,可以使用IP也可以使用localhost
        host:'localhost',

        //服务端压缩是否开启,一般设置为开启
        compress:true,

        //配置服务端口号,建议不使用8080
        port:1717
 }
(3)添加一个 script 脚本,可以直接运行开发服务器(dev server):
package.json
{
  "name": "webpack_dome",
  "version": "1.0.0",
  "description": "",
  "main": "index.js",
  "scripts": {
    "test": "echo \"Error: no test specified\" && exit 1",
    "watch": "webpack --watch",
    "start": "webpack-dev-server --open",
    "build": "webpack"
  },
  "keywords": [],
  "author": "",
  "license": "ISC",
  "devDependencies": {
    "clean-webpack-plugin": "^1.0.0",
    "html-webpack-plugin": "^3.2.0",
    "webpack": "^4.28.2",
    "webpack-cli": "^3.1.2",
    "webpack-dev-server": "^3.1.14"
  }
}
(4)运行npm start
现在我们可以在命令行中运行 npm start,就会看到浏览器自动加载页面。如果现在修改和保存任意源文件,web 服务器就会自动重新加载编译后的代码。
优点:首先会自动打开index.html页面,然后会自动刷新页面。
webpack-dev-server 带有许多可配置的选项,请参考:开发中 Server(devServer)
3、使用 webpack-dev-middleware
webpack-dev-middleware 是一个容器(wrapper),它可以把 webpack 处理后的文件传递给一个服务器(server)。 webpack-dev-server 在内部使用了它,同时,它也可以作为一个单独的包来使用,以便进行更多自定义设置来实现更多的需求。
接下来是一个 webpack-dev-middleware 配合 express server 的示例。
(1)安装 express 和 webpack-dev-middleware:
> sudo npm install --save-dev express webpack-dev-middleware
(2)在根目录下创建server.js
server.js:
(我们将端口设置为3000)
const express = require('express');
const webpack = require('webpack');
const webpackDevMiddleware = require('webpack-dev-middleware');

const app = express();
const config = require('./webpack.config.js');
const compiler = webpack(config);

// Tell express to use the webpack-dev-middleware and use the webpack.config.js
// configuration file as a base.
app.use(webpackDevMiddleware(compiler, {
  publicPath: config.output.publicPath
}));

// Serve the files on port 3000.
app.listen(3000, function () {
  console.log('Example app listening on port 3000!\n');
});
(3)webpack.config.js:
const path = require('path');
const HtmlWebpackPlugin = require('html-webpack-plugin');
const CleanWebpackPlugin = require('clean-webpack-plugin');

module.exports = {
	entry:{
		app:'./src/index.js',
		print:'./src/print.js'
	},
	devtool: 'inline-source-map',
	devServer: {
		contentBase: './dist'
	},
	plugins: [
		new CleanWebpackPlugin(['dist']),
		new HtmlWebpackPlugin({
			title:'Output Management'
		})
	],
	output:{
		filename:'[name].bundle.js',
		path:path.resolve(__dirname,'dist'),
		publicPath: '/'
	}
}
publicPath 也会在服务器脚本用到,以确保文件资源能够在 http://localhost:3000 下正确访问。
(4)添加一个 npm script,以使我们更方便地运行服务
package.json:
{
  "name": "webpack_dome",
  "version": "1.0.0",
  "description": "",
  "main": "index.js",
  "scripts": {
    "test": "echo \"Error: no test specified\" && exit 1",
    "watch": "webpack --watch",
    "start": "webpack-dev-server --open",
    "server": "node server.js",
    "build": "webpack"
  },
  "keywords": [],
  "author": "",
  "license": "ISC",
  "devDependencies": {
    "clean-webpack-plugin": "^1.0.0",
    "express": "^4.16.4",
    "html-webpack-plugin": "^3.2.0",
    "webpack": "^4.28.2",
    "webpack-cli": "^3.1.2",
    "webpack-dev-middleware": "^3.4.0",
    "webpack-dev-server": "^3.1.14"
  }
}
(5)执行 npm run server

现在,打开浏览器并进入 http://localhost:3000,你应该看到你的webpack 应用程序已经运行。
缺点:同webpack's Watch Mode