这是我在网上看到的一个大神写的android本地推送的文章很好,很详细,特转载了过来,如果原作者看到,不让转载的话,我会立刻删除该博客,大神原链接:https://www.cnblogs.com/GuyaWeiren/p/4830854.html
【前言】
对于手游来说,什么时候需要推送呢?玩过一些带体力限制的游戏就会发现,我的体力在恢复满后,手机会收到一个通知告诉我体力已完全恢复了。这类通知通常是由本地的客户端发起的,没有经过服务端。
在安卓应用中,本地通知推送是通过调用系统级服务NotificationManager实现的。虽然U3D本身也有NotificationServices类可以进行通知推送,但仅限于iOS平台(这篇博文讲了怎么使用它在iOS平台发起本机推送)。
而现在我们的游戏是使用U3D开发的,并不能像安卓开发一样直接在代码中调用服务。为了实现本地定时推送效果,需要自己写一个插件来实现了。
由于推送通常发生在客户端关闭的状态,这个推送应该被放在一个延时服务中,否则玩游戏玩得好好的突然跳出来一条自己的推送,太诡异了。
于是我们需要完成一个提供三个功能的模块:1、设定X秒后显示一条推送通知;2、设定X秒后显示一条通知,之后每天再显示一次;3、清除本应用的所有推送。
【解决思路】
因为U3D引擎提供了调用jar包的方法,所以我们可以在jar包中调用安卓的类库,实现消息推送,然后在jar包中留出接口供U3D使用即可,没有必要走JNI层。
【所需工具】
● eclipse
● 安卓SDK(我使用的4.4)
● Unity编辑器(我使用的5.1.3)
【开工】
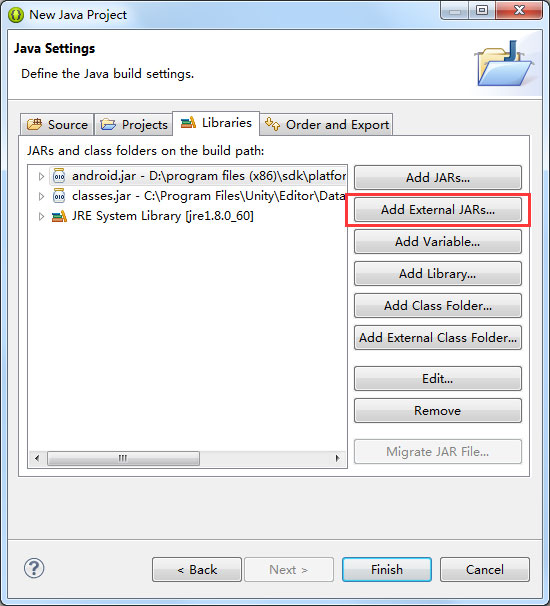
1、 创建jar包工程
创建的时候要引入两个第三方jar包。
一个是Unity的包,地址: Unity安装目录\Editor\Data\PlaybackEngines\androidplayer\release\bin\classes.jar(貌似4.x的目录和5.x不太一样,但总之就是找到androidplayer里面的classes.jar)
还有一个是安卓SDK的包,地址: 安卓SDK安装目录\platforms\安卓版本\android.jar
2、 编码
思路就是使用AlarmManager服务,在一定时间后发起广播,然后通过接收器接受展示。如果你做过安卓开发,对这段代码肯定不会陌生。如果没做过也没关系,当成一个黑盒,在需要的时候调接口就行。
首先添加一个Java类,注意父类要设为BroadcastReceiver。
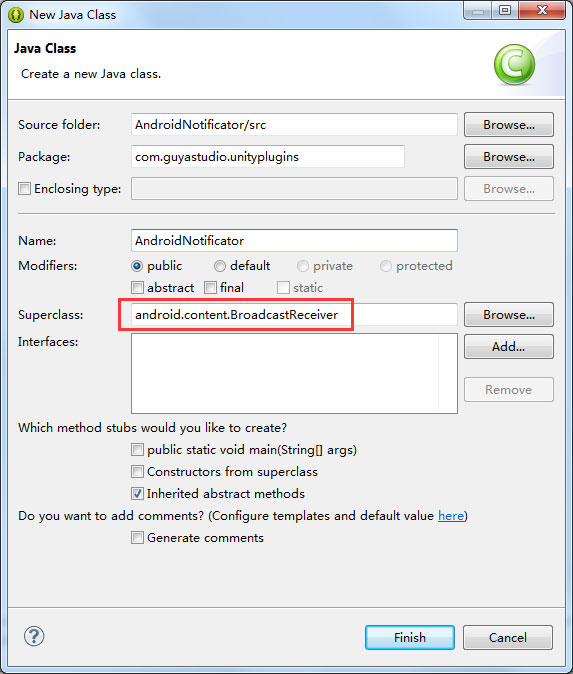
添加完成后,就可以开始写了:
| 1 2 3 4 5 6 7 8 9 10 11 12 13 14 15 16 17 18 19 20 21 22 23 24 25 26 27 28 29 30 31 32 33 34 35 36 37 38 39 40 41 42 43 44 45 46 47 48 49 50 51 52 53 54 55 56 57 58 59 60 61 62 63 64 65 66 67 68 69 70 71 72 73 74 75 76 77 78 79 80 81 82 83 84 85 86 87 88 89 90 91 92 93 94 95 96 97 98 99 100 101 102 103 104 105 106 107 108 109 110 111 112 113 114 115 116 117 118 119 120 121 122 123 124 125 126 127 128 129 130 131 132 133 134 135 136 137 |
|
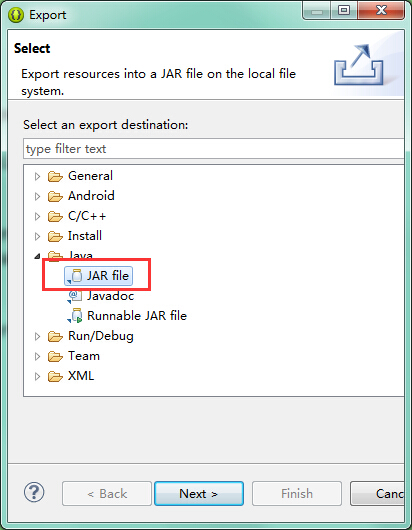
3、 导出jar包
在项目上右键——Export,导出为jar格式。
4、添加AndroidManifest.xml
安卓应用中如果要让应用收到广播,还需要在AndroidManifest.xml中加入receiver标签。我们创建的项目是一个Java项目,不会自动生成AndroidManifest,所以需要手动写一个:
| 1 2 3 4 5 6 7 8 9 10 11 12 13 14 15 16 17 18 19 20 21 22 23 24 |
|
● 注意“<action android:name="UNITY_NOTIFICATOR" />”这里名字要和前面Java代码中的一致。
4、 在U3D项目中调用
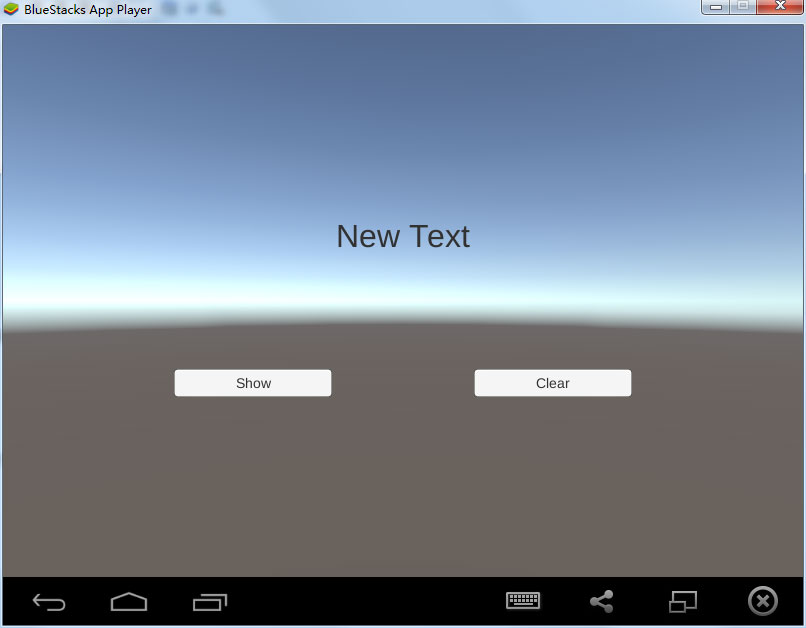
创建一个新的U3D项目,在界面上放一个Text和两个Button(为节约时间我用的源生UI):

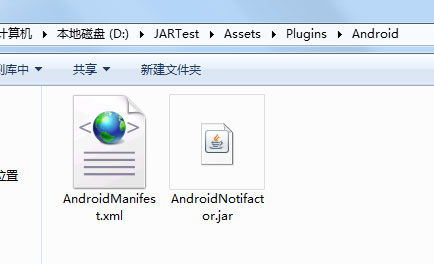
然后将导出的jar文件和AndroidManifest.xml文件移动到 U3D项目目录\Assets\Plugins\Android下:
在几个UI的父节点上加一个脚本,内容如下:
| 1 2 3 4 5 6 7 8 9 10 11 12 13 14 15 16 17 18 19 20 21 22 23 24 25 26 27 28 29 30 31 32 33 34 35 36 37 38 39 40 41 42 43 44 45 46 47 48 49 50 51 52 53 54 55 56 57 58 59 60 61 62 63 64 65 66 67 68 69 70 71 72 73 74 75 76 77 |
|
● 注意实例化AndroidJavaObject的参数名字要和Java工程的包名类名一致。
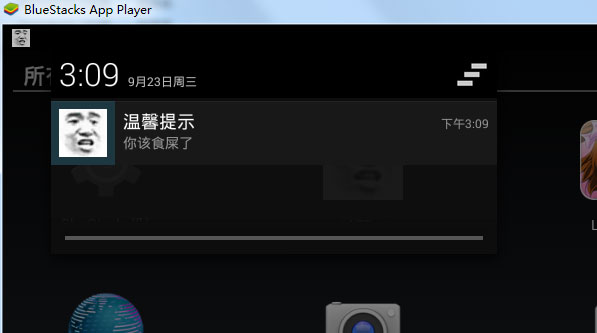
然后绑定控件和事件方法。绑定好后先编译一下,如果通过了,就可以导出一个apk包了。将这个包安装到安卓设备上。我手头没有安卓设备,就用模拟器来测试:
点击“Show”按钮,10秒后会收到通知(点击后可将应用至后台,或杀掉):
而点击“Clean”按钮,通知都会被清除。
至此,这个通知插件就完成了。