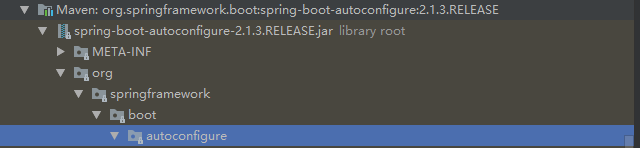
项目中进行整合:
1、整合 新建项目加入依赖(NoSql)
springboot默认使用SpringDate ElasticSearch模块进行操作
查看自动配置类:
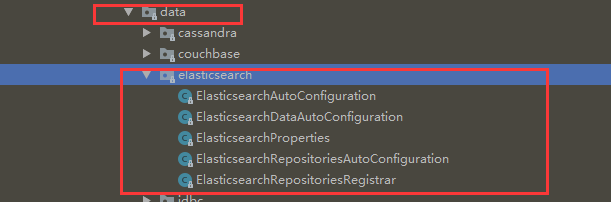
SpringBoot默认支持两种技术来和ES交互“
1、Jest

2、SpringDate ElasticSearch
.png)

@Bean
@ConditionalOnMissingBean
public TransportClient elasticsearchClient() throws Exception {
    TransportClientFactoryBean factory = new TransportClientFactoryBean();
    factory.setClusterNodes(this.properties.getClusterNodes());
    factory.setProperties(this.createProperties());
    factory.afterPropertiesSet();
    return factory.getObject();
}

private Properties createProperties() {
    Properties properties = new Properties();
    properties.put("cluster.name", this.properties.getClusterName());
    properties.putAll(this.properties.getProperties());
    return properties;
}

public class ElasticsearchProperties {
    private String clusterName = "elasticsearch";
    private String clusterNodes;
    private Map<String, String> properties = new HashMap();

@Bean
@ConditionalOnMissingBean
@ConditionalOnBean({Client.class})
public ElasticsearchTemplate elasticsearchTemplate(Client client, ElasticsearchConverter converter) {
    try {
        return new ElasticsearchTemplate(client, converter);
    } catch (Exception var4) {
        throw new IllegalStateException(var4);
    }
}
2、测试
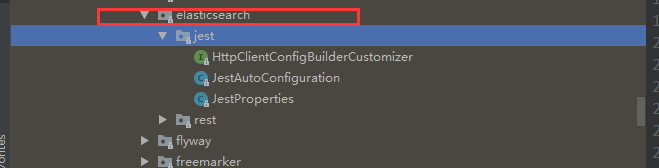
1、Jest方式
依赖:
<dependency>
    <groupId>org.springframework.boot</groupId>
    <artifactId>spring-boot-starter-data-elasticsearch</artifactId>
</dependency>

<!-- https://mvnrepository.com/artifact/io.searchbox/jest -->
<dependency>
    <groupId>io.searchbox</groupId>
    <artifactId>jest</artifactId>
    <version>5.3.4</version>
</dependency>

@Bean(
    destroyMethod = "shutdownClient"
)
@ConditionalOnMissingBean
public JestClient jestClient() {
    JestClientFactory factory = new JestClientFactory();
    factory.setHttpClientConfig(this.createHttpClientConfig());
    return factory.getObject();
}
.png)
 相关的配置
相关的配置
private List<String> uris = new ArrayList(Collections.singletonList("http://localhost:9200"));
配置文件:
spring.elasticsearch.jest.uris=http://192.168.1.121:9200
pojo类:
public class Article {
    //标识为主键
    //@JestId
    private Integer id;
    private String  author;
    private String title;
}
测试类:
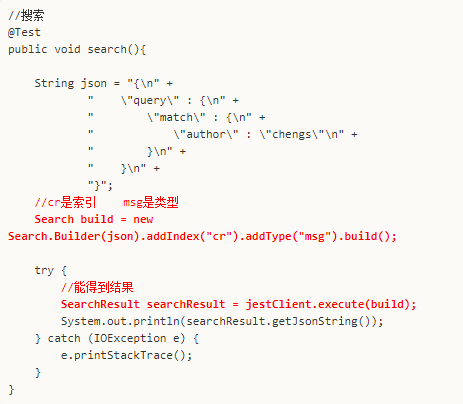
@Autowired
JestClient jestClient;

@Test
public void contextLoads() {
    System.out.println(jestClient);
    //给es保存索引文档
    Article article = new Article();
    article.setId(1);
    article.setAuthor("mrchengs");
    article.setTitle("EsTest");

    String id = String.valueOf(article.getId());
    //构建一个索引功能
    //new Index.Builder(article).index("cr").type("msg").id()
    //cr是索引   msg是类型  此时也是可以是设置id的,但是在类中已经进行了设置
    Index index = new Index.Builder(article).index("cr").type("msg").id(id).build();


    try {
        jestClient.execute(index);
    } catch (IOException e) {
        e.printStackTrace();
    }

}
此时的可以查看结果:

测试搜索功能的实现:
{"took":656,"timed_out":false,"_shards":{"total":5,"successful":5,"skipped":0,"failed":0},"hits":{"total":1,"max_score":0.2876821,"hits":[{"_index":"cr","_type":"msg","_id":"1","_score":0.2876821,"_source":{"id":1,"author":"mrchengs","title":"EsTest"}}]}}
2、SpringDate ElasticSearch
待更新.......