导读:
本章主要总结了图像增强技术中的点处理技术,包括灰度直方图的获取、直方图均衡化、直方图规范化和对比度调整等内容。C++和Python语言环境下,使用OpenCV工具实现上述图像增强操作。
OpenCV 简介:
1、OpenCV的特点
(1) 总体描述
o OpenCV是一个基于C/C++语言的开源图像处理函数库
o 其代码都经过优化,可用于实时处理图像
o 具有良好的可移植性
o 可以进行图像/视频载入、保存和采集的常规操作
o 具有低级和高级的应用程序接口(API)
o 提供了面向Intel IPP高效多媒体函数库的接口,可针对你使用的Intel CPU优化代码,提高程序性能。
(2) 功能
o 图像数据操作(内存分配与释放,图像复制、设定和转换)
Image data manipulation (allocation, release, copying, setting, conversion).
o 图像/视频的输入输出(支持文件或摄像头的输入,图像/视频文件的输出)
Image and video I/O (file and camera based input, image/video file output).
o 矩阵/向量数据操作及线性代数运算(矩阵乘积、矩阵方程求解、特征值、奇异值分解)
Matrix and vector manipulation and linear algebra routines (products, solvers, eigenvalues, SVD).
o 支持多种动态数据结构(链表、队列、数据集、树、图)
Various dynamic data structures (lists, queues, sets, trees, graphs).
o 基本图像处理(去噪、边缘检测、角点检测、采样与插值、色彩变换、形态学处理、直方图、图像金字塔结构)
Basic image processing (filtering, edge detection, corner detection, sampling and interpolation, color conversion, morphological operations, histograms, image pyramids).
o 结构分析(连通域/分支、轮廓处理、距离转换、图像矩、模板匹配、霍夫变换、多项式逼近、曲线拟合、椭圆拟合、狄劳尼三角化)
Structural analysis (connected components, contour processing, distance transform, various moments, template matching, Hough transform, polygonal approximation, line fitting, ellipse fitting, Delaunay triangulation).
o 摄像头标定(寻找和跟踪定标模式、参数定标、基本矩阵估计、单应矩阵估计、立体视觉匹配)
Camera calibration (finding and tracking calibration patterns, calibration, fundamental matrix estimation, homography estimation, stereo correspondence).
o 运动分析(光流、动作分割、目标跟踪)
Motion analysis (optical flow, motion segmentation, tracking).
o 目标识别(特征方法、HMM模型)
Object recognition (eigen-methods, HMM).
o 基本的GUI(显示图像/视频、键盘/鼠标操作、滑动条)
Basic GUI (display image/video, keyboard and mouse handling, scroll-bars).
o 图像标注(直线、曲线、多边形、文本标注)
Image labeling (line, conic, polygon, text drawing)
(3) OpenCV模块
- core – 核心函数库
- imgproc– 图像处理函数库
- vedio – 视频函数库
- highgui – GUI函数库
- ml – 机器学习函数库
Topics to be discussed: 基本图像处理---图像增强
图像增强技术是图像预处理中的一种手段,主要分为**空间域增强**和**频率域增强**,其中空间域增强又可以分为点处理和空间域滤波两大类,滤波器用处广泛,在后续章节中将补充其在去噪、图像分割等方面的应用;频率域增强主要有平滑和锐化两种方法,具体分类如下:
1. 点处理(Point Processing)
- 简单像素亮度转换(Simple intensity transformation)
- 直方图处理(Histogram processing)
2. 空间域滤波(Spatial Filtering)
- 平滑滤波器(Smoothing Filters)
- 锐化滤波器(Sharpening Filters)
- 双边滤波器(Bilateral Filter)
图像增强简介
图像增强的原则是处理某个给定的图像,使其结果较源图像更便于后续的操作与应用。
图像增强主要解决由于图像的灰度级范围较小造成的对比度较低的问题,目的就是将输出图像的灰度级放大到指定的程度,使得图像中的细节看起来增加清晰。**对比度增强**有几种常用的方法,如线性变换、**分段线性变换**、**伽马变换**、**直方图正规化**、**直方图均衡化**、**局部自适应直方图均衡化**等。
图像处理
- 一般图像处理操作符是获取一个或多个输入图像并产生输出图像的功能。
- 图像变换可以看作:
- 点运算(像素变换)-
- Point operators (pixel transforms)
- 邻域操作
- Neighborhood (area-based) operators
像素转换
- 在这种图像处理变换中,每个输出像素的值仅取决于相应的输入像素值。
- 这种算子的例子包括亮度和对比度调整以及颜色校正和变换。
图像处理可以锐化图像特征,例如:**边缘(edges)、边界(boundaries)、对比度(contrast)**等,使得图像获得更好的显示效果或更便于图像分析。
图像增强并不增加原图所包含的信息量,但是它增加了所选取特征的动态范围。
图像增强操作的主要分类如下:

亮度和对比度调整
增加(/减少)β将为每个像素添加(/减去)一个常量值。像素值在[0; 255]范围将饱和(即,高于(/小于)255(/ 0)的像素值将被截止到255(/ 0))。

原始图像的直方图,当Gimp中亮度= 80时为深灰色
直方图针对每个颜色级别表示具有该颜色级别的像素的数量。暗图像将具有许多具有低颜色值的像素,因此直方图将在其左侧部分呈现峰值。当添加恒定偏置时,直方图向右移动,因为我们已经为所有像素添加了恒定偏置。
在一个参数将修改级别的传播方式。如果α<1,颜色等级将被压缩,结果将是对比度较低的图像。

原始图像的直方图,当在Gimp中对比度<0时为深灰色
请注意,这些直方图是使用Gimp软件中的亮度 - 对比度工具获得的。亮度工具应与β相同偏差参数但对比工具似乎与α不同 输出范围似乎以Gimp为中心的增益(正如您在前面的直方图中所注意到的那样)。
β可能会发生偏差会改善亮度,但同时图像会出现轻微的面纱,因为对比度会降低。该α 增益可以用来减少这种效果,但由于饱和,我们将失去原始明亮区域的一些细节。
亮度和对比度调整
-
两个常用的点过程是乘法和加法与常量:
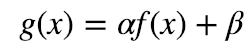
- 参数α>0和β通常称为增益和偏差参数(the gain and bias parameters),这些参数分别控制对比度和亮度。
-
假设f(x)作为源图像像素,g(x)作为输出图像像素,上述表达式可以改写为:

其中,i和j表示像素位于第i行和第j列。
对比度线性变换:
假设输入图像为I,宽为W,高为H,输出图像记为O,图像的线性变换可以用以下公式定义:

如下图所示,当a=1,b=0时,O为I 的一个副本;如果a>1,则输出图像的对比度比有所增大;如果0<a<1,则的对比度比有所减小。而b值的改变,影响的是输出图像的亮度,当b>0时,亮度增加;当b<0时,亮度减小。
而对8位图进行对比度增强来说,线性变换计算出的输出值可能要大于255,需要将这些值截断为255,而不是取模运算,所以不能简单地只是用“*”运算来实现线性变换。具体代码如下:
Python(简略):
import cv2 as cv
import numpy as np
import matplotlib.pyplot as plt

# 绘制直方图函数
def grayHist(img):
    h, w = img.shape[:2]
    pixelSequence = img.reshape([h * w, ])
    numberBins = 256
    histogram, bins, patch = plt.hist(pixelSequence, numberBins,
                                      facecolor='black', histtype='bar')
    plt.xlabel("gray label")
    plt.ylabel("number of pixels")
    plt.axis([0, 255, 0, np.max(histogram)])
    plt.show()

img = cv.imread("../testImages/4/img4.jpg", 0)
out = 2.0 * img
# 进行数据截断,大于255的值截断为255
out[out > 255] = 255
# 数据类型转换
out = np.around(out)
out = out.astype(np.uint8)
# 分别绘制处理前后的直方图
# grayHist(img)
# grayHist(out)
cv.imshow("img", img)
cv.imshow("out", out)
cv.waitKey()
C ++代码
- 完整代码:
/**
 * Created with Clion IDEA.
 * Description: Simple program to change contrast and brightness
 *
 * User: haowang
 * Date: 2019-02-15
 * Time: 12:31
 */


#include "opencv2/imgcodecs.hpp"
#include "opencv2/highgui.hpp"
#include "opencv2/opencv.hpp"
#include "opencv2/imgproc/imgproc.hpp"
#include <iostream>

// we're NOT "using namespace std;" here, to avoid collisions between the beta variable and std::beta in c++17
using std::cin;
using std::cout;
using std::endl;
using namespace cv;


double getPSNR(const Mat &I1, const Mat &I2);

/* Peak Signal to Noise Ratio */


int main(int argc, char **argv) {
/**
 * @function main
 * @brief Main function
 */
	/// Read image given by user
	//! [basic-linear-transform-load]
//	CommandLineParser parser( argc, argv, "/Users/haowang/Standard Pictures/111548040079_.pic_hd.jpg" );
	Mat image = imread("/Users/haowang/Standard Pictures/test1.jpg", 1);
	if (image.empty()) {
		cout << "Could not open or find the image!\n" << endl;
		cout << "Usage: " << argv[0] << "inputImg" << endl;
		return -1;
	}
	//! [basic-linear-transform-load]

	//! [basic-linear-transform-output]

	Mat new_image = Mat::zeros(image.size(), image.type());
	//! [basic-linear-transform-output]

	//! [basic-linear-transform-parameters]
	double alpha = 1.0; /*< Simple contrast control */
	int beta = 0;       /*< Simple brightness control */

	/// Initialize values by usr
	cout << " Basic Linear Transforms " << endl;
	cout << "-------------------------" << endl;
	cout << "* Orginal Image Size is:   " << image.size << endl;
	cout << "* Enter the alpha value [1.0-3.0]:  ";
	cin >> alpha;
	cout << "* Enter the beta value [0-100]: ";
	cin >> beta;
	//! [basic-linear-transform-parameters]

	/// Do the operation new_image(i,j) = alpha*image(i,j) + beta
	/// Instead of these 'for' loops we could have used simply:
	/// image.convertTo(new_image, -1, alpha, beta);
	/// but we wanted to show you how to access the pixels :)

	//! [basic-linear-transform-operation]
	for (int y = 0; y < image.rows; y++) {
		for (int x = 0; x < image.cols; x++) {
			for (int c = 0; c < image.channels(); c++) {
				new_image.at<Vec3b>(y, x)[c] =
						saturate_cast<uchar>(alpha * image.at<Vec3b>(y, x)[c] + beta);
			}
		}
	}
	//! [basic-linear-transform-operation]

	//! [basic-linear-transform-display]

	Mat ResizedImg, ResizedNewImg, ShaprenImg;

//	Resize images
	resize(image, ResizedImg, Size(image.cols * 0.3, image.rows * 0.3), INTER_LINEAR);
	resize(new_image, ResizedNewImg, Size(new_image.cols * 0.3, new_image.rows * 0.3), INTER_LINEAR);
	cout << "* Resized Image Size is:   " << ResizedNewImg.size << endl;

//	Sharpen the operated image by using filter2D
	//![kernel]
	Mat kernel = (Mat_<char>(3, 3) << 0, -1, 0,
			-1, 5, -1,
			0, -1, 0);
	//![kern]

	double t = (double) getTickCount();  // Define a timer

	//![filter2D]
//	CV_EXPORTS_W void filter2D( InputArray src, OutputArray dst, int ddepth,
//                            InputArray kernel, Point anchor = Point(-1,-1),
//                            double delta = 0, int borderType = BORDER_DEFAULT );
//
///** @brief Applies a separable linear filter to an image.
	filter2D(ResizedNewImg, ShaprenImg, ResizedNewImg.depth(), kernel);

	//![filter2D]
	t = ((double) getTickCount() - t) / getTickFrequency();

	double psnr_filter2D = getPSNR(ResizedNewImg, ShaprenImg);

	cout << "Built-in filter2D time passed in seconds:     " << t << endl;
	cout << "Built-in filter2D  sharpen psnr is: " << psnr_filter2D << "dB" << endl;


// Show stuff

	namedWindow("Original Image", WINDOW_NORMAL); //creat windows
	namedWindow("New Image", WINDOW_NORMAL);
	namedWindow("Sharpen Image",WINDOW_NORMAL);

	imshow("Original Image", ResizedImg);
	imshow("New Image", ResizedNewImg);
	imshow("Sharpen Image", ShaprenImg);


	/// Wait until user press some key
	waitKey();
	//! [basic-linear-transform-display]
	return 0;
}


/* Peak Signal to Noise Ratio */
double getPSNR(const Mat &I1, const Mat &I2) {
//	the original image is I1 and the sharpen image is I2
	Mat s1;
	absdiff(I1, I2, s1);       // |I1 - I2|
	s1.convertTo(s1, CV_32F);  // cannot make a square on 8 bits
	s1 = s1.mul(s1);           // |I1 - I2|^2

	Scalar s = sum(s1);        // sum elements per channel

	double sse = s.val[0] + s.val[1] + s.val[2]; // sum channels

	if (sse <= 1e-10) // for small values return zero
		return 0;
	else {
		double mse = sse / (double) (I1.channels() * I1.total());
		double psnr = 10.0 * log10((255 * 255) / mse);
		return psnr;
	}
}
代码分析:
- 我们使用cv :: imread加载图像并将其保存在Mat对象中:
  CommandLineParser parser( argc, argv, "{@input | ../data/lena.jpg | input image}" );
    Mat image = imread( parser.get<String>( "@input" ) );
    if( image.empty() )
    {
      cout << "Could not open or find the image!\n" << endl;
      cout << "Usage: " << argv[0] << " <Input image>" << endl;
      return -1;
}- 现在,由于我们将对此图像进行一些转换,因此我们需要一个新的Mat对象来存储它。此外,我们希望它具有以下功能:
- 初始像素值等于零
- 与原始图像的大小和类型相同
 Mat new_image = Mat::zeros( image.size(), image.type() );
// the same size and type of Mat img
我们观察到cv :: Mat :: zeros返回一个基于image.size()和image.type()的Matlab样式的零初始值设定项
- 我们现在问α的值和β 由用户输入:
 double alpha = 1.0; /*< Simple contrast control */
    int beta = 0;       /*< Simple brightness control */
    cout << " Basic Linear Transforms " << endl;
    cout << "-------------------------" << endl;
    cout << "* Enter the alpha value [1.0-3.0]: "; cin >> alpha;
    cout << "* Enter the beta value [0-100]: ";    cin >> beta;
- 现在,执行操作g(i,j)= α · f(i,j)+ b我们将访问图像中的每个像素。由于我们使用BGR图像进行操作,因此每个像素(B,G和R)将有三个值,因此我们也将单独访问它们。
- 代码:
 for( int y = 0; y < image.rows; y++ ) {
        for( int x = 0; x < image.cols; x++ ) {
            for( int c = 0; c < image.channels(); c++ ) {
                new_image.at<Vec3b>(y,x)[c] =
                  saturate_cast<uchar>( alpha*image.at<Vec3b>(y,x)[c] + beta );
            }
        }
    }
请注意以下内容(仅限C ++代码):
- 要访问图像中的每个像素,我们使用以下语法:image.at <Vec3b>(y,x)[c]其中y是行,x是列,c是R,G或B(0,1或2)。
- 由于操作α&CenterDot;&p(i,j)+ b可以给出超出范围的值或不是整数(如果α是浮动),我们使用cv :: saturate_cast来确保值是有效的。
- 最后,我们创建窗口并以通常的方式显示图像。
    imshow("Original Image", image);
    imshow("New Image", new_image);
    waitKey();
注意
我们可以简单地使用此命令,而不是使用for循环来访问每个像素:
image.convertTo(new_image,-1,alpha,beta);
其中cv :: Mat :: convertTo将有效地执行* new_image = a * image + beta *。但是,我们想向您展示如何访问每个像素。在任何情况下,两种方法都给出相同的结果,但convertTo更优化,工作速度更快。
运行结果:

图片:
描述:
选择一副1080x1922的接近灰度的彩色图像,图像暗部细节几乎被掩盖掉,亮部细节清晰,先采用线性方法对图片的对比度进行调整。
由于图像的尺寸过大,可在处理之前或显示时进行调整,OpenCV中提供了相关的函数resize(),使用详情请上传送门:
https://blog.csdn.net/hhaowang/article/details/87354760
处理结果如图所示:

暗部细节提升明显,人物轮廓及细节也凸显出来,原本被掩盖的色彩信息也有了较为出色的还原。但是,我们注意到,采用这种简单的线性对比度调整在调整暗部亮度和对比度(HDR-HIGH Dynamic Range)的同时会使得亮部过曝,因此需要对图像进行动态对比度调整,在提升暗部亮度的同时也要保持亮部的原本亮度值。
在上一部分中,我们将通过调整图像的亮度和对比度来实践我们所学到的校正曝光不足图像的方法。我们还将看到另一种技术来校正称为伽马校正图像亮度。
伽玛校正
通过在输入值和映射的输出值之间使用非线性变换,Gamma校正可用于校正图像的亮度:
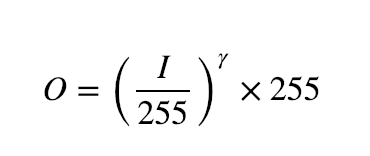
由于此关系是非线性的,因此对于所有像素,效果将不相同,并且将取决于它们的原始值。

绘制不同的伽玛值,当γ< 1中,原始的暗区将是明亮,直方图将被向右移位,而这将是与相对的γ> 1。
纠正曝光不足的图像
以下图像示例α=1.3和β= 40。

整体亮度已得到改善,但您可以注意到,经过对比度调整之后,暗部细节得到了明显改善,与此同时,高亮度部分的云已经过饱和,使得天空颜色失真。
以下图像已用:γ校正= 0.4

伽马校正应该倾向于增加图像的动态对比度,因为映射是非线性的并且不存在如先前方法中那样的数值饱和。

左:alpha,beta校正后的直方图; 中:原始图像的直方图; 右:伽马校正后的直方图
上图比较了三幅图像的直方图(三个直方图之间的y范围不同)。您可以注意到,大多数像素值位于原始图像直方图的下半部分。在α之后,b校正,由于饱和以及右移,我们可以观察到255处的大峰值。在伽马校正之后,直方图向右移动但是暗区域中的像素比亮区域中的像素更加偏移(参见伽马曲线图)。
伽马变换对比线性变换:
C++代码:
 Mat lookUpTable(1, 256, CV_8U);
    uchar* p = lookUpTable.ptr();
    for( int i = 0; i < 256; ++i)
        p[i] = saturate_cast<uchar>(pow(i / 255.0, gamma_) * 255.0);
    Mat res = img.clone();
    LUT(img, lookUpTable, res);
完整代码:
/**
 * Created with Clion IDEA.
 * Description: Simple program to change contrast and brightness
 *
 * User: haowang
 * Date: 2019-02-15
 * Time: 12:31
 */


#include "opencv2/imgcodecs.hpp"
#include "opencv2/highgui.hpp"
#include "opencv2/opencv.hpp"
#include "opencv2/imgproc/imgproc.hpp"
#include <iostream>

// we're NOT "using namespace std;" here, to avoid collisions between the beta variable and std::beta in c++17
using std::cin;
using std::cout;
using std::endl;
using namespace cv;

namespace {
/** Global Variables */
	double alpha = 1.0; /*< Simple contrast control */
	int beta = 0;       /*< Simple brightness control */
	int gamma_cor = 100;
	double getPSNR_val = 0;

	Mat ResizedImg, ResizedNewImg, ShaprenImg, img_gamma_corrected;


	/* Peak Signal to Noise Ratio */
	double getPSNR(const Mat &I1, const Mat &I2) {
//	the original image is I1 and the sharpen image is I2
		Mat s1;
		absdiff(I1, I2, s1);       // |I1 - I2|
		s1.convertTo(s1, CV_32F);  // cannot make a square on 8 bits
		s1 = s1.mul(s1);           // |I1 - I2|^2

		Scalar s = sum(s1);        // sum elements per channel

		double sse = s.val[0] + s.val[1] + s.val[2]; // sum channels

		if (sse <= 1e-10) // for small values return zero
			return 0;
		else {
			double mse = sse / (double) (I1.channels() * I1.total());
			double psnr = 10.0 * log10((255 * 255) / mse);
			return psnr;
		}
	}

	void gammaCorrection(const Mat &img, const double gamma_) {
		CV_Assert(gamma_ >= 0);
		//! [changing-contrast-brightness-gamma-correction]
		Mat lookUpTable(1, 256, CV_8U);
		uchar *p = lookUpTable.ptr();
		for (int i = 0; i < 256; ++i)
			p[i] = saturate_cast<uchar>(pow(i / 255.0, gamma_) * 255.0);

		Mat res = img.clone();
		LUT(img, lookUpTable, res);
		//! [changing-contrast-brightness-gamma-correction]

		hconcat(img, res, img_gamma_corrected);

		imshow("Gamma correction", img_gamma_corrected);

	}

	void on_gamma_correction_trackbar(int, void *) {
		double gamma_value = gamma_cor / 100.0;
		gammaCorrection(ResizedImg, gamma_value);
//		getPSNR_val = getPSNR(ResizedImg, img_gamma_corrected);
//		cout << "When gamma =  " << gamma_value << "    , PSNR =  " << getPSNR_val << endl;
	}

}

int main(int argc, char **argv) {
/**
 * @function main
 * @brief Main function
 */
	/// Read image given by user
	//! [basic-linear-transform-load]
//	CommandLineParser parser( argc, argv, "/Users/haowang/Standard Pictures/111548040079_.pic_hd.jpg" );
	Mat image = imread("/Users/haowang/Standard Pictures/test1.jpg", 1);
	if (image.empty()) {
		cout << "Could not open or find the image!\n" << endl;
		cout << "Usage: " << argv[0] << "inputImg" << endl;
		return -1;
	}
	//! [basic-linear-transform-load]


	//! [basic-linear-transform-output]
	Mat new_image = Mat::zeros(image.size(), image.type());
	//! [basic-linear-transform-output]


	/// Initialize values by usr
	cout << " Basic Linear Transforms " << endl;
	cout << "-------------------------" << endl;
	cout << "* Orginal Image Size is:   " << image.size << endl;
	cout << "* Enter the alpha value [1.0-3.0]:  ";
	cin >> alpha;
	cout << "* Enter the beta value [0-100]: ";
	cin >> beta;
	//! [basic-linear-transform-parameters]

	/// Do the operation new_image(i,j) = alpha*image(i,j) + beta
	/// Instead of these 'for' loops we could have used simply:
	/// image.convertTo(new_image, -1, alpha, beta);
	/// but we wanted to show you how to access the pixels :)

	//! [basic-linear-transform-operation]
	for (int y = 0; y < image.rows; y++) {
		for (int x = 0; x < image.cols; x++) {
			for (int c = 0; c < image.channels(); c++) {
				new_image.at<Vec3b>(y, x)[c] =
						saturate_cast<uchar>(alpha * image.at<Vec3b>(y, x)[c] + beta);
			}
		}
	}
	//! [basic-linear-transform-operation]

	//! [basic-linear-transform-display]


//	Resize images
	resize(image, ResizedImg, Size(image.cols * 0.3, image.rows * 0.3), INTER_LINEAR);
	resize(new_image, ResizedNewImg, Size(new_image.cols * 0.3, new_image.rows * 0.3), INTER_LINEAR);
	cout << "* Resized Image Size is:   " << ResizedNewImg.size << endl;

//	Sharpen the operated image by using filter2D
	//![kernel]
	Mat kernel = (Mat_<char>(3, 3) << 0, -1, 0,
			-1, 5, -1,
			0, -1, 0);
	//![kern]

	double t = (double) getTickCount();  // Define a timer

	//![filter2D]
//	CV_EXPORTS_W void filter2D( InputArray src, OutputArray dst, int ddepth,
//                            InputArray kernel, Point anchor = Point(-1,-1),
//                            double delta = 0, int borderType = BORDER_DEFAULT );
//
///** @brief Applies a separable linear filter to an image.
	filter2D(ResizedNewImg, ShaprenImg, ResizedNewImg.depth(), kernel);

	//![filter2D]
	t = ((double) getTickCount() - t) / getTickFrequency();

	double psnr_filter2D = getPSNR(ResizedNewImg, ShaprenImg);

	cout << "Built-in filter2D time passed in seconds:     " << t << endl;
	cout << "Built-in filter2D  sharpen psnr is: " << psnr_filter2D << "dB" << endl;


//! [changing-contrast-brightness-gamma-correction]
	img_gamma_corrected = Mat(ResizedImg.rows, ResizedImg.cols * 2, ResizedImg.type());

	hconcat(ResizedImg, ResizedImg, img_gamma_corrected);


// Show stuff

	namedWindow("Original Image", WINDOW_NORMAL); //creat windows
	namedWindow("New Image", WINDOW_NORMAL);
	namedWindow("Sharpen Image", WINDOW_NORMAL);
	namedWindow("Gamma correction", WINDOW_NORMAL);

	imshow("Original Image", ResizedImg);
	imshow("New Image", ResizedNewImg);
	imshow("Sharpen Image", ShaprenImg);

	createTrackbar("Gamma correction", "Gamma correction", &gamma_cor, 200, on_gamma_correction_trackbar);

	on_gamma_correction_trackbar(0, 0);

	/// Wait until user press some key
	waitKey();
	//! [basic-linear-transform-display]
	return 0;
}
伽马亮度对比度调整结果:

线性变换结果:
结论:
整体亮度得到很大改善,经过伽马对比度调整之后,暗部细节得到了明显改善,与此同时,窗口天空的高亮度部分其色彩和亮度得到了保留,而采用线性变换方法时天空颜色过饱和,产生失真。
伽马非线性变换较线性变换对对比度较小的图像的提升更明显。
附:Python代码
lookUpTable = np.empty((1,256), np.uint8)
    for i in range(256):
        lookUpTable[0,i] = np.clip(pow(i / 255.0, gamma) * 255.0, 0, 255)
    res = cv.LUT(img_original, lookUpTable)
完整代码:
from __future__ import print_function
from __future__ import division
import cv2 as cv
import numpy as np
import argparse

alpha = 1.0
alpha_max = 500
beta = 0
beta_max = 200
gamma = 1.0
gamma_max = 200

def basicLinearTransform():
    res = cv.convertScaleAbs(img_original, alpha=alpha, beta=beta)
    img_corrected = cv.hconcat([img_original, res])
    cv.imshow("Brightness and contrast adjustments", img_corrected)

def gammaCorrection():
    ## [changing-contrast-brightness-gamma-correction]
    lookUpTable = np.empty((1,256), np.uint8)
    for i in range(256):
        lookUpTable[0,i] = np.clip(pow(i / 255.0, gamma) * 255.0, 0, 255)

    res = cv.LUT(img_original, lookUpTable)
    ## [changing-contrast-brightness-gamma-correction]

    img_gamma_corrected = cv.hconcat([img_original, res]);
    cv.imshow("Gamma correction", img_gamma_corrected);

def on_linear_transform_alpha_trackbar(val):
    global alpha
    alpha = val / 100
    basicLinearTransform()

def on_linear_transform_beta_trackbar(val):
    global beta
    beta = val - 100
    basicLinearTransform()

def on_gamma_correction_trackbar(val):
    global gamma
    gamma = val / 100
    gammaCorrection()

parser = argparse.ArgumentParser(description='Code for Changing the contrast and brightness of an image! tutorial.')
parser.add_argument('--input', help='Path to input image.', default='lena.jpg')
args = parser.parse_args()

img_original = cv.imread(cv.samples.findFile(args.input))
if img_original is None:
    print('Could not open or find the image: ', args.input)
    exit(0)

img_corrected = np.empty((img_original.shape[0], img_original.shape[1]*2, img_original.shape[2]), img_original.dtype)
img_gamma_corrected = np.empty((img_original.shape[0], img_original.shape[1]*2, img_original.shape[2]), img_original.dtype)

img_corrected = cv.hconcat([img_original, img_original])
img_gamma_corrected = cv.hconcat([img_original, img_original])

cv.namedWindow('Brightness and contrast adjustments')
cv.namedWindow('Gamma correction')

alpha_init = int(alpha *100)
cv.createTrackbar('Alpha gain (contrast)', 'Brightness and contrast adjustments', alpha_init, alpha_max, on_linear_transform_alpha_trackbar)
beta_init = beta + 100
cv.createTrackbar('Beta bias (brightness)', 'Brightness and contrast adjustments', beta_init, beta_max, on_linear_transform_beta_trackbar)
gamma_init = int(gamma * 100)
cv.createTrackbar('Gamma correction', 'Gamma correction', gamma_init, gamma_max, on_gamma_correction_trackbar)

on_linear_transform_alpha_trackbar(alpha_init)
on_gamma_correction_trackbar(gamma_init)

cv.waitKey()
查找线性表用于提高计算性能,因为只需要计算一次256个值。