在Spring第四篇中 我们主要介绍了set get的注入方式
在Spring第五篇中 我们主要介绍使用注解配置Spring 主要分为两个步骤
1 导包的同时引入新得约束 导包如下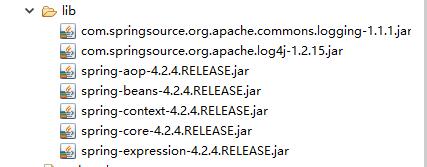
1.1 重写注解代理配置文件 代码如下
<?xml version="1.0" encoding="UTF-8"?>
<beans xmlns:xsi="http://www.w3.org/2001/XMLSchema-instance" xmlns="http://www.springframework.org/schema/beans" xmlns:context="http://www.springframework.org/schema/context" xsi:schemaLocation="http://www.springframework.org/schema/beans http://www.springframework.org/schema/beans/spring-beans-4.2.xsd http://www.springframework.org/schema/context http://www.springframework.org/schema/context/spring-context-4.2.xsd ">
<context:component-scan base-package="cn.lijun.bean"></context:component-scan>
</beans>
1.2 在上一篇的基础上 建立bean包 并且建立User和Phoe两个类,并且生成相关的get set 方法
1.3 将对象注册到容器
代码如下
@Component("user") 同时为了便于开发 也有@Service("user") @Controller("user") @Repository("user")
1.4 Demo测试类
代码如下
package cn.lijun.Demo;
import org.junit.Test;
import org.springframework.context.support.ClassPathXmlApplicationContext;
import cn.lijun.bean.User;
public class Demo {
@Test
public void fun1(){
ClassPathXmlApplicationContext ac = new ClassPathXmlApplicationContext("applicationContext.xml");
User u = (User)ac.getBean("user");
User u1 = (User)ac.getBean("user");
System.out.println(u1==u);
}
}
2 值类型注入
通过set方法赋值 代码如下
package cn.lijun.bean;
import javax.annotation.Resource;
import org.springframework.beans.factory.annotation.Value;
import org.springframework.context.annotation.Scope;
import org.springframework.stereotype.Component;
@Component("user")
@Scope(scopeName="singleton")
public class User {
private String name;
private Integer age;
@Resource(name="phone")
private Phoe phone;
public String getName() {
return name;
}
@Value("lijun")
public void setName(String name) {
this.name = name;
}
public Integer getAge() {
return age;
}
public void setAge(Integer age) {
this.age = age;
}
public Phoe getPhone() {
return phone;
}
public void setPhone(Phoe phone) {
this.phone = phone;
}
@Override
public String toString() {
return "User [name=" + name + ", age=" + age + ", phone=" + phone + "]";
}
}
package cn.lijun.bean;
import org.springframework.beans.factory.annotation.Value;
import org.springframework.stereotype.Component;
@Component("phone")
public class Phoe {
private String name;
private String color;
public String getName() {
return name;
}
@Value("小米9")
public void setName(String name) {
this.name = name;
}
public String getColor() {
return color;
}
@Value("珀金黑")
public void setColor(String color) {
this.color = color;
}
@Override
public String toString() {
return "Phoe [name=" + name + ", color=" + color + "]";
}
}
package cn.lijun.Demo;
import org.junit.Test;
import org.springframework.context.support.ClassPathXmlApplicationContext;
import cn.lijun.bean.User;
public class Demo {
@Test
public void fun1(){
ClassPathXmlApplicationContext ac = new ClassPathXmlApplicationContext("applicationContext.xml");
User u = (User)ac.getBean("user");
//User u1 = (User)ac.getBean("user");
System.out.println(u);
//System.out.println(u1==u);
}
}
运行结果如下
User [name=lijun, age=null, phone=Phoe [name=小米9, color=珀金黑]]
注意 当给引用类型赋值时 需要先把该引用类型交给spring管理,如上面例子中Phone类 需要先@Component("phone")
然后在User中指定 @Resource(name="phone") 在Phone类中再进行赋值。