spring cloud 基本搭建
如下我们使用eureka体系的spring cloud
以下工作都在project : spring-cloud-eureka-project
1,创建一个注册中心(包括监控中心):sc-eureka-server

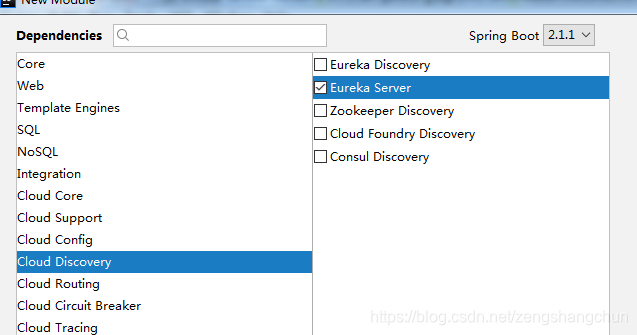
1)新建一个module: sc-eureka-server

2)增加依赖:

	<dependency>
         <groupId>org.springframework.cloud</groupId>
         <artifactId>spring-cloud-starter-netflix-eureka-server</artifactId>
    </dependency>

 3)在 application.yml 配置eureka server
 	把 application.properties 改成 application.yml 并添加配置:

 		server:
 			port: 8080
		#eureka server 的配置
		#register-with-eureka:表示该eureka节点不能注册服务
		#fetch-registry:表示该eureka节点不能发现(订阅)服务
		#instance.secure-port-enabled:安全保护机制(端口)关闭
		eureka:
  			client:
    			register-with-eureka: false
    			fetch-registry: false
    		instance:
    			secure-port-enabled: false


 4)在主启动类上增加eureka server注解标签

 	@SpringBootApplication
	@EnableEurekaServer
	public class ScEurekaServerApplication {
    	public static void main(String[] args) {
        	SpringApplication.run(ScEurekaServerApplication.class, args);
    	}
	}

 5)启动测试类(ScEurekaServerApplication)
2,发布一个服务

1)新建一个module  : sc-eureka-service-provider
2)增加依赖:

	<!--公共包-->
	<dependency>
       <groupId>org.kgc1803</groupId>
       <artifactId>sc-eureka-common</artifactId>
       <version>1.0-SNAPSHOT</version>
    </dependency>

	<!--eureka-client 既能注册服务又能订阅服务-->
    <dependency>
        <groupId>org.springframework.cloud</groupId>
        <artifactId>spring-cloud-starter-netflix-eureka-client</artifactId>
    </dependency>

    <!--测试-->
	<dependency>
        <groupId>org.springframework.boot</groupId>
        <artifactId>spring-boot-starter-test</artifactId>
        <scope>test</scope>
    </dependency>

    <!--spring cloud发布服务多用rest风格,所以需要spring-boot  web包-->
    <dependency>
        <groupId>org.springframework.boot</groupId>
        <artifactId>spring-boot-starter-web</artifactId>
    </dependency>

3)编写一个服务类(与主测试类同级或低级)

	import org.springframework.web.bind.annotation.RequestMapping;
	import org.springframework.web.bind.annotation.RestController;
	import org.kgc1803.pojo.User;
	//rest 风格控制器
	@RestController
	public class DemoService {
    	@RequestMapping("/getInfo")
    	public String getDemoInfo(){
        	return "this is a provider service";
    	}

    	@RequestMapping("/getString")
    	public String getDemoInfo1(String userId){
        	return userId+",this is a provider service";
    	}

    	@RequestMapping("/getUser")
    	public User getUser(@RequestBody User user){
        	return user;
    	}
	}

4)在application中完成eureka client 发布服务的配置(用properties或者yml都一样)

	server:
 		port: 8081
	#client(客户端)向server(服务器)注册服务的配置
	#instance.appname:指明注册中的名字
	#service-url.defaultZone:配置注册中心地址
	eureka:
  		instance:
    		appname: demo_service_provider
  		client:
    		service-url:
      			defaultZone: http://127.0.0.1:8080/eureka/
	#应用名字
	spring:
  		application:
    		name: demo01

5)在主启动类中增加发布服务的注解配置(也可以不加):

	import org.springframework.boot.SpringApplication;
	import org.springframework.boot.autoconfigure.SpringBootApplication;
	import org.springframework.cloud.netflix.eureka.EnableEurekaClient;

	@SpringBootApplication
	@EnableEurekaClient
	public class ScEurekaServiceProviderApplication {
    	public static void main(String[] args) {
        	SpringApplication.run(ScEurekaServiceProviderApplication.class, args);
    	}
	}

6)启动与测试
3,发现(订阅)一个服务

1)新建一个module  : sc-eureka-service-consume
2)增加依赖:

	<!--公共包-->
	<dependency>
       <groupId>org.kgc1803</groupId>
       <artifactId>sc-eureka-common</artifactId>
       <version>1.0-SNAPSHOT</version>
    </dependency>

	<!--eureka-client 既能注册服务又能订阅服务-->
    <dependency>
        <groupId>org.springframework.cloud</groupId>
        <artifactId>spring-cloud-starter-netflix-eureka-client</artifactId>
    </dependency>

	<!--测试-->
	<dependency>
        <groupId>org.springframework.boot</groupId>
        <artifactId>spring-boot-starter-test</artifactId>
        <scope>test</scope>
    </dependency>

    <!--spring cloud发布服务多用rest风格,所以需要spring-boot  web包-->
    <dependency>
        <groupId>org.springframework.boot</groupId>
        <artifactId>spring-boot-starter-web</artifactId>
    </dependency>

3)编写一个控制器(主要用来调用已注册的服务)

	//需要注入一个 RestTemplate 工具对象,先在测试类添加一个注入RestTemplate
	对象的方法,然后在控制器类里注入RestTemplate类。

	//测试类
	import org.springframework.boot.SpringApplication;
	import org.springframework.boot.autoconfigure.SpringBootApplication;
	import org.springframework.context.annotation.Bean;
	import org.springframework.web.client.RestTemplate;

	@SpringBootApplication
	public class ScEurekaServiceConsumeApplication {
    	public static void main(String[] args) {
        	SpringApplication.run(ScEurekaServiceConsumeApplication.class, args);
    	}

    	//向spring里注入一个RestTemplate对象
    	@Bean
    	public RestTemplate getRestTemplate(){
        	return new RestTemplate();
    	}
	}

	//控制器类
	import org.springframework.beans.factory.annotation.Autowired;
	import org.springframework.http.HttpMethod;
	import org.springframework.http.RequestEntity;
	import org.springframework.http.ResponseEntity;
	import org.springframework.web.bind.annotation.RequestMapping;
	import org.kgc1803.pojo.User;
	import org.springframework.web.bind.annotation.RestController;
	import org.springframework.web.client.RestTemplate;

	@RestController
	public class DemoController {
    	@Autowired
    	private RestTemplate restTemplate;
    	@RequestMapping("/test1")
    	public String getEurekaServiceInfo(){
        	/**
         	* exchange(url,type,paras,resutType)
         	* url:请求地址
         	* type:请求类型 get,post
         	* paras:参数
         	* resutType:返回值类型
         	*/
        	String url="http://localhost:8081/getInfo";
        	HttpMethod type=HttpMethod.GET;
        	RequestEntity<String> paras=null;
        	ResponseEntity<String> responseEntity=restTemplate.exchange(url,type,paras,String.class);
        	return responseEntity.getBody();
    	}

		@RequestMapping("/test2")
    	public String getString1(){
        	//getForObject 调用无参方法,返回结果为String的方法
        	String url="http://localhost:8081/getInfo";
        	String res=restTemplate.getForObject(url,String.class);
        	return res;
    	}

		@RequestMapping("/test3")
    	public String getString2(){
        	//getForObject 调用有参方法,路径添加参数。返回结果为String的方法
        	String url="http://localhost:8081/getString?userId=sn001";
        	String res=restTemplate.getForObject(url,String.class);
        	return res;
    	}

		@RequestMapping("/test4")
    	public User getUser(){
        	//参数为实体类对象,返回结果为实体类对象
        	User user=new User();
        	user.setUserId(1);
        	user.setUserName("zsc");
        	user.setPassword("123");
        	String url="http://localhost:8081/getUser";
        	//User u=restTemplate.getForObject(url,User.class,user);
        	User u =restTemplate.postForObject(url,user,User.class);
        	return u;
    	}
	}

4)在application中完成eureka client 发布服务的配置(用properties或者yml都一样)

	server:
 		port: 8082
	#client(客户端)向server(服务器)注册服务的配置
	#instance.appname:指明注册中的名字
	#service-url.defaultZone:配置注册中心地址
	eureka:
  		instance:
    		appname: demo_service_consume
  		client:
    		service-url:
      			defaultZone: http://127.0.0.1:8080/eureka/

5)启动测试