首先介绍一下搭建微服务需要那些服务
1.Eureka(服务注册和发现模块)
2.Spring cloud config(分布式配置中心)
3.Zuul(路由网管)
4.Zipkin(链路跟踪)
5.Server(真实服务,例如:会员服务,产品服务,支付服务,订单服务等等)
开始搭建项目
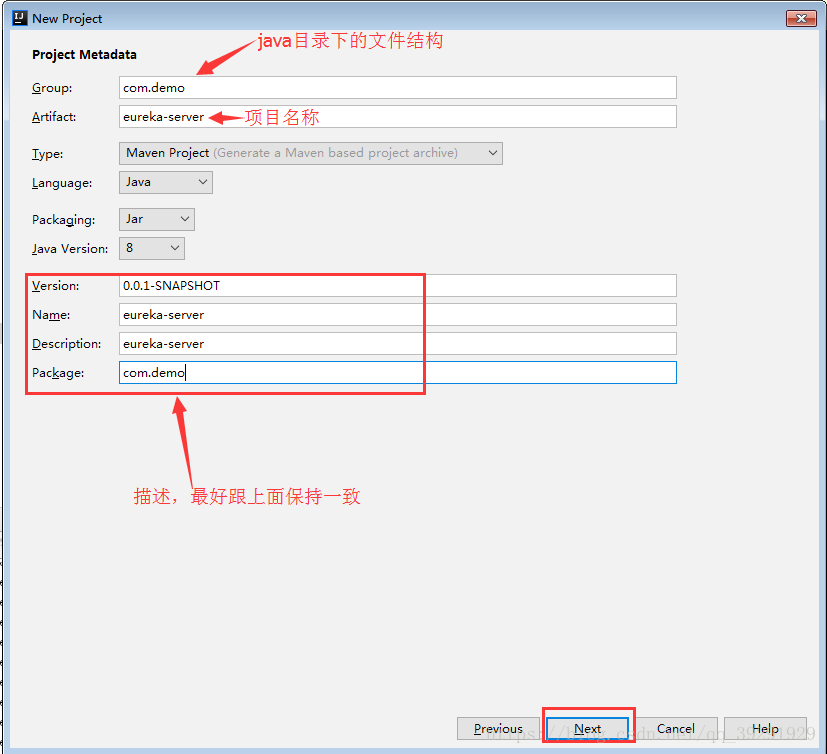
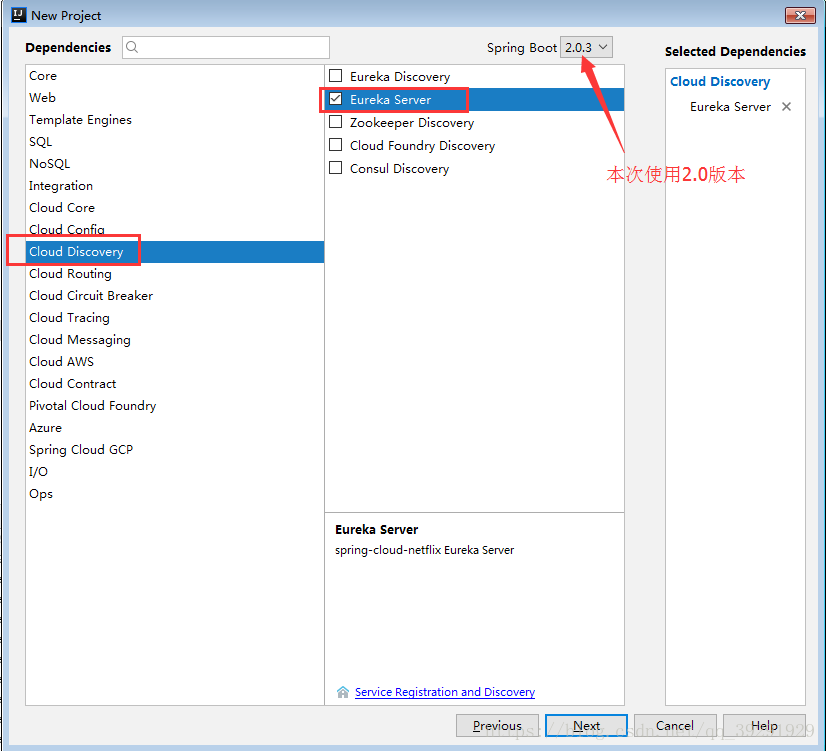
1.首先搭建Eureka服务
第一步:
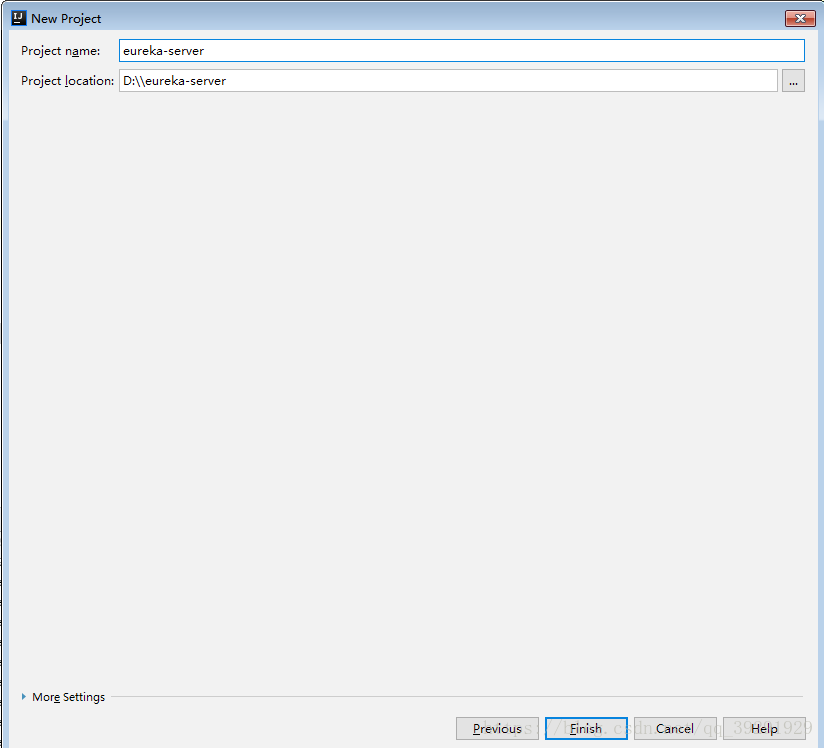
点击完成
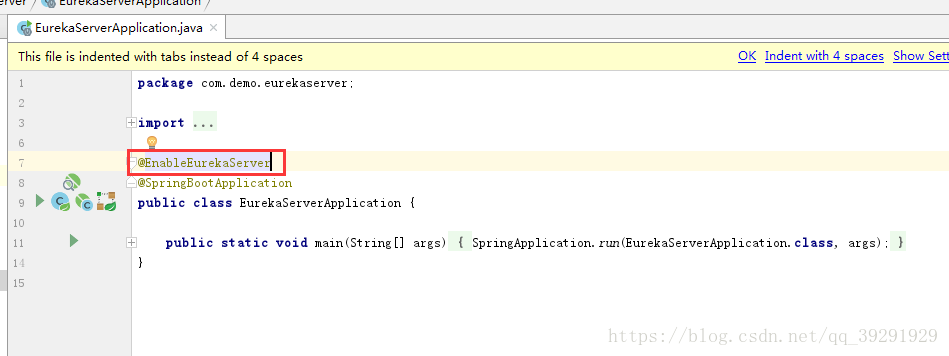
第五步:配置注册和发现服务,添加@EnableEurekaServer
第六步:application.propeties文件中配置服务(初始化是空的)
spring cloud 1.0 --> eureka.instance.hostname=${spring.cloud.client.ipAddress}
spring cloud 2.0 --> eureka.instance.hostname=${spring.cloud.client.ip-address}
第七步:从maven私服中下载依赖jar包
在pom.xml中配置如下内容
<repositories>
<repository>
<id>ugold</id>
<name>ugold repository</name>
<url>http://127.0.0.1:8081/nexus/content/groups/public/</url>
<releases>
<enabled>true</enabled>
</releases>
<snapshots>
<enabled>true</enabled>
</snapshots>
</repository>
<repository>
<id>spring-repo</id>
<name>Spring Repository</name>
<url>http://repo.spring.io/release</url>
</repository>
</repositories>
第八步:启动项目
游览器打开连接地址:http://127.0.0.1:8000/
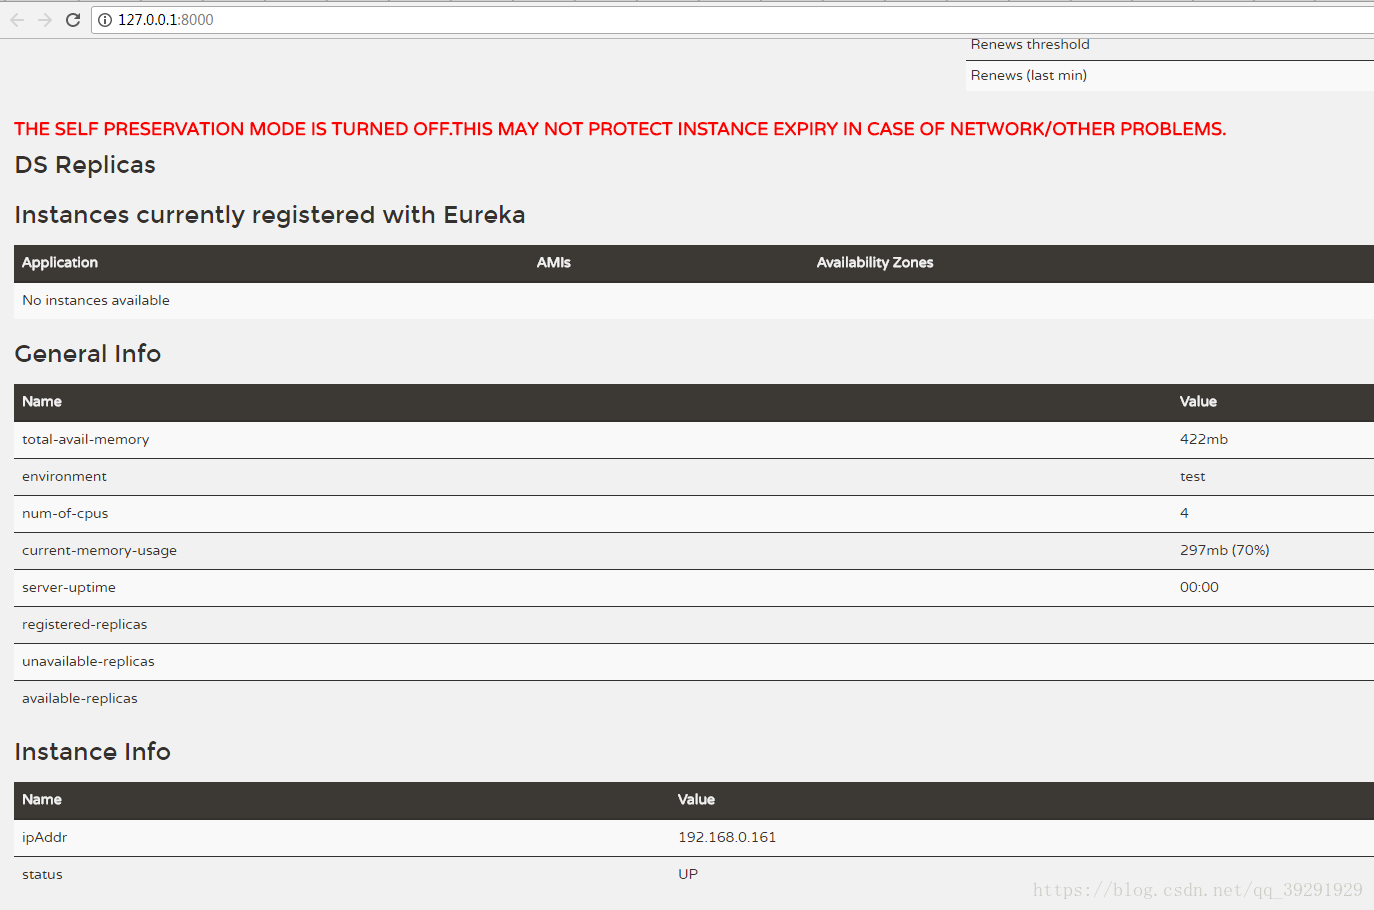
注册和发现发布搭建完成。
2.搭建配置服务中心
第一步和上述Eureka服务一样
第二步:
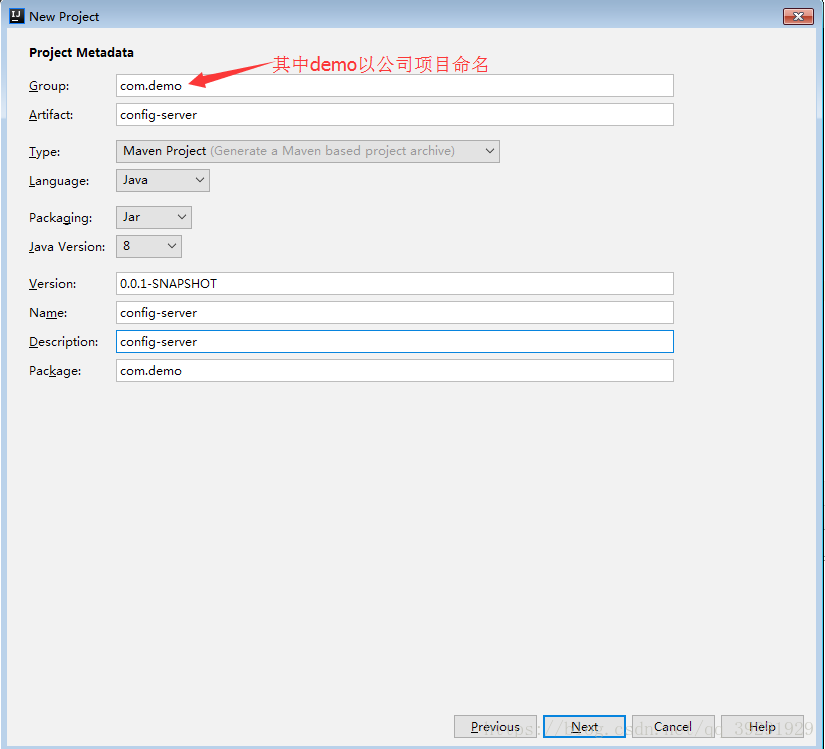
第三步:
点击下一步完成如下:
第四步:配置分布式配置中心服务
@SpringBootApplication
@EnableConfigServer
@EnableEurekaClient
@EnableAutoConfiguration
@Configuration
public class ConfigServerApplication {
public static void main(String[] args) {
SpringApplication.run(ConfigServerApplication.class, args);
}
}
第五步:配置application.properties(默认是空的)
# 服务端口
server.port=8001
spring.application.name=config-server
spring.profiles.active=native
############################## eureka配置 ######################################
eureka.instance.instance-id=${spring.application.name}:${eureka.instance.ip-address}:${server.port}
eureka.client.service-url.defaultZone=http://127.0.0.1:8000/eureka/
# 实例IP地址
eureka.instance.ip-address=192.168.0.161
# 优先使用IP地址作为主机名标识
eureka.instance.prefer-ip-address=true
# 续约时间间隔
eureka.instance.lease-renewal-interval-in-seconds=5
# 续约到期时间
eureka.instance.lease-expiration-duration-in-seconds=10
# 状态页面URL
eureka.instance.status-page-url-path=${management.context-path}/info
# 健康检查页面URL
eureka.instance.health-check-url-path=${management.context-path}/health
第六步:在resources目录下创建config文件夹(该文件夹下包含所有服务的配置)
在三种环境配置,开发(dev),测试(test),正式(beta)三种
配置如下:
############################## Config 配置 #####################################
# 默认密码
config.defaultPassword=123456
# 系统ID
config.systemId=${spring.application.name}
# 系统名称
config.systemName=${spring.application.name}
# 每页记录数
config.pageSize=10
# 缓存超时时间(单位秒)
config.cacheTimeout=60
############################## 日志配置 ######################################
#日志只输出root及以上级别的信息
logging.level.root=info
logging.config=classpath:logback-spring.xml
logging.path=/root/ugold/log/${spring.application.name}
############################## Redis配置 ######################################
# Redis数据库索引(默认为0)
spring.redis.database=0
# Redis服务器地址
spring.redis.host=127.0.0.1
# Redis服务器连接端口
spring.redis.port=6379
# Redis服务器连接密码(默认为空)
spring.redis.password=my_redis
# 连接超时时间(毫秒)
spring.redis.timeout=300
# 连接池最大连接数(使用负值表示没有限制)
spring.redis.pool.max-active=8
# 连接池中的最大空闲连接
spring.redis.pool.max-idle=8
# 连接池中的最小空闲连接
spring.redis.pool.min-idle=0
# 连接池最大阻塞等待时间(使用负值表示没有限制)
spring.redis.pool.max-wait=2000
############################## rabbitmq配置 ######################################
spring.rabbitmq.host=127.0.0.1
spring.rabbitmq.port=5672
spring.rabbitmq.username=test
spring.rabbitmq.password=test
############################## 超时设置 ###############################
# 请求处理超时时间
ribbon.ReadTimeout=9000
# 请求连接超时时间
ribbon.ConnectTimeout=1000
# 断路器超时时间
hystrix.command.default.execution.isolation.thread.timeoutInMilliseconds=10000
第七步:启动服务
1.Eureka(服务注册和发现模块)
2.Spring cloud config(分布式配置中心)
3.Zuul(路由网管)
4.Zipkin(链路跟踪)
5.Server(真实服务,例如:会员服务,产品服务,支付服务,订单服务等等)
开始搭建项目
1.首先搭建Eureka服务
第一步:
第二步:
第三步:
点击完成
第五步:配置注册和发现服务,添加@EnableEurekaServer
第六步:application.propeties文件中配置服务(初始化是空的)
# 服务端口
server.port=8000
spring.application.name=eureka-server

eureka.instance.hostname=${spring.cloud.client.ip-address}
# 优先使用IP地址作为主机名标识
eureka.instance.prefer-ip-address=true
# 不向注册中心注册自己
eureka.client.register-with-eureka=false
# 不需要检索服务
eureka.client.fetch-registry=false
eureka.client.service-url.defaultZone=http://${eureka.instance.hostname}:${server.port}/eureka/
# 关闭自我保护
eureka.server.enable-self-preservation=false
# 清理无效节点时间(10 * 1000)
eureka.server.eviction-interval-timer-in-ms=10000
# 刷新readCacheMap的时间
eureka.server.response-cache-update-interval-ms=3000
重点:spring cloud 1.0和2.0配置有所不同
spring cloud 1.0 --> eureka.instance.hostname=${spring.cloud.client.ipAddress}
spring cloud 2.0 --> eureka.instance.hostname=${spring.cloud.client.ip-address}
第七步:从maven私服中下载依赖jar包
在pom.xml中配置如下内容
<repositories>
<repository>
<id>ugold</id>
<name>ugold repository</name>
<url>http://127.0.0.1:8081/nexus/content/groups/public/</url>
<releases>
<enabled>true</enabled>
</releases>
<snapshots>
<enabled>true</enabled>
</snapshots>
</repository>
<repository>
<id>spring-repo</id>
<name>Spring Repository</name>
<url>http://repo.spring.io/release</url>
</repository>
</repositories>
第八步:启动项目
游览器打开连接地址:http://127.0.0.1:8000/
注册和发现发布搭建完成。
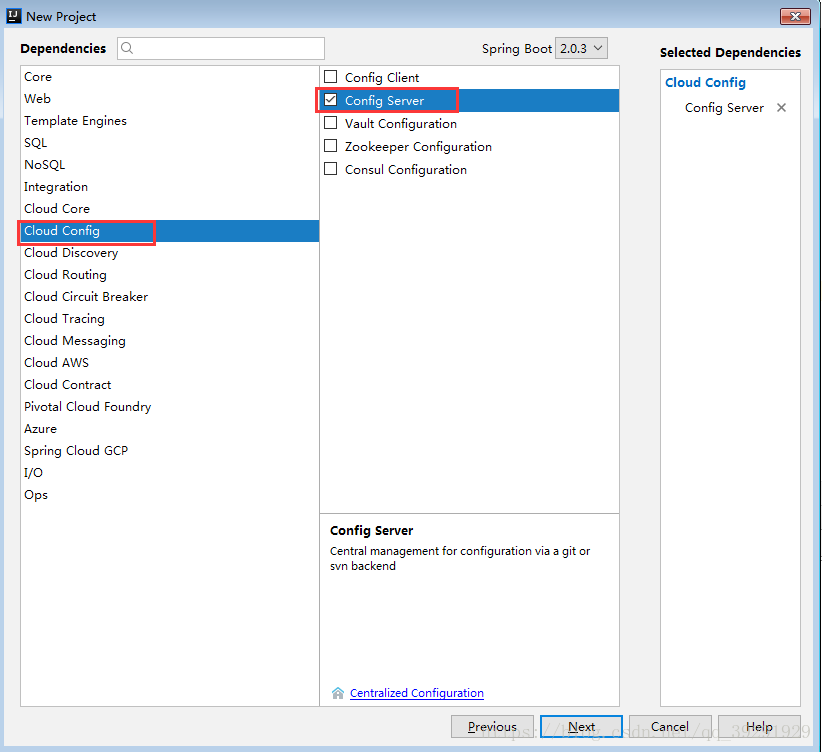
2.搭建配置服务中心
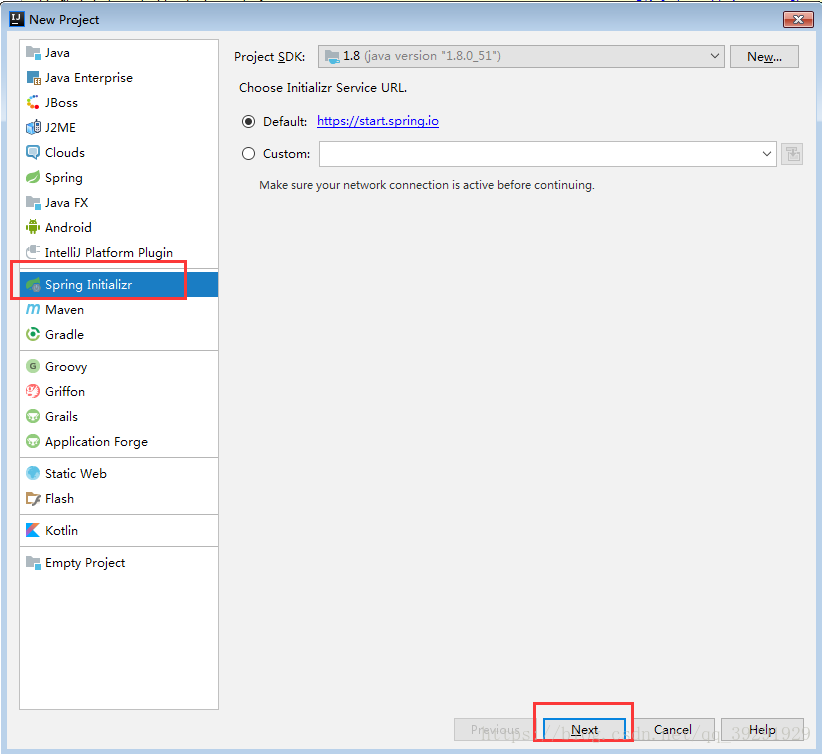
第一步和上述Eureka服务一样
第二步:
第三步:
点击下一步完成如下:
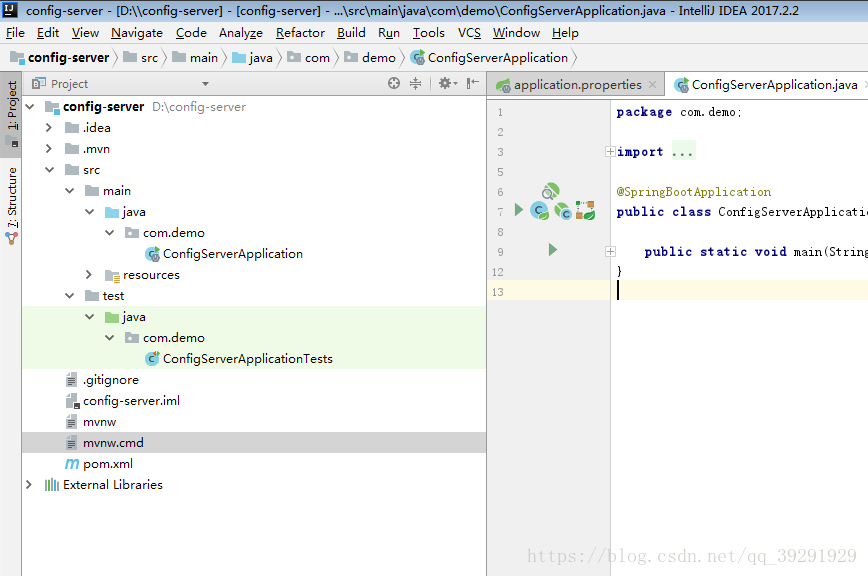
第四步:配置分布式配置中心服务
@SpringBootApplication
@EnableConfigServer
@EnableEurekaClient
@EnableAutoConfiguration
@Configuration
public class ConfigServerApplication {
public static void main(String[] args) {
SpringApplication.run(ConfigServerApplication.class, args);
}
}
第五步:配置application.properties(默认是空的)
# 服务端口
server.port=8001
spring.application.name=config-server
spring.profiles.active=native
############################## eureka配置 ######################################
eureka.instance.instance-id=${spring.application.name}:${eureka.instance.ip-address}:${server.port}
eureka.client.service-url.defaultZone=http://127.0.0.1:8000/eureka/
# 实例IP地址
eureka.instance.ip-address=192.168.0.161
# 优先使用IP地址作为主机名标识
eureka.instance.prefer-ip-address=true
# 续约时间间隔
eureka.instance.lease-renewal-interval-in-seconds=5
# 续约到期时间
eureka.instance.lease-expiration-duration-in-seconds=10
# 状态页面URL
eureka.instance.status-page-url-path=${management.context-path}/info
# 健康检查页面URL
eureka.instance.health-check-url-path=${management.context-path}/health
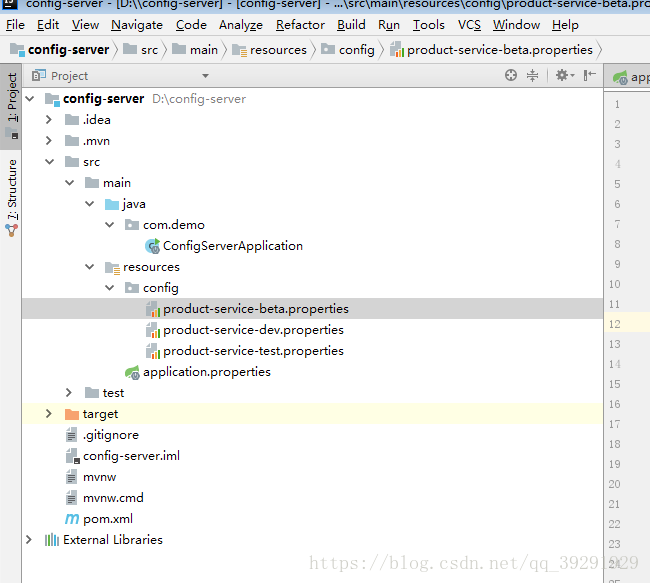
第六步:在resources目录下创建config文件夹(该文件夹下包含所有服务的配置)
在三种环境配置,开发(dev),测试(test),正式(beta)三种
配置如下:
############################## Config 配置 #####################################
# 默认密码
config.defaultPassword=123456
# 系统ID
config.systemId=${spring.application.name}
# 系统名称
config.systemName=${spring.application.name}
# 每页记录数
config.pageSize=10
# 缓存超时时间(单位秒)
config.cacheTimeout=60
############################## 日志配置 ######################################
#日志只输出root及以上级别的信息
logging.level.root=info
logging.config=classpath:logback-spring.xml
logging.path=/root/ugold/log/${spring.application.name}
############################## Redis配置 ######################################
# Redis数据库索引(默认为0)
spring.redis.database=0
# Redis服务器地址
spring.redis.host=127.0.0.1
# Redis服务器连接端口
spring.redis.port=6379
# Redis服务器连接密码(默认为空)
spring.redis.password=my_redis
# 连接超时时间(毫秒)
spring.redis.timeout=300
# 连接池最大连接数(使用负值表示没有限制)
spring.redis.pool.max-active=8
# 连接池中的最大空闲连接
spring.redis.pool.max-idle=8
# 连接池中的最小空闲连接
spring.redis.pool.min-idle=0
# 连接池最大阻塞等待时间(使用负值表示没有限制)
spring.redis.pool.max-wait=2000
############################## rabbitmq配置 ######################################
spring.rabbitmq.host=127.0.0.1
spring.rabbitmq.port=5672
spring.rabbitmq.username=test
spring.rabbitmq.password=test
############################## 超时设置 ###############################
# 请求处理超时时间
ribbon.ReadTimeout=9000
# 请求连接超时时间
ribbon.ConnectTimeout=1000
# 断路器超时时间
hystrix.command.default.execution.isolation.thread.timeoutInMilliseconds=10000
第七步:启动服务