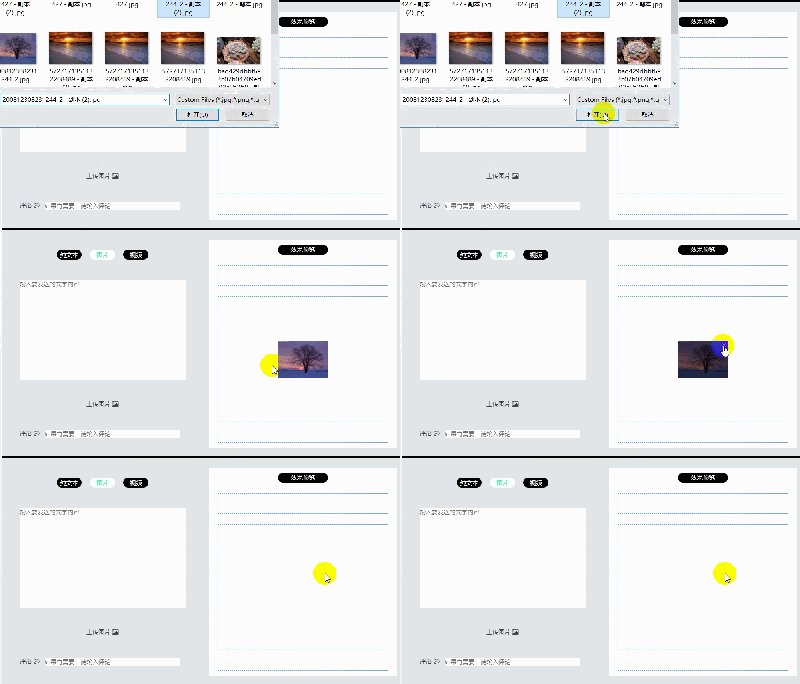
先看下效果

实现原理
- 选择本地文件
- 上传到服务器
- 服务器返回的值(图片的url)保存到vuex
- 遍历地址的集合
- css 实现, 主要要用到::before
直接上代码
上传的html
 <div>
	<label class="pointer" for="picture" v-if="type==='picture'">
	     上传图片
	     <i class="fa fa-picture-o" aria-hidden="true"></i>
   	</label>
   <input
     v-show="false"
     id="picture"
     ref="picture"
     accept=".jpg, .png, .gif, .jpeg"
     type="file"
     @change="showPicture()"
   >
   <label class="pointer" for="video" v-if="type==='video'">
     上传视频
     <i class="fa fa-film" aria-hidden="true"></i>
   </label>
   <input
     v-show="false"
     id="video"
     ref="video"
     accept=".mp4"
     type="file"
     @change="showVideo()"
   >
 </div>
预览的html
<div v-if="type==='picture'" class="attachment-preview">
	<div class="content-img" v-for="(img, index) in attachmentP" :key="index">
	     <img :src="img.url" alt>
	     <div class="click-div" @click="deleteImg(index)"></div>
	   </div>
	 </div>
 	<div v-if="type==='video'" class="attachment-preview">
	<video
		class="video"
		:src="video.url"
		v-for="(video, index) in attachmentV"
		:key="index"
		controls
		autoplay
	></video>
</div>
js 只贴出了核心的代码
data () {
    return {
	  // 保存图片的信息
      attachmentP: [],
      // 保存视频的信息
      attachmentV: []
    }
  }
showPicture () {
	console.log('showPicture')
	let picture = this.$refs.picture.files[0]
	console.log(picture)
	if (!validPicture(picture.path)) {
		this.$refs.picture.value = ''
		alert('图片格式只能是jpg|jpeg|png|gif')
	} else {
		if (picture) {
			let formdata = new FormData()
			formdata.append('myfile', picture)
			this.$store.dispatch('UploadFile', formdata).then(res => {
				console.log(res)
				this.$refs.picture.value = ''
				if (this.attachmentP.length >= 9) {
					alert('最多只能添加9张图片')
				} else {
					this.attachmentP.push(res)
				}
			}).catch(
				err => {
				console.log(err)
			})
		}
	}
	console.log(this.attachmentP)
}
删除图片的js
 deleteImg (index) {
      console.log(index)
      this.attachmentP.splice(index, 1)
    }
下面是css 用的是scss 核心代码
注意:
- img直接使用::before 没有效果
- 不能用::after,不然点击删除不会出发事件
- 也可以用filter 、@mouseover …等实现同样的效果
- 红叉是emoji
.attachment-preview {
      width: 90%;
      height: 60%;
      position: relative;
      border: #4bbcfb 1px dashed;
      display: flex;
      align-items: center;
      justify-content: space-around;
      flex-wrap: wrap;
      .content-img {
        width: 30%;
        height: 30%;
        position: relative;
        display: flex;
        align-content: center;
        justify-content: space-around;
        &:hover {
          cursor: pointer;
          // & {
          //   filter: grayscale(0.8);
          // }
          &::before {
            content: "❌";
            position: absolute;
            background: rgba(0, 0, 0, 0.5);
            width: 100%;
            height: 100%;
            left: 0;
            top: 0;
            text-align: end;
          }
        }
        .click-div {
          width: 15px;
          height: 15px;
          position: absolute;
          right: 0;
          top: 0;
        }
        img {
          width: auto;
          height: auto;
          max-width: 100%;
          max-height: 100%;
        }
      }
    }
你如果有更好的方法 欢迎留言交流!!