一、创建数据库
CREATE DATABASE glance;
GRANT ALL PRIVILEGES ON glance.* TO 'glance'@'localhost' IDENTIFIED BY 'glance2018';
GRANT ALL PRIVILEGES ON glance.* TO 'glance'@'%' IDENTIFIED BY 'glance2018';
创建glance用户凭证
用admin用户凭证创建glance用户凭证
source /etc/profile
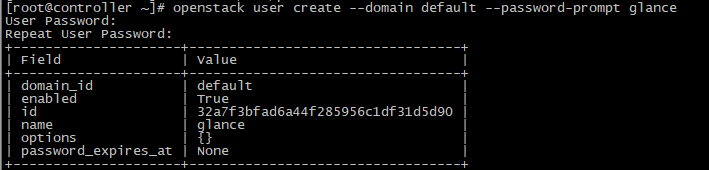
openstack user create --domain default --password-prompt glance #设置密码glance2018
将admin角色添加到glance用户和service项目:
openstack role add --project service --user glance admin
创建glance服务实体及endpoint
openstack service create --name glance --description "OpenStack Image" image
openstack endpoint create --region RegionOne image public http://10.1.80.110:9292
openstack endpoint create --region RegionOne image internal http://10.1.80.110:9292
openstack endpoint create --region RegionOne image admin http://10.1.80.110:9292
二、安装、配置glance组件
yum install -y openstack-glance
修改配置文件glance-api.conf
vim /etc/glance/glance-api.conf
编辑模式下(冒号)
删除#开头行 %g/^#/d
删除空白行 %g/^$/d
[database]
connection = mysql://glance:[email protected]/glance
[keystone_authtoken]
auth_uri = http://10.1.80.110:5000
auth_url = http://10.1.80.110:35357
memcached_servers = 10.1.80.110:11211
auth_type = password
project_domain_name = default
user_domain_name = default
project_name = service
username = glance
password = glance2018
[paste_deploy]
flavor = keystone
[glance_store]
stores = file,http
default_store = file
filesystem_store_datadir = /var/lib/glance/images/
修改配置文件glance-registry.conf
vim /etc/glance/glance-registry.conf
[database]
connection = mysql://glance:[email protected]/glance
[keystone_authtoken]
auth_uri = http://10.1.80.110:5000
auth_url = http://10.1.80.110:35357
memcached_servers = 10.1.80.110:11211
auth_type = password
project_domain_name = default
user_domain_name = default
project_name = service
username = glance
password = glance2018
[paste_deploy]
flavor = keystone
初始化数据库
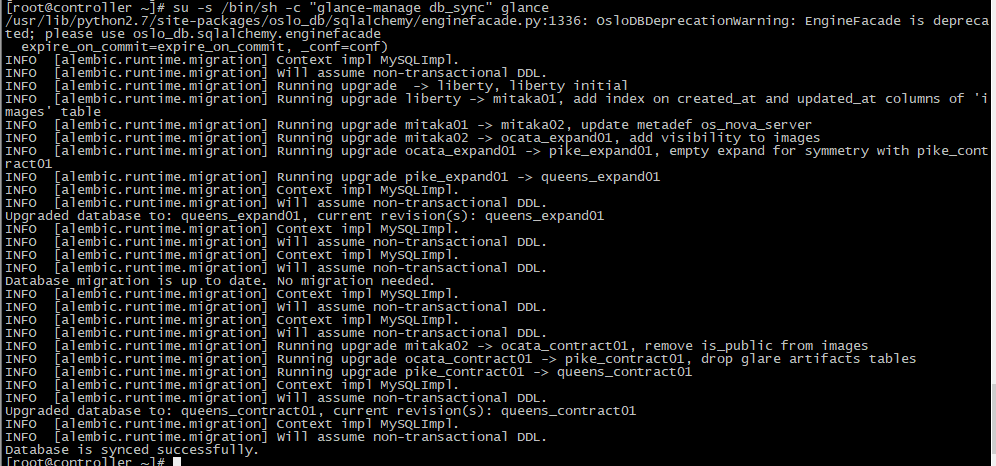
su -s /bin/sh -c "glance-manage db_sync" glance
启动glance
systemctl enable openstack-glance-api.service openstack-glance-registry.service
systemctl start openstack-glance-api.service openstack-glance-registry.service
systemctl status openstack-glance-api.service openstack-glance-registry.service
三、检查安装
重新加载环境变量
source admin-openrc
下载镜像
wget http://download.cirros-cloud.net/0.3.5/cirros-0.3.5-x86_64-disk.img
上传镜像
openstack image create "cirros" \
--file cirros-0.3.5-x86_64-disk.img \
--disk-format qcow2 --container-format bare \
--public
上传ISO镜像
openstack image create --disk-format qcow2 --container-format bare --public --file CentOS-6.10-x86_64-minimal.iso CentOS-6.10-x86_64
查看镜像
openstack image list