springboot整合springsecurity从Hello World到源码解析(一):hello world程序入门

security
摘要:权限控制在我们的项目当中一般都有用到,有简单的登录就搞定的权限访问,也有分级身份的权限控制,
而权限控制的方式对于不同的需求也有多种选择,小到使用代码硬编码,自定义过滤器,自定义拦截器等等。更加灵活的方式则是使用已有的权限工具。
如shiro,springsecurity等。而本系列博客将重点介绍springsecurity的工作原理以及应用。springsecurity的官方介绍:Spring Security是一个功能强大且可高度自定义的身份验证和访问控制框架。它是保护基于Spring的应用程序的框架。
Spring Security是一个专注于为Java应用程序提供身份验证和授权的框架。与所有Spring项目一样,Spring Security的真正强大之处在于它可以轻松扩展以满足自定义要求
从上面的介绍我们知道,spring security是基于spring框架的,所以与spring基本无缝集成,而本系列博客也将使用最新的springboot(没接触过的可以先学习springboot系列教程) 进行演示,好了,说了这么多废话,接下来看hello world的入门搭建。
系列其它文章
[springboot整合springsecurity从Hello World到源码解析(一):hello world程序入门](https://blog.csdn.net/Iperishing/article/details/86504847)
[springboot整合springsecurity从Hello World到源码解析(二):springsecurity配置加载解析](https://blog.csdn.net/Iperishing/article/details/86505017)
[springboot整合springsecurity从Hello World到源码解析(三):基础配置详解](https://blog.csdn.net/Iperishing/article/details/86505120)
[springboot整合springsecurity从Hello World到源码解析(四):springsecurity基础架构解析](https://blog.csdn.net/Iperishing/article/details/86521621)
[springboot整合springsecurity从Hello World到源码解析(五):springsecurity+jwt整合restful服务](https://blog.csdn.net/Iperishing/article/details/86575416)
环境搭建
基础环境,springboot: 2.1.1.RELEASE
注意,因为本项目演示有多个,所以我把他们构建成了多个子项目。
父pom文件:
 1<?xml version="1.0" encoding="UTF-8"?>
 2<project xmlns="http://maven.apache.org/POM/4.0.0" xmlns:xsi="http://www.w3.org/2001/XMLSchema-instance"
 3         xsi:schemaLocation="http://maven.apache.org/POM/4.0.0 http://maven.apache.org/xsd/maven-4.0.0.xsd">
 4    <modelVersion>4.0.0</modelVersion>
 5    <packaging>pom</packaging>
 6    <modules>
 7        <module>basic-security</module>
 8    </modules>
 9
10    <parent>
11        <groupId>org.springframework.boot</groupId>
12        <artifactId>spring-boot-starter-parent</artifactId>
13        <version>2.1.1.RELEASE</version>
14        <relativePath/> <!-- lookup parent from repository -->
15    </parent>
16
17    <groupId>cn.jsbintask</groupId>
18    <artifactId>spring-security-demos</artifactId>
19    <version>1.0.0</version>
20
21    <name>spring-security-demos</name>
22    <description>Demos project for Spring Security</description>
23
24    <properties>
25        <java.version>1.8</java.version>
26    </properties>
27</project>
hello-world版本pom文件:
 1<?xml version="1.0" encoding="UTF-8"?>
 2<project xmlns="http://maven.apache.org/POM/4.0.0"
 3         xmlns:xsi="http://www.w3.org/2001/XMLSchema-instance"
 4         xsi:schemaLocation="http://maven.apache.org/POM/4.0.0 http://maven.apache.org/xsd/maven-4.0.0.xsd">
 5    <parent>
 6        <groupId>cn.jsbintask</groupId>
 7        <artifactId>spring-security-demos</artifactId>
 8        <version>1.0.0</version>
 9    </parent>
10
11    <modelVersion>4.0.0</modelVersion>
12    <artifactId>basic-security</artifactId>
13
14    <dependencies>
15        <dependency>
16            <groupId>org.springframework.boot</groupId>
17            <artifactId>spring-boot-starter-freemarker</artifactId>
18        </dependency>
19        <dependency>
20            <groupId>org.springframework.boot</groupId>
21            <artifactId>spring-boot-starter-security</artifactId>
22        </dependency>
23        <dependency>
24            <groupId>org.springframework.boot</groupId>
25            <artifactId>spring-boot-starter-web</artifactId>
26        </dependency>
27
28        <dependency>
29            <groupId>org.projectlombok</groupId>
30            <artifactId>lombok</artifactId>
31            <optional>true</optional>
32        </dependency>
33        <dependency>
34            <groupId>org.springframework.boot</groupId>
35            <artifactId>spring-boot-starter-test</artifactId>
36            <scope>test</scope>
37        </dependency>
38        <dependency>
39            <groupId>org.springframework.security</groupId>
40            <artifactId>spring-security-test</artifactId>
41            <scope>test</scope>
42        </dependency>
43    </dependencies>
44
45    <build>
46        <plugins>
47            <plugin>
48                <groupId>org.springframework.boot</groupId>
49                <artifactId>spring-boot-maven-plugin</artifactId>
50            </plugin>
51        </plugins>
52    </build>
53</project>
注意上方引入了lombok和freemarker,主要为了演示方便。
基础配置
- 环境搭建好后,接下来开始编写helloworld程序,首先编写一个freemarker模板(不知道的可以当作html处理)
hello.html放到templates目录下方
 1<!DOCTYPE html>
 2<html lang="en">
 3<head>
 4    <meta charset="UTF-8">
 5    <title>hello</title>
 6</head>
 7<body>
 8    <h2>hello world from jsbintask.</h2>
 9</body>
10</html>
- 修改application.yml
 1server:
 2  port: 8080
 3
 4spring:
 5  freemarker:
 6    enabled: true
 7    cache: false
 8    template-loader-path: classpath:/templates/
 9    suffix: .html
10
11  security:
12    user:
13      name: user
14      password: admin
15      roles: user, admin
上方配置先不进行讲解,下章解析工作原理时会着重进行讲解,各位可以先跟着配置。
- 编写controller
1@Controller
2@RequestMapping
3public class HelloController {
4
5    @RequestMapping("/hello")
6    public String hello(ModelAndView mv) {
7        return "hello";
8    }
9}
此处为映射请求 /hello 到我们编写的 hello.html程序。
- 启动应用(main app)
接下来我们在浏览器访问 hello, 出现如下拦截页面: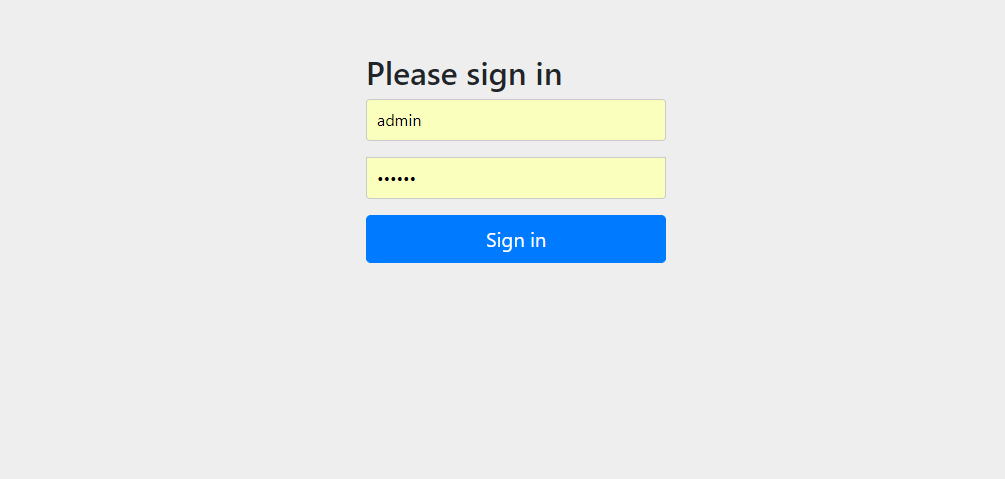
springsecurity
我们的helloworld程序也就成功了。
总结
本hello world程序展示了springboot结合springsecurity基础配置,接下来我将讲解springsecurity是如何工作的。
本项目git地址:spring-security-demos
本文原创地址,我的博客:https://jsbintask.cn/2019/01/08/springsecurity-helloworld/#more,未经允许,禁止转载!