本系列文章主要记录自己学习ActiveMQ的过程,由于自己初次接触ActiveMQ,故将学习过程记录在此,方便自己以后回顾。首先介绍ActiveMQ的基本使用,从而对ActiveMQ有个大致了解,在接下来的文章中将具体介绍相关知识点,首先我们来写一个ActiveMQ的"hello world";
1.下载并启动ActiveMQ
- 下载ActiMQ,官方下载地址:
http://activemq.apache.org/ - 将文件上传至linux系统中,并解压
- 进入activemq文件夹中的/bin目录中,并运行
sh activemq start启动activemq

- 查看activemq是否启动成功
1.可通过
sh activemq status查看是否启动成功
2.可通过ps -ef | grep activemq查看是否启动成功,展示应用路径表示启动成功
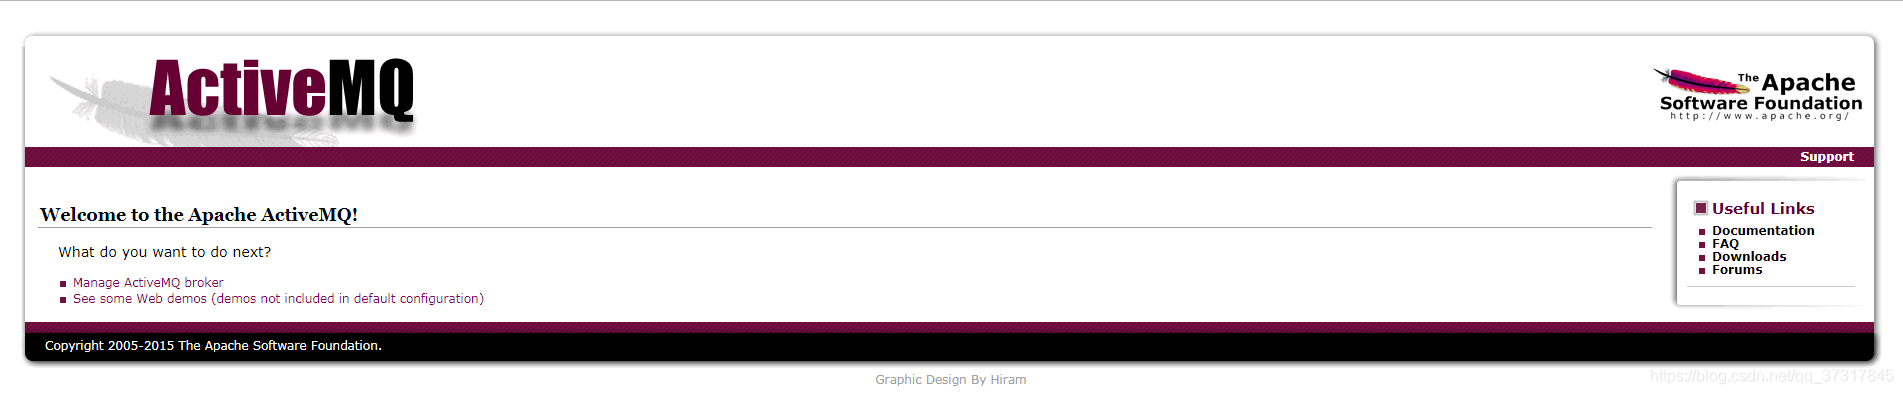
3.可通过访问http://192.168.31.100:8161访问浏览器,若出现如下页面则表示启动成功,管控台默认用户名及密码均为admin


2.书写一个helloworld
- 引入activemq的依赖
目前最新版本为ActiveMQ 5.15.7 ,本文采用的版本为ActiveMQ5.15.0,同时在使用时应该注意ActiveMQ的版本与jdk依赖版本需保持一致,下图展示了ActiveMQ与jdk版本相对应
ActiveMQ与JDK版本对应

  <!--引入activemq依赖-->
 <dependencies>
       <dependency>
           <groupId>org.apache.activemq</groupId>
           <artifactId>activemq-all</artifactId>
           <version>5.15.0</version>
       </dependency>
   </dependencies>
- 发送端代码实现
public class ActivemqSender {
   public static void main(String[] args) {
       //1.创建activemq的连接工厂,同时以tcp协议创建
       ConnectionFactory factory  = new ActiveMQConnectionFactory("tcp://192.168.31.100:61616");
       //2.创建connection连接
       Connection connection = null;
       try {
           connection = factory.createConnection();
           //3.启动连接
           connection.start();
           //4.创建会话session
           Session session = connection.createSession(Boolean.TRUE, Session.AUTO_ACKNOWLEDGE);
           //5.创建发送目标
           Destination destination = session.createQueue("first_queue");
           //6.创建发送端的producer
           MessageProducer producer = session.createProducer(destination);
           //7.创建发送信息
           TextMessage textMessage = session.createTextMessage();
           //8.设置发送内容
           textMessage.setText("hello world,this is my first activemq message");
           //9.发送消息
           producer.send(textMessage);
           session.commit();
           session.close();
       } catch (JMSException e) {
           e.printStackTrace();
       }finally {
           if(null!=connection){
               try {
                   connection.close();
               } catch (JMSException e) {
                   e.printStackTrace();
               }
           }
       }
   }
}
上述发送端代码运行后,我们可通过管控台看到如下图现象
首先解释一下各列代码的意思
1.Number of Pending Messages:表示队列中有几条消息未被消费
2.Number of Consumers:表示有几个客户端等待
3.Messages Enqueued:表示生产了多少条消息
3.Messages Dequeued:表示消费了多少条消息
通过上述解决可以看到,我们运行发送端,则会在生产一条消息,并将其放入队列中

- 接收端代码实现
public class ActivemqReciver {
    public static void main(String[] args) throws JMSException {
        //1.创建jms工厂
        ConnectionFactory factory = new ActiveMQConnectionFactory("tcp://192.168.31.100:61616");
        //2.创建connection
        Connection connection = factory.createConnection();
        connection.start();
        //3.创建session
        Session session = connection.createSession(Boolean.TRUE, Session.AUTO_ACKNOWLEDGE);
        //4.创建desition
        Destination destination = session.createQueue("first_queue");
        //5.创建consumer
        MessageConsumer consumer = session.createConsumer(destination);
        TextMessage textMessage = (TextMessage) consumer.receive();
        System.out.println(textMessage.getText());
        session.commit();
        session.close();
        if(connection!=null){
            connection.close();
        }
    }
}
接受端接收消息后,我们查看管控台发现,消息数量发生了如下变化
其中:Number Of Pending Message数量为0,表示消息队列中无消息存在,Messages Dequeued由0变为1表示消费了一条消息,通过此我们可以发现发送端发送到activemq中的消息已经被接收端消费,并且接收端控制台输出接收到的消息正是发送端发送的textMessage.set()的消息数据。此次第一个hello world实例已演示完成,后续会继续学习API详细使用、两种经典的消息模式(点通点和订阅/发布)、与Spring整合、ActiveMQ集群等功能 。
