转自:http://blog.csdn.net/evankaka/article/details/44784205
本文将主讲了spring在Eclipse下的配置,并用Spring运行了第一个HelloWorld.
一、下载需要的文件
这里我们已经配置好Java的运行环境和装好Eclipse了。
下载Spring
下载地址:http://maven.springframework.org/release/org/springframework/spring/
下载commons-logging
下载地址:http://commons.apache.org/proper/commons-logging/download_logging.cgi
将它们下载后解压到自己想放的位置,下载之前记得要看清楚是32位还是64位
二、配置Spring
1、新建一个工程,就叫SpringHelloworld。
2、添加Spring3.x的包,网上有很多不同的方法。这里我只讲一种。
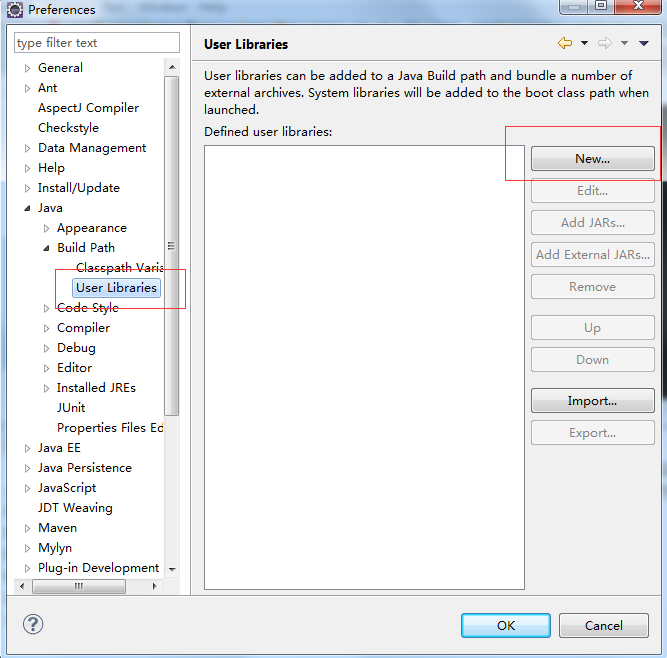
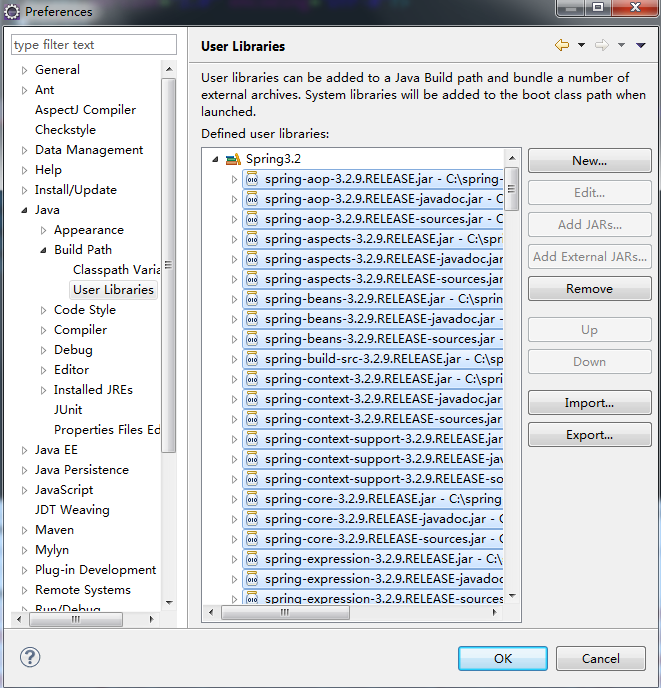
在Window->Preferences->Java->Build Path->User Libraries->New添加一个用户包的库,这里这么做的原因是Spring包比较多,我们这样做,配置一次后,以后每个工程要用直接添加该库就行了
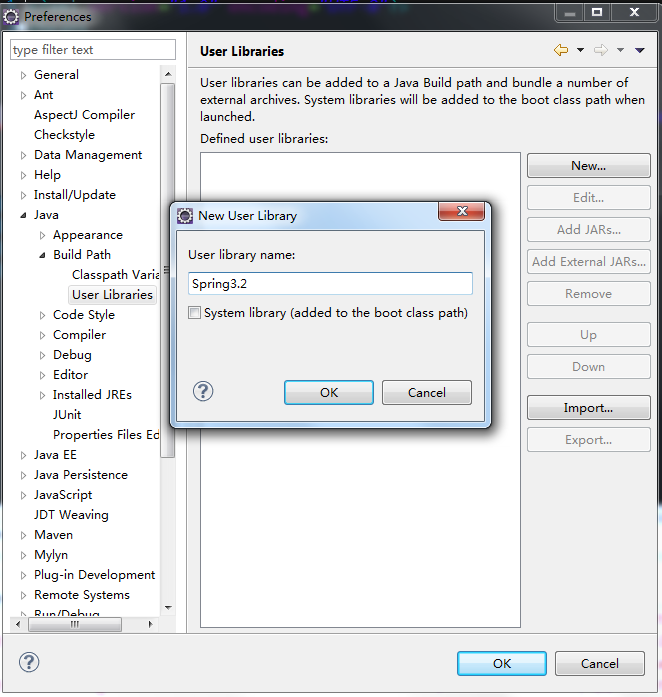
命名为Spring3.2,点击OK
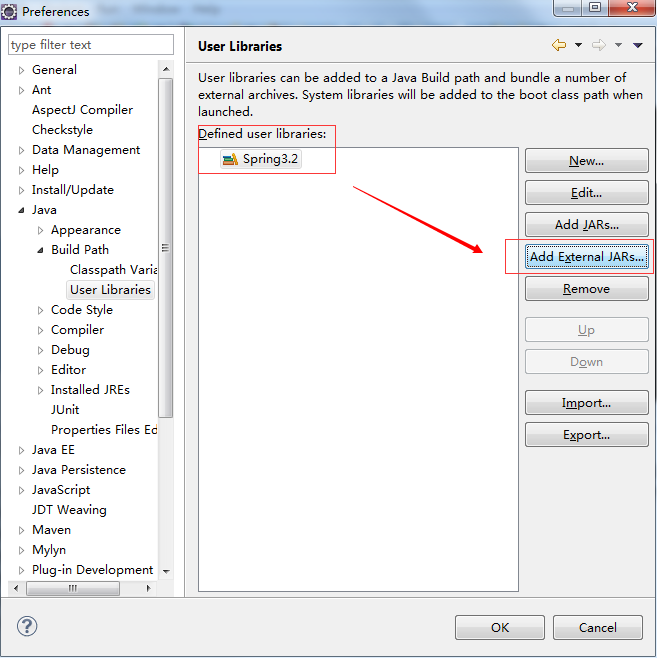

添加成功后
添加到工程中来:
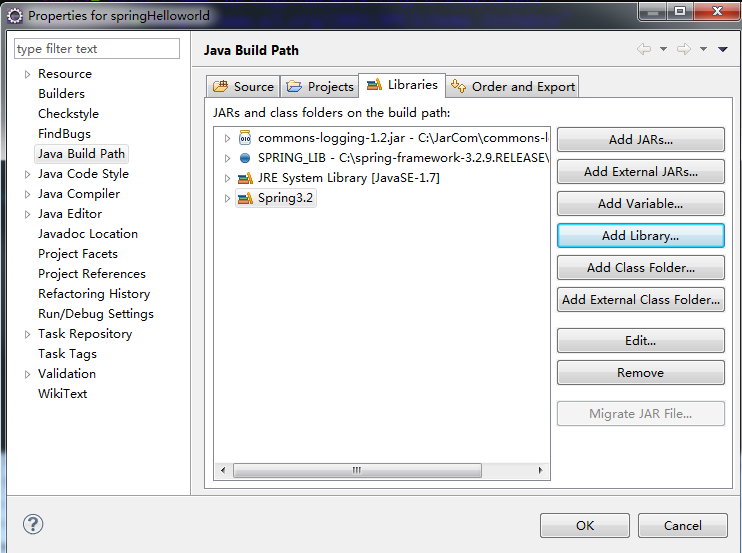
选择新建的工程-》Properties->Java Build Path->Add library
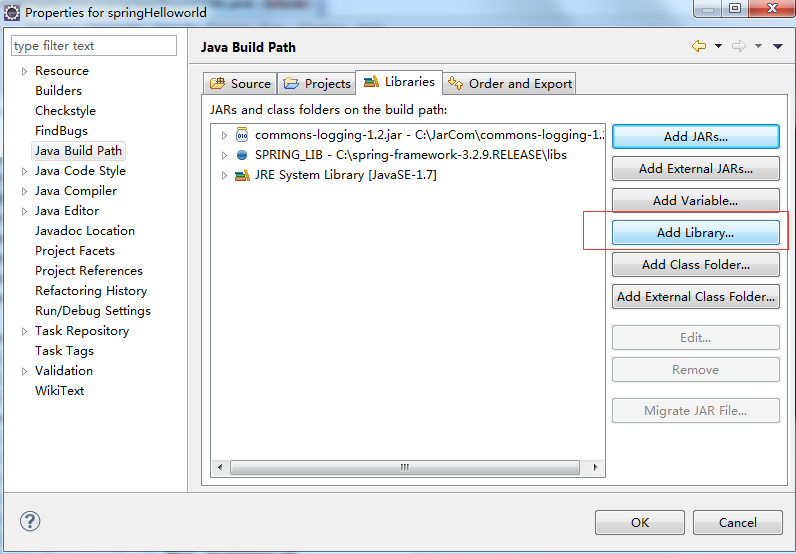
在跳出的窗口中选择User Library
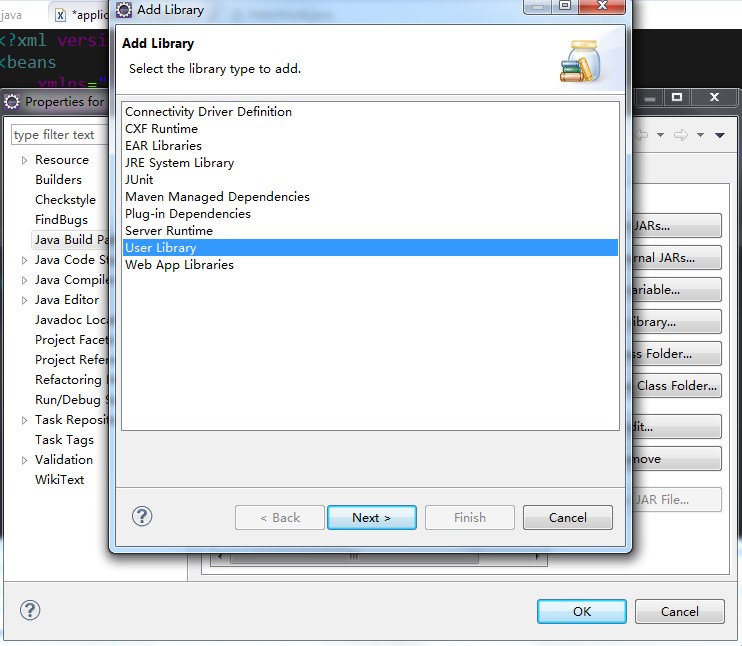
然后又会跳出一个窗口,这时就可以选择我们之前配置的用户库的包Spring3.2了,把沟打上。
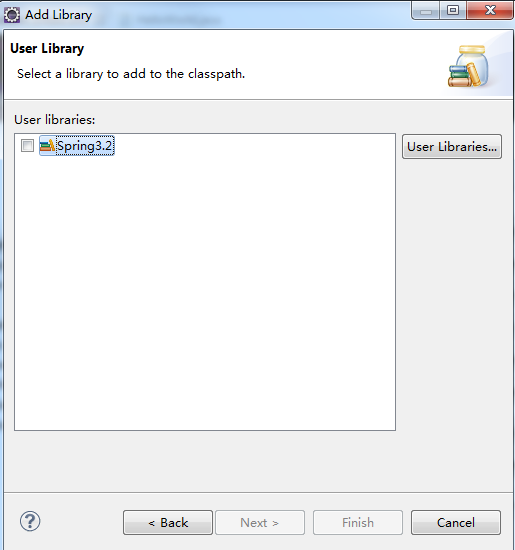
添加成功
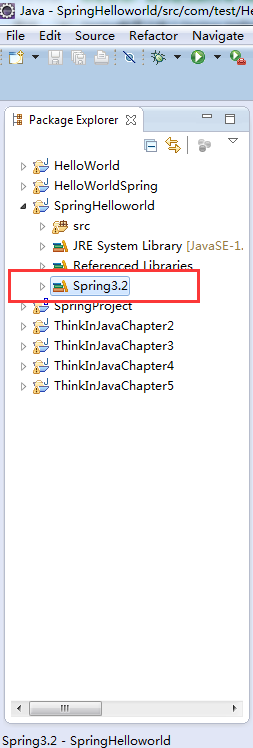
然后工程中就可以看到添加进来的Spring3.2了
三、添加commons-logging
选择工程-》Properties->Java Build Path->Add library
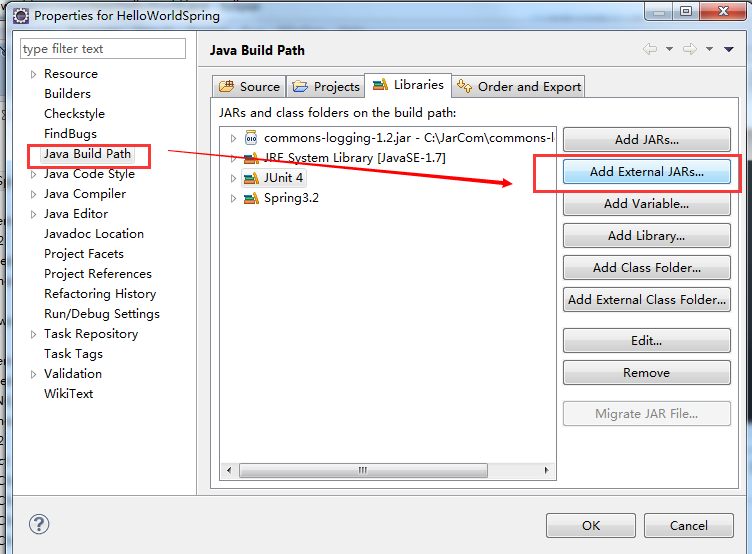
然后选择commons-logging所在的包就可以了

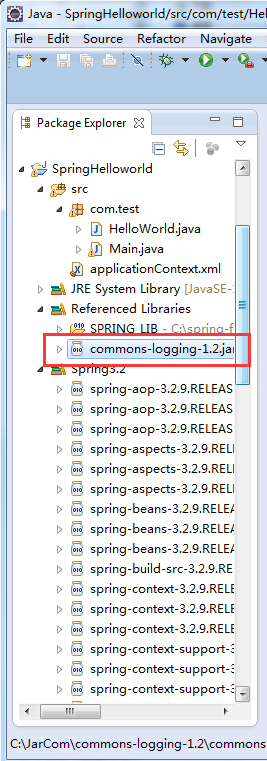
添加成功了
四、开始Spring编程
好了,上面的配置都弄好后,我们就可以开始第一个HelloWorld了
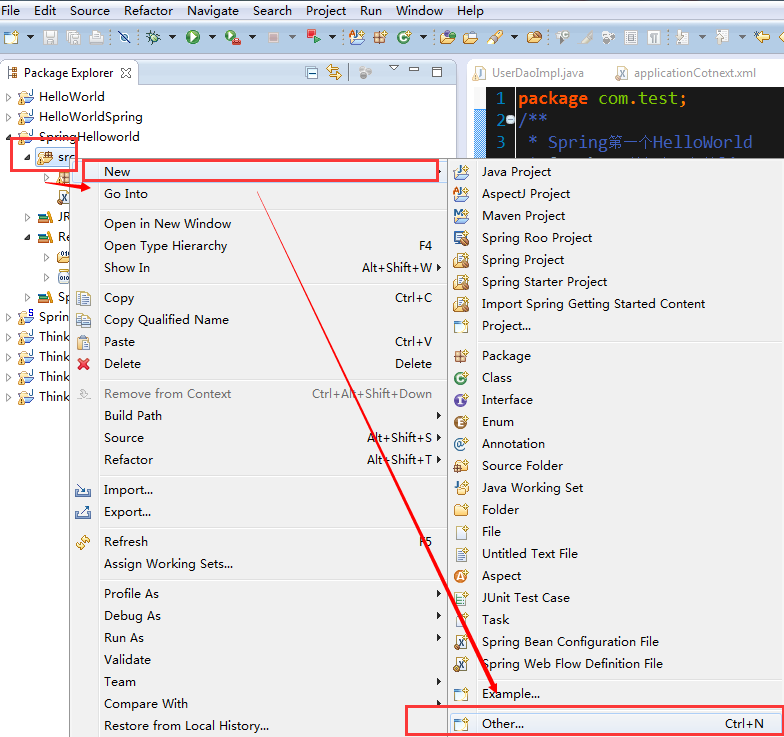
1.首先在当前包下新建一个HelloWorld.java
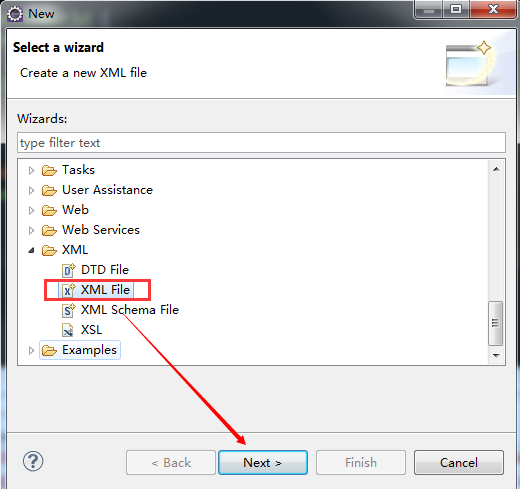
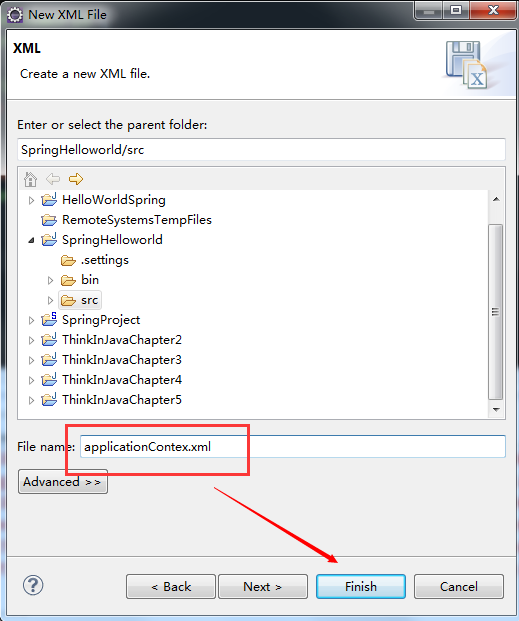
2、编写配置文件applicationContext.xml
注意:因为路径配置的是 ClassPathXmlApplicationContext("applicationContext.xml");所以applicationContext.xml一定要放在src路径下,不要放在他的二级目录
在当前工程下
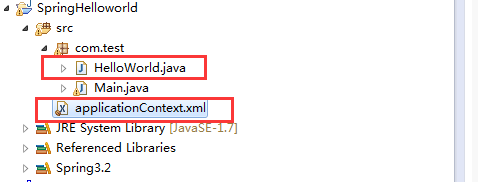
这就是添加成功后的
然后把applicationContext.xml内容改为如下:
3、反转控制开始
在Main.java中添加如下:
然后选择工程右键:
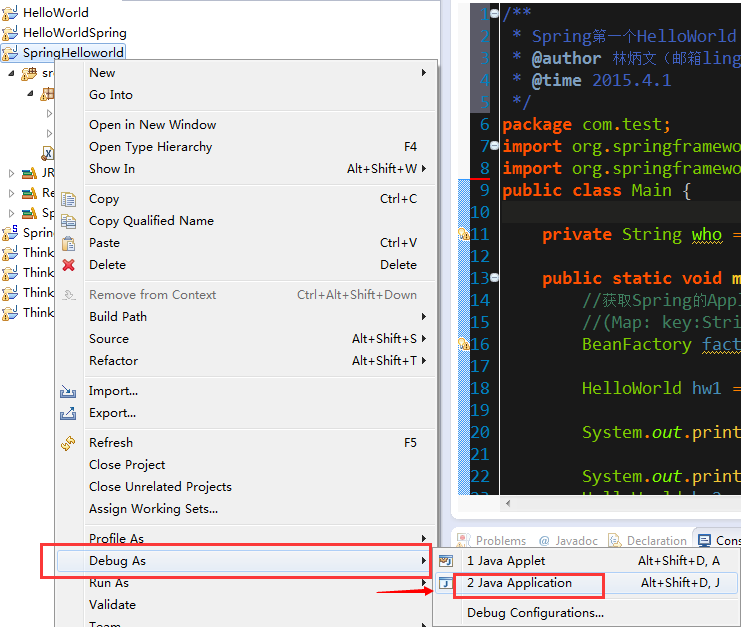
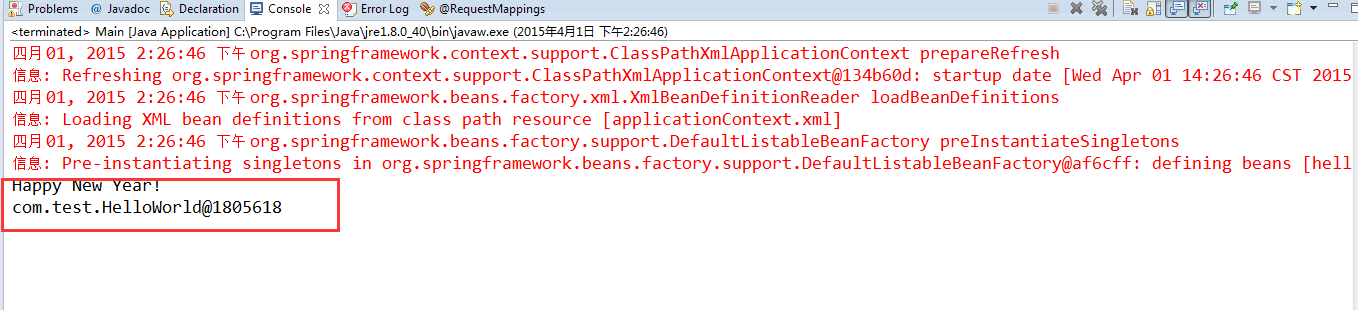
接下来就是输出结果啦: