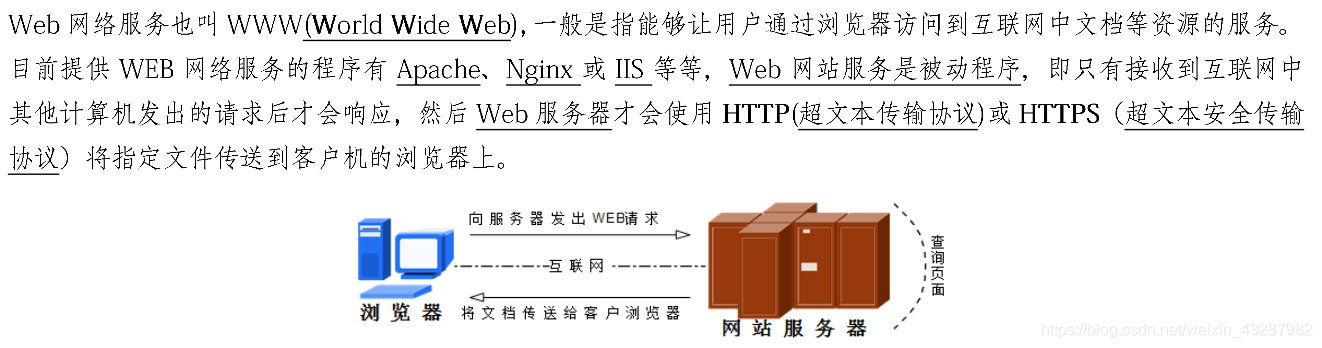
在介绍Apache服务之前,先了解一下Web网络服务和其他两个服务。
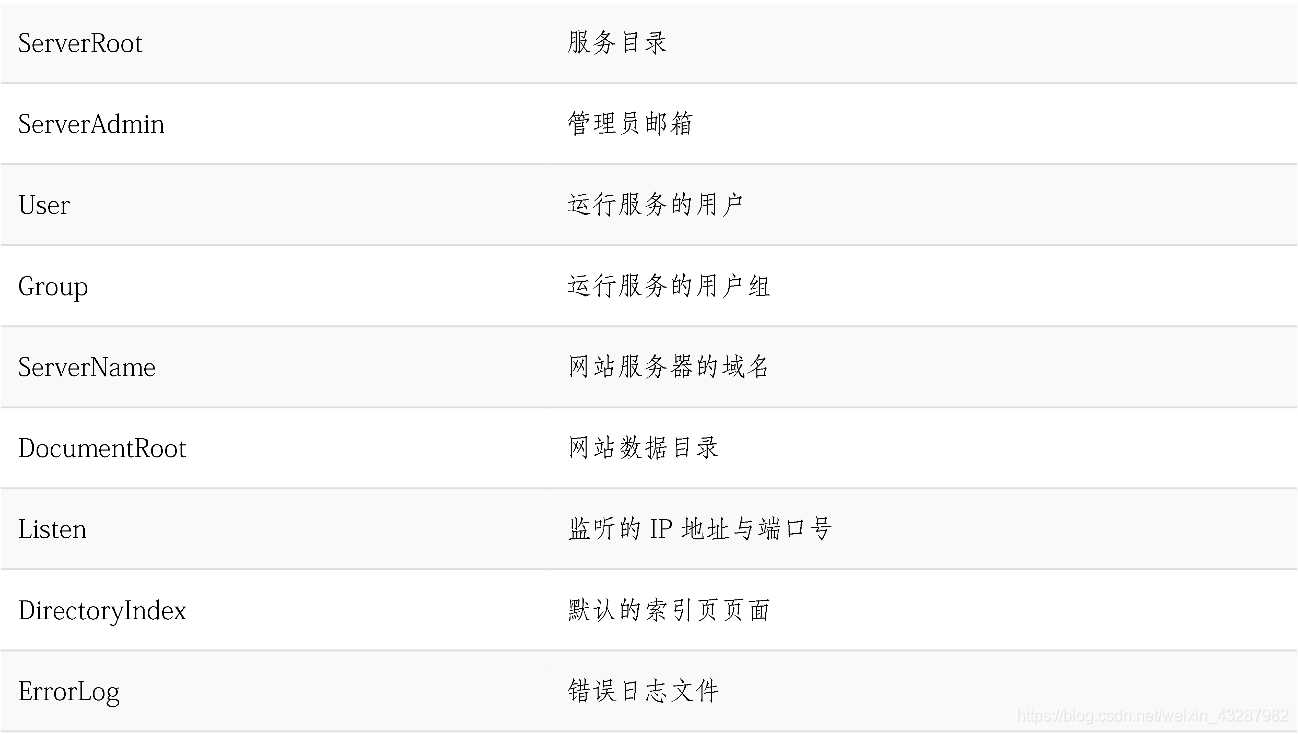
配置文件
/etc/httpd/conf/httpd.conf 参数

部署Apache服务
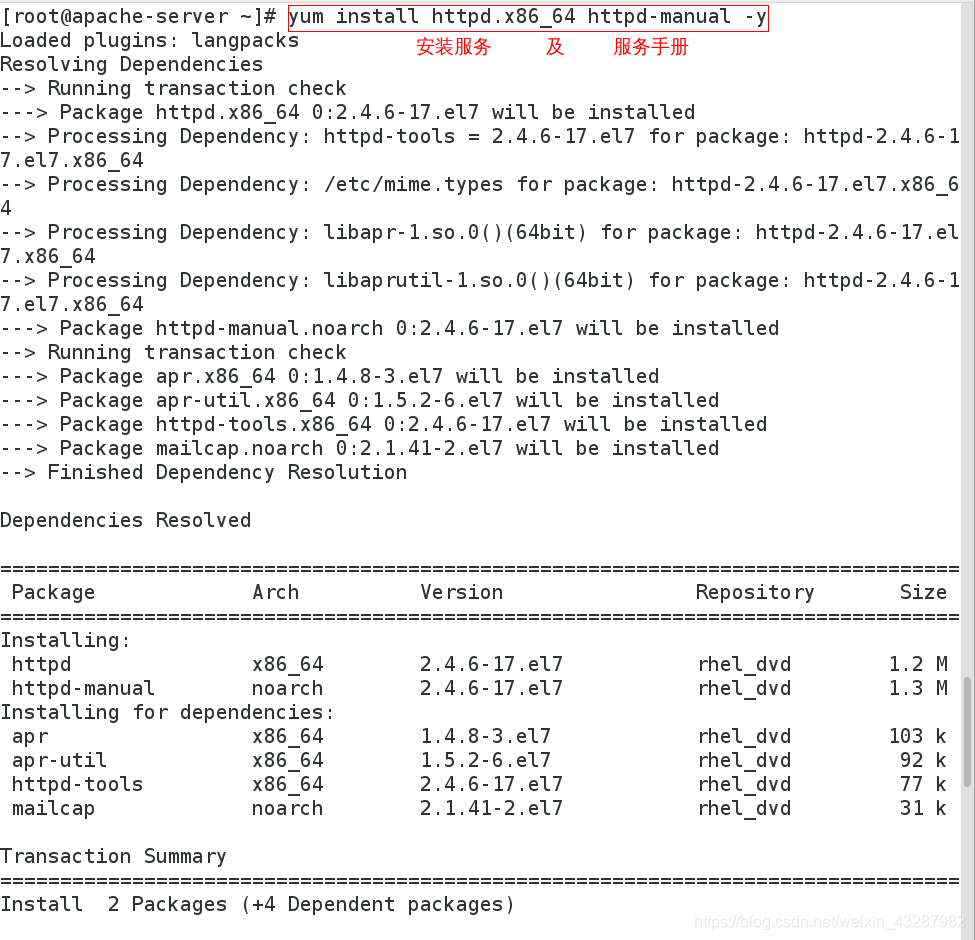
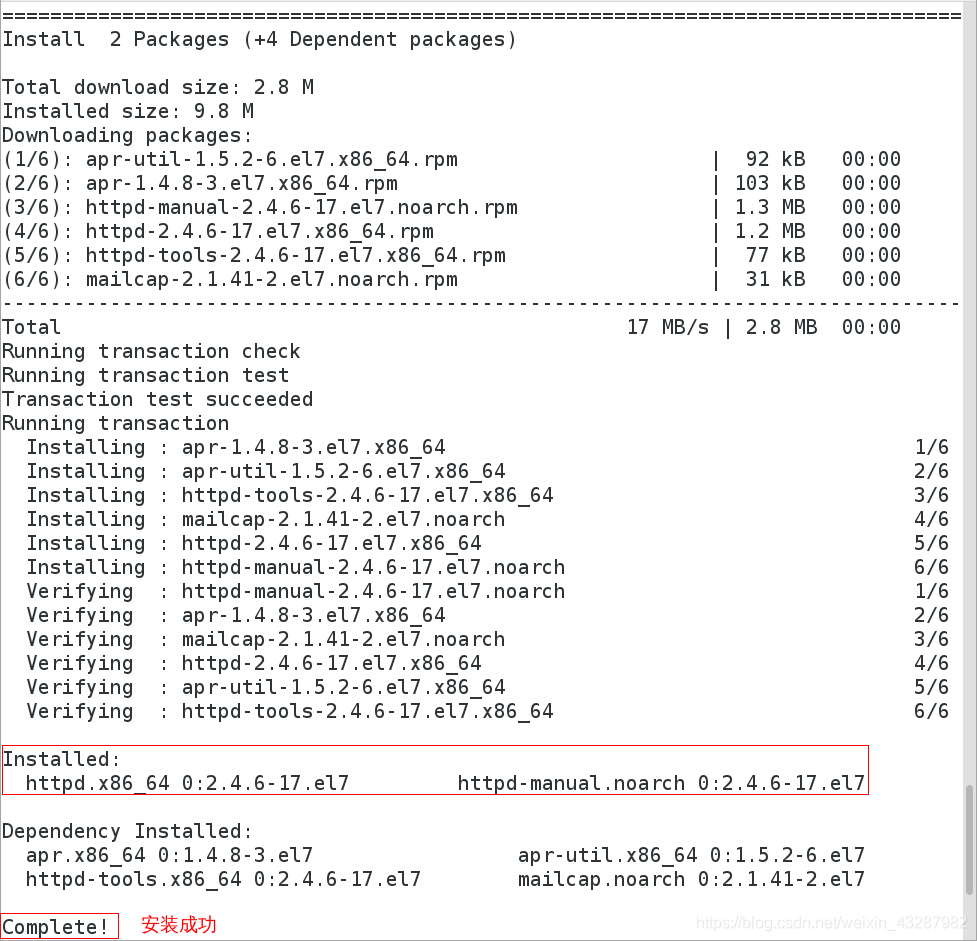
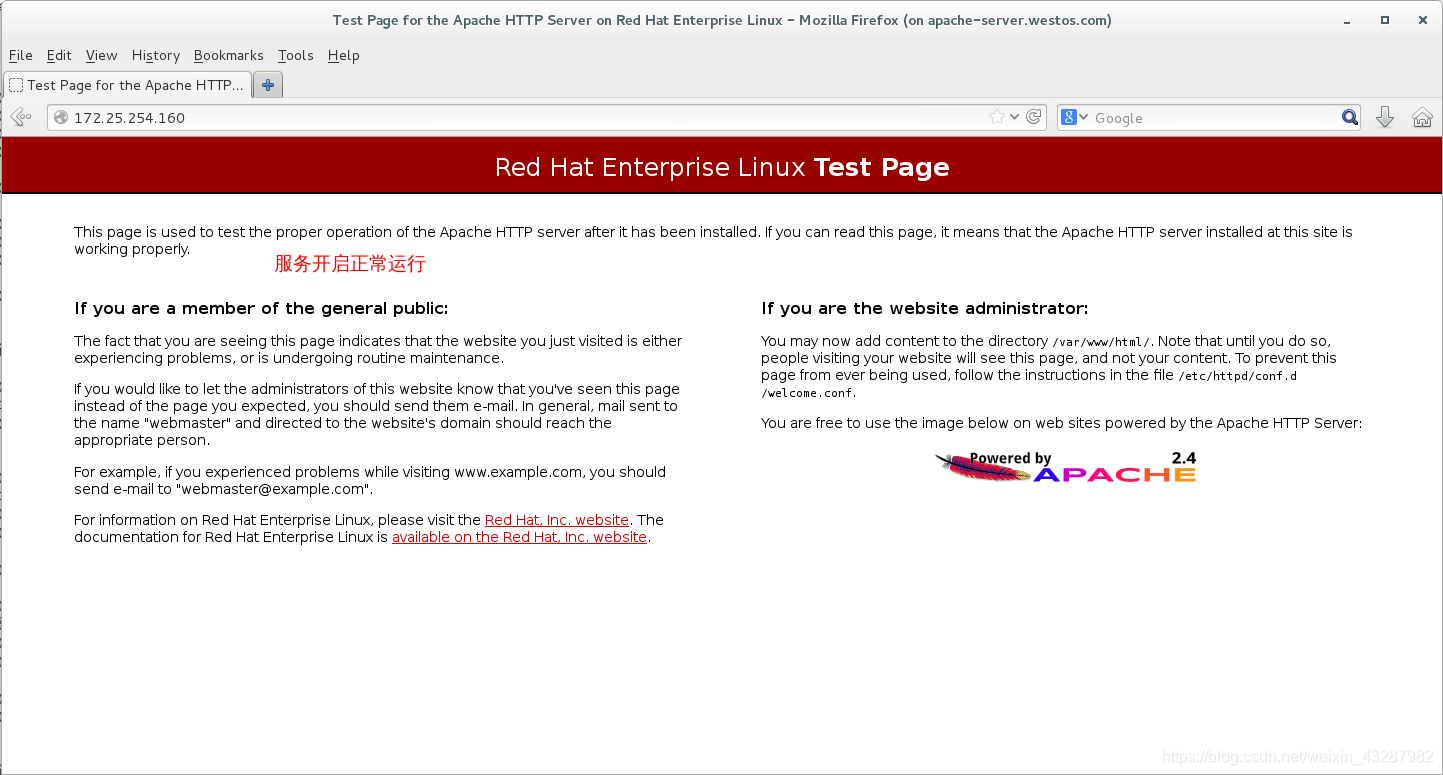
[root@apache-server ~]# yum install httpd.x86_64 httpd-manual -y 安装服务
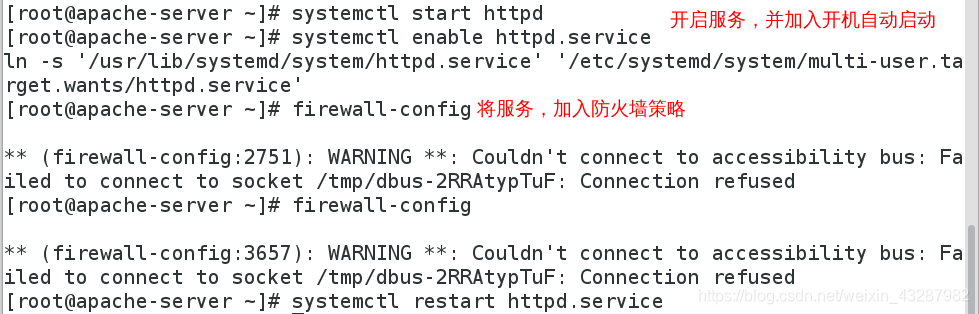
[root@apache-server ~]# systemctl start httpd 启动服务
[root@apache-server ~]# systemctl enable httpd.service 开机自启
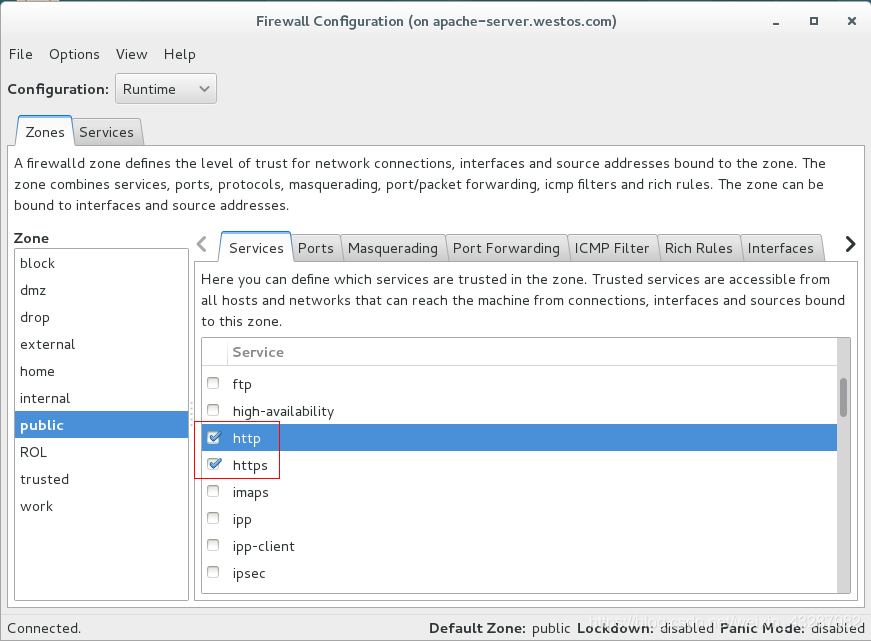
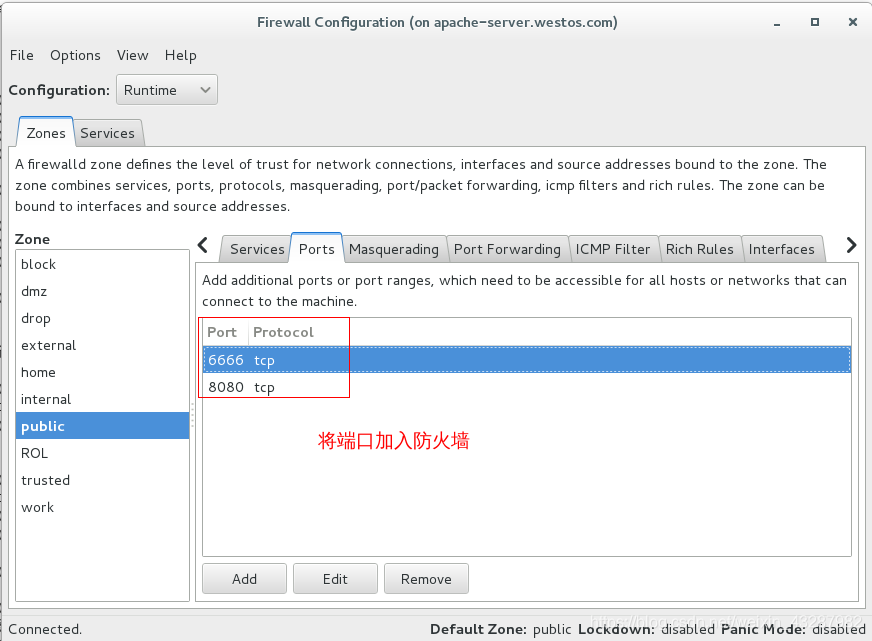
[root@apache-server ~]# firewall-config 将服务加入防火墙策略,图形界面方法
[root@apache-server ~]# firewall-cmd --permanent --add-service=http 命令方法
[root@apache-server ~]# firewall-cmd --permanent --add-service=https
[root@apache-server ~]# firewall-cmd --reload
[root@apache-server ~]# systemctl restart httpd.service 重启服务,使设置生效
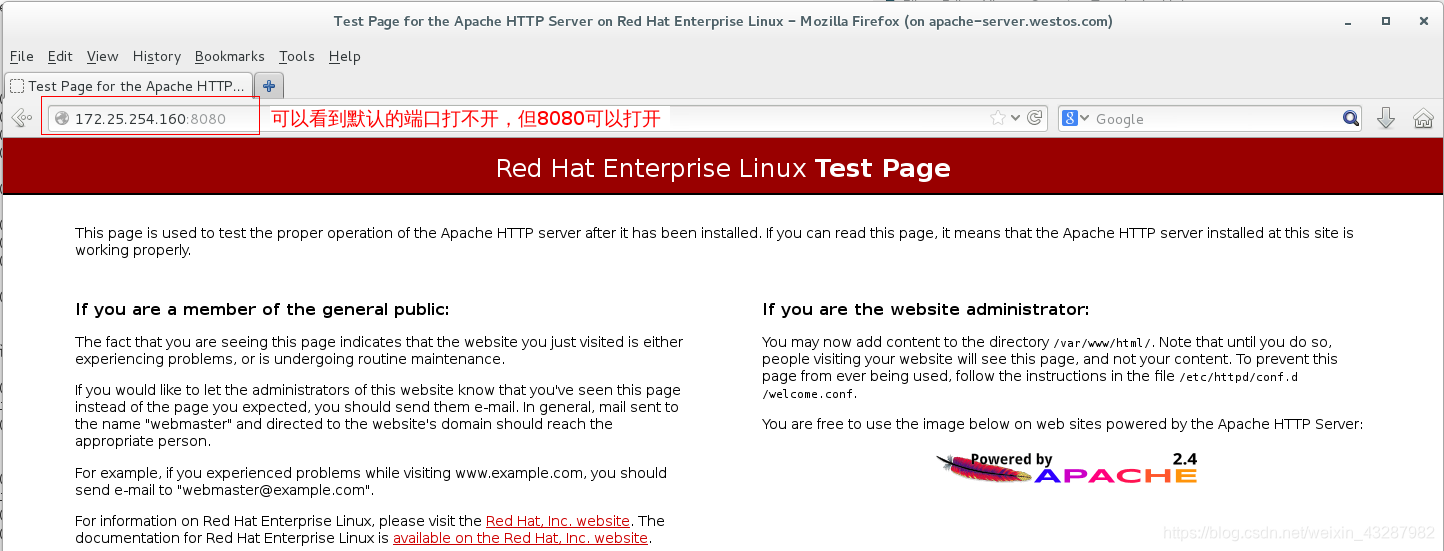
修改默认端口
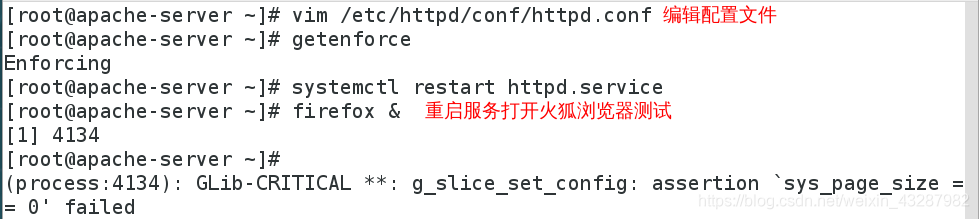
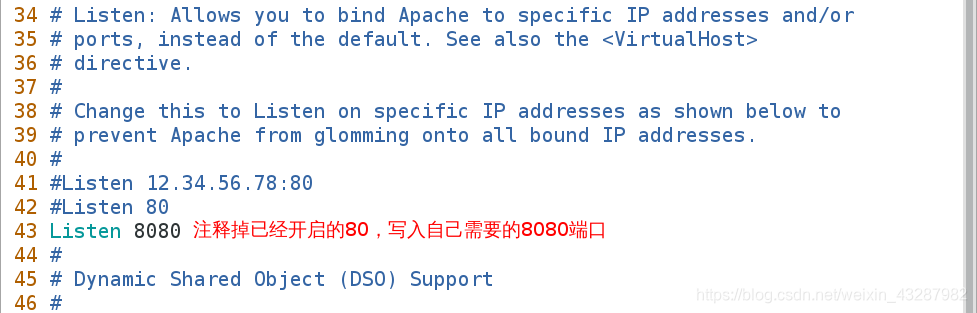
[root@apache-server ~]# vim /etc/httpd/conf/httpd.conf
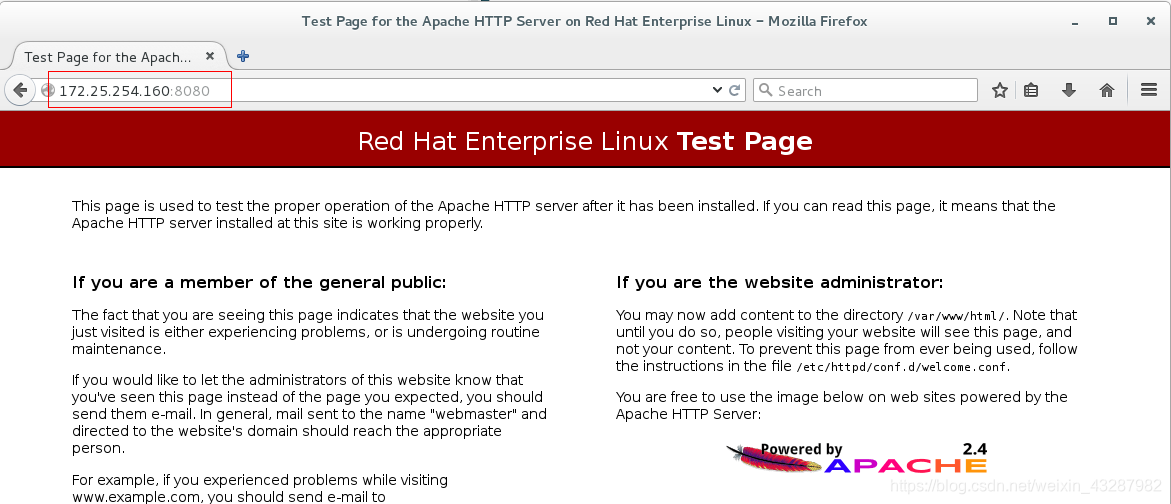
43 Listen 8080
[root@apache-server ~]# systemctl restart httpd.service selinux处于强制状态
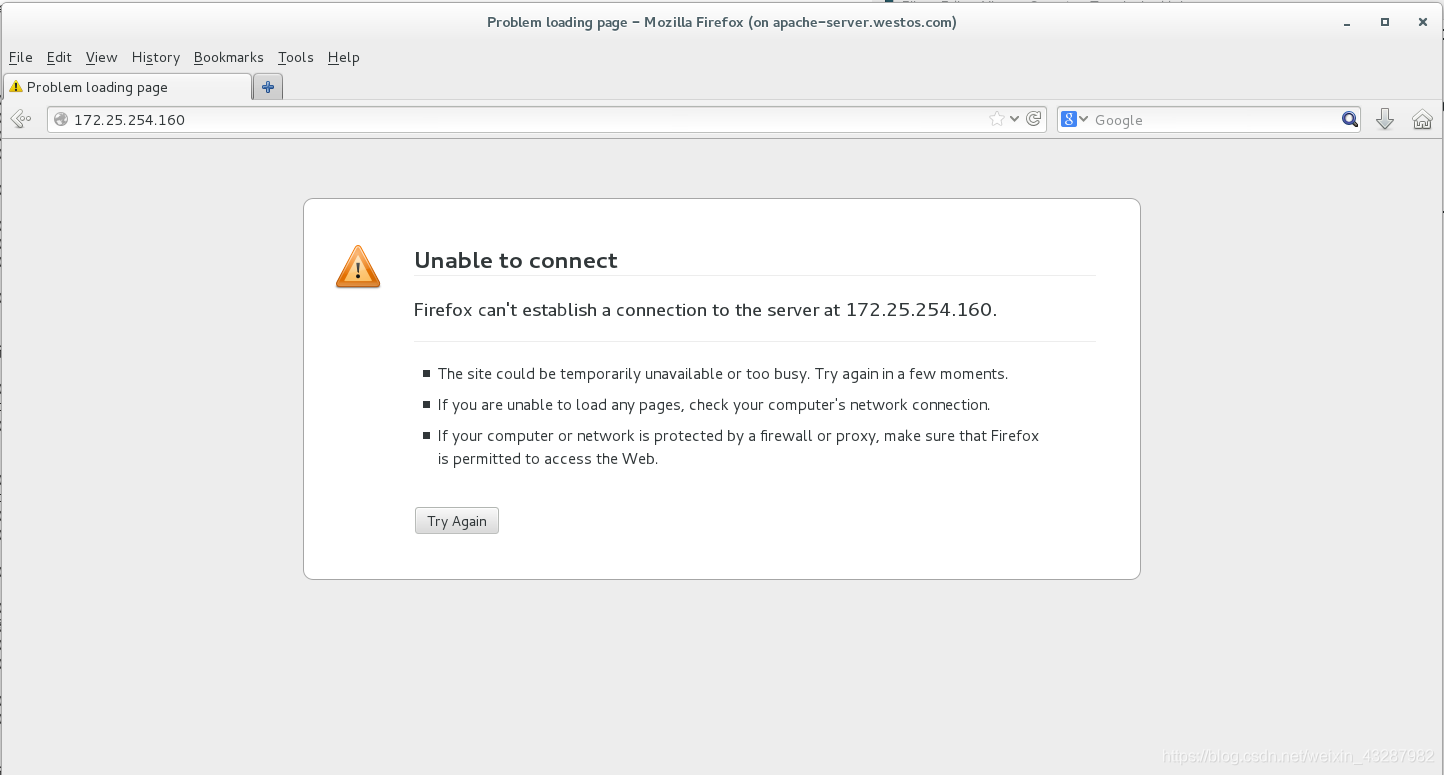
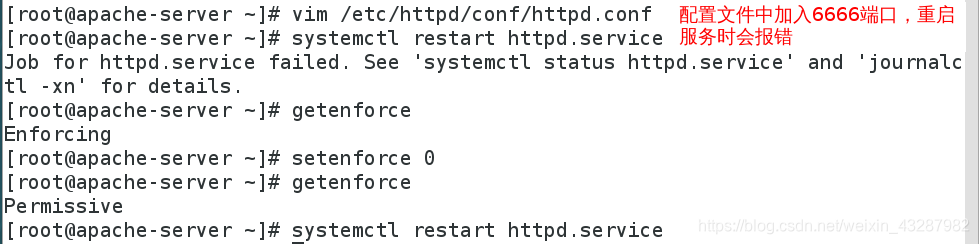
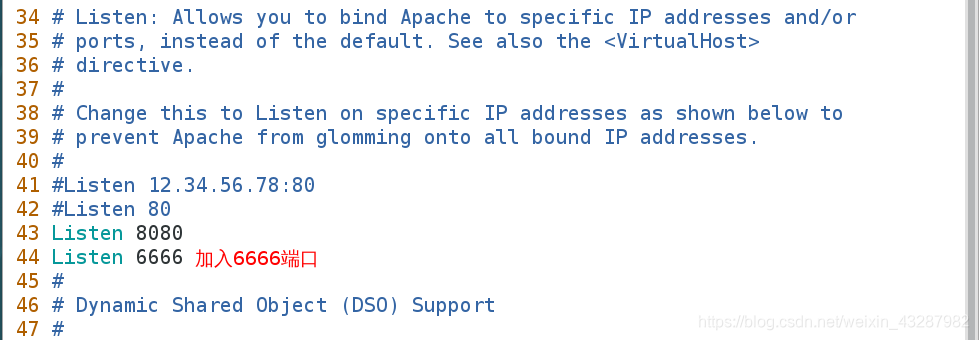
[root@apache-server ~]# vim /etc/httpd/conf/httpd.conf
44 Listen 6666
[root@apache-server ~]# setenforce 0
[root@apache-server ~]# systemctl restart httpd.service selinux处于警告状态,
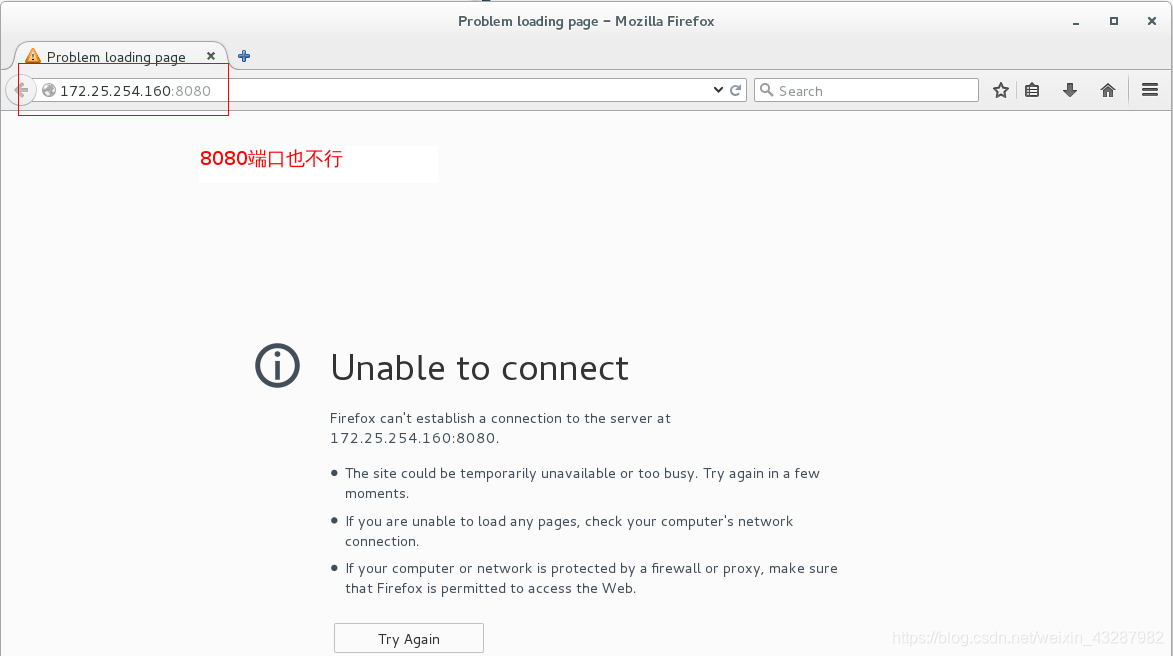
selinux处于强制状态启动服务会失败,因为apache服务默认不支持6666端口
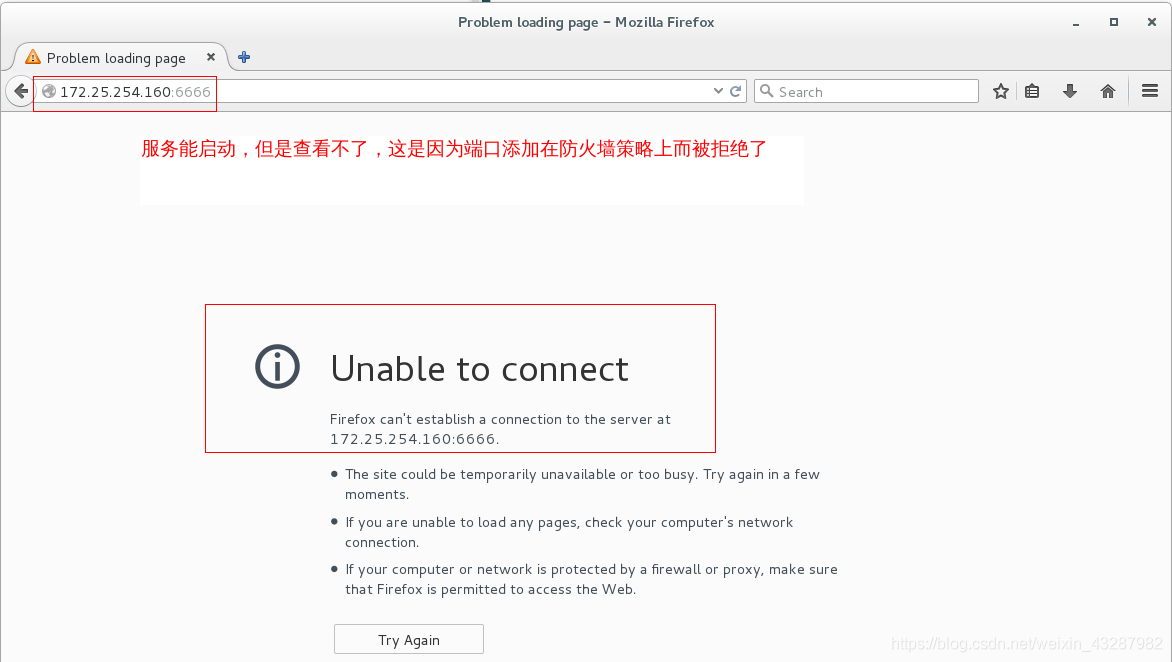
[root@apache-server ~]# semanage port -l | grep http 查看支持的端口
[root@apache-server ~]# firewall-config 防火墙图形界面允许端口
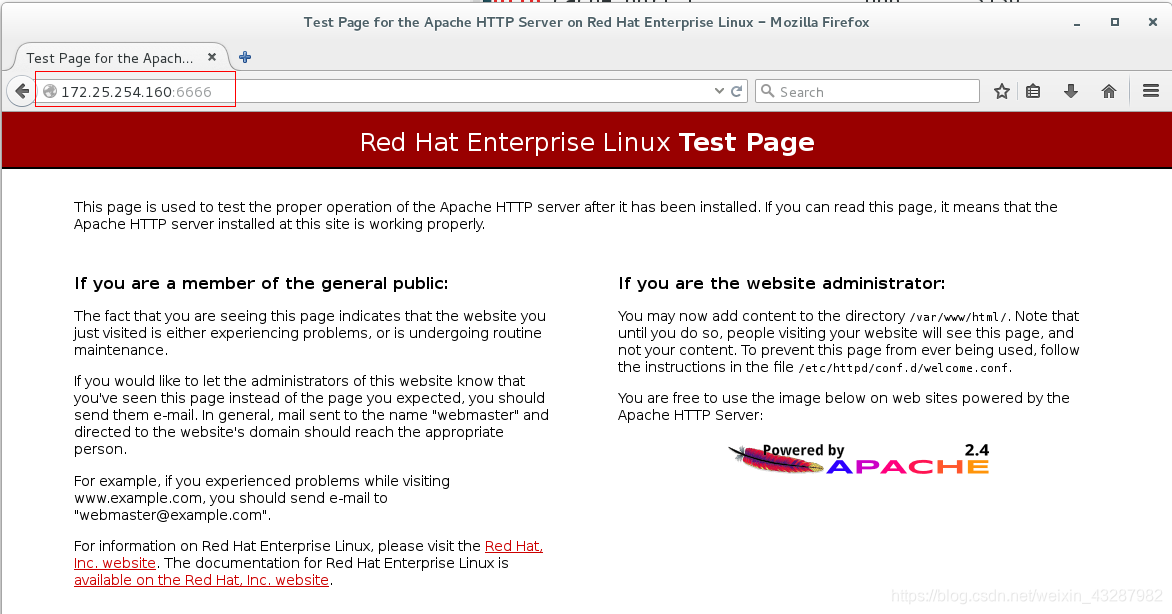
[root@apache-server ~]# semanage port -a -t http_port_t -p tcp 6666 打开6666端口
-a 添加 -t 类型 -p 端口
[root@apache-server ~]# systemctl restart httpd.service

修改默认发布文件
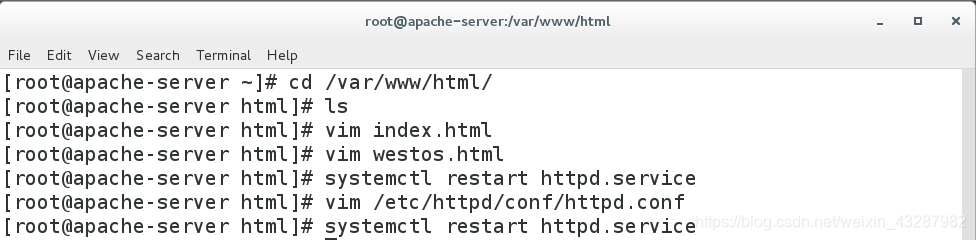
[root@apache-server ~]# cd /var/www/html/
[root@apache-server html]# ls
[root@apache-server html]# vim index.html
1 <h1>index's page</h1>
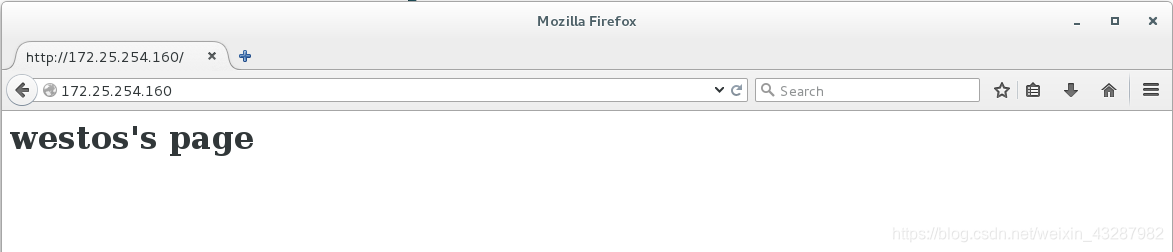
[root@apache-server html]# vim westos.html
1 <h1>westos's page</h1>
第一个文件为Apache服务默认的发布文件,第二个是我们编写的文件
[root@apache-server html]# systemctl restart httpd.service
[root@apache-server html]# vim /etc/httpd/conf/httpd.conf
164 DirectoryIndex westos.html index.html 哪个文件在前面就默认是哪个
[root@apache-server html]# systemctl restart httpd.service


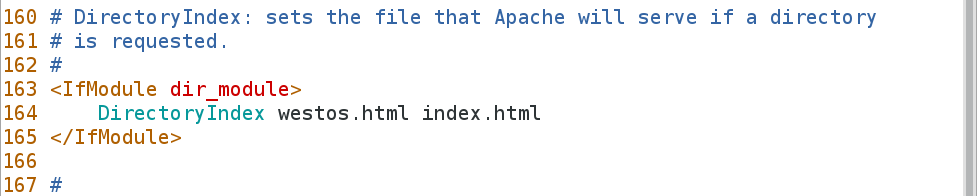
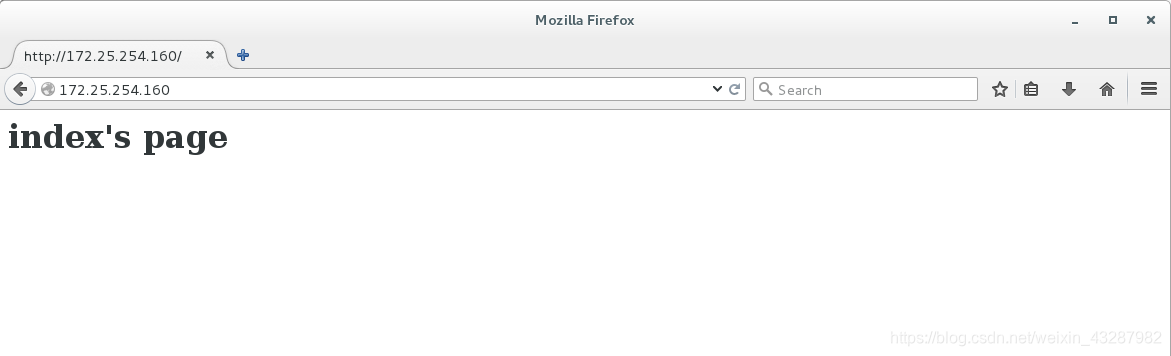
上面的图片,是在重启服务前的,下面的是在改了默认发布文件后重启服务所看到的
修改默认发布目录
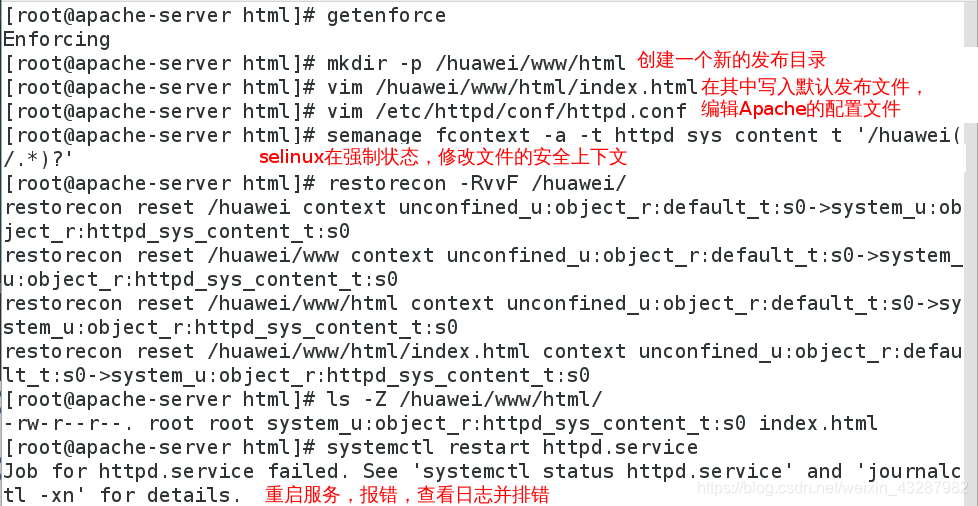
[root@apache-server html]# getenforce
[root@apache-server html]# mkdir -p /huawei/www/html
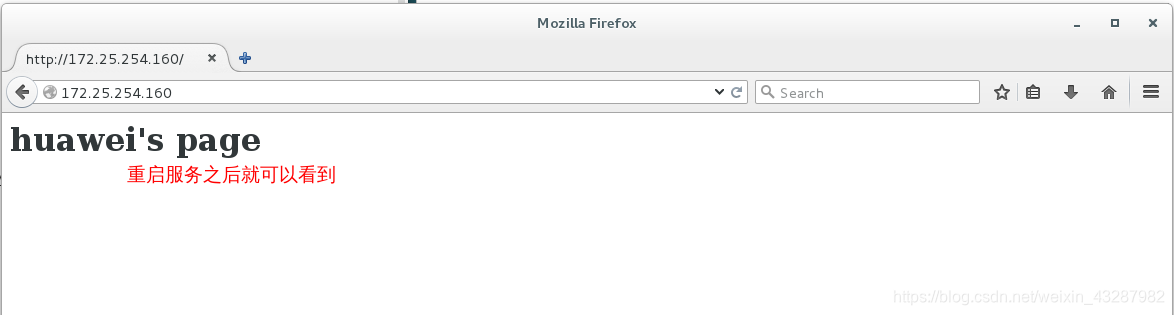
[root@apache-server html]# vim /huawei/www/html/index.html
1 <h1>huawei's page</h1>
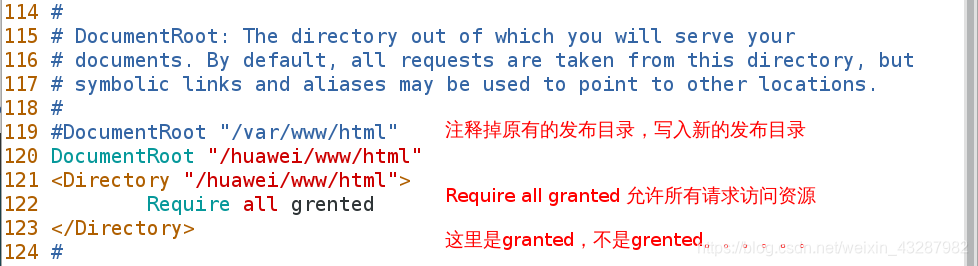
[root@apache-server html]# vim /etc/httpd/conf/httpd.conf
119 #DocumentRoot "/var/www/html" 注释掉默认的路径
120 DocumentRoot "/huawei/www/html" 写上自己指定的路径
121 <Directory "/huawei/www/html">
122 Require all grented
123 </Directory>
[root@apache-server html]# semanage fcontext -a -t httpd_sys_content_t '/huawei(/.*)?'
[root@apache-server html]# restorecon -RvvF /huawei/
[root@apache-server html]# ls -Z /huawei/www/html/
[root@apache-server html]# systemctl restart httpd.service

日志查看、排错
[root@apache-server html]# cat /etc/httpd/logs/error_log
[root@apache-server html]# cat /var/log/messages
恢复实验环境
[root@apache-server ~]# rm -rf /etc/httpd/conf/httpd.conf
[root@apache-server ~]# yum reinstall httpd.x86_64 -y
[root@apache-server ~]# systemctl restart httpd.service
虚拟主机功能
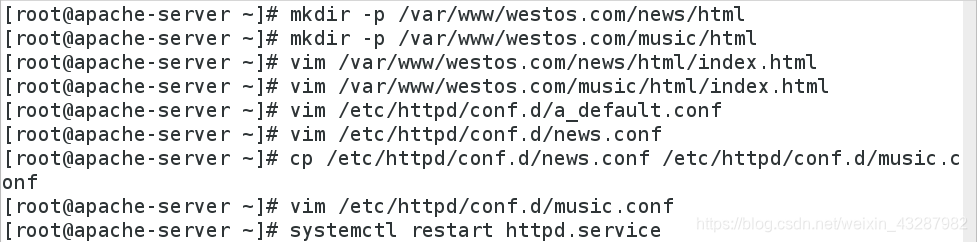
[root@apache-server ~]# mkdir -p /var/www/westos.com/news/html
[root@apache-server ~]# mkdir -p /var/www/westos.com/music/html
[root@apache-server ~]# vim /var/www/westos.com/news/html/index.html
1 <h1>news's page</h1>
[root@apache-server ~]# vim /var/www/westos.com/music/html/index.html
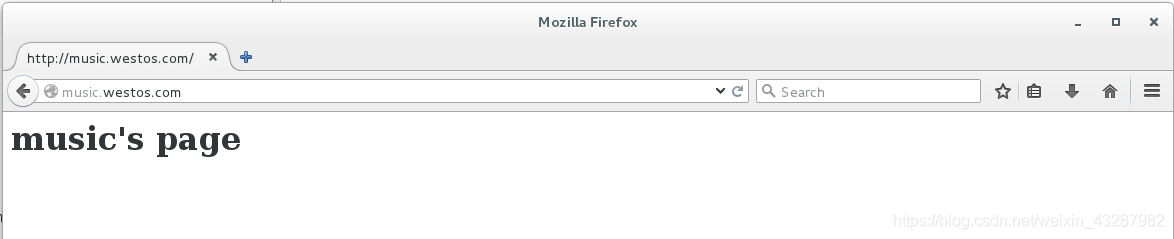
1 <h1>music's page</h1>
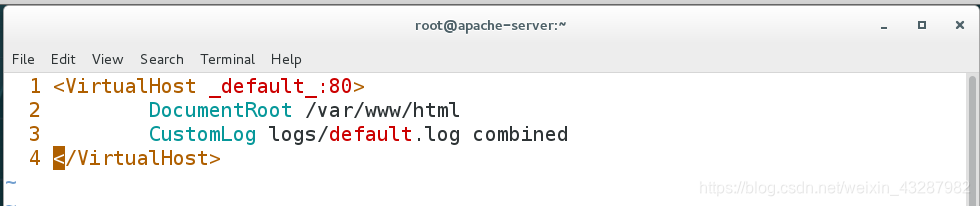
[root@apache-server ~]# vim /etc/httpd/conf.d/a_default.conf
1 <VirtualHost _default_:80>
2 DocumentRoot /var/www/html
3 CustomLog logs/default.log combined
logs = /etc/httpd/log combined 所有类型的日志
4 </VirtualHost>
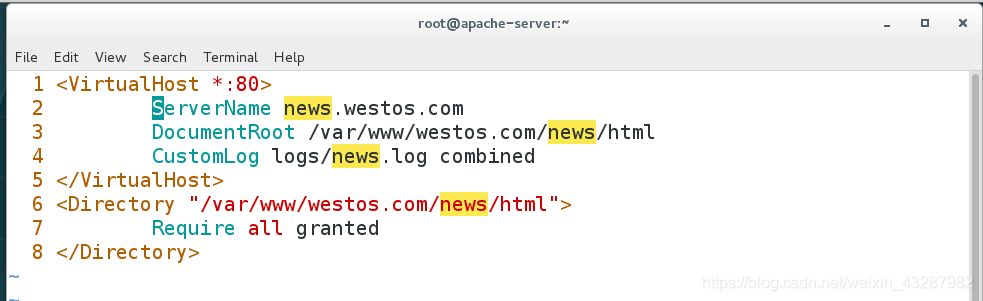
[root@apache-server ~]# vim /etc/httpd/conf.d/news.conf
1 <VirtualHost *:80>
2 ServerName news.westos.com
3 DocumentRoot /var/www/westos.com/news/html
4 CustomLog logs/news.log combined
5 </VirtualHost>
6 <Directory "/var/www/westos.com/news/html">
7 Require all granted
8 </Directory>
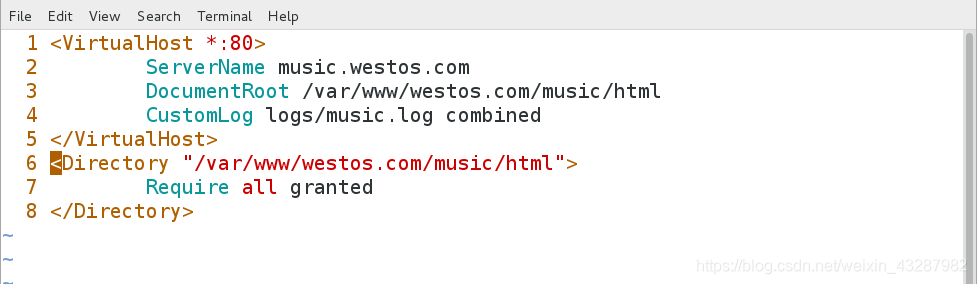
[root@apache-server ~]# cp /etc/httpd/conf.d/news.conf /etc/httpd/conf.d/music.conf
[root@apache-server ~]# vim /etc/httpd/conf.d/music.conf
:%s/news/music/g 批量修改
1 <VirtualHost *:80>
2 ServerName music.westos.com
3 DocumentRoot /var/www/westos.com/music/html
4 CustomLog logs/music.log combined
5 </VirtualHost>
6 <Directory "/var/www/westos.com/music/html">
7 Require all granted
8 </Directory>
[root@apache-server ~]# systemctl restart httpd.service
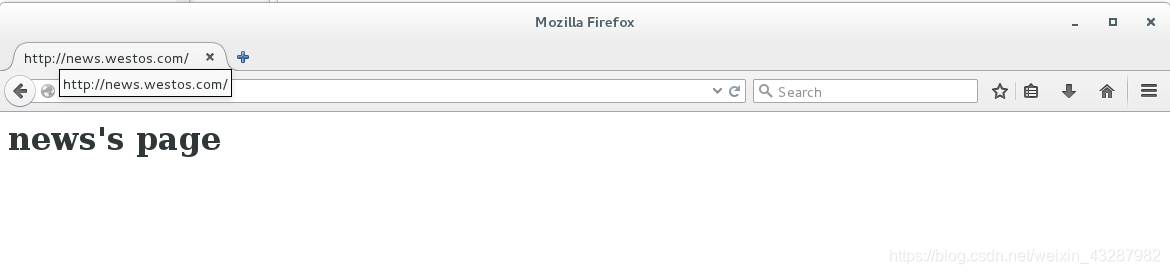
在客户端本地域名解析
[root@foundation60 Desktop]# vim /etc/hosts 使用超级用户编辑,权限限制
172.25.254.160 www.westos.com news.westos.com music.westos.com


下面三张图依次是默认主机、news主机、music主机。
测试机做域名解析


测试

访问控制
基于IP进行访问控制
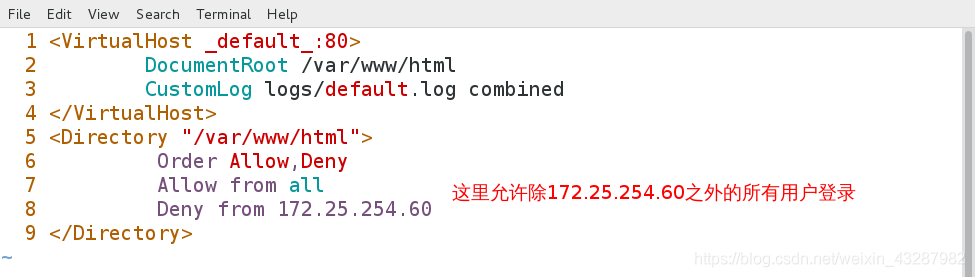
[root@apache-server ~]# vim /etc/httpd/conf.d/a_default.conf
1 <VirtualHost _default_:80>
2 DocumentRoot /var/www/html
3 CustomLog logs/default.log combined
4 </VirtualHost>
5 <Directory "/var/www/html">
6 Order Allow,Deny 这里的Allow和Deny有先后顺序,后面的会覆盖掉前面的
7 Allow from all
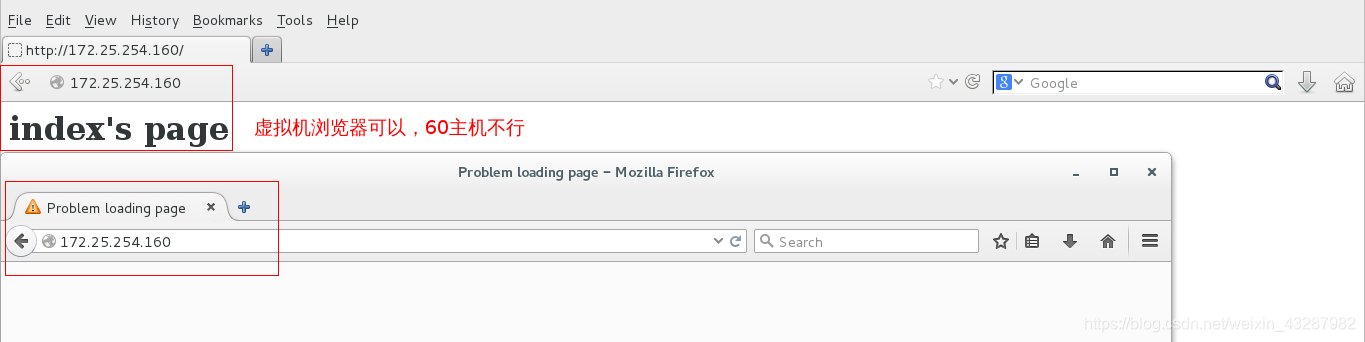
8 Deny from 172.25.254.60
9 </Directory>
[root@apache-server ~]# systemctl restart httpd.service

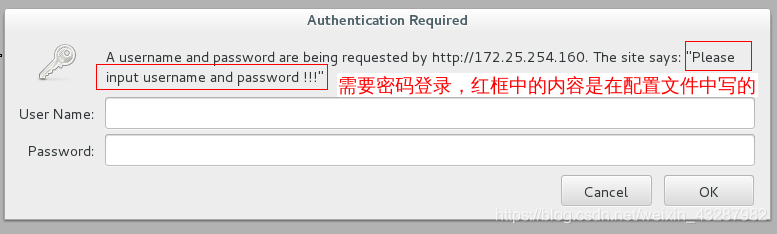
基于帐号-密码进行访问控制
[root@apache-server ~]# htpasswd -cm http_userlist admin
[root@apache-server ~]# htpasswd -m http_userlist admin1
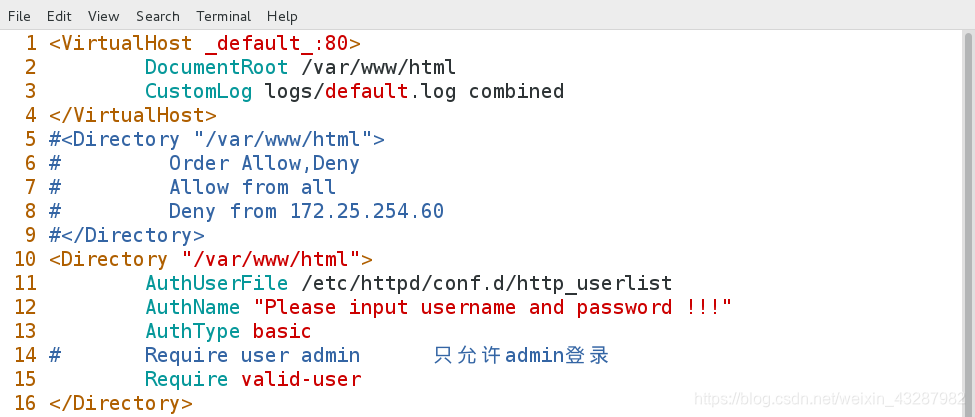
[root@apache-server ~]# vim /etc/httpd/conf.d/a_default.conf
10 <Directory "/var/www/html">
11 AuthUserFile /etc/httpd/conf.d/http_userlist
12 AuthName "Please input username and password !!!"
13 AuthType basic
14 # Require user admim
15 Require valid-user
16 </Directory>
[root@apache-server ~]# systemctl restart httpd.service