代理是什么?
代理实际上就是代理服务器, 代理服务器的工作机制很象我们生活中常常提及的代理商,假设你的机器为A机,你想获得的数据由B机提供,代理服务器为C机,那么具体的连接过程是这样的。 首先,A机需要B机的数据,它与C机建立连接,C机接收到A机的数据请求后,与B机建立连接,下载A机所请求的B机上的数据到本地,再将此数据发送至A机,完成代理任务。如图(图片有点丑):

为什么要使用代理?
我们在做爬虫的过程中经常会遇到这样的情况,最初爬虫正常运行,正常抓取数据,一切看起来都是那么美好,然而一杯茶的功夫可能就会出现错误,比如403 Forbidden,这时候打开网页一看,可能会看到“您的IP访问频率太高”这样的提示。出现这种现象的原因是网站采取了一些反爬虫措施。比如,服务器会检测某个IP在单位时间内的请求次数,如果超过了这个阈值,就会直接拒绝服务,返回一些错误信息,这种情况可以称为封IP。
这时候代理的作用就来了, 你封我的ip,我用代理以后,使用代理ip来请求数据最后返回给我,你没辙了吧,哈哈!!废话不多说,进入正题!
动态代理ip
动态代理,顾名思义,会变化的ip。通过拨号vps来实现。
VPS服务器,即VPS(VirtualPrivateServer虚拟专用服务器)技术,将部服务器分割成多个虚拟专享服务器的优质服务。每个VPS都可分配独立公网IP地址、独立操作系统、独立超大空间、独立内存、独立CPU资源、独立执行程序和独立系统配置等。用户除了可以分配多个虚拟主机及无限企业邮箱外,更具有独立服务器功能,可自行安装程序,单独重启服务器。通俗的来说,VPS服务器也就是虚拟的专用服务器,用户并接触不到物理上的机器,也不需要机器的物理硬件等设施负责维护等。
拨号vps服务器在vps服务器的基础原理 上添加了一个动态换IP的功能,行驶不定期更换用户的功能,常用与投票,刷单,批量注册微博,批量注册QQ等,所有你能想到使用IP的服务器,有很多人用这种功能抢手机抢票你能想到用IP赚钱的方式应该都是用的上。
拨号vps架设动态代理服务器

在购买拨号vps的时候,选择预装centos7系统,这里还附带了拨号软件pppoe。(没有的话联系服务商装好)
下面来配置pppoe:
[root@localhost ~]# pppoe-setup     #进入配置
Welcome to the PPPoE client setup.  First, I will run some checks on
your system to make sure the PPPoE client is installed properly...


LOGIN NAME

Enter your Login Name (default root):     #输入宽带账号

INTERFACE

Enter the Ethernet interface connected to the PPPoE modem
For Solaris, this is likely to be something like /dev/hme0.
For Linux, it will be ethX, where 'X' is a number.
(default eth0): #回车跳过就可以了,默认使用eth0网卡,ifconfig可以查看网卡信息

Do you want the link to come up on demand, or stay up continuously?
If you want it to come up on demand, enter the idle time in seconds
after which the link should be dropped.  If you want the link to
stay up permanently, enter 'no' (two letters, lower-case.)
NOTE: Demand-activated links do not interact well with dynamic IP
addresses.  You may have some problems with demand-activated links.
Enter the demand value (default no): no  #这里询问的是,adsl连接以后,是否持续保持连接。或者是自动的断开,在指定的时间(以秒数计算)内。多数情况下,我们希望手动的打开关闭连接。所以这里选择默认的no。

DNS

Please enter the IP address of your ISP's primary DNS server.
If your ISP claims that 'the server will provide dynamic DNS addresses',
enter 'server' (all lower-case) here.
If you just press enter, I will assume you know what you are
doing and not modify your DNS setup.
Enter the DNS information here: #DNS设置,回车跳过

PASSWORD

Please enter your Password:     #输如宽带密码
Please re-enter your Password:     #再次输入

USERCTRL

Please enter 'yes' (three letters, lower-case.) if you want to allow
normal user to start or stop DSL connection (default yes): yes  #是否允许普通用户启用/关闭 ADSL连接。默认是允许。

FIREWALLING

Please choose the firewall rules to use.  Note that these rules are
very basic.  You are strongly encouraged to use a more sophisticated
firewall setup; however, these will provide basic security.  If you
are running any servers on your machine, you must choose 'NONE' and
set up firewalling yourself.  Otherwise, the firewall rules will deny
access to all standard servers like Web, e-mail, ftp, etc.  If you
are using SSH, the rules will block outgoing SSH connections which
allocate a privileged source port.

The firewall choices are:
0 - NONE: This script will not set any firewall rules.  You are responsible
          for ensuring the security of your machine.  You are STRONGLY
          recommended to use some kind of firewall rules.
1 - STANDALONE: Appropriate for a basic stand-alone web-surfing workstation
2 - MASQUERADE: Appropriate for a machine acting as an Internet gateway
                for a LAN
Choose a type of firewall (0-2): 0    #防火墙选项。这里提供的防火墙可以给你提供基本的安全保护。我不推荐你使用----你最好选择“NONE”选项0。无论是什么样的用户使用,我都建议你使用额外的工具来配置防火墙规则(iptables目前看来是一个非常不错的工具)。

Start this connection at boot time

Do you want to start this connection at boot time?
Please enter no or yes (default no):yes    #是否在开机时,打开这个连接?

** Summary of what you entered **

Ethernet Interface: eth0
User name:          123456
Activate-on-demand: No
DNS:                Do not adjust
Firewalling:        NONE
User Control:       yes
Accept these settings and adjust configuration files (y/n)? y  #所有的配置信息填写完成之后,系统将给出一个报告,完整的显示出你输入的配置信息。如果,你确信你输入的配置信息是正确的,输入yes写入配置文件。输入no放弃配置。
Adjusting /etc/sysconfig/network-scripts/ifcfg-ppp0
Adjusting /etc/ppp/chap-secrets and /etc/ppp/pap-secrets
  (But first backing it up to /etc/ppp/chap-secrets.bak)
  (But first backing it up to /etc/ppp/pap-secrets.bak)


Congratulations, it should be all set up!

Type '/sbin/ifup ppp0' to bring up your xDSL link and '/sbin/ifdown ppp0'
to bring it down.
Type '/sbin/pppoe-status /etc/sysconfig/network-scripts/ifcfg-ppp0'
to see the link status.
配置完成,

介绍三个命令:
pppoe-start 拨号
pppoe-stop 断开
pppoe-status 查看拨号状态
[root@localhost ~]# pppoe-start
[root@localhost ~]# pppoe-status
pppoe-status: Link is up and running on interface ppp0
4: ppp0: <POINTOPOINT,MULTICAST,NOARP,UP,LOWER_UP> mtu 1480 qdisc pfifo_fast state UNKNOWN qlen 3
    link/ppp
    inet xxx。xxx。xxx peer 1.1.1.1/32 scope global ppp0
       valid_lft forever preferred_lft forever

红箭头所指的位置是ip。
来测试一下是否可以连通网络。
[root@localhost ~]# ping www.baidu.com
PING www.a.shifen.com (115.239.210.27) 56(84) bytes of data.
64 bytes from 115.239.210.27: icmp_seq=1 ttl=54 time=72.4 ms
64 bytes from 115.239.210.27: icmp_seq=2 ttl=54 time=70.4 ms
64 bytes from 115.239.210.27: icmp_seq=3 ttl=54 time=70.7 ms
ok,有网了。
代理选择使用TinyProxy。
yum安装:
[root@localhost ~]# yum -y install tinyproxy
Loaded plugins: fastestmirror
Loading mirror speeds from cached hostfile
* base: mirrors.163.com
* extras: mirrors.cn99.com
* updates: mirrors.163.com
No package tinyproxy available.
Error: Nothing to do
新系统上yum源需要自己配置,上面报错是因为镜像源没有这个包。
添加企业版 Linux 附加软件包(EPEL),企业版 Linux 附加软件包(以下简称 EPEL)是一个 Fedora 特别兴趣小组,用以创建、维护以及管理针对企业版 Linux 的一个高质量附加软件包集,面向的对象包括但不限于 红帽企业版 Linux (RHEL)、 CentOS、Scientific Linux (SL)、Oracle Linux (OL) 。(https://fedoraproject.org/wiki/EPEL/zh-cn)
centos系统安装并启用epel源:
yum install epel-release
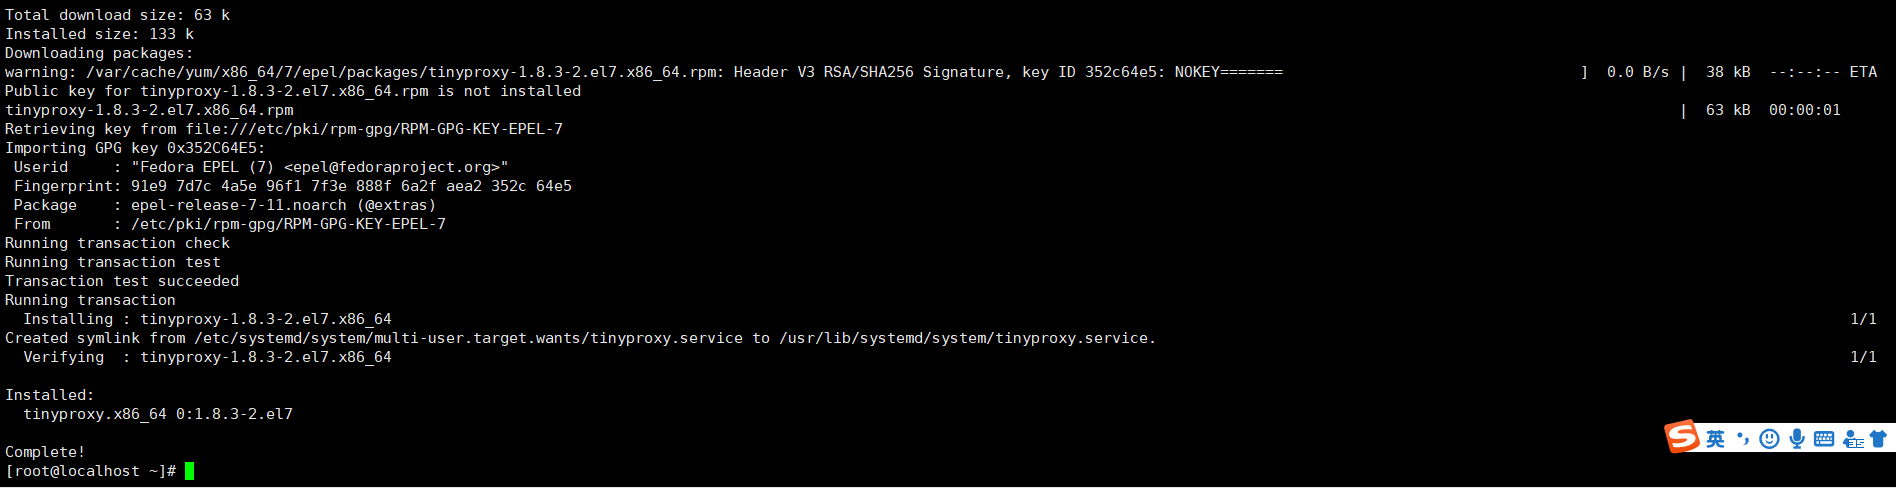
[root@localhost ~]# yum install epel-release
Loaded plugins: fastestmirror
Loading mirror speeds from cached hostfile
 * base: mirrors.163.com
 * extras: mirrors.cn99.com
 * updates: mirrors.163.com
Resolving Dependencies
--> Running transaction check
---> Package epel-release.noarch 0:7-11 will be installed
--> Finished Dependency Resolution

Dependencies Resolved

=================================================================================================================================================================================================================
 Package                                                Arch                                             Version                                          Repository                                        Size
=================================================================================================================================================================================================================
Installing:
 epel-release                                           noarch                                           7-11                                             extras                                            15 k

Transaction Summary
=================================================================================================================================================================================================================
Install  1 Package

Total download size: 15 k
Installed size: 24 k
Is this ok [y/d/N]: y  #开始
Downloading packages:
epel-release-7-11.noarch.rpm                                                                                                                                                              |  15 kB  00:00:00
Running transaction check
Running transaction test
Transaction test succeeded
Running transaction
  Installing : epel-release-7-11.noarch                                                                                                                                                                      1/1
  Verifying  : epel-release-7-11.noarch                                                                                                                                                                      1/1

Installed:
  epel-release.noarch 0:7-11

Complete!
重新执行thinproxy安装命令:
配置代理,访问源限制和端口设置。
[root@localhost ~]# vi /etc/tinyproxy/tinyproxy.conf
修改 Port 端口,默认为 8888
Port 8888
注释掉 Allow,表示允许所有人访问代理
#Allow 127.0.0.1
配置好了,启动tinyproxy。
tinyproxy 启动代理
killall tinyproxy 关闭所有端口(没有killall命令,安装yum install psmisc)
[root@localhost ~]# firewall-cmd --zone=public --add-port=8888/tcp --permanent  #设置防火墙允许8888端口通过
success
[root@localhost ~]# firewall-cmd --reload  #重载防火墙配置
success
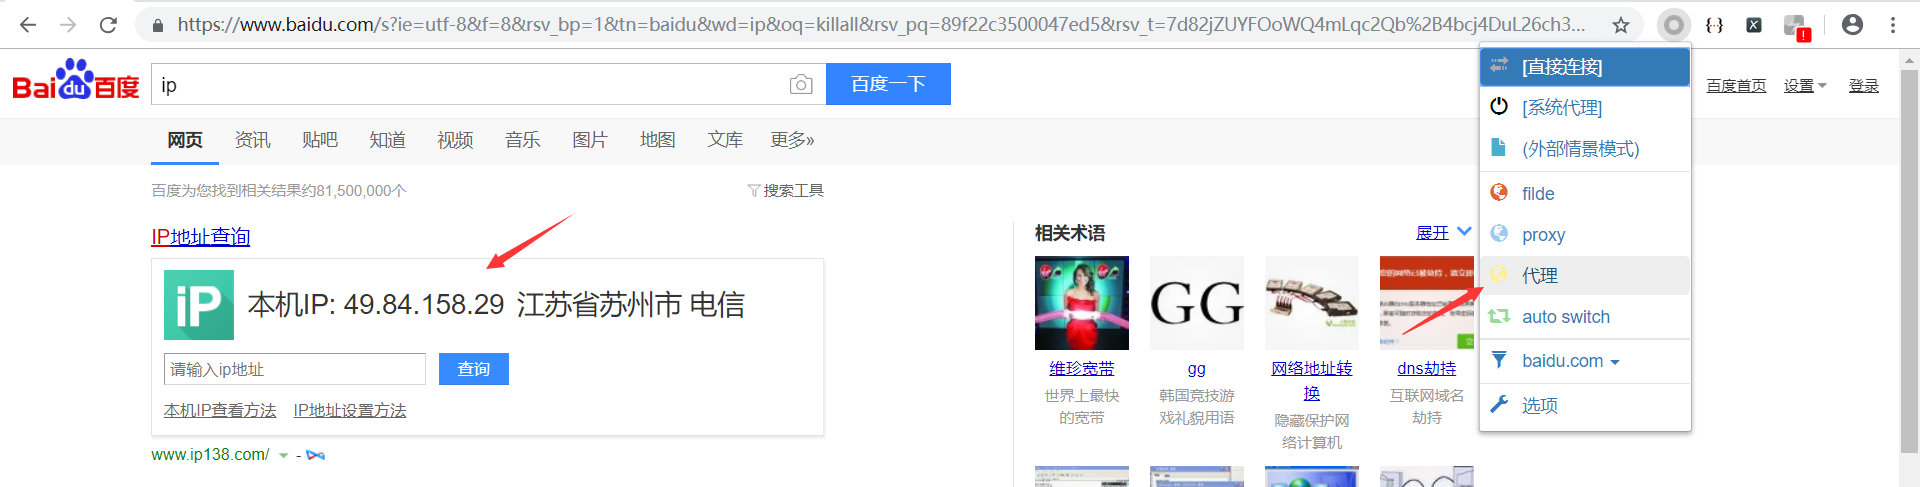
全部配置完毕,测试代理是否可用。pppoe-status查看ip,谷歌插件SwitchyOmega配置代理。

选择配置好的代理,能正常访问表示代理服务器搭建成功。
Python操作pppoe更换ip
python3环境安装
yum  -y install wget  #安装wget下载
wget https://www.python.org/ftp/python/3.6.5/Python-3.6.5.tgz #下载

tar -xvf Python-3.6.5.tgz  #解压
cd Python-3.6.5  #进入文件夹
./configure prefix=/usr/local/python3  #配置编译地址
make && make install  #开始编译
ln -s /usr/local/python3/bin/python3  /usr/bin/python3  #配置软连接

那顺便把pip3和redis(python操作redis模块)装了,下一步会用到python3操作redis。
yum install -y python34-setuptools
easy_install-3.4 pip
pip3 install redis

import os
#切换IP,重启代理服务
def changeIP():
    os.system('pppoe-stop') #断开
    time.sleep(2)
    os.popen('pppoe-start')    #等待2s重拨
    time.sleep(8)
    os.popen('service tinyproxy restart')    #等待重拨完毕,重启代理服务


#取出当前IP
def extractIP():
    infor = os.popen('pppoe-status').read()     #读取代理
    ip = re.search('(\d+\.\d+\.\d+\.\d+)',infor).group(1)    #正则匹配ip
    print(ip)
    return ip
搭建代理池(redis)
下载安装包
wget http://download.redis.io/releases/redis-4.0.2.tar.gz解压安装包并安装
tar xzf redis-4.0.2.tar.gz
cd redis-4.0.2
make
make install
启动redis
redis-server

python操作redis写入ip
import re,time,os,datetime,redis

#获取时间
def getTime():
    numtime = datetime.datetime.now().strftime('%Y-%m-%d %H-%M-%S---')
    return numtime


#切换IP,重启代理服务
def changeIP():
    os.system('pppoe-stop')
    time.sleep(2)
    os.popen('pppoe-start')
    time.sleep(8)
    os.popen('service tinyproxy restart')


#取出当前IP
def extractIP():
    infor = os.popen('pppoe-status').read()
    try:
        ip = re.search('(\d+\.\d+\.\d+\.\d+)',infor).group(1)
        print(ip)
        return ip
    except Exception as e:
        log_list.append(getTime()+'提取IP错误:'+str(e))
        return False
#
#删除ip   对应键ip1
def updateDel():
    r = redis.Redis(host='', port=6379, db=0, decode_responses=True, password='')
    r.delete('ip1')
#重新写入ip   对应键ip1
def updatePut(ip):
    print("更新ip")
    r = redis.Redis(host='', port=6379, db=0, decode_responses=True, password='')
    r.set('ip1',ip+':8888')
    print("更新完毕")

if __name__ == '__main__':
    #删除ip后20s重拨
    state = updateDel()
    time.sleep(20)
    os.popen('killall tinyproxy')
    #重新连接
    changeIP()
    #取出当前IP
    ip = extractIP()
    if ip:
        updatePut(ip)
redis用的键值对,也可以用表写入,提取ip更方便。

这里的意思是删除数据库中的ip后20s后重拨,保证已经提取出去的ip有20s的响应时间来跑爬虫。
crontab设置定时任务
crontab -e
0 */1 * * * python3 /root/zhaozhi/IP.py & 1小时执行一次(测试好ip可用时间,自行更改)
多部署几个代理服务器,保证切换ip的断层会有ip可以提取。
温馨提示
- 如果您对本文有疑问,请在评论部分留言,我会在最短时间回复。
- 如果本文帮助了您,也请评论关注,作为对我的一份鼓励。
- 如果您感觉我写的有问题,也请批评指正,我会尽量修改。
- 本文为原创,转载请注明出处。
- 本文所有代码仅供学习参考,在爬取的同时考虑对方的服务器承受能力,适可而止。