本文中所有用[]括起来的和xxx都是变量
基本操作:
1、根据id修改文档,使用POST请求
POST /[index]/[type]/[id]/_update
{
  "doc": {"[XXX]":"[xxxxx]"}
}
举例:
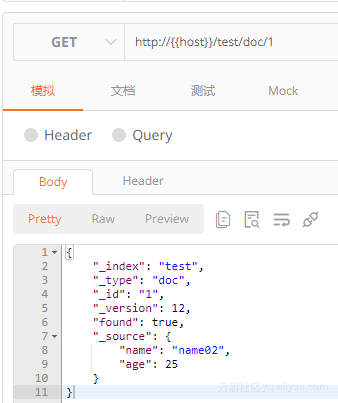
上面这个图片中index为test,type为doc,id为1,我们将里面的name改为“name03” age改为20,请求如下:
POST  /test/doc/_update
{
    "doc": {
        "name": "name03",
        "age": 20
    }
}
返回结果为:
{
    "_index": "test",
    "_type": "doc",
    "_id": "1",
    "_version": 13,
    "result": "updated",
    "_shards": {
        "total": 2,
        "successful": 1,
        "failed": 0
    },
    "_seq_no": 13,
    "_primary_term": 1
}
对该id再进行一次查询,结果如图所示: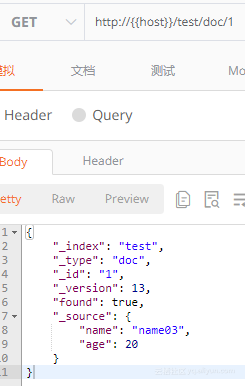
2、使用脚本修改
POST /[index]/[type]/[id]/_update
{
  "script" : "ctx._source.[xxx] = [xxx]"
}
继续使用上面的文档
POST  /test/doc/1/_update
{
   "script":"ctx._source.age+=5;ctx._source.name=\"name04\""
}
查询结果: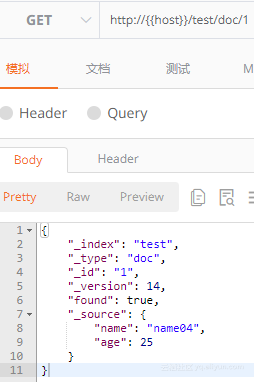
修改成功。
3、删除
DELETE /[index]/[type]/[id]比较简单,不做举例
4、批量创建
批量创建和批量修改的请求都是一样的, 传的参数不一样
请求:
POST /[index]/[type]/_bulk批量创建参数:
{"index":{"_id":"xxx"}}
{"xxx": "xxx" }
{"index":{"_id":"xxx"}}
{"xxx": "xxx" }
举例:
POST /test01/doc01/_bulk
{"index":{"_id":"1"}}
{"name": "name01" }
{"index":{"_id":"2"}}
{"name": "name02","age":20 }
{"index":{"_id":"3"}}
{"name": "name03","age":20 }   --------------1
这里有一点要注意:在图中1的位置,后面一定要换行,否则会报错,提示需要新的一行作为结束的标识,报错信息如下
{
    "error": {
        "root_cause": [
            {
                "type": "illegal_argument_exception",
                "reason": "The bulk request must be terminated by a newline [\n]"
            }
        ],
        "type": "illegal_argument_exception",
        "reason": "The bulk request must be terminated by a newline [\n]"
    },
    "status": 400
}

注意上面两张图片中最左边序号的不同,下面是正确的json数据,体会什么叫以新的一行作为结束的标识。
这种操作实际上是id存在就更新,不存在就创建,返回结果如下:
{
  "took": 162,
  "errors": false,
  "items": [
    {
      "index": {
        "_index": "test01",
        "_type": "doc01",
        "_id": "1",
        "_version": 6,
        "result": "updated",
        "_shards": {
          "total": 2,
          "successful": 1,
          "failed": 0
        },
        "_seq_no": 5,
        "_primary_term": 1,
        "status": 200
      }
    },
    {
      "index": {
        "_index": "test01",
        "_type": "doc01",
        "_id": "2",
        "_version": 2,
        "result": "updated",
        "_shards": {
          "total": 2,
          "successful": 1,
          "failed": 0
        },
        "_seq_no": 1,
        "_primary_term": 1,
        "status": 200
      }
    },
    {
      "index": {
        "_index": "test01",
        "_type": "doc01",
        "_id": "3",
        "_version": 1,
        "result": "created",
        "_shards": {
          "total": 2,
          "successful": 1,
          "failed": 0
        },
        "_seq_no": 0,
        "_primary_term": 1,
        "status": 201
      }
    }
  ]
}
查看下这三个id的具体内容: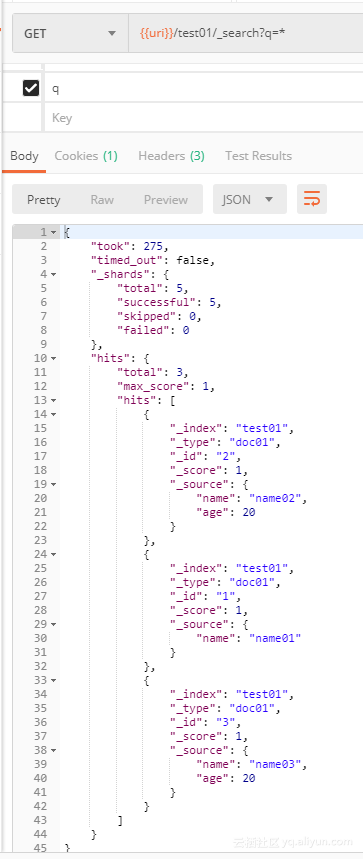
5、批量修改
参数:
{"update":{"_id":"xxx"}}
{"doc": { "XXX": "xxx" } }
{"delete":{"_id":"xxx"}}
现在对上面创建的三条记录做批量修改:
POST /test01/doc01/_bulk
 {"update":{"_id":"1"}}
{"doc": { "name": "name011"}}
{"delete":{"_id":"2"}}
{"update":{"_id":"3"}}
{"script": "ctx._source.age+=5;ctx._source.name=\"name033\""}  -----------1
和批量创建一样,最后一行需要换行。
查询索引test01的数据如下: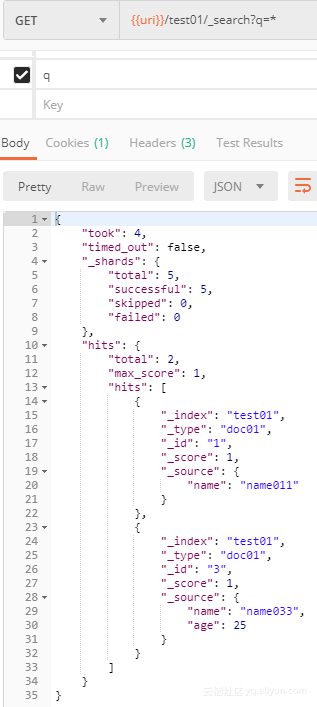
数据全部修改成功!