一 下载解压安装包
可以下载后上传到linux服务器 也可以使用命令下载
- sheel> wget https://sonatype-download.global.ssl.fastly.net/nexus/3/nexus-3.9.0-01-unix.tar.gz
- sheel> tar zxvf nexus-3.9.0-01-unix.tar.gz
二 启动停止
进入解压后生成的文件夹 使用bin/nexus start 命令进行启动
如果提示使用root用户进行启动是不提倡的 而且没有启动成功
使用命令: vi /etc/profile编辑环境变量 在最后追加一行 export RUN_AS_USER=root
停止命令: bin/nexus stop
在浏览器地址栏输入192.168.0.200:8081/nexus访问页面 ip改为你linux的ip
nexus启动后大约需要一分钟才能访问到页面
如果过了一分钟还没有访问到 请检查是否开启了防火墙8081端口
命令:vi /etc/sysconfig/iptables开始否有8081端口

如果没有 请手动添加
- centos7开启防火墙8081端口
- sheel> firewall-cmd --zone=public --add-port=8081/tcp --permanent
- sheel> firewall-cmd --reload 重新载入
三 配置
进入页面后 点击右上角的sign in登录 初始账号密码: admin/admin123
这时页面多出来配置一项 点击进入

进入后 可以看到这样两项 blob是jar本地存放的地址 repositories是网上jar仓库

配置一个blob 点击create blob store 输入name后 path自动弹出 可以自定义

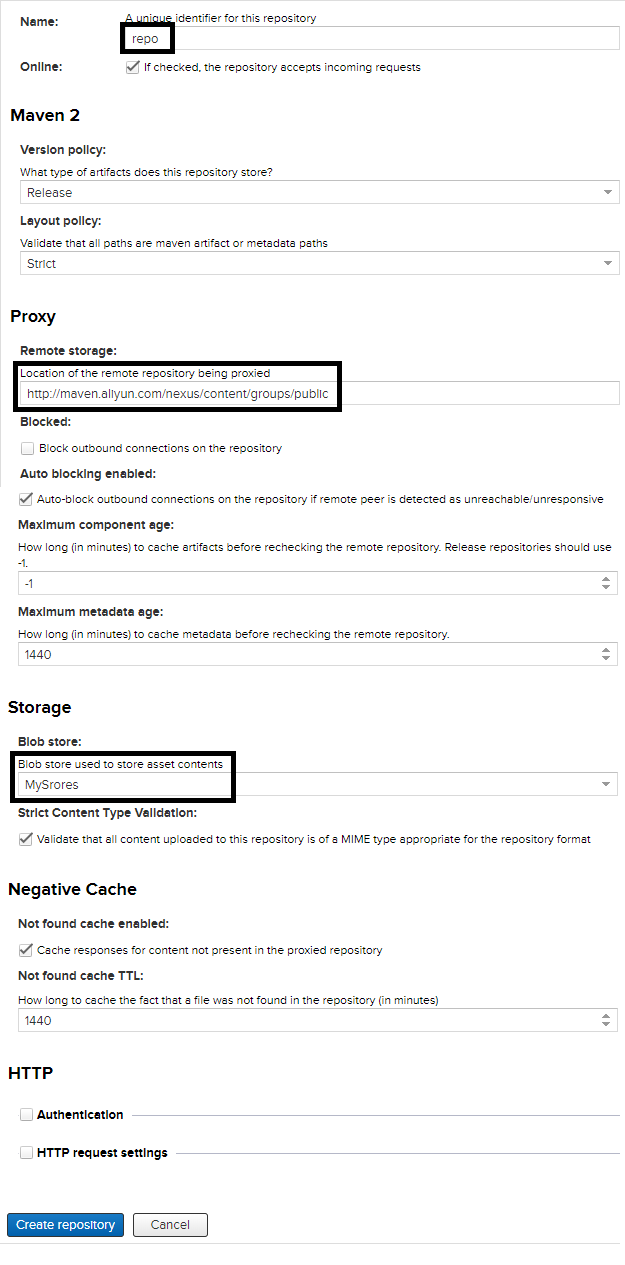
创建一个repository 点击create

选择maven2(repoxy)

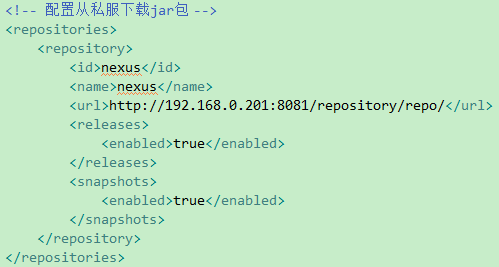
输入名称 链接(项目要使用的地址) 和jar包存放的仓库
四 使用
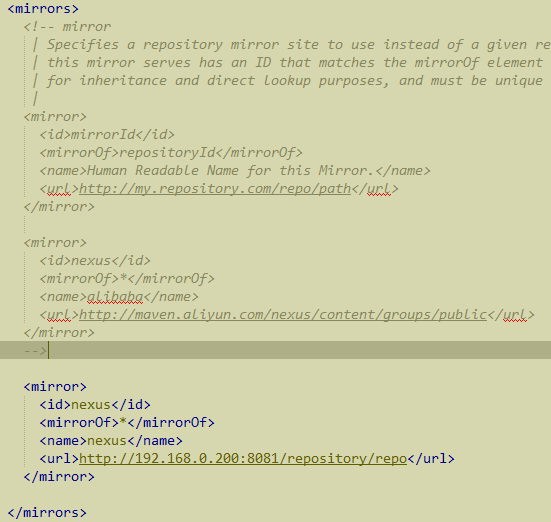
配置maven的setting.xml文件
也可以在pom文件中添加仓库地址