上一节介绍了开发环境的搭建,如果使用树莓派的朋友可以先参考其他文章配置完之后再参考本节。
开发Android Things 的工具即为Android Studio。请自己下载安装即可。
打开Android Studio,原始界面如下。点击start a new Android Studio project.

取名MyFirst。

点击next之后,选择项目适用类型如下。
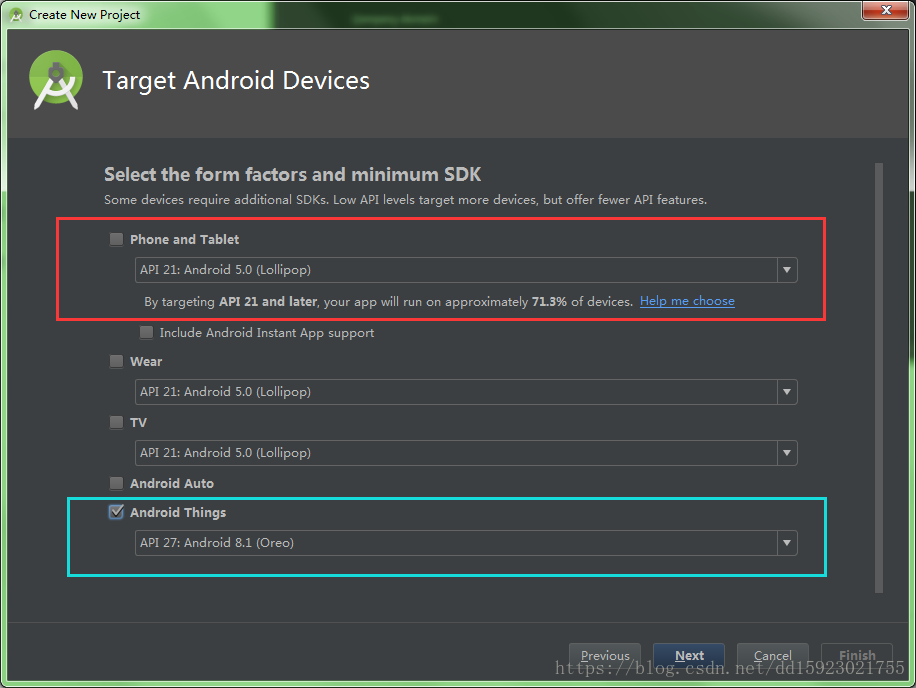
默认选择的是红色框中,此为创建普通的APP项目,取消选择红框,选择蓝色框中Android Things选项,API选择API 27。

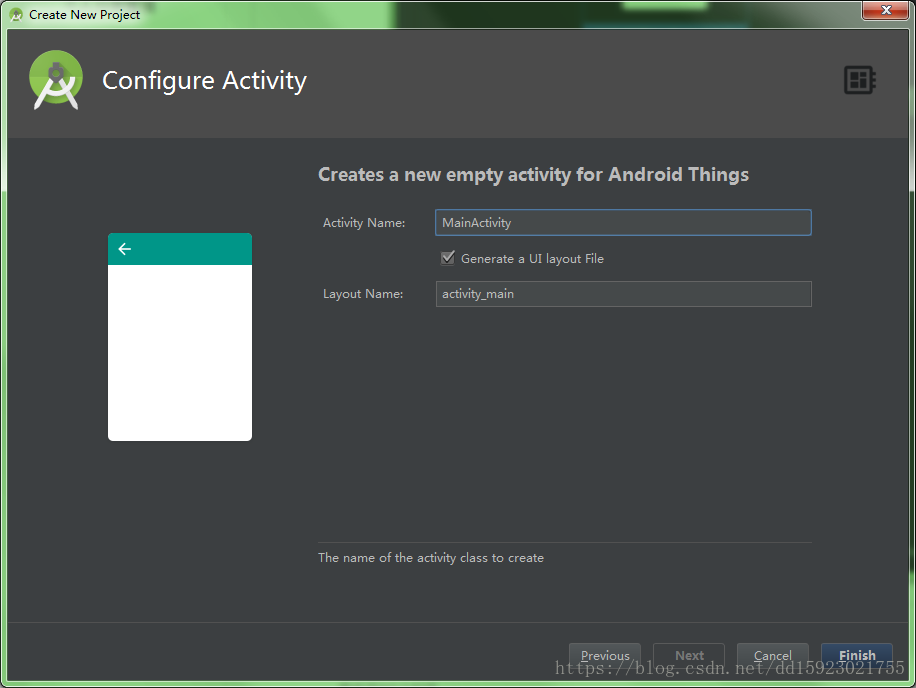
我的开发板带有显示屏,因此我选择了中间可以做界面的Activity。无论有没有显示屏都可以选这个。默认Activity名字即可。
之后创建完成项目。删除一些多于的注释,MainActivy.java如下所示。可见只加入了一个主界面,无其他代码。
package com.example.cz.myfirst;

import android.app.Activity;
import android.os.Bundle;

public class MainActivity extends Activity {

    @Override
    protected void onCreate(Bundle savedInstanceState) {
        super.onCreate(savedInstanceState);
        setContentView(R.layout.activity_main);   //显示主界面
    }
}
再打开activity_main.xml查看一下布局文件。如下所示。可见布局中只有一个显示文本的TextView控件显示Hello Word。
<?xml version="1.0" encoding="utf-8"?>
<android.support.constraint.ConstraintLayout xmlns:android="http://schemas.android.com/apk/res/android"
    xmlns:app="http://schemas.android.com/apk/res-auto"
    xmlns:tools="http://schemas.android.com/tools"
    android:layout_width="match_parent"
    android:layout_height="match_parent"
    tools:context=".MainActivity">

    <TextView
        android:layout_width="wrap_content"
        android:layout_height="wrap_content"
        android:text="Hello World!"
        app:layout_constraintBottom_toBottomOf="parent"
        app:layout_constraintLeft_toLeftOf="parent"
        app:layout_constraintRight_toRightOf="parent"
        app:layout_constraintTop_toTopOf="parent" />

</android.support.constraint.ConstraintLayout>
之后看一下AndroidManifest.xml配置文件。其中第二个intent filter是用于使程序开机自启动的,如果加上这个,则可断电后开机自动加载这个程序,否则加载系统界面。
<?xml version="1.0" encoding="utf-8"?>
<manifest xmlns:android="http://schemas.android.com/apk/res/android"
    package="com.example.cz.myfirst">
    <application>
        <uses-library android:name="com.google.android.things" />
        <activity android:name=".MainActivity">
            <intent-filter>
                <action android:name="android.intent.action.MAIN" />
                <category android:name="android.intent.category.LAUNCHER" />
            </intent-filter>
            <intent-filter>
                <action android:name="android.intent.action.MAIN" />
                <category android:name="android.intent.category.IOT_LAUNCHER" />
                <category android:name="android.intent.category.DEFAULT" />
            </intent-filter>
        </activity>
    </application>
</manifest>
这个自动生成的程序是可以直接在开发板上跑的。
按照第一节中的接线方式(https://blog.csdn.net/dd15923021755/article/details/82354483)将开发板连接好,其中TypeC连接线既用于提供电源,也用于ADB调试。
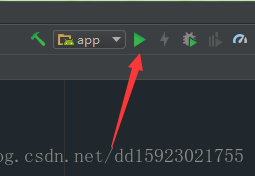
调试这里我搞了很久。点击右上角的运行按钮,
出现选择调试工具的界面。

列表中第一个为虚拟仪器,第二个为NXP的开发板,选择第二个选择OK,即可将程序烧写进入开发板并自动运行。
此处,本人在调试的时候出现了读不出设备的问题(上图中没有红框中的选型),在网上找过许多帖子都没有提到过,知道最后厚脸皮问了两家淘宝卖家,才得知检测不到设备主要有几个原因:typeC线出问题,Android Things系统未装好,第三个就是我出现的问题,Android Studio不是最新版。这个问题确实困扰了我很久,因为其他地方实在找不出问题,结果两家淘宝客服都说试一试更新Android Studio,我的Android Studio装的比较早,后来更新之后就能识别出开发板了。
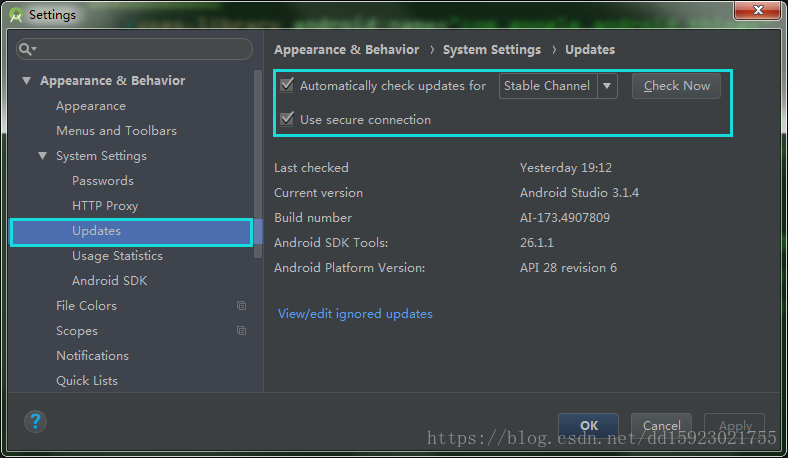
更新的方式:File--Settings,之后出现设置的界面。如下。选择Stable Channel,再点击check Now即可。如果有更新可以选择更新Android Studio。
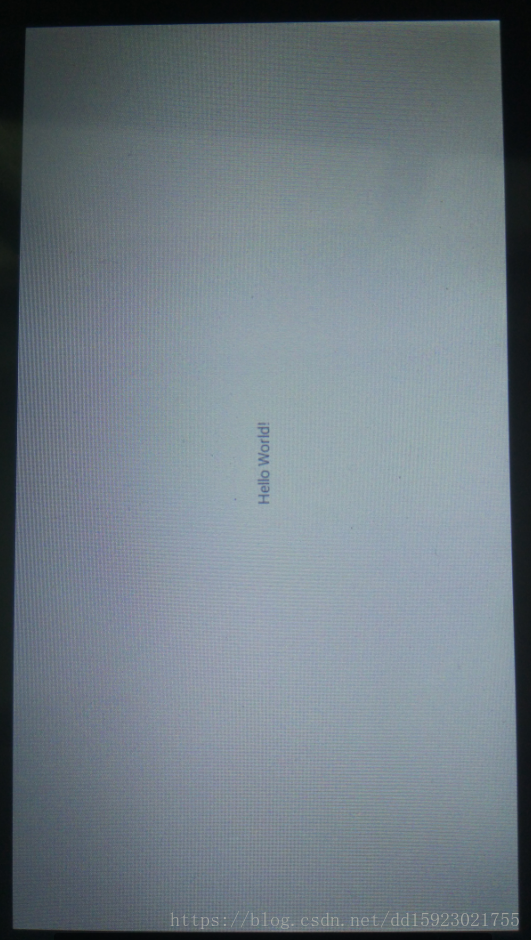
接上步,程序烧进开发板自动运行,其效果如下图。成功在屏幕中间显示出:Hello Word字样。第一个Android Things程序完成!
后续开发请参考后续帖子。
转载请注明出处:https://blog.csdn.net/dd15923021755/article/details/82354886