说明
本文承接上一篇修改yolo2相关配置的博客,用来说明如何制作自己的训练数据,。主要流程就是手动标注目标信息了,当然,图片首先要自己准备好。
注意:本文的识别类型只有1类
工具
- 画框程序 https://github.com/puzzledqs/BBox-Label-Tool
- 格式转换程序https://github.com/Guanghan/darknet?files=1 ——主要是用这里的scripts/convert.py 转换格式
画框程序介绍
首先将该程序下载并解压,会得到一个BBox-Label-Tool-master的文件夹,里面还有Examples,Images,Labels三个文件夹。
将自己的图片整合成一个文件夹,然后命名为002(003,004)这种形式,拷贝进Examples和Images里。(不知道为啥要同时拷到两个文件夹中,反正我拷到一个中用不了)
- 通过命令行进入该文件夹,输入:
python main.py可以得到如下画面:
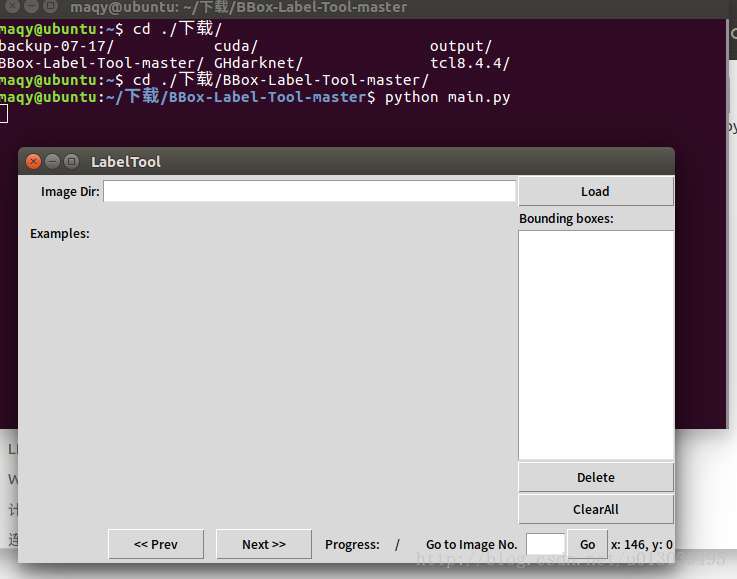
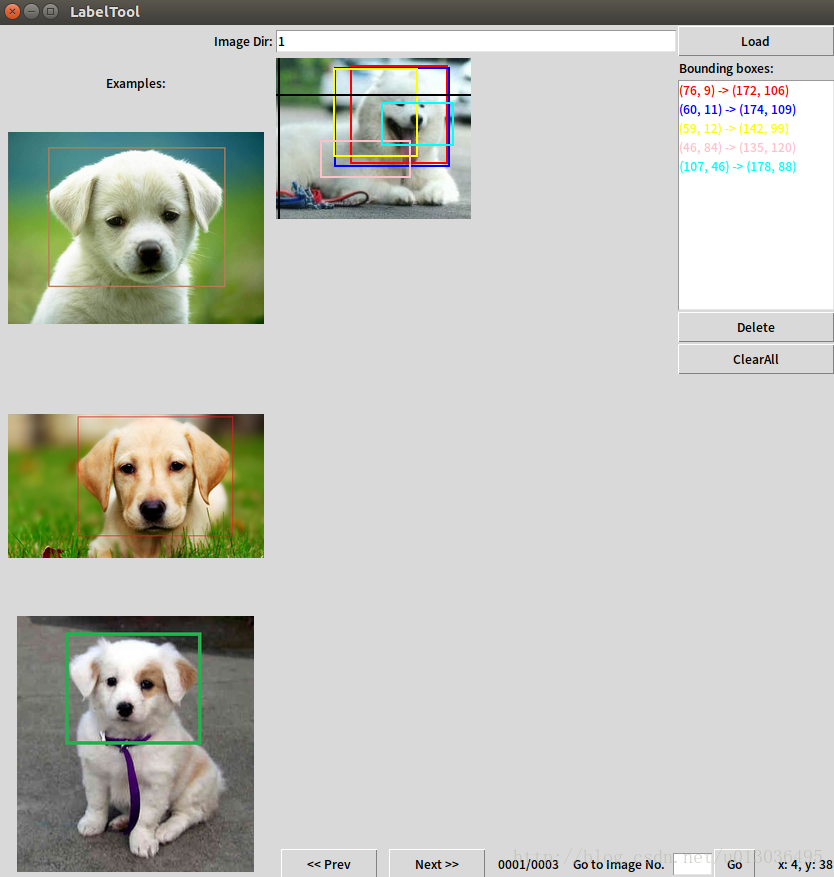
在image Dir的框中输入2(3,4),就是你拷进去的文件夹名。然后就会显示图像了,此时就可以开始慢慢的标记了,每标完一张图要点击“next>>”才会保存,txt保存在labels文件夹下。
注意:该程序默认只能读取.JPEG的文件,如果你的图片是.jpg是读取不到的。 解决方法:编辑main.py,用CTRL+F搜索JPEG,在134行和152行左右修改“.JPEG”为“.jpg”即可。
标记完成后进入labels文件夹,会出现对应的txt文件,文件内容类似如下:
2
112 73 155 154
205 128 277 154
第一行表示个数,第二行开始表示框的位置和大小。前两个数表示框的左上角顶点,后两个数表示框的长和宽。
现在我们就得到了图片和相应的标记了,但是还不能开始训练,因为要将标签转化为yolo所需要的格式。
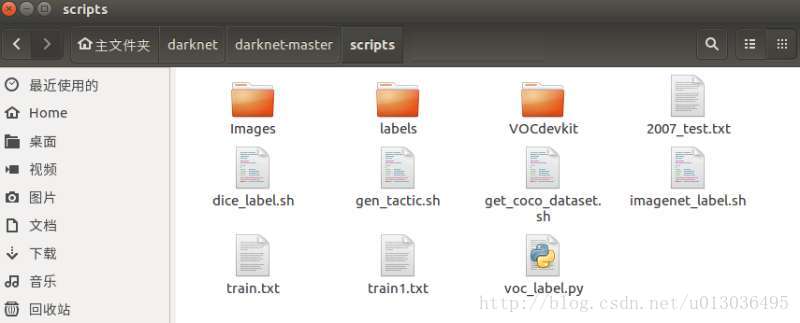
格式转化程序
首先将该程序下载并解压,我们仅需用到scripts/convert.py。这里要修改convert.py,我加中文注释的地方是需要修改的。
# -*- coding: utf-8 -*-
"""
Created on Wed Dec  9 14:55:43 2015

This script is to convert the txt annotation files to appropriate format needed by YOLO

@author: Guanghan Ning
Email: [email protected]
"""

import os
from os import walk, getcwd
from PIL import Image

classes = ["ship"]              #修改为自己的类别

def convert(size, box):
    dw = 1./size[0]
    dh = 1./size[1]
    x = (box[0] + box[1])/2.0
    y = (box[2] + box[3])/2.0
    w = box[1] - box[0]
    h = box[3] - box[2]
    x = x*dw
    w = w*dw
    y = y*dh
    h = h*dh
    return (x,y,w,h)


"""-------------------------------------------------------------------"""

""" Configure Paths"""
mypath = "/home/maqy/下载/BBox-Label-Tool-master/Labels/002/"   #修改为自己的原标签所在地
outpath = "/home/maqy/下载/output/002/"   #转化后的标签存储的地方,注意002这个文件夹也要存在

cls = "ship"    #修改为自己的类别
if cls not in classes:
    exit(0)
cls_id = classes.index(cls)

wd = getcwd()
list_file = open('%s/%s_list.txt'%(wd, cls), 'w')

""" Get input text file list """
txt_name_list = []
for (dirpath, dirnames, filenames) in walk(mypath):
    txt_name_list.extend(filenames)
    break
print(txt_name_list)

""" Process """
for txt_name in txt_name_list:
    # txt_file =  open("Labels/stop_sign/001.txt", "r")

    """ Open input text files """
    txt_path = mypath + txt_name
    print("Input:" + txt_path)
    txt_file = open(txt_path, "r")
    lines = txt_file.read().split('\n')   #for ubuntu, use "\r\n" instead of "\n",这里我用“\r\n”会报错,根据情况修改

    """ Open output text files """
    txt_outpath = outpath + txt_name
    print("Output:" + txt_outpath)
    txt_outfile = open(txt_outpath, "w")


    """ Convert the data to YOLO format """
    ct = 0
    for line in lines:
        print('lenth of line is: ')
        print(len(line))
        print('\n')
        if(len(line) >= 2):
            ct = ct + 1
            print(line + "\n")
            elems = line.split(' ')
            print(elems)
            xmin = elems[0]
            xmax = elems[2]
            ymin = elems[1]
            ymax = elems[3]
            #
            img_path = str('%s/images/%s/%s.jpg'%(wd, cls, os.path.splitext(txt_name)[0])) #这里是训练图片路径,
#可以做相应的修改或者把训练图片拷贝过来,
#注意与原版yolo中的Images文件名首字母I的大小写是不同的。 应该是通过这个路径读取图片的长宽
        print("wd:"+wd+"cls"+cls+"os.path"+os.path.splitext(txt_name)[0])
            #t = magic.from_file(img_path)
            #wh= re.search('(\d+) x (\d+)', t).groups()
            print("wd:"+wd+" cls:"+cls+" os.path:"+os.path.splitext(txt_name)[0])
            im=Image.open(img_path)
            w= int(im.size[0])
            h= int(im.size[1])
            #w= 256
            #h= 256
            #w = int(xmax) - int(xmin)
            #h = int(ymax) - int(ymin)
            # print(xmin)
            print(w, h)
            b = (float(xmin), float(xmax), float(ymin), float(ymax))
            bb = convert((w,h), b)
            print(bb)
            txt_outfile.write(str(cls_id) + " " + " ".join([str(a) for a in bb]) + '\n')

    """ Save those images with bb into list"""
    if(ct != 0):
        list_file.write('%s/images/%s/%s.jpg\n'%(wd, cls, os.path.splitext(txt_name)[0]))

list_file.close()
然后在scripts/images/目录下创建一个文件夹,名为代码段中修改过的cls的值。
cls = "ship" #修改为自己的类别
(我的即是ship) 的文件夹,将之前进行过标注的图片拷贝进去。然后在目录下运行:
python convert.py此时在你的输出目录下就有改好的txt文件了。
准备训练
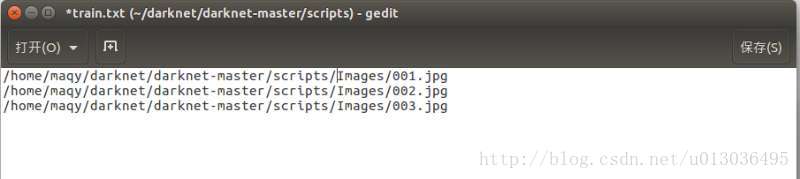
回到自己的darknet目录,进入scripts目录,将图片和标签复制进来,并创建train.txt文件。
其中Images中存储的是图片,labels中存储的是修改完后的标签。train.txt中存储训练图片的地址。
不过建议采取Voc的形式,即在scripts中创建文件夹VOCdevkit/VOC2012/JPEGImages和VOCdevkit/VOC2012/labels,将图片和标签分别放入这两个文件夹。此时train.txt文档为:

开始训练
首先下载一个预训练的model(当然你也可以自己生成),放到darkent/目录下。
下载地址 (76 MB):http://pjreddie.com/media/files/darknet19_448.conv.23
然后运行指令:./darknet detector train cfg/voc.data cfg/yolo-voc.2.0.cfg darknet19_448.conv.23
指令中的yolo-voc.2.0.cfg 可以换成别的网络。就可以开始训练了,迭代次数为设置的max_batches数。
测试结果
此时在backup目录下会有很多.weights文件,利用他们就可以进行检测了。
./darknet detector test cfg/voc.data cfg/yolo-voc.2.0.cfg ./backup/yolo-voc_final.weights ./data/test/sar10.jpg
其中 cfg/yolo-voc.2.0.cfg替换成你所用的,./data/test/sar10.jpg是用来检测的图像,修改为自己的路径即可。