版权声明:本文为博主原创文章,转载请注明出处。 https://blog.csdn.net/qq_29150765/article/details/81607321
前端路由
- 服务器端路由:的功能是根据URL地址,跳转到相应页面,这些页面都是真实存在于服务端的
- 前端路由:由前端实现以上功能,前端只存在d单页面首页index.htm
优点
- 不需要每次都从服务器获取,渲染页面更快速
缺点
- 不利于SEO
- 使用浏览器前进、后退按键时重新发送请求,未合理利用缓存
- 单页面无法记住之前滚动的位置
前端路由的使用
- vue-router用来构建SPA
- 跳转:html页面:
<router-link></router-link>或者 js:this.$router.push({path:}) - 渲染:
<router-view></router-view>
动态路由匹配
规定URL格式,获取URL内容;
使用场景:共用页面,如商品详情,只是商品的id不同
| 模式 | 匹配路径 | $route.params |
|---|---|---|
| /user/:username | /user/enent | { username: ‘event’ } |
| /user/:username/post/:post_id | /user/event/post/123 | {username: ‘event’, post_id: 123} |
实例:
1.创建vue页面
<template>
<div>
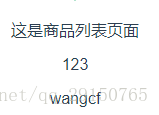
这是商品列表页面
<p>{{$route.params.goosdId}}</p>
<p>{{$route.params.userName}}</p>
</div>
</template>
<script>
export default {
name: "goods-list"
}
</script>
<style scoped>
</style>
2.修改/router/index.js
import GoodsList from'@/views/GoodsList'

Vue.use(Router)

export default new Router({
  routes: [
    //mode: 'history',//默认为`hash`哈希模式
    {
      path: '/goods/:goosdId/user/:userName',
      name: 'GoodsList',
      component: GoodsList
    }
  ]
})
3.输入地址
http://localhost:8080/#/goods/123/user/wangcf
4.输出结果
vue-router是对history对象的封装;
地址中的#是指定路由模式,可以修改为history
- history.go():前进
- history.back():后退
- history.pushState(‘desc’,’test’,’/#/goods/123/user/wangcf’):跳转
嵌套路由
路由之中嵌套路由;通过嵌套路由实现不同页面之间的切换
实例
1.新建组件Image.vue,Title.vue
<div>
      这是商品的 图片/标题 子组件
</div>
2.在GoodsList.vue中添加
<!--嵌套路由子路由-->
    <div>
      <router-link to="/goods/title">显示商品标题</router-link>
      <router-link to="/goods/img">显示商品图片</router-link>
    </div>
    <div>
          <!--在页面中渲染的位置-->
          <router-view></router-view>
    </div>
3.配置路由设置,添加子路由
children:[
        {
          path: 'title',
          name: 'title',
          component: Title
        },
        {
          path: 'img',
          name: 'img',
          component: Image
        }
4.访问 http://localhost:8080/goods

编程式路由
通过Js来实现页面的跳转
- 字符串:$router.push(‘/name’)
- 路由地址:$router.push({path:’name’})
- 传参: router.push({path:’name’,query:{a:123}})
- $router.go(1)
例子:
1.商品列表页面
<template>
  <div>
    <!--编程式路由-->
    <div>
      <router-link to="/cart">跳转到购物车</router-link>
      <li><button @click="jumpStr">跳转到购物车页面(字符串)</button></li>
      <li><button @click="jumpObj">跳转到购物车页面(对象)</button></li>
      <li><button @click="jumpQue">跳转到购物车页面(传参)</button></li>
      <li><button @click="jumpGo">前进</button></li>
      <li><button @click="jumpBack">后退</button></li>
    </div>

  </div>
</template>

<script>
    export default {
        methods:{
          jumpStr(){
            this.$router.push('/cart')
          },
          jumpObj(){
            this.$router.push({path:'cart'})
          },
          jumpQue(){
            this.$router.push({path:'cart',query:{goodsId:123}})
          },
          jumpGo(){
            this.$router.go(1)
          },
          jumpBack(){
            this.$router.go(-1)
          }

        }
    }
</script>
2.购物车页面
注意这里是用的route而不是router
并且获取参数是用query而不是params和动态路由传参有区别
<div>
      这是购物车页面
      <p>{{$route.query.goodsId}}</p>
</div>
命名路由和命名视图
给路由和视图(组件)定义名称,通过名称进行渲染
命名路由例子
1.为路由命名
    {
      path: '/cart/:cartId',
      name: 'cart',//路由名称
      component: Cart
    }
2.使用 v-bind:to="{name:'cart'},params:{cartId:321}" 添加跳转
- name:路由名称
- params,可选:路由参数(动态路由)
<div>
<router-link v-bind:to="{ name:'cart',params:{cardId:321} }">跳转到购物车页面(命名路由)</router-link>
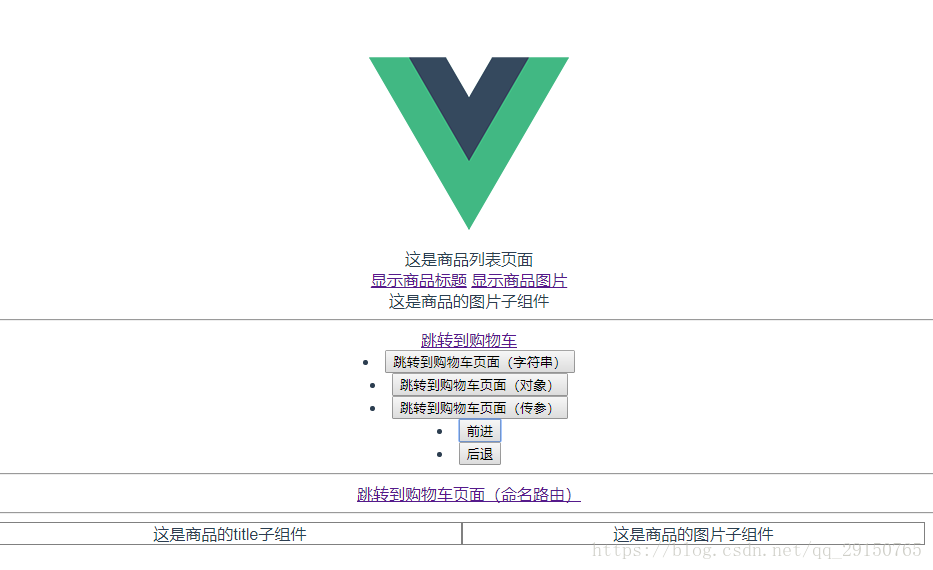
</div>命名视图例子
1.在router/index中配置命名视图
      //命名视图
      components: {
        default: GoodsList,
        title: Title,
        img: Image
      },
2.在App.vue中显示视图
  <div id="app">
    <img src="./assets/logo.png">
    <router-view class="main"/>
    <router-view class="left" name="title"></router-view>
    <router-view class="right" name="img"></router-view>
  </div>