前言:接触vue已经有一段时间了,前面也写了几篇关于vue全家桶的内容,感兴趣的小伙伴可以去看看,刚接触的时候就想去膜拜一下源码~可每次鼓起勇气去看vue源码的时候,当看到几万行代码的时候就直接望而却步了,小伙伴是不是也跟我当初一样呢? 下面分享一下我看vue源码的一些感触,然后记录一下我对源码的理解,欢迎指正,纯属个人笔记,大牛勿喷!
我们直接上一张vue官网的vue的生命周期图:

我们跟着源码结合demo把张图全部跑一遍~~
我们以一个webpack+vue单页面引用为demo
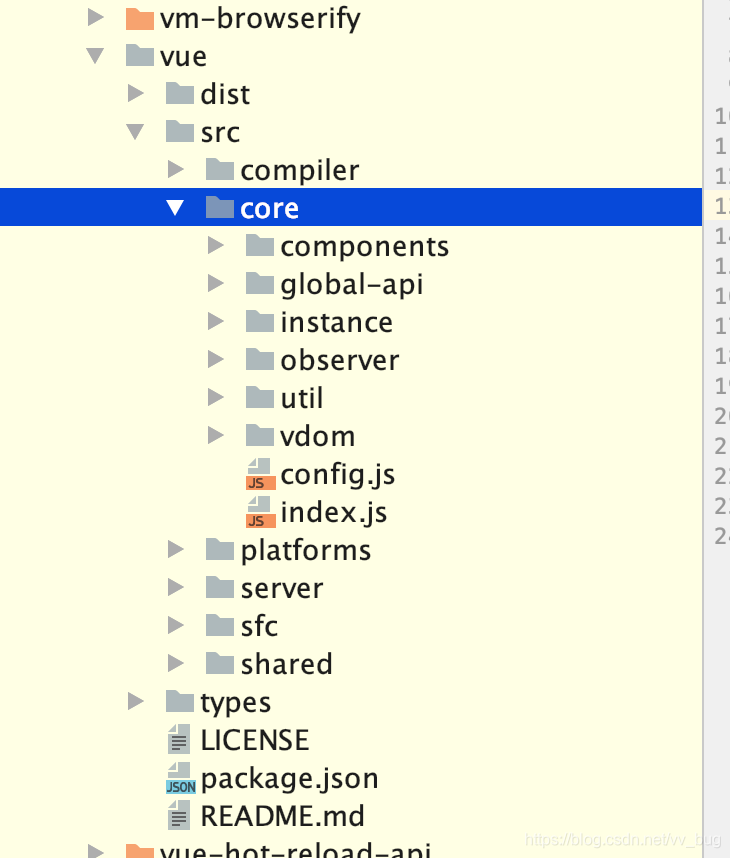
首先我们看一下vue源码文件:
我们首先从我们项目的main.js文件开始:
// The Vue build version to load with the `import` command
// (runtime-only or standalone) has been set in webpack.base.conf with an alias.
import Vue from 'vue'
import App from './App'
import router from './router'
import store from './store'

import LazyImage from './lazy'
import {sync} from 'vuex-router-sync'

Vue.config.productionTip = false
Vue.use(LazyImage)
sync(store,router)
/* eslint-disable no-new */
new Vue({
  el: '#app',
  router,
  store,
  ddd: {name: 'yasin'},
  render(h) {
    return h(App)
  }
})
我们已经默默的开始的我们的旅程,目前已经到达了生命周期的(new Vue())
我们点开vue的源码(/node_modules/vue/src/core),找到构造函数:
import Vue from './instance/index'
import { initGlobalAPI } from './global-api/index'
import { isServerRendering } from 'core/util/env'
import { FunctionalRenderContext } from 'core/vdom/create-functional-component'

initGlobalAPI(Vue)

Object.defineProperty(Vue.prototype, '$isServer', {
  get: isServerRendering
})

Object.defineProperty(Vue.prototype, '$ssrContext', {
  get () {
    /* istanbul ignore next */
    return this.$vnode && this.$vnode.ssrContext
  }
})

// expose FunctionalRenderContext for ssr runtime helper installation
Object.defineProperty(Vue, 'FunctionalRenderContext', {
  value: FunctionalRenderContext
})

Vue.version = '__VERSION__'

export default Vue
入口文件中定义了一些服务端渲染的东西,我们不关心,继续往下走
/node_modules/vue/src/core/instance:
import { initMixin } from './init'
import { stateMixin } from './state'
import { renderMixin } from './render'
import { eventsMixin } from './events'
import { lifecycleMixin } from './lifecycle'
import { warn } from '../util/index'

function Vue (options) {
  if (process.env.NODE_ENV !== 'production' &&
    !(this instanceof Vue)
  ) {
    warn('Vue is a constructor and should be called with the `new` keyword')
  }
  this._init(options)
}

initMixin(Vue)
stateMixin(Vue)
eventsMixin(Vue)
lifecycleMixin(Vue)
renderMixin(Vue)

export default Vue
好啦~ 整个vue的构造函数中就只调用了一个init方法(我们已经来到了生命周期图的init函数了):
init方法哪里来的呢? 我们可以下面调用了:
initMixin(Vue)
/node_modules/vue/src/core/instance/init.js
export function initMixin (Vue: Class<Component>) {
  Vue.prototype._init = function (options?: Object) {
    const vm: Component = this
    // a uid
    vm._uid = uid++

    let startTag, endTag
    /* istanbul ignore if */
    if (process.env.NODE_ENV !== 'production' && config.performance && mark) {
      startTag = `vue-perf-start:${vm._uid}`
      endTag = `vue-perf-end:${vm._uid}`
      mark(startTag)
    }

    // a flag to avoid this being observed
    vm._isVue = true
    // merge options
    if (options && options._isComponent) {
      // optimize internal component instantiation
      // since dynamic options merging is pretty slow, and none of the
      // internal component options needs special treatment.
      initInternalComponent(vm, options)
    } else {
      vm.$options = mergeOptions(
        resolveConstructorOptions(vm.constructor),
        options || {},
        vm
      )
    }
    /* istanbul ignore else */
    if (process.env.NODE_ENV !== 'production') {
      initProxy(vm)
    } else {
      vm._renderProxy = vm
    }
    // expose real self
    vm._self = vm
    initLifecycle(vm)
    initEvents(vm)
    initRender(vm)
    callHook(vm, 'beforeCreate')
    initInjections(vm) // resolve injections before data/props
    initState(vm)
    initProvide(vm) // resolve provide after data/props
    callHook(vm, 'created')

    /* istanbul ignore if */
    if (process.env.NODE_ENV !== 'production' && config.performance && mark) {
      vm._name = formatComponentName(vm, false)
      mark(endTag)
      measure(`vue ${vm._name} init`, startTag, endTag)
    }

    if (vm.$options.el) {
      vm.$mount(vm.$options.el)
    }
  }
}
代码已经有点多了,问题不大~ 我们找重点,我们再看一下生命周期图,看一下我们接下来走哪一步了:
可以看到,我们接下来要走init方法中的events跟lifecyle,字面意思就可以知道是注册“事件”跟“生命周期”的意思:
我们在init方法中找到对应的代码:
Vue.prototype._init = function (options?: Object) {
    ....
    // expose real self
    vm._self = vm
    initLifecycle(vm)
    initEvents(vm)
    initRender(vm)
    callHook(vm, 'beforeCreate')
  ....
  }
我们首先点开initLifecycle方法:
/node_modules/vue/src/core/instance/lifecycle.js
export function initLifecycle (vm: Component) {
  const options = vm.$options

  // locate first non-abstract parent
  let parent = options.parent
  if (parent && !options.abstract) {
    while (parent.$options.abstract && parent.$parent) {
      parent = parent.$parent
    }
    parent.$children.push(vm)
  }

  vm.$parent = parent
  vm.$root = parent ? parent.$root : vm

  vm.$children = []
  vm.$refs = {}

  vm._watcher = null
  vm._inactive = null
  vm._directInactive = false
  vm._isMounted = false
  vm._isDestroyed = false
  vm._isBeingDestroyed = false
}
很简单,就是初始化一些生命周期的变量(未渲染、未销毁等等)
我们接下来看一下init方法中的Events(initEvents):
export function initEvents (vm: Component) {
  vm._events = Object.create(null)
  vm._hasHookEvent = false
  // init parent attached events
  const listeners = vm.$options._parentListeners
  if (listeners) {
    updateComponentListeners(vm, listeners)
  }
}
events是啥呢? 就是我们执行vm. on、vm.$emit方法发送的一些事件,分为注册事件跟触发事件(观察者模式)
好啦,我们已经把init的events跟lifecycle看完了,在继续往下之前我们再来看一下入口文件的这些方法:
node_modules/vue/src/core/instance/index.js
initMixin(Vue)
stateMixin(Vue)
eventsMixin(Vue)
lifecycleMixin(Vue)
renderMixin(Vue)

export default Vue
initMixin方法我们上面已经看过了
我们看一下 stateMixin方法:
export function stateMixin (Vue: Class<Component>) {
  // flow somehow has problems with directly declared definition object
  // when using Object.defineProperty, so we have to procedurally build up
  // the object here.
  const dataDef = {}
  dataDef.get = function () { return this._data }
  const propsDef = {}
  propsDef.get = function () { return this._props }
  if (process.env.NODE_ENV !== 'production') {
    dataDef.set = function (newData: Object) {
      warn(
        'Avoid replacing instance root $data. ' +
        'Use nested data properties instead.',
        this
      )
    }
    propsDef.set = function () {
      warn(`$props is readonly.`, this)
    }
  }
  Object.defineProperty(Vue.prototype, '$data', dataDef)
  Object.defineProperty(Vue.prototype, '$props', propsDef)

  Vue.prototype.$set = set
  Vue.prototype.$delete = del

  Vue.prototype.$watch = function (
    expOrFn: string | Function,
    cb: any,
    options?: Object
  ): Function {
    const vm: Component = this
    if (isPlainObject(cb)) {
      return createWatcher(vm, expOrFn, cb, options)
    }
    options = options || {}
    options.user = true
    const watcher = new Watcher(vm, expOrFn, cb, options)
    if (options.immediate) {
      cb.call(vm, watcher.value)
    }
    return function unwatchFn () {
      watcher.teardown()
    }
  }
}
我们在vue项目中代码可能会用到 Vue.prototype. delete、 Vue.prototype. set的工作原理,其他两个方法小伙伴自己去研究哦~
为什么需要用到vm.$set方法呢?
小伙伴可以看官网解释:
https://cn.vuejs.org/v2/guide/reactivity.html
Vue 不允许在已经创建的实例上动态添加新的根级响应式属性 (root-level reactive property)。然而它可以使用 Vue.set(object, key, value) 方法将响应属性添加到嵌套的对象上.
有点抽象哦,比如你在data中定义了一个user对象,然后你想给user对象添加一个name属性,你直接this.name=xxx是没有响应式的,你需要执行:
vm.$set(this.user,'name','xxxx')
这样你的name属性就具有响应式了,好啦~ 我们继续看源码:
Vue.prototype.$set = set
export function set (target: Array<any> | Object, key: any, val: any): any {
  if (process.env.NODE_ENV !== 'production' &&
    (isUndef(target) || isPrimitive(target))
  ) {
    warn(`Cannot set reactive property on undefined, null, or primitive value: ${(target: any)}`)
  }
  if (Array.isArray(target) && isValidArrayIndex(key)) {
    target.length = Math.max(target.length, key)
    target.splice(key, 1, val)
    return val
  }
  if (key in target && !(key in Object.prototype)) {
    target[key] = val
    return val
  }
  const ob = (target: any).__ob__
  if (target._isVue || (ob && ob.vmCount)) {
    process.env.NODE_ENV !== 'production' && warn(
      'Avoid adding reactive properties to a Vue instance or its root $data ' +
      'at runtime - declare it upfront in the data option.'
    )
    return val
  }
  if (!ob) {
    target[key] = val
    return val
  }
  defineReactive(ob.value, key, val)
  ob.dep.notify()
  return val
}
我们看最关键的一行:
defineReactive(ob.value, key, val)
export function defineReactive (
  obj: Object,
  key: string,
  val: any,
  customSetter?: ?Function,
  shallow?: boolean
) {
  const dep = new Dep()

  const property = Object.getOwnPropertyDescriptor(obj, key)
  if (property && property.configurable === false) {
    return
  }

  // cater for pre-defined getter/setters
  const getter = property && property.get
  if (!getter && arguments.length === 2) {
    val = obj[key]
  }
  const setter = property && property.set

  let childOb = !shallow && observe(val)
  Object.defineProperty(obj, key, {
    enumerable: true,
    configurable: true,
    get: function reactiveGetter () {
      const value = getter ? getter.call(obj) : val
      if (Dep.target) {
        dep.depend()
        if (childOb) {
          childOb.dep.depend()
          if (Array.isArray(value)) {
            dependArray(value)
          }
        }
      }
      return value
    },
    set: function reactiveSetter (newVal) {
      const value = getter ? getter.call(obj) : val
      /* eslint-disable no-self-compare */
      if (newVal === value || (newVal !== newVal && value !== value)) {
        return
      }
      /* eslint-enable no-self-compare */
      if (process.env.NODE_ENV !== 'production' && customSetter) {
        customSetter()
      }
      if (setter) {
        setter.call(obj, newVal)
      } else {
        val = newVal
      }
      childOb = !shallow && observe(newVal)
      dep.notify()
    }
  })
}
可以看到,最后执行了 Object.defineProperty方法,而 Object.defineProperty方法正好也是vue的mvvm机制的工作原理
继续回头看一下入口文件方法:
initMixin(Vue)
stateMixin(Vue)
eventsMixin(Vue)
lifecycleMixin(Vue)
renderMixin(Vue)

export default Vue
我们已经继续lifecycleMixin
export function lifecycleMixin (Vue: Class<Component>) {
  Vue.prototype._update = function (vnode: VNode, hydrating?: boolean) {
    const vm: Component = this
    if (vm._isMounted) {
      callHook(vm, 'beforeUpdate')
    }
    const prevEl = vm.$el
    const prevVnode = vm._vnode
    const prevActiveInstance = activeInstance
    activeInstance = vm
    vm._vnode = vnode
    // Vue.prototype.__patch__ is injected in entry points
    // based on the rendering backend used.
    if (!prevVnode) {
      // initial render
      vm.$el = vm.__patch__(
        vm.$el, vnode, hydrating, false /* removeOnly */,
        vm.$options._parentElm,
        vm.$options._refElm
      )
      // no need for the ref nodes after initial patch
      // this prevents keeping a detached DOM tree in memory (#5851)
      vm.$options._parentElm = vm.$options._refElm = null
    } else {
      // updates
      vm.$el = vm.__patch__(prevVnode, vnode)
    }
    activeInstance = prevActiveInstance
    // update __vue__ reference
    if (prevEl) {
      prevEl.__vue__ = null
    }
    if (vm.$el) {
      vm.$el.__vue__ = vm
    }
    // if parent is an HOC, update its $el as well
    if (vm.$vnode && vm.$parent && vm.$vnode === vm.$parent._vnode) {
      vm.$parent.$el = vm.$el
    }
    // updated hook is called by the scheduler to ensure that children are
    // updated in a parent's updated hook.
  }

  Vue.prototype.$forceUpdate = function () {
    const vm: Component = this
    if (vm._watcher) {
      vm._watcher.update()
    }
  }

  Vue.prototype.$destroy = function () {
    const vm: Component = this
    if (vm._isBeingDestroyed) {
      return
    }
    callHook(vm, 'beforeDestroy')
    vm._isBeingDestroyed = true
    // remove self from parent
    const parent = vm.$parent
    if (parent && !parent._isBeingDestroyed && !vm.$options.abstract) {
      remove(parent.$children, vm)
    }
    // teardown watchers
    if (vm._watcher) {
      vm._watcher.teardown()
    }
    let i = vm._watchers.length
    while (i--) {
      vm._watchers[i].teardown()
    }
    // remove reference from data ob
    // frozen object may not have observer.
    if (vm._data.__ob__) {
      vm._data.__ob__.vmCount--
    }
    // call the last hook...
    vm._isDestroyed = true
    // invoke destroy hooks on current rendered tree
    vm.__patch__(vm._vnode, null)
    // fire destroyed hook
    callHook(vm, 'destroyed')
    // turn off all instance listeners.
    vm.$off()
    // remove __vue__ reference
    if (vm.$el) {
      vm.$el.__vue__ = null
    }
    // release circular reference (#6759)
    if (vm.$vnode) {
      vm.$vnode.parent = null
    }
  }
}
又是一长串代码,还是一句话:“不要慌,问题不大!! 我们找关键点”
主要就是注册了几个方法:
Vue.prototype._update :vnode对象更新时候触发
Vue.prototype.
destroy :销毁当前vnode对象
官网解释说是:“可以说这三个方法一般是用不到的,除非你代码出问题了~”
我重点说一下 set方法一样,当你动态给一个data对象添加一个属性的时候,如果没有用 forceUpdate方法.
我说是这么说哈,小伙伴项目中可别这么干,因为当你用$forceUpdate方法解决问题的时候,90%是你程序出错了.
我们继续看入口文件:
initMixin(Vue)
stateMixin(Vue)
eventsMixin(Vue)
lifecycleMixin(Vue)
renderMixin(Vue)

export default Vue
还差最后一个renderMixin(Vue)方法:
export function renderMixin (Vue: Class<Component>) {
  // install runtime convenience helpers
  installRenderHelpers(Vue.prototype)

  Vue.prototype.$nextTick = function (fn: Function) {
    return nextTick(fn, this)
  }

  Vue.prototype._render = function (): VNode {
    const vm: Component = this
    const { render, _parentVnode } = vm.$options

    // reset _rendered flag on slots for duplicate slot check
    if (process.env.NODE_ENV !== 'production') {
      for (const key in vm.$slots) {
        // $flow-disable-line
        vm.$slots[key]._rendered = false
      }
    }

    if (_parentVnode) {
      vm.$scopedSlots = _parentVnode.data.scopedSlots || emptyObject
    }

    // set parent vnode. this allows render functions to have access
    // to the data on the placeholder node.
    vm.$vnode = _parentVnode
    // render self
    let vnode
    try {
      vnode = render.call(vm._renderProxy, vm.$createElement)
    } catch (e) {
      handleError(e, vm, `render`)
      // return error render result,
      // or previous vnode to prevent render error causing blank component
      /* istanbul ignore else */
      if (process.env.NODE_ENV !== 'production') {
        if (vm.$options.renderError) {
          try {
            vnode = vm.$options.renderError.call(vm._renderProxy, vm.$createElement, e)
          } catch (e) {
            handleError(e, vm, `renderError`)
            vnode = vm._vnode
          }
        } else {
          vnode = vm._vnode
        }
      } else {
        vnode = vm._vnode
      }
    }
    // return empty vnode in case the render function errored out
    if (!(vnode instanceof VNode)) {
      if (process.env.NODE_ENV !== 'production' && Array.isArray(vnode)) {
        warn(
          'Multiple root nodes returned from render function. Render function ' +
          'should return a single root node.',
          vm
        )
      }
      vnode = createEmptyVNode()
    }
    // set parent
    vnode.parent = _parentVnode
    return vnode
  }
创建了两个方法:
Vue.prototype.$nextTick
Vue.prototype._render
_render方法先搁一会,后面会详细介绍,我们先看一下nextTick方法,当然,官网也有解释:
例如,当你设置 vm.someData = ‘new value’ ,该组件不会立即重新渲染。当刷新队列时,组件会在事件循环队列清空时的下一个“tick”更新。多数情况我们不需要关心这个过程,但是如果你想在 DOM 状态更新后做点什么,这就可能会有些棘手。虽然 Vue.js 通常鼓励开发人员沿着“数据驱动”的方式思考,避免直接接触 DOM,但是有时我们确实要这么做。为了在数据变化之后等待 Vue 完成更新 DOM ,可以在数据变化之后立即使用 Vue.nextTick(callback) 。
我简单说一下原理: 当你执行vm.someData = ‘new value’—>触发vm的update方法更新vnode—>vnode判断平台(web、week)做dom操作–>更新完dom后回调nextTick方法
好啦,入口文件的几个方法我们都研究完了,我们再回顾一下生命周期图:
我们已经走到了第三步了(init方法的injections跟reactivity)
我们找到init方法的这段代码:
 Vue.prototype._init = function (options?: Object) {
    ....
    initInjections(vm) // resolve injections before data/props
    initState(vm)
    initProvide(vm) // resolve provide after data/props
   ....
  }
我们首先看一下initInjections方法:
export function initInjections (vm: Component) {
  const result = resolveInject(vm.$options.inject, vm)
  if (result) {
    toggleObserving(false)
    Object.keys(result).forEach(key => {
      /* istanbul ignore else */
      if (process.env.NODE_ENV !== 'production') {
        defineReactive(vm, key, result[key], () => {
          warn(
            `Avoid mutating an injected value directly since the changes will be ` +
            `overwritten whenever the provided component re-renders. ` +
            `injection being mutated: "${key}"`,
            vm
          )
        })
      } else {
        defineReactive(vm, key, result[key])
      }
    })
    toggleObserving(true)
  }
}
看代码有点懵逼,什么意思呢?比如在父类或者超类组件中定义了一些基础数据,子类组件需要拿到这些基础数据,我们就可以用inject,inject中包含了initInjections跟initProvide.
怎么用呢?
比如我们的组件render1.vue中定义了一个叫title的字段:
<template>
    <render2>
    </render2>
</template>
<script>
  import Render2 from './Render2.vue'

  export default {
    name: 'Render1',
    components: {
      Render2
    },
    provide() {
      return {
        title: '我是render1'
      }
    }
  }
</script>
<style scoped>

</style>
然后我们可以在render2中拿到我们的title字段:
render2.vue
<script>
  export default {
    name: 'Render2',
    render(h) {
      console.log(this.name)
      return h('div', [
        < p > 111111 < /p>,
      this.$scopedSlots.default({title: 'yasin'}),
        this.$slots.default
    ])
    },
    inject: {
      name: {
        from: 'title'
      }
    }
  }
</script>
<style scoped>

</style>
render2.vue中只需要在当前vm的options中提供inject对象然后需要标明需要注入的属性来自哪:
  inject: {
      name: { //需要注入的key
        from: 'title' //来自父组件的什么字段比如:“title”
      }
    }
我们就可以在当前的render2.vue中使用this.name访问render1.vue中的title字段了,小伙伴可以自己尝试一下哦~
好啦,我们继续我们的生命周期解析,当解析完了init方法的events,我们还差一个reactivity:
 Vue.prototype._init = function (options?: Object) {
 ....
callHook(vm, 'beforeCreate')
    initInjections(vm) // resolve injections before data/props
    initState(vm)
    initProvide(vm) // resolve provide after data/props
    callHook(vm, 'created')
     ....
我们直接点开initState方法:
export function initState (vm: Component) {
  vm._watchers = []
  const opts = vm.$options
  if (opts.props) initProps(vm, opts.props)
  if (opts.methods) initMethods(vm, opts.methods)
  if (opts.data) {
    initData(vm)
  } else {
    observe(vm._data = {}, true /* asRootData */)
  }
  if (opts.computed) initComputed(vm, opts.computed)
  if (opts.watch && opts.watch !== nativeWatch) {
    initWatch(vm, opts.watch)
  }
}
initState的目的就是初始化一些响应式操作,具体有:data属性、props属性、computed属性、watch属性. 想必小伙伴用的最多的就是这几个属性了,我们改变一个组件的props、data、computed、都会触发响应式操作然后更新组件,watch里面的属性如果改变了也会触发watch方法,那么它们的工作原理是是什么呢?
我们首先看props,我们看到这么一行代码:
export function initState (vm: Component) {
  vm._watchers = []
  const opts = vm.$options
  if (opts.props) initProps(vm, opts.props)
  ....
}
function initProps (vm: Component, propsOptions: Object) {
  //获取我们的属性值(也就是我们在组件中传递的属性)
  const propsData = vm.$options.propsData || {}
  //定义当前vm的_props对象
  const props = vm._props = {}
  // cache prop keys so that future props updates can iterate using Array
  // instead of dynamic object key enumeration.
  const keys = vm.$options._propKeys = []
  const isRoot = !vm.$parent
  // root instance props should be converted
  if (!isRoot) {
    toggleObserving(false)
  }
  //遍历我们在组件中定义的props
  for (const key in propsOptions) {
    keys.push(key)
    //验证props
    const value = validateProp(key, propsOptions, propsData, vm)
    /* istanbul ignore else */
    if (process.env.NODE_ENV !== 'production') {
      const hyphenatedKey = hyphenate(key)
      if (isReservedAttribute(hyphenatedKey) ||
          config.isReservedAttr(hyphenatedKey)) {
        warn(
          `"${hyphenatedKey}" is a reserved attribute and cannot be used as component prop.`,
          vm
        )
      }
      //给当前vm的_props对象添加响应式属性(也就是我们传递的属性值)
      defineReactive(props, key, value, () => {
        if (vm.$parent && !isUpdatingChildComponent) {
          warn(
            `Avoid mutating a prop directly since the value will be ` +
            `overwritten whenever the parent component re-renders. ` +
            `Instead, use a data or computed property based on the prop's ` +
            `value. Prop being mutated: "${key}"`,
            vm
          )
        }
      })
    } else {
      //给当前vm的_props对象添加响应式属性(也就是我们传递的属性值)
      defineReactive(props, key, value)
    }
    // static props are already proxied on the component's prototype
    // during Vue.extend(). We only need to proxy props defined at
    // instantiation here.
    //把vm中的属性通过代理方式指向_props对象(也就是我们可以在vm中通过this.xxx访问某个属性)
    if (!(key in vm)) {
      proxy(vm, `_props`, key)
    }
  }
  toggleObserving(true)
}
代码中都有解释,我就不多说了,data跟props的原理差不多,watch跟computed无非就是一些响应的回调触发,我们也不多说了~~
我们已经把vue created之前生命周期源码解析了一遍,再看一眼生命周期图:
callHook(vm, 'created')

   ...

    if (vm.$options.el) {
      vm.$mount(vm.$options.el)
    }
当我们给vue实例传递了el参数的时候,vue会直接调用mount方法,然后就会走渲染逻辑,当然,如果我们没有el参数的时候,我们可以手动的调用mount方法把vue实例挂载到某个dom元素中,所以接下来我们重点研究一下mount方法.
那么mount方法在哪定义的呢?
我们找到这么一个文件
/vue/src/platforms/web/runtime/index.js
// public mount method
Vue.prototype.$mount = function (
  el?: string | Element,
  hydrating?: boolean
): Component {
  el = el && inBrowser ? query(el) : undefined
  return mountComponent(this, el, hydrating)
}
然后在vue/src/platforms/web/entry-runtime-with-compiler.js文件中又再一次对mount方法重定义了:
const mount = Vue.prototype.$mount
Vue.prototype.$mount = function (
  el?: string | Element,
  hydrating?: boolean
): Component {
  el = el && query(el)

  /* istanbul ignore if */
  if (el === document.body || el === document.documentElement) {
    process.env.NODE_ENV !== 'production' && warn(
      `Do not mount Vue to <html> or <body> - mount to normal elements instead.`
    )
    return this
  }

  const options = this.$options
  // resolve template/el and convert to render function
  if (!options.render) {
    let template = options.template
    if (template) {
      if (typeof template === 'string') {
        if (template.charAt(0) === '#') {
          template = idToTemplate(template)
          /* istanbul ignore if */
          if (process.env.NODE_ENV !== 'production' && !template) {
            warn(
              `Template element not found or is empty: ${options.template}`,
              this
            )
          }
        }
      } else if (template.nodeType) {
        template = template.innerHTML
      } else {
        if (process.env.NODE_ENV !== 'production') {
          warn('invalid template option:' + template, this)
        }
        return this
      }
    } else if (el) {
      template = getOuterHTML(el)
    }
    if (template) {
      /* istanbul ignore if */
      if (process.env.NODE_ENV !== 'production' && config.performance && mark) {
        mark('compile')
      }

      const { render, staticRenderFns } = compileToFunctions(template, {
        shouldDecodeNewlines,
        shouldDecodeNewlinesForHref,
        delimiters: options.delimiters,
        comments: options.comments
      }, this)
      options.render = render
      options.staticRenderFns = staticRenderFns

      /* istanbul ignore if */
      if (process.env.NODE_ENV !== 'production' && config.performance && mark) {
        mark('compile end')
        measure(`vue ${this._name} compile`, 'compile', 'compile end')
      }
    }
  }
  return mount.call(this, el, hydrating)
}
可以看到,最后执行了mount.call,而这里的mount方法是/vue/src/platforms/web/runtime/index.js文件中定义的,而/vue/src/platforms/web/runtime/index.js文件中的mount方法:
// public mount method
Vue.prototype.$mount = function (
  el?: string | Element,
  hydrating?: boolean
): Component {
  el = el && inBrowser ? query(el) : undefined
  return mountComponent(this, el, hydrating)
}
最后执行了mountComponent方法,而mountComponent又是vue/VuexDemo/node_modules/vue/src/core/instance/render.js文件中定义的:
export function renderMixin (Vue: Class<Component>) {
  // install runtime convenience helpers
  installRenderHelpers(Vue.prototype)

  Vue.prototype.$nextTick = function (fn: Function) {
    return nextTick(fn, this)
  }

  Vue.prototype._render = function (): VNode {
    const vm: Component = this
    const { render, _parentVnode } = vm.$options

    // reset _rendered flag on slots for duplicate slot check
    if (process.env.NODE_ENV !== 'production') {
      for (const key in vm.$slots) {
        // $flow-disable-line
        vm.$slots[key]._rendered = false
      }
    }

    if (_parentVnode) {
      vm.$scopedSlots = _parentVnode.data.scopedSlots || emptyObject
    }

    // set parent vnode. this allows render functions to have access
    // to the data on the placeholder node.
    vm.$vnode = _parentVnode
    // render self
    let vnode
    try {
      vnode = render.call(vm._renderProxy, vm.$createElement)
    } catch (e) {
      handleError(e, vm, `render`)
      // return error render result,
      // or previous vnode to prevent render error causing blank component
      /* istanbul ignore else */
      if (process.env.NODE_ENV !== 'production') {
        if (vm.$options.renderError) {
          try {
            vnode = vm.$options.renderError.call(vm._renderProxy, vm.$createElement, e)
          } catch (e) {
            handleError(e, vm, `renderError`)
            vnode = vm._vnode
          }
        } else {
          vnode = vm._vnode
        }
      } else {
        vnode = vm._vnode
      }
    }
    // return empty vnode in case the render function errored out
    if (!(vnode instanceof VNode)) {
      if (process.env.NODE_ENV !== 'production' && Array.isArray(vnode)) {
        warn(
          'Multiple root nodes returned from render function. Render function ' +
          'should return a single root node.',
          vm
        )
      }
      vnode = createEmptyVNode()
    }
    // set parent
    vnode.parent = _parentVnode
    return vnode
  }
}
好吧,小伙伴是不是有点绕了呢? 还是那句话:“别慌,问题不大!! 我们看重点~~”
首先当我们直接调用vm的mount方法的时候会触发最后一个定义mount方法的地方,也就是上面的/vue/src/platforms/web/entry-runtime-with-compiler.js:
const mount = Vue.prototype.$mount
Vue.prototype.$mount = function (
  el?: string | Element,
  hydrating?: boolean
): Component {
  //在vm中传递的el属性
  el = el && query(el)

  /* istanbul ignore if */
  if (el === document.body || el === document.documentElement) {
    process.env.NODE_ENV !== 'production' && warn(
      `Do not mount Vue to <html> or <body> - mount to normal elements instead.`
    )
    return this
  }

  const options = this.$options
  // 如果在options中没有传递render方法
  if (!options.render) {
    let template = options.template
    //如果有template属性,就把template编译完毕后传递给render方法
    if (template) {
      if (typeof template === 'string') {
        if (template.charAt(0) === '#') {
          template = idToTemplate(template)
          /* istanbul ignore if */
          if (process.env.NODE_ENV !== 'production' && !template) {
            warn(
              `Template element not found or is empty: ${options.template}`,
              this
            )
          }
        }
      } else if (template.nodeType) {
        template = template.innerHTML
      } else {
        if (process.env.NODE_ENV !== 'production') {
          warn('invalid template option:' + template, this)
        }
        return this
      }
    } else if (el) {
      //如果没有template属性但是有el属性的时候,把el的outerHtml当成template传递给render对象
      template = getOuterHTML(el)
    }
    if (template) {
      /* istanbul ignore if */
      if (process.env.NODE_ENV !== 'production' && config.performance && mark) {
        mark('compile')
      }

      const { render, staticRenderFns } = compileToFunctions(template, {
        shouldDecodeNewlines,
        shouldDecodeNewlinesForHref,
        delimiters: options.delimiters,
        comments: options.comments
      }, this)
      options.render = render
      options.staticRenderFns = staticRenderFns

      /* istanbul ignore if */
      if (process.env.NODE_ENV !== 'production' && config.performance && mark) {
        mark('compile end')
        measure(`vue ${this._name} compile`, 'compile', 'compile end')
      }
    }
  }
  return mount.call(this, el, hydrating)
}
最后走到了mountComponent方法(很关键):
vue/src/core/instance/lifecycle.js
export function mountComponent (
  vm: Component,
  el: ?Element,
  hydrating?: boolean
): Component {
  vm.$el = el
  if (!vm.$options.render) {
    vm.$options.render = createEmptyVNode
    if (process.env.NODE_ENV !== 'production') {
      /* istanbul ignore if */
      if ((vm.$options.template && vm.$options.template.charAt(0) !== '#') ||
        vm.$options.el || el) {
        warn(
          'You are using the runtime-only build of Vue where the template ' +
          'compiler is not available. Either pre-compile the templates into ' +
          'render functions, or use the compiler-included build.',
          vm
        )
      } else {
        warn(
          'Failed to mount component: template or render function not defined.',
          vm
        )
      }
    }
  }
  callHook(vm, 'beforeMount')

  let updateComponent
  /* istanbul ignore if */
  if (process.env.NODE_ENV !== 'production' && config.performance && mark) {
    updateComponent = () => {
      const name = vm._name
      const id = vm._uid
      const startTag = `vue-perf-start:${id}`
      const endTag = `vue-perf-end:${id}`

      mark(startTag)
      const vnode = vm._render()
      mark(endTag)
      measure(`vue ${name} render`, startTag, endTag)

      mark(startTag)
      vm._update(vnode, hydrating)
      mark(endTag)
      measure(`vue ${name} patch`, startTag, endTag)
    }
  } else {
    updateComponent = () => {
      vm._update(vm._render(), hydrating)
    }
  }

  // we set this to vm._watcher inside the watcher's constructor
  // since the watcher's initial patch may call $forceUpdate (e.g. inside child
  // component's mounted hook), which relies on vm._watcher being already defined
  new Watcher(vm, updateComponent, noop, null, true /* isRenderWatcher */)
  hydrating = false

  // manually mounted instance, call mounted on self
  // mounted is called for render-created child components in its inserted hook
  if (vm.$vnode == null) {
    vm._isMounted = true
    callHook(vm, 'mounted')
  }
  return vm
}
可以看到,mountComponent方法创建了Watcher对象,Watcher是干什么的呢?Watcher就是监听响应式数据的变换,然后执行updateComponent方法,最后执行update方法:
Vue.prototype._update = function (vnode: VNode, hydrating?: boolean) {
    const vm: Component = this
    if (vm._isMounted) {
      callHook(vm, 'beforeUpdate')
    }
    const prevEl = vm.$el
    const prevVnode = vm._vnode
    const prevActiveInstance = activeInstance
    activeInstance = vm
    vm._vnode = vnode
    // Vue.prototype.__patch__ is injected in entry points
    // based on the rendering backend used.
    if (!prevVnode) {
      // initial render
      vm.$el = vm.__patch__(
        vm.$el, vnode, hydrating, false /* removeOnly */,
        vm.$options._parentElm,
        vm.$options._refElm
      )
      // no need for the ref nodes after initial patch
      // this prevents keeping a detached DOM tree in memory (#5851)
      vm.$options._parentElm = vm.$options._refElm = null
    } else {
      // updates
      vm.$el = vm.__patch__(prevVnode, vnode)
    }
    activeInstance = prevActiveInstance
    // update __vue__ reference
    if (prevEl) {
      prevEl.__vue__ = null
    }
    if (vm.$el) {
      vm.$el.__vue__ = vm
    }
    // if parent is an HOC, update its $el as well
    if (vm.$vnode && vm.$parent && vm.$vnode === vm.$parent._vnode) {
      vm.$parent.$el = vm.$el
    }
    // updated hook is called by the scheduler to ensure that children are
    // updated in a parent's updated hook.
  }
然后修改dom元素,最后刷新页面~~
好啦!! 整个vue的生命周期的流程图就大致走了一遍了~~
下一节我们重点说一下render函数跟mount函数.
先到这里啦,欢迎志同道合的小伙伴入群,一起交流一起学习~~ 加油骚年!!
qq群链接: