一、导包(导入maven的依赖)
<?xml version="1.0" encoding="UTF-8"?>
<project xmlns="http://maven.apache.org/POM/4.0.0"
         xmlns:xsi="http://www.w3.org/2001/XMLSchema-instance"
         xsi:schemaLocation="http://maven.apache.org/POM/4.0.0 http://maven.apache.org/xsd/maven-4.0.0.xsd">
    <modelVersion>4.0.0</modelVersion>

    <groupId>day2</groupId>
    <artifactId>day2</artifactId>
    <version>1.0-SNAPSHOT</version>

    <dependencies>
        <dependency>
            <groupId>org.springframework</groupId>
            <artifactId>spring-core</artifactId>
            <version>4.1.4.RELEASE</version>
        </dependency>

        <dependency>
            <groupId>org.springframework</groupId>
            <artifactId>spring-context</artifactId>
            <version>4.1.4.RELEASE</version>
        </dependency>
        <dependency>
            <groupId>junit</groupId>
            <artifactId>junit</artifactId>
            <version>4.12</version>
        </dependency>

        <dependency>
            <groupId>org.aspectj</groupId>
            <artifactId>aspectjweaver</artifactId>
            <version>1.8.13</version>
        </dependency>

        <dependency>
            <groupId>org.springframework</groupId>
            <artifactId>spring-test</artifactId>
            <version>4.1.6.RELEASE</version>
        </dependency>
    </dependencies>

</project>
二、书写配置文件(用的是IDEA,配置文件applicationContext.xml要放到resources文件夹中,不然会报找不到该文件异常)
<?xml version="1.0" encoding="UTF-8"?>
<beans xmlns:xsi="http://www.w3.org/2001/XMLSchema-instance" xmlns="http://www.springframework.org/schema/beans" xmlns:context="http://www.springframework.org/schema/context" xmlns:aop="http://www.springframework.org/schema/aop" xsi:schemaLocation="http://www.springframework.org/schema/beans http://www.springframework.org/schema/beans/spring-beans-4.2.xsd http://www.springframework.org/schema/context http://www.springframework.org/schema/context/spring-context-4.2.xsd http://www.springframework.org/schema/aop http://www.springframework.org/schema/aop/spring-aop-4.2.xsd ">

    <!-- 准备工作: 导入aop(约束)命名空间 -->
    <!-- 1.配置目标对象 -->
    <bean name="userService" class="dyh.aop.service.UserServiceImpl" ></bean>
    <!-- 2.配置通知对象 -->
    <bean name="myAdvice" class="dyh.aop.springaop1.MyAdvice" ></bean>
    <!-- 3.开启使用注解完成织入 -->
    <aop:aspectj-autoproxy></aop:aspectj-autoproxy>

</beans>
三、书写要增强的接口和实现类
public interface UserService {
    void save();
    void delete();
    void update();
    void find();
}
public class UserServiceImpl implements UserService {

    public void save() {
        System.out.println("保存用户!");
        //int i = 1/0;
    }

    public void delete() {
        System.out.println("删除用户!");
    }

    public void update() {
        System.out.println("更新用户!");
    }

    public void find() {
        System.out.println("查找用户!");
    }
}
四、书写通知类
import org.aspectj.lang.ProceedingJoinPoint;
import org.aspectj.lang.annotation.*;

//通知类
@Aspect
public class MyAdvice {

    @Pointcut("execution(* dyh.aop.service.*ServiceImpl.*(..))")
    public void pc(){}
    //前置通知
    //指定该方法是前置通知,并制定切入点
    @Before("MyAdvice.pc()")
    public void before(){
        System.out.println("这是前置通知!!");
    }
    //后置通知
    @AfterReturning("execution(* dyh.aop.service.*ServiceImpl.*(..))")
    public void afterReturning(){
        System.out.println("这是后置通知(如果出现异常不会调用)!!");
    }
    //环绕通知
    @Around("execution(* dyh.aop.service.*ServiceImpl.*(..))")
    public Object around(ProceedingJoinPoint pjp) throws Throwable {
        System.out.println("这是环绕通知之前的部分!!");
        Object proceed = pjp.proceed();//调用目标方法
        System.out.println("这是环绕通知之后的部分!!");
        return proceed;
    }
    //异常通知
    @AfterThrowing("execution(* dyh.aop.service.*ServiceImpl.*(..))")
    public void afterException(){
        System.out.println("出事啦!出现异常了!!");
    }
    //后置通知
    @After("execution(* dyh.aop.service.*ServiceImpl.*(..))")
    public void after(){
        System.out.println("这是后置通知(出现异常也会调用)!!");
    }
}
五、测试
package dyh.aop.springaop1;

import dyh.aop.service.UserService;
import org.junit.Test;
import org.junit.runner.RunWith;
import org.springframework.test.context.ContextConfiguration;
import org.springframework.test.context.junit4.SpringJUnit4ClassRunner;

import javax.annotation.Resource;

@RunWith(SpringJUnit4ClassRunner.class)
@ContextConfiguration(locations = {"classpath:applicationContextAop.xml"})
public class Demo {

    @Resource(name = "userService")
    private UserService us;

    @Test
    public void funaop(){
        us.save();

    }
}
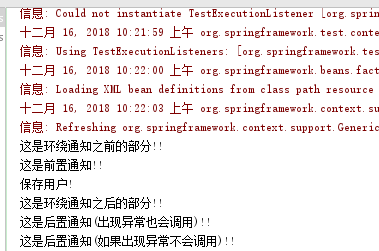
测试结果: