高级阶段回顾:
Nginx高级之高级模块(secure_link/secure_link_md5/geoip_module)
基础语法
Lua是一个简洁/轻量/可扩展的脚本语言
安装Lua解释器:
yum install lua
查看lua版本:
![]()
输出:
① 交互式输出

② 脚本式输出
脚本内容:
#!/usr/bin/lua
print("this is lua test!!!")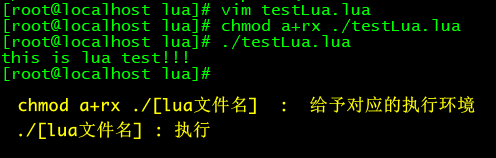
注释:
行注释: --
块注释:
--[[
注释内容...
--]]
变量:
a='alo\n123'
a="alo\n123\""
数值变量只有double类型.
布尔类型只有nil和false: nil代表是空, false代表是false, 其他(包括空串 数字0)都是true
lua中的变量在没有声明的情况下都是全局变量, 如果要声明成局部变量, 需要加上local
循环: lua不支持++或+=的操作
while循环:
sum = 0
num = 1
while num <= 100 do
sum = sum + num
num = num + 1
end
print("sum =", sum)
for循环:
sum = 0
for i = 1, 100 do
sum = sum + i
end
if判断:
if age == 40 and sex == "Male" then
print("大于40男人")
elseif age > 60 and sex ~= "Female" then
print("非女人而且大于60")
else
local age = io.read()
print("Your age is "..age)
end
注: "~=" 表示不等于, 字符串的拼接操作符"..", io库的分别从stdin和stdout读写的read和write函数
Nginx的Lua环境
准备工作:
① LuaJIT(Lua解释器)
② ngx_devel_kit(nginx的Lua开发库)和lua-nginx-module(nginx的Lua模块)
③ 重新编译nginx
Nginx调用Lua的指令:
| set_by_lua、 set_by_lua_file |
设置nginx变量, 可以实现复杂的赋值逻辑 |
| access_by_lua、 access_by_lua_file |
请求访问阶段处理, 用于访问控制 |
| content_by_lua、 content_by_lua_file |
内容处理器, 接收请求处理并输出响应 |
Lua调用Nginx的指令:
| ngx.var | nginx变量 |
| ngx.req.get_headers | 获取请求头 |
| ngx.req.get_uri_args | 获取url请求参数 |
| ngx.redirect | 重定向 |
| ngx.print | 输出响应内容体 |
| ngx.say | 同ngx.print, 但是会最后输出一个换行符 |
| ngx.header | 输出响应头 |
步骤:
注: 所有步骤都在/opt/Milky-Way/lua目录下, 执行nginx编译时需要进入nginx的文件夹, 并且所有的tar包需先解压
LuaJIT(需要解压后进入文件夹内)
wget http://luajit.org/download/LuaJIT-2.0.2.tar.gz
make install PREFIX=/usr/local/LuaJIT
export LUAJIT_LIB=/usr/local/LuaJIT/lib
export LUAJIT_INC=/usr/local/LuaJIT/include/luajit-2.0
ngx_devel_kit和lua-nginx-module(需解压)
wget https://github.com/simpl/ngx_devel_kit/archive/v0.3.0.tar.gz
wget https://github.com/openresty/lua-nginx-module/archive/v0.10.9rc7.tar.gz
nginx-1.14.1
需要进入nginx文件夹
./configure --prefix=/etc/nginx --sbin-path=/usr/sbin/nginx --modules-path=/usr/lib64/nginx/modules --conf-path=/etc/nginx/nginx.conf --error-log-path=/var/log/nginx/error.log --http-log-path=/var/log/nginx/access.log --pid-path=/var/run/nginx.pid --lock-path=/var/run/nginx.lock --http-client-body-temp-path=/var/cache/nginx/client_temp --http-proxy-temp-path=/var/cache/nginx/proxy_temp --http-fastcgi-temp-path=/var/cache/nginx/fastcgi_temp --http-uwsgi-temp-path=/var/cache/nginx/uwsgi_temp --http-scgi-temp-path=/var/cache/nginx/scgi_temp --user=nginx --group=nginx --with-compat --with-file-aio --with-threads --with-http_addition_module --with-http_auth_request_module --with-http_dav_module --with-http_flv_module --with-http_gunzip_module --with-http_gzip_static_module --with-http_mp4_module --with-http_random_index_module --with-http_realip_module --with-http_secure_link_module --with-http_slice_module --with-http_ssl_module --with-http_stub_status_module --with-http_sub_module --with-http_v2_module --with-mail --with-mail_ssl_module --with-stream --with-stream_realip_module --with-stream_ssl_module --with-stream_ssl_preread_module --with-cc-opt='-O2 -g -pipe -Wall -Wp,-D_FORTIFY_SOURCE=2 -fexceptions -fstack-protector-strong --param=ssp-buffer-size=4 -grecord-gcc-switches -m64 -mtune=generic -fPIC' --with-ld-opt='-Wl,-z,relro -Wl,-z,now -pie' --add-module=/opt/Milky-Way/lua/ngx_devel_kit-0.3.0 --add-module=/opt/Milky-Way/lua/lua-nginx-module-0.10.9rc7
编译
make -j 4 && make install
加载lua库,加入到ld.so.conf文件并启动配置
echo "/usr/local/LuaJIT/lib" >> /etc/ld.so.conf
ldconfig
实战:
灰度发布
按一定的关系区别, 分部分代码进行上线, 平滑过渡的一种发布方式.
根据个人信息(cookie)来做区别
根据个人ip来做区别
模型:

模型解释:
当用户访问Nginx&Lua服务器时, Lua会去MemCache取ip列表, 判断该用户是否在列表中, 如果存在, 则访问8080端口, 不存在则访问9090端口.
准备工作:
① 安装MemCache(key-value缓存数据库)
命令: yum install memcached
② 安装tomcat(网上自行下载tomcat进行解压即可), 分别设置端口为8080和9090
在两个tomcat的webapps/ROOT目录下创建一个.jsp文件, 内容自定义.
启动tomcat: 进入bin/, 执行 sh catalina.sh start
查看进程: netstat -luntp

启动MemCache: 执行 memcached -p [默认端口11211] -u nobody -d(-d表示以守护进程运行)
查看进程: netstat -luntp | grep 11211

③ 下载Lua调用MemCache包
wget https://github.com/agentzh/lua-resty-memcached/archive/v0.11.tar.gz
tar -zxvf v0.11.tar.gz
cp -r lua-resty-memcached-0.11/lib/resty [lua本地的安装路径]
④ 配置default.conf

⑤ dep.lua文件
clientIP = ngx.req.get_headers()["X-Real-IP"]
        if clientIP == nil then
                clientIP = ngx.req.get_headers()["x_forwarded_for"]
        end
        if clientIP == nil then
                clientIP = ngx.var.remote_addr
        end
        local memcached = require "resty.memcached"
        local memc, err = memcached:new()
        if not memc then
                ngx.say("failed to instantiate memc: ", err)
                return
        end
        local ok, err = memc:connect("127.0.0.1", 11211)
        if not ok  then
                ngx.say("failed to connect: ", err)
                return
        end
        local res, flags, err = memc:get(clientIP)
        ngx.say("value key: ", res, clientIP)
        if err then
                ngx.say("failed to get clientIP", err)
                return
        end
        if  res == "1" then
                ngx.exec("@server_test")
                return
        end
        ngx.exec("@server")
⑥ 将需要的ip设置进MemCache中, 没有安装telnet工具自行百度.
执行: telnet 127.0.0.1 11211
连接上之后执行: set [需要的ip] 0 0 1 ==> 回车
回车后填上值 1 == > 再回车 ==> quit 退出telnet

⑦ 启动nginx, 访问[ip]/[jsp文件名].