前言:
关于Kafka,是一个比较流行的MQ工具,也是多数公司比较常用的。有关于Kafka的一些基本内容读者可以参考官方文档,了解一下生产者消费者的使用。kafka的搭建笔者也不再详述,网络上有很多文章介绍。
这篇文章主要是从源码的角度来分析一下Spring对kafka的使用封装
笔者搭建的kafka版本为 kafka_2.11-0.11.0.1
1.原生的使用生产者、消费者
引入maven为:
<dependency>
      <groupId>org.apache.kafka</groupId>
      <artifactId>kafka-clients</artifactId>
      <version>0.10.1.1</version>
</dependency>
1)生产者代码如下
import org.apache.kafka.clients.producer.KafkaProducer;
import org.apache.kafka.clients.producer.Producer;
import org.apache.kafka.clients.producer.ProducerRecord;

import java.util.Properties;

public class KafkaProducerExample {
    public static void main(String[] args) {
        Properties props = new Properties();
        props.put("bootstrap.servers", "localhost:9092");
        props.put("acks", "all");
        props.put("retries", 0);
        props.put("batch.size", 16384);
        props.put("linger.ms", 1);
        props.put("buffer.memory", 33554432);
        props.put("key.serializer", "org.apache.kafka.common.serialization.StringSerializer");
        props.put("value.serializer", "org.apache.kafka.common.serialization.StringSerializer");

        Producer<String, String> producer = new KafkaProducer<>(props);
        for(int i = 0; i < 100; i++)
        	producer.send(new ProducerRecord<String, String>("test", "Hello"));
        	producer.close();
    }
}
总结:通过以上可知,生产者比较简单,主要就是创建Producer,然后执行send方法即可
2)消费者代码如下
import org.apache.kafka.clients.consumer.ConsumerRecord;
import org.apache.kafka.clients.consumer.ConsumerRecords;
import org.apache.kafka.clients.consumer.KafkaConsumer;

import java.util.Arrays;
import java.util.Properties;

public class KafkaConsumerExample {
    public static void main(String[] args) {
        Properties props = new Properties();
        props.put("bootstrap.servers", "localhost:9092");
        props.put("group.id", "test");
        props.put("enable.auto.commit", "true");
        props.put("auto.commit.interval.ms", "1000");
        props.put("session.timeout.ms", "30000");
        props.put("key.deserializer", "org.apache.kafka.common.serialization.StringDeserializer");
        props.put("value.deserializer", "org.apache.kafka.common.serialization.StringDeserializer");
        KafkaConsumer<String, String> consumer = new KafkaConsumer<>(props);
        consumer.subscribe(Arrays.asList("test"));
        while (true) {
            ConsumerRecords<String, String> records = consumer.poll(100);
            for (ConsumerRecord<String, String> record : records)
                System.out.printf("offset = %d, key = %s, value = %s\n", record.offset(), record.key(), record.value());
        }
    }
}
总结:消费者主要就是通过KafkaConsumer.poll()方法拉取ConsumerRecords获取消费内容
2.Spring-kafka使用生产者、消费者
maven引入
<dependency>
    <groupId>org.springframework.kafka</groupId>
    <artifactId>spring-kafka</artifactId>
    <version>1.1.8.RELEASE</version>
</dependency>
1)配置文件application.properties
spring.kafka.bootstrap-servers=localhost:9092

spring.kafka.producer.retries=0
spring.kafka.producer.batch-size=16384
spring.kafka.producer.buffer-memory=33554432

spring.kafka.producer.key-serializer=org.apache.kafka.common.serialization.StringSerializer
spring.kafka.producer.value-serializer=org.apache.kafka.common.serialization.StringSerializer

#=============== consumer  =======================
spring.kafka.consumer.group-id=test-consumer-group

#spring.kafka.consumer.auto-offset-reset=earliest
spring.kafka.consumer.auto-offset-reset=latest

spring.kafka.consumer.enable-auto-commit=true
spring.kafka.consumer.auto-commit-interval=100

spring.kafka.consumer.key-deserializer=org.apache.kafka.common.serialization.StringDeserializer
spring.kafka.consumer.value-deserializer=org.apache.kafka.common.serialization.StringDeserializer
2)创建PropsConfig类
@Configuration
@Data
public class PropsConfig {

    @Value("${spring.kafka.bootstrap-servers}")
    private String broker;

    @Value("${spring.kafka.consumer.group-id}")
    private String groupId;

    @Value("${spring.kafka.consumer.auto-offset-reset}")
    private String autoOffsetReset;

    @Value("${spring.kafka.consumer.enable-auto-commit}")
    private String enableAutoCommit;

}3)生产者代码
* 生产者KafkaTemplate创建,创建KafkaProducerConfig类,代码如下
@Configuration
@EnableKafka
public class KafkaProducerConfig {

    @Autowired
    PropsConfig propsConfig;

    @Bean
    public ProducerFactory<String, String> producerFactory() {
        return new DefaultKafkaProducerFactory<>(producerConfigs());
    }

    @Bean
    public Map<String, Object> producerConfigs() {
        Map<String, Object> props = new HashMap<>();
        props.put(ProducerConfig.BOOTSTRAP_SERVERS_CONFIG, propsConfig.getBroker());
        props.put(ProducerConfig.RETRIES_CONFIG, 0);
        props.put(ProducerConfig.BATCH_SIZE_CONFIG, 16384);
        props.put(ProducerConfig.LINGER_MS_CONFIG, 1);
        props.put(ProducerConfig.BUFFER_MEMORY_CONFIG, 33554432);
        props.put(ProducerConfig.KEY_SERIALIZER_CLASS_CONFIG, StringSerializer.class);
        props.put(ProducerConfig.VALUE_SERIALIZER_CLASS_CONFIG, StringSerializer.class);
        return props;
    }

    @Bean
    public KafkaTemplate<String, String> kafkaTemplate() {
        return new KafkaTemplate<String, String>(producerFactory());
    }
}
* 生产者KafkaTemplate使用
@Component
public class ProducerServiceImpl implements ProducerService {
    private static final Logger logger = LoggerFactory.getLogger(ProducerServiceImpl.class);

    @Autowired
    private KafkaTemplate template;

    //发送消息方法
    private void sendJson(String topic, String content) {

        ListenableFuture<SendResult<String, String>> future = template.send(topic, content);
        future.addCallback(new ListenableFutureCallback<SendResult<String, String>>() {
            @Override
            public void onSuccess(SendResult<String, String> result) {
                logger.info("msg OK. " + result.toString());
            }

            @Override
            public void onFailure(Throwable ex) {
                logger.error("msg send failed.", ex);
            }
        });
    }
}
总结:生产者主要就是使用KafkaTemplate.send()方法来实现
2)消费者代码
* 创建消费者Config类,创建类KafkaConsumerConfig,代码如下
@Configuration
@EnableKafka
public class KafkaConsumerConfig {
    @Autowired
    PropsConfig propsConfig;// 配置文件对象

    // 主要就是为了创建一下两个Factory
    @Bean
    KafkaListenerContainerFactory<ConcurrentMessageListenerContainer<String, String>> kafkaListenerContainerFactory() {
        ConcurrentKafkaListenerContainerFactory<String, String> factory = new ConcurrentKafkaListenerContainerFactory<>();
        factory.setConsumerFactory(consumerFactory());
        factory.setConcurrency(4);
        factory.setBatchListener(true);
        factory.getContainerProperties().setPollTimeout(3000);
        return factory;
    }

    @Bean
    public ConsumerFactory<String, String> consumerFactory() {
        return new DefaultKafkaConsumerFactory<>(consumerConfigs());
    }

    @Bean
    public Map<String, Object> consumerConfigs() {
        Map<String, Object> propsMap = new HashMap<>();
        propsMap.put(ConsumerConfig.BOOTSTRAP_SERVERS_CONFIG, propsConfig.getBroker());
        propsMap.put(ConsumerConfig.ENABLE_AUTO_COMMIT_CONFIG, propsConfig.getEnableAutoCommit());
        propsMap.put(ConsumerConfig.AUTO_COMMIT_INTERVAL_MS_CONFIG, "100");
        propsMap.put(ConsumerConfig.SESSION_TIMEOUT_MS_CONFIG, "15000");
        propsMap.put(ConsumerConfig.KEY_DESERIALIZER_CLASS_CONFIG, StringDeserializer.class);
        propsMap.put(ConsumerConfig.VALUE_DESERIALIZER_CLASS_CONFIG, StringDeserializer.class);
        propsMap.put(ConsumerConfig.GROUP_ID_CONFIG, propsConfig.getGroupId());
        propsMap.put(ConsumerConfig.AUTO_OFFSET_RESET_CONFIG, propsConfig.getAutoOffsetReset());
        propsMap.put(ConsumerConfig.MAX_POLL_RECORDS_CONFIG, 50);
        return propsMap;
    }
}
* 创建Listener监听,主要是@KafkaListener
public class MyListener {
    private static final String TPOIC = "test";
    // 监听topic为test的0,1,2三个partition
    @KafkaListener(id = "id0", topicPartitions = { @TopicPartition(topic = TPOIC, partitions = { "0","1","2" })})
    public void listenPartition0(List<ConsumerRecord<?, ?>> records) {
        log.info("Id0 Listener, Thread ID: " + Thread.currentThread().getId());
        log.info("Id0 records size " +  records.size());

        for (ConsumerRecord<?, ?> record : records) {
            Optional<?> kafkaMessage = Optional.ofNullable(record.value());
            log.info("Received: " + record);
            if (kafkaMessage.isPresent()) {
                Object message = record.value();
                String topic = record.topic();
                log.info("p0 Received message={}",  message);
            }
        }
    }
}
总结:可以看到这里的消费者方式与传统的消费者方式有很大差异,下面我们主要来分析消费者的代码
3.Spring-kafka生产者源码分析
通过上面的分析可以看到,生产者主要就是KafkaTemplate.send()方法,下面我们就来分析一下这个方法
// KafkaTemplate.send(String topic, V data)
@Override
public ListenableFuture<SendResult<K, V>> send(String topic, V data) {
    ProducerRecord<K, V> producerRecord = new ProducerRecord<>(topic, data);// 这里同原生的使用是一致的,将消费封装为ProducerRecord
    return doSend(producerRecord);// 主要在这里
}

// KafkaTemplate.doSend(final ProducerRecord<K, V> producerRecord)
protected ListenableFuture<SendResult<K, V>> doSend(final ProducerRecord<K, V> producerRecord) {
    // 1.获取生产者
    // this.producerFactory.createProducer()可以看到是通过工厂类来创建的
    final Producer<K, V> producer = getTheProducer();
    if (this.logger.isTraceEnabled()) {
        this.logger.trace("Sending: " + producerRecord);
    }
    final SettableListenableFuture<SendResult<K, V>> future = new SettableListenableFuture<>();

    // 2.通过send方法发送数据,并调用回调方法
    producer.send(producerRecord, new Callback() {

        @Override
        public void onCompletion(RecordMetadata metadata, Exception exception) {
            try {
                if (exception == null) {
                    future.set(new SendResult<>(producerRecord, metadata));
                    if (KafkaTemplate.this.producerListener != null
                        && KafkaTemplate.this.producerListener.isInterestedInSuccess()) {
                        KafkaTemplate.this.producerListener.onSuccess(producerRecord.topic(),
                                                                      producerRecord.partition(), producerRecord.key(), producerRecord.value(), metadata);
                    }
                }
                else {
                    future.setException(new KafkaProducerException(producerRecord, "Failed to send", exception));
                    if (KafkaTemplate.this.producerListener != null) {
                        KafkaTemplate.this.producerListener.onError(producerRecord.topic(),
                                                                    producerRecord.partition(),
                                                                    producerRecord.key(),
                                                                    producerRecord.value(),
                                                                    exception);
                    }
                }
            }
            finally {
                producer.close();
            }
        }

    });
    // 3.刷新
    if (this.autoFlush) {
        flush();
    }
    if (this.logger.isTraceEnabled()) {
        this.logger.trace("Sent: " + producerRecord);
    }
    return future;
}
总结:发送的方法比较简单,就是简单的通过Producer.send()来发送消息,同原生的方式基本没有区别
4.Spring-kafka消费者源码分析
消费者的实现比较隐蔽,我们主观能看到的就是两个注解@EnableKafka和@KafkaListener
按照Spring的一贯风格那就应该是这两个注解实现的,下面我们来看下这两个注解,首先来分析@EnableKafka
1)@EnableKafka注解分析
@Target(ElementType.TYPE)
@Retention(RetentionPolicy.RUNTIME)
@Documented
@Import(KafkaBootstrapConfiguration.class)// 主要功能就是倒入一个类,我们来看下这个类
public @interface EnableKafka {
}

// KafkaBootstrapConfiguration
@Configuration
public class KafkaBootstrapConfiguration {

	@SuppressWarnings("rawtypes")
	@Bean(name = KafkaListenerConfigUtils.KAFKA_LISTENER_ANNOTATION_PROCESSOR_BEAN_NAME)
	@Role(BeanDefinition.ROLE_INFRASTRUCTURE)
	public KafkaListenerAnnotationBeanPostProcessor kafkaListenerAnnotationProcessor() {
		return new KafkaListenerAnnotationBeanPostProcessor();
	}

	@Bean(name = KafkaListenerConfigUtils.KAFKA_LISTENER_ENDPOINT_REGISTRY_BEAN_NAME)
	public KafkaListenerEndpointRegistry defaultKafkaListenerEndpointRegistry() {
		return new KafkaListenerEndpointRegistry();
	}

}
总结:可以看到KafkaBootstrapConfiguration的主要功能也就是创建两个bean
* KafkaListenerAnnotationBeanPostProcessor,注解如下
从注解可知,其主要功能就是监听@KafkaListener注解(我们重点分析这个类)
/**
 * Bean post-processor that registers methods annotated with {@link KafkaListener}
 * to be invoked by a Kafka message listener container created under the covers
 * by a {@link org.springframework.kafka.config.KafkaListenerContainerFactory}
 * according to the parameters of the annotation.
 *
 * <p>Annotated methods can use flexible arguments as defined by {@link KafkaListener}.
* KafkaListenerEndpointRegistry,注解如下
可知,其主要功能就是为KafkaListenerEndpoint接口管理MessageListenerContainer,我们暂时没用到这个功能,故先不分析
有兴趣的读者可以参考这篇博客:http://www.cnblogs.com/huangfox/p/9798446.html 里面是其一个应用场景
/**
 * Creates the necessary {@link MessageListenerContainer} instances for the
 * registered {@linkplain KafkaListenerEndpoint endpoints}. Also manages the
 * lifecycle of the listener containers, in particular within the lifecycle
 * of the application context.
5.KafkaListenerAnnotationBeanPostProcessor的分析
类结构如下:
public class KafkaListenerAnnotationBeanPostProcessor<K, V>
implements BeanPostProcessor, Ordered, BeanFactoryAware, SmartInitializingSingleton {关于BeanPostProcessor,我们并不陌生,在之前的Spring源码系列分析中,实现这个接口的类,会实现其postProcessAfterInitialization()方法,可用来修改bean对象,如果读者想对该接口有进一步了解,可参考:https://blog.csdn.net/elim168/article/details/76146351
1)KafkaListenerAnnotationBeanPostProcessor.postProcessAfterInitialization()方法分析
	@Override
	public Object postProcessAfterInitialization(final Object bean, final String beanName) throws BeansException {
		if (!this.nonAnnotatedClasses.contains(bean.getClass())) {
            // 1.获取bean对应的Class
			Class<?> targetClass = AopUtils.getTargetClass(bean);
            // 2.查找类是否有@KafkaListener注解(本例中类没有相关注解)
			Collection<KafkaListener> classLevelListeners = findListenerAnnotations(targetClass);
			final boolean hasClassLevelListeners = classLevelListeners.size() > 0;
			final List<Method> multiMethods = new ArrayList<Method>();
            // 3.查找类中方法上是否有对应的@KafkaListener注解,本例中是注解再方法上的
			Map<Method, Set<KafkaListener>> annotatedMethods = MethodIntrospector.selectMethods(targetClass,
					new MethodIntrospector.MetadataLookup<Set<KafkaListener>>() {

						@Override
						public Set<KafkaListener> inspect(Method method) {
							Set<KafkaListener> listenerMethods = findListenerAnnotations(method);
							return (!listenerMethods.isEmpty() ? listenerMethods : null);
						}

					});
			if (hasClassLevelListeners) {
				Set<Method> methodsWithHandler = MethodIntrospector.selectMethods(targetClass,
						new ReflectionUtils.MethodFilter() {

							@Override
							public boolean matches(Method method) {
								return AnnotationUtils.findAnnotation(method, KafkaHandler.class) != null;
							}

						});
				multiMethods.addAll(methodsWithHandler);
			}
            // 4.annotatedMethods不为空,直接走else逻辑
			if (annotatedMethods.isEmpty()) {
				this.nonAnnotatedClasses.add(bean.getClass());
				if (this.logger.isTraceEnabled()) {
					this.logger.trace("No @KafkaListener annotations found on bean type: " + bean.getClass());
				}
			}
			else {
				// Non-empty set of methods
				for (Map.Entry<Method, Set<KafkaListener>> entry : annotatedMethods.entrySet()) {
					Method method = entry.getKey();
					for (KafkaListener listener : entry.getValue()) {
                        // 主要逻辑就在这,处理方法上的@KafkaListener,接下来我们单独分析这个方法
						processKafkaListener(listener, method, bean, beanName);
					}
				}
				if (this.logger.isDebugEnabled()) {
					this.logger.debug(annotatedMethods.size() + " @KafkaListener methods processed on bean '"
							+ beanName + "': " + annotatedMethods);
				}
			}
			if (hasClassLevelListeners) {
				processMultiMethodListeners(classLevelListeners, multiMethods, bean, beanName);
			}
		}
		return bean;
}2)KafkaListenerAnnotationBeanPostProcessor.processKafkaListener(listener, method, bean, beanName);
protected void processKafkaListener(KafkaListener kafkaListener, Method method, Object bean, String beanName) {
    Method methodToUse = checkProxy(method, bean);
    MethodKafkaListenerEndpoint<K, V> endpoint = new MethodKafkaListenerEndpoint<K, V>();
    endpoint.setMethod(methodToUse);
    endpoint.setBeanFactory(this.beanFactory);
    // 主要功能在这里
    processListener(endpoint, kafkaListener, bean, methodToUse, beanName);
}

// processListener()
protected void processListener(MethodKafkaListenerEndpoint<?, ?> endpoint, KafkaListener kafkaListener, Object bean,
                               Object adminTarget, String beanName) {
    // 1.封装Endpoint
    endpoint.setBean(bean);
    endpoint.setMessageHandlerMethodFactory(this.messageHandlerMethodFactory);
    endpoint.setId(getEndpointId(kafkaListener));
    endpoint.setTopicPartitions(resolveTopicPartitions(kafkaListener));
    endpoint.setTopics(resolveTopics(kafkaListener));
    endpoint.setTopicPattern(resolvePattern(kafkaListener));
    String group = kafkaListener.group();
    if (StringUtils.hasText(group)) {
        Object resolvedGroup = resolveExpression(group);
        if (resolvedGroup instanceof String) {
            endpoint.setGroup((String) resolvedGroup);
        }
    }

    // 2.我们可以主动指定@KafkaListener的containerFactory,在本例中,我们没有主动指定
    KafkaListenerContainerFactory<?> factory = null;
    String containerFactoryBeanName = resolve(kafkaListener.containerFactory());
    if (StringUtils.hasText(containerFactoryBeanName)) {
        Assert.state(this.beanFactory != null, "BeanFactory must be set to obtain container factory by bean name");
        try {
            factory = this.beanFactory.getBean(containerFactoryBeanName, KafkaListenerContainerFactory.class);
        }
        catch (NoSuchBeanDefinitionException ex) {
            throw new BeanInitializationException("Could not register Kafka listener endpoint on [" + adminTarget
                                                  + "] for bean " + beanName + ", no " + KafkaListenerContainerFactory.class.getSimpleName()
                                                  + " with id '" + containerFactoryBeanName + "' was found in the application context", ex);
        }
    }

    // 将endpoint注册到registrar,我们继续看下这个方法
    this.registrar.registerEndpoint(endpoint, factory);
}

//KafkaListenerEndpointRegistrar.registerEndpoint()
public void registerEndpoint(KafkaListenerEndpoint endpoint, KafkaListenerContainerFactory<?> factory) {
    Assert.notNull(endpoint, "Endpoint must be set");
    Assert.hasText(endpoint.getId(), "Endpoint id must be set");
    // 1.将endpoint封装为KafkaListenerEndpointDescriptor
    KafkaListenerEndpointDescriptor descriptor = new KafkaListenerEndpointDescriptor(endpoint, factory);
    synchronized (this.endpointDescriptors) {
        if (this.startImmediately) { // Register and start immediately
            this.endpointRegistry.registerListenerContainer(descriptor.endpoint,
                                                            resolveContainerFactory(descriptor), true);
        }
        else {

            // 将descriptor添加到endpointDescriptors
            // List<KafkaListenerEndpointDescriptor> endpointDescriptors = new ArrayList<>();
            this.endpointDescriptors.add(descriptor);
        }
    }
}
一连串的分析,我们最终得到一个含有KafkaListener基本信息的Endpoint,最后Endpoint被封装到KafkaListenerEndpointDescriptor,KafkaListenerEndpointDescriptor被添加到KafkaListenerEndpointRegistrar.endpointDescriptors中,也就是一个list中,结束了。
那么放到这个list的后续处理呢?
我们可以看下这个KafkaListenerEndpointRegistrar的类结构
public class KafkaListenerEndpointRegistrar implements BeanFactoryAware, InitializingBean {实现了InitializingBean接口,这个接口中有一个afterPropertiesSet()方法,会在类加载完成之后自动执行,那么我们来看下这个方法
3)KafkaListenerEndpointRegistrar.afterPropertiesSet()初始化方法
@Override
public void afterPropertiesSet() {
    registerAllEndpoints();
}

protected void registerAllEndpoints() {
    synchronized (this.endpointDescriptors) {
        // 遍历descriptor中的每一个KafkaListenerEndpointDescriptor,并执行对应的方法
        for (KafkaListenerEndpointDescriptor descriptor : this.endpointDescriptors) {
            // 关键在这里
            this.endpointRegistry.registerListenerContainer(
                descriptor.endpoint, resolveContainerFactory(descriptor));
        }
        this.startImmediately = true;  // trigger immediate startup
    }
}

// KafkaListenerEndpointRegistry.registerListenerContainer()
public void registerListenerContainer(KafkaListenerEndpoint endpoint, KafkaListenerContainerFactory<?> factory) {
    registerListenerContainer(endpoint, factory, false);
}

@SuppressWarnings("unchecked")
public void registerListenerContainer(KafkaListenerEndpoint endpoint, KafkaListenerContainerFactory<?> factory,
                                      boolean startImmediately) {
    Assert.notNull(endpoint, "Endpoint must not be null");
    Assert.notNull(factory, "Factory must not be null");

    String id = endpoint.getId();
    Assert.hasText(id, "Endpoint id must not be empty");
    synchronized (this.listenerContainers) {
        Assert.state(!this.listenerContainers.containsKey(id),
                     "Another endpoint is already registered with id '" + id + "'");

        // 1.创建Endpoint对应的MessageListenerContainer,将创建好的MessageListenerContainer放入listenerContainers
        MessageListenerContainer container = createListenerContainer(endpoint, factory);
        this.listenerContainers.put(id, container);

        // 2.如果我们的KafkaListener注解中有对应的group信息,则将container添加到对应的group中
        if (StringUtils.hasText(endpoint.getGroup()) && this.applicationContext != null) {
            List<MessageListenerContainer> containerGroup;
            if (this.applicationContext.containsBean(endpoint.getGroup())) {
                containerGroup = this.applicationContext.getBean(endpoint.getGroup(), List.class);
            }
            else {
                containerGroup = new ArrayList<MessageListenerContainer>();
                this.applicationContext.getBeanFactory().registerSingleton(endpoint.getGroup(), containerGroup);
            }
            containerGroup.add(container);
        }
        // 3.startImmediately默认为false,则不执行start方法
        if (startImmediately) {
            startIfNecessary(container);
        }
    }
}
我们将创建Container的方法单独拎出来介绍
4)KafkaListenerEndpointRegistry.createListenerContainer(endpoint, factory);
protected MessageListenerContainer createListenerContainer(KafkaListenerEndpoint endpoint,
                                                           KafkaListenerContainerFactory<?> factory) {

    // 主要在这里,通过工厂来创建Container
    MessageListenerContainer listenerContainer = factory.createListenerContainer(endpoint);
    ...

    return listenerContainer;
}

// AbstractKafkaListenerContainerFactory.createListenerContainer()
public C createListenerContainer(KafkaListenerEndpoint endpoint) {
    // 重点在这里
    C instance = createContainerInstance(endpoint);
    // 一系列设置参数的动作
    ...

    // 初始化Container的"topics", "topicPartitions", "topicPattern","messageListener", "ackCount", "ackTime"等参数
    endpoint.setupListenerContainer(instance, this.messageConverter);
    initializeContainer(instance);

    return instance;
}

// 默认ConcurrentKafkaListenerContainerFactory.createContainerInstance()
// 由该方法可知,最终创建的容器是ConcurrentMessageListenerContainer,根据用户设定的参数
protected ConcurrentMessageListenerContainer<K, V> createContainerInstance(KafkaListenerEndpoint endpoint) {
    Collection<TopicPartitionInitialOffset> topicPartitions = endpoint.getTopicPartitions();
    if (!topicPartitions.isEmpty()) {
        ContainerProperties properties = new ContainerProperties(
            topicPartitions.toArray(new TopicPartitionInitialOffset[topicPartitions.size()]));
        return new ConcurrentMessageListenerContainer<K, V>(getConsumerFactory(), properties);
    }
    else {
        Collection<String> topics = endpoint.getTopics();
        if (!topics.isEmpty()) {
            ContainerProperties properties = new ContainerProperties(topics.toArray(new String[topics.size()]));
            return new ConcurrentMessageListenerContainer<K, V>(getConsumerFactory(), properties);
        }
        else {
            ContainerProperties properties = new ContainerProperties(endpoint.getTopicPattern());
            return new ConcurrentMessageListenerContainer<K, V>(getConsumerFactory(), properties);
        }
    }
}
总结:经过以上一些列的分析,我们@KafkaListener注解变为ConcurrentMessageListenerContainer类,这个Container中包含了我们所需要的topic相关信息
6.ConcurrentMessageListenerContainer的源码分析
类结构如下:

其实现了Lifecycle接口,Lifecycle是一个神奇的接口,它定义了对象的生命周期方法,任何Spring管理的对象都可以实现这个借口,当ApplicationContext自身启动和停止时,它会自动调动上下文中所有生命周期的实现。更多关于Lifecycle的内容可参考:https://www.cnblogs.com/wade-luffy/p/6074088.html
所以可以知道:ConcurrentMessageListenerContainer在容器初始化完成时候会自动调用start()方法
1)ConcurrentMessageListenerContainer.start()
// AbstractMessageListenerContainer.start()
@Override
public final void start() {
    synchronized (this.lifecycleMonitor) {
        if (!isRunning()) {
            Assert.isTrue(
                this.containerProperties.getMessageListener() instanceof KafkaDataListener,
                "A " + GenericMessageListener.class.getName() + " implementation must be provided");
            // 直接调用子类的doStart()方法
            doStart();
        }
    }
}

// ConcurrentMessageListenerContainer.doStart()
@Override
protected void doStart() {
    if (!isRunning()) {
        ContainerProperties containerProperties = getContainerProperties();
        TopicPartitionInitialOffset[] topicPartitions = containerProperties.getTopicPartitions();

        // 1.将concurrency设置为topicPartitions大小,本例中我们的consumer监听3个分片
        if (topicPartitions != null
            && this.concurrency > topicPartitions.length) {
            this.logger.warn("When specific partitions are provided, the concurrency must be less than or "
                             + "equal to the number of partitions; reduced from " + this.concurrency + " to "
                             + topicPartitions.length);
            this.concurrency = topicPartitions.length;
        }
        setRunning(true);

        // 2.根据分片数创建KafkaMessageListenerContainer,每一个分片创建一个Container
        for (int i = 0; i < this.concurrency; i++) {
            KafkaMessageListenerContainer<K, V> container;
            if (topicPartitions == null) {
                container = new KafkaMessageListenerContainer<>(this.consumerFactory, containerProperties);
            }
            else {
                container = new KafkaMessageListenerContainer<>(this.consumerFactory, containerProperties,
                                                                partitionSubset(containerProperties, i));
            }
            if (getBeanName() != null) {
                container.setBeanName(getBeanName() + "-" + i);
            }
            if (getApplicationEventPublisher() != null) {
                container.setApplicationEventPublisher(getApplicationEventPublisher());
            }
            container.setClientIdSuffix("-" + i);

            // 3.启动Container,并添加其到containers中
            // 重点就在这个start方法,启动了KafkaMessageListenerContainer,下面单独来分析
            container.start();
            this.containers.add(container);
        }
    }
}
2)KafkaMessageListenerContainer.start()方法分析
@Override
public final void start() {
    synchronized (this.lifecycleMonitor) {
        if (!isRunning()) {
            Assert.isTrue(
                this.containerProperties.getMessageListener() instanceof KafkaDataListener,
                "A " + GenericMessageListener.class.getName() + " implementation must be provided");
            // 直接调用子类KafkaMessageListenerContainer.doStart()方法
            doStart();
        }
    }
}

// KafkaMessageListenerContainer.doStart()
@Override
protected void doStart() {
    // 1.如果已启动,则直接返回
    if (isRunning()) {
        return;
    }
    ContainerProperties containerProperties = getContainerProperties();
    ...
    // 2.获取对应的监听类,本例中就是MyListener,被包装到BatchMessagingMessageListenerAdapter中
    Object messageListener = containerProperties.getMessageListener();
    Assert.state(messageListener != null, "A MessageListener is required");
    if (messageListener instanceof GenericAcknowledgingMessageListener) {
        // 2.1 将监听类MyListener赋值到acknowledgingMessageListener
        this.acknowledgingMessageListener = (GenericAcknowledgingMessageListener<?>) messageListener;
    }
    else if (messageListener instanceof GenericMessageListener) {
        this.listener = (GenericMessageListener<?>) messageListener;
    }
    ...
    // 3.根据this.listener, this.acknowledgingMessageListener创建对应的listenerConsumer
    this.listenerConsumer = new ListenerConsumer(this.listener, this.acknowledgingMessageListener);
    setRunning(true);

    // 4.最后一步,将listenerConsumer作为一个任务提交
    this.listenerConsumerFuture = containerProperties
        .getConsumerTaskExecutor()
        .submitListenable(this.listenerConsumer);
}
总结:看到这里,可以看出,最终将我们@KafkaListener中的topicPartitions
@KafkaListener(id = "id0", topicPartitions = { @TopicPartition(topic = TPOIC, partitions = { "0","1","2" })})转换为ListenerConsumer,每一个partition生成一个ListenerConsumer
7.ListenerConsumer的工作
ListenerConsumer是一个私有类,在KafkaMessageListenerContainer类里面,类结构如下(可知,其实现了一个Runnable接口)
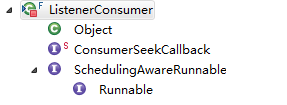
1)主要成员变量及构造方法
private final class ListenerConsumer implements SchedulingAwareRunnable, ConsumerSeekCallback {

    private final ContainerProperties containerProperties = getContainerProperties();

    private final OffsetCommitCallback commitCallback = this.containerProperties.getCommitCallback() != null
        ? this.containerProperties.getCommitCallback()
        : new LoggingCommitCallback();

    // 都是一些比较熟悉的属性,关键是这个consumer,主要的消费功能就是它来实现的
    private final Consumer<K, V> consumer;

    private final Map<String, Map<Integer, Long>> offsets = new HashMap<String, Map<Integer, Long>>();

    private final boolean autoCommit = KafkaMessageListenerContainer.this.consumerFactory.isAutoCommit();
    ...

// 下面来看一下ListenerConsumer的构造方法
@SuppressWarnings("unchecked")
ListenerConsumer(GenericMessageListener<?> listener, GenericAcknowledgingMessageListener<?> ackListener) {
	Assert.state(!this.isAnyManualAck || !this.autoCommit,
			"Consumer cannot be configured for auto commit for ackMode " + this.containerProperties.getAckMode());
	this.theListener = listener == null ? ackListener : listener;

    // 1.最终要的方法,构造Consumer
	final Consumer<K, V> consumer = KafkaMessageListenerContainer.this.consumerFactory.createConsumer(
			this.consumerGroupId, KafkaMessageListenerContainer.this.clientIdSuffix);
	this.consumer = consumer;

	ConsumerRebalanceListener rebalanceListener = createRebalanceListener(consumer);

    // 2.subscribe对应的topic
	if (KafkaMessageListenerContainer.this.topicPartitions == null) {
		if (this.containerProperties.getTopicPattern() != null) {
			consumer.subscribe(this.containerProperties.getTopicPattern(), rebalanceListener);
		}
		else {
			consumer.subscribe(Arrays.asList(this.containerProperties.getTopics()), rebalanceListener);
		}
	}

    // 3.或者assign给定的partition
	else {
		List<TopicPartitionInitialOffset> topicPartitions =
				Arrays.asList(KafkaMessageListenerContainer.this.topicPartitions);
		this.definedPartitions = new HashMap<>(topicPartitions.size());
		for (TopicPartitionInitialOffset topicPartition : topicPartitions) {
			this.definedPartitions.put(topicPartition.topicPartition(),
					new OffsetMetadata(topicPartition.initialOffset(), topicPartition.isRelativeToCurrent()));
		}
		consumer.assign(new ArrayList<>(this.definedPartitions.keySet()));
	}
    ...
}
总结:通过构造方法,ListenerConsumer完成了Consumer的创建以及topic和partition的监听
2)run()方法,主要业务实现方法
@Override
public void run() {
    this.consumerThread = Thread.currentThread();
    if (this.theListener instanceof ConsumerSeekAware) {
        ((ConsumerSeekAware) this.theListener).registerSeekCallback(this);
    }
    if (this.transactionManager != null) {
        ProducerFactoryUtils.setConsumerGroupId(this.consumerGroupId);
    }
    this.count = 0;
    this.last = System.currentTimeMillis();
    if (isRunning() && this.definedPartitions != null) {
        initPartitionsIfNeeded();
    }
    long lastReceive = System.currentTimeMillis();
    long lastAlertAt = lastReceive;

    // 不停轮询实现topic的消费
    while (isRunning()) {
        try {
            if (!this.autoCommit && !this.isRecordAck) {
                processCommits();
            }
            processSeeks();

            // 1.使用poll方法拉取数据
            ConsumerRecords<K, V> records = this.consumer.poll(this.containerProperties.getPollTimeout());
            this.lastPoll = System.currentTimeMillis();

            if (records != null && this.logger.isDebugEnabled()) {
                this.logger.debug("Received: " + records.count() + " records");
            }
            // 2.获取到数据后执行监听器的回调方法
            if (records != null && records.count() > 0) {
                if (this.containerProperties.getIdleEventInterval() != null) {
                    lastReceive = System.currentTimeMillis();
                }
                // 回调在此
                invokeListener(records);
            }
            else {
                if (this.containerProperties.getIdleEventInterval() != null) {
                    long now = System.currentTimeMillis();
                    if (now > lastReceive + this.containerProperties.getIdleEventInterval()
                        && now > lastAlertAt + this.containerProperties.getIdleEventInterval()) {
                        publishIdleContainerEvent(now - lastReceive);
                        lastAlertAt = now;
                        if (this.theListener instanceof ConsumerSeekAware) {
                            seekPartitions(getAssignedPartitions(), true);
                        }
                    }
                }
            }
        }
        ...
    }
    ...
}

//invokeListener(records);
private void invokeListener(final ConsumerRecords<K, V> records) {
    if (this.isBatchListener) {
        invokeBatchListener(records);
    }
    else {
        invokeRecordListener(records);
    }
}
...
// 一层层追踪下来最终到了
    private RuntimeException doInvokeRecordListener(final ConsumerRecord<K, V> record,
                                                    @SuppressWarnings("rawtypes") Producer producer) throws Error {
    try {
        if (this.acknowledgingMessageListener != null) {
            // 最终实现在这里,即调用BatchMessagingMessageListenerAdapter.onMessage方法
            // BatchMessagingMessageListenerAdapter是一个包装类,包装了真正需要调用的类和对应方法
            // 在本例中就是MyListener.listenPartition0()方法,至此,消费就结束了
            this.acknowledgingMessageListener.onMessage(record,
                                                        this.isAnyManualAck
                                                        ? new ConsumerAcknowledgment(record)
                                                        : null);
        }
        else {
            this.listener.onMessage(record);
        }
        ackCurrent(record, producer);
    }
    ...
        return null;
}
总结:
1)@EnableKafka注解引入KafkaListenerAnnotationBeanPostProcessor类
2)KafkaListenerAnnotationBeanPostProcessor类监听所有带有@KafkaListener注解的类或方法
3)将每一个带有@KafkaListener注解的类或方法封装为一个MethodKafkaListenerEndpoint
4)将KafkaListenerEndpoint和对应的KafkaListenerContainerFactory封装到一个KafkaListenerEndpointDescriptor中,并将其添加到KafkaListenerEndpointRegistrar.endpointDescriptors中
5)遍历每一个KafkaListenerEndpointDescriptor,为其创建一个MessageListenerContainer,在本例中具体实现类为ConcurrentMessageListenerContainer
6)ConcurrentMessageListenerContainer在ApplicationContext创建完成之后,自动调用其start方法,start方法会根据我们在@KafkaListener中设置的topic和分片数来创建对应数量的KafkaMessageListenerContainer,并调用其start方法
7)KafkaMessageListenerContainer.start()方法会创建一个ListenerConsumer,ListenerConsumer是一个Runnable接口实现类
8)ListenerConsumer在构造的时候会创建一个Consumer,并assign对应的topic和partitions,然后执行一个while循环,在循环中不停的执行consumer.poll()方法拉取数据,并回调@KafkaListener对应的方法
至此,Spring-kafka的消费者代码分析结束。