demo地址: https://github.com/Lkkkkkkg/webpack-demo
上次使用 webpack-dev-serve : https://blog.csdn.net/qq593249106/article/details/84922572
当前目录结构 :
|- /dist //用于放打包后文件的文件夹
  |- app.bundle.js //出口文件
  |- print.bundle.js //出口文件
  |- index.html //模板文件
|- /node_modules
|- /src //用于放源文件的文件夹
  |- index.js //入口文件
  |- print.js
|- package.json
|- webpack.config.js //webpack配置文件
webpack.config.js
const path = require('path');
const HtmlWebpackPlugin = require('html-webpack-plugin');
const CleanWebpackPlugin = require('clean-webpack-plugin');


module.exports = {
    entry: {
        app: './src/index.js'
        // print: './src/print.js'
    },
    devtool: 'inline-source-map', // 不同选项适用于不同环境
    devServer: {
        contentBase: './dist', //将dist目录下的文件(index.html)作为可访问文件, 如果不写这个参数则默认与webpack.cofig.js的同级目录
        port: 8080 //端口号设为8080, 默认也是8080
    },
    plugins: [ //webpack 通过 plugins 实现各种功能, 比如 html-webpack-plugin 使用模版生成 html 文件
        new CleanWebpackPlugin(['dist']), //设置清除的目录
        new HtmlWebpackPlugin({
            filename: 'index.html', //设置生成的HTML文件的名称, 支持指定子目录,如:assets/admin.html
            title: 'Form HtmlWebpackPlugin', //设置生成的HTML的title
        })
    ],
    output: {
        filename: '[name].bundle.js', //根据入口文件输出不同出口文件
        path: path.resolve(__dirname, 'dist')
    }
};
这里把配置的 入口文件 print.js 给去掉了, 因为 print.js 被 入口文件 index.js 应用了
HMR(模块热替换)
模块热替换(Hot Module Replacement 或 HMR)是 webpack 提供的最有用的功能之一, 它允许在运行时更新各种模块, 而无需进行完全刷新
比如在这个现在修改 print.js 里面的内容, 使用 HMR 就可以只更新 print.js 里面的内容而不用重新加在整个页面
启用HMR
启用这个功能很简答, 只需要修改一下 webpack.config.js 的配置, 使用 webpack 内置的 HMR 插件就可以了
webpack.config.js
const path = require('path');
const HtmlWebpackPlugin = require('html-webpack-plugin');
const CleanWebpackPlugin = require('clean-webpack-plugin');
const webpack = require('webpack'); //引入 webpack


module.exports = {
    entry: {
        app: './src/index.js'
        // print: './src/print.js'
    },
    devtool: 'inline-source-map', // 不同选项适用于不同环境
    devServer: {
        contentBase: './dist', //将dist目录下的文件(index.html)作为可访问文件, 如果不写这个参数则默认与webpack.cofig.js的同级目录
        port: 8080, //端口号设为8080, 默认也是8080,
        hot: true
    },
    plugins: [ //webpack 通过 plugins 实现各种功能, 比如 html-webpack-plugin 使用模版生成 html 文件
        new CleanWebpackPlugin(['dist']), //设置清除的目录
        new HtmlWebpackPlugin({
            filename: 'index.html', //设置生成的HTML文件的名称, 支持指定子目录,如:assets/admin.html
            title: 'Form HtmlWebpackPlugin', //设置生成的HTML的title
        }),
        new webpack.HotModuleReplacementPlugin() //启用 webpack 内置的 HMR插件
    ],
    output: {
        filename: '[name].bundle.js', //根据入口文件输出不同出口文件
        path: path.resolve(__dirname, 'dist')
    }
};
启用 webpack 内置的 HMR插件后, module.hot 接口就会暴露在 index.js 中, 接下来需要在 index.js 中配置告诉 webpack 接受HMR的模块( print.js ):
index.js
import _ from 'lodash';
import printMe from './print.js';

function component() {
    var element = document.createElement('div');
    var btn = document.createElement('button'); //新建一个button对象

    element.innerHTML = _.join(['Hello', 'webpack'], ' '); //要用到lodash的语法

    btn.innerHTML = 'Click me and check the console!';
    btn.onclick = printMe; //button触发的事件是引用的print.js暴露的事件

    element.appendChild(btn); //把button对象插入div中

    return element;
}

document.body.appendChild(component());

if (module.hot) {
    module.hot.accept('./print.js', function() { //告诉 webpack 接受热替换的模块
        console.log('Accepting the updated printMe module!');
        printMe();
    })
}
启动 webpack-dev-server
终端输入 npm run dev 启动, 打开 index.html, 然后去修改 print.js 里面的内容:
print.js
export default function printMe() {
    //console.log('I get called from print.js!');
    console.log('change');
}
回到网页看控制台:
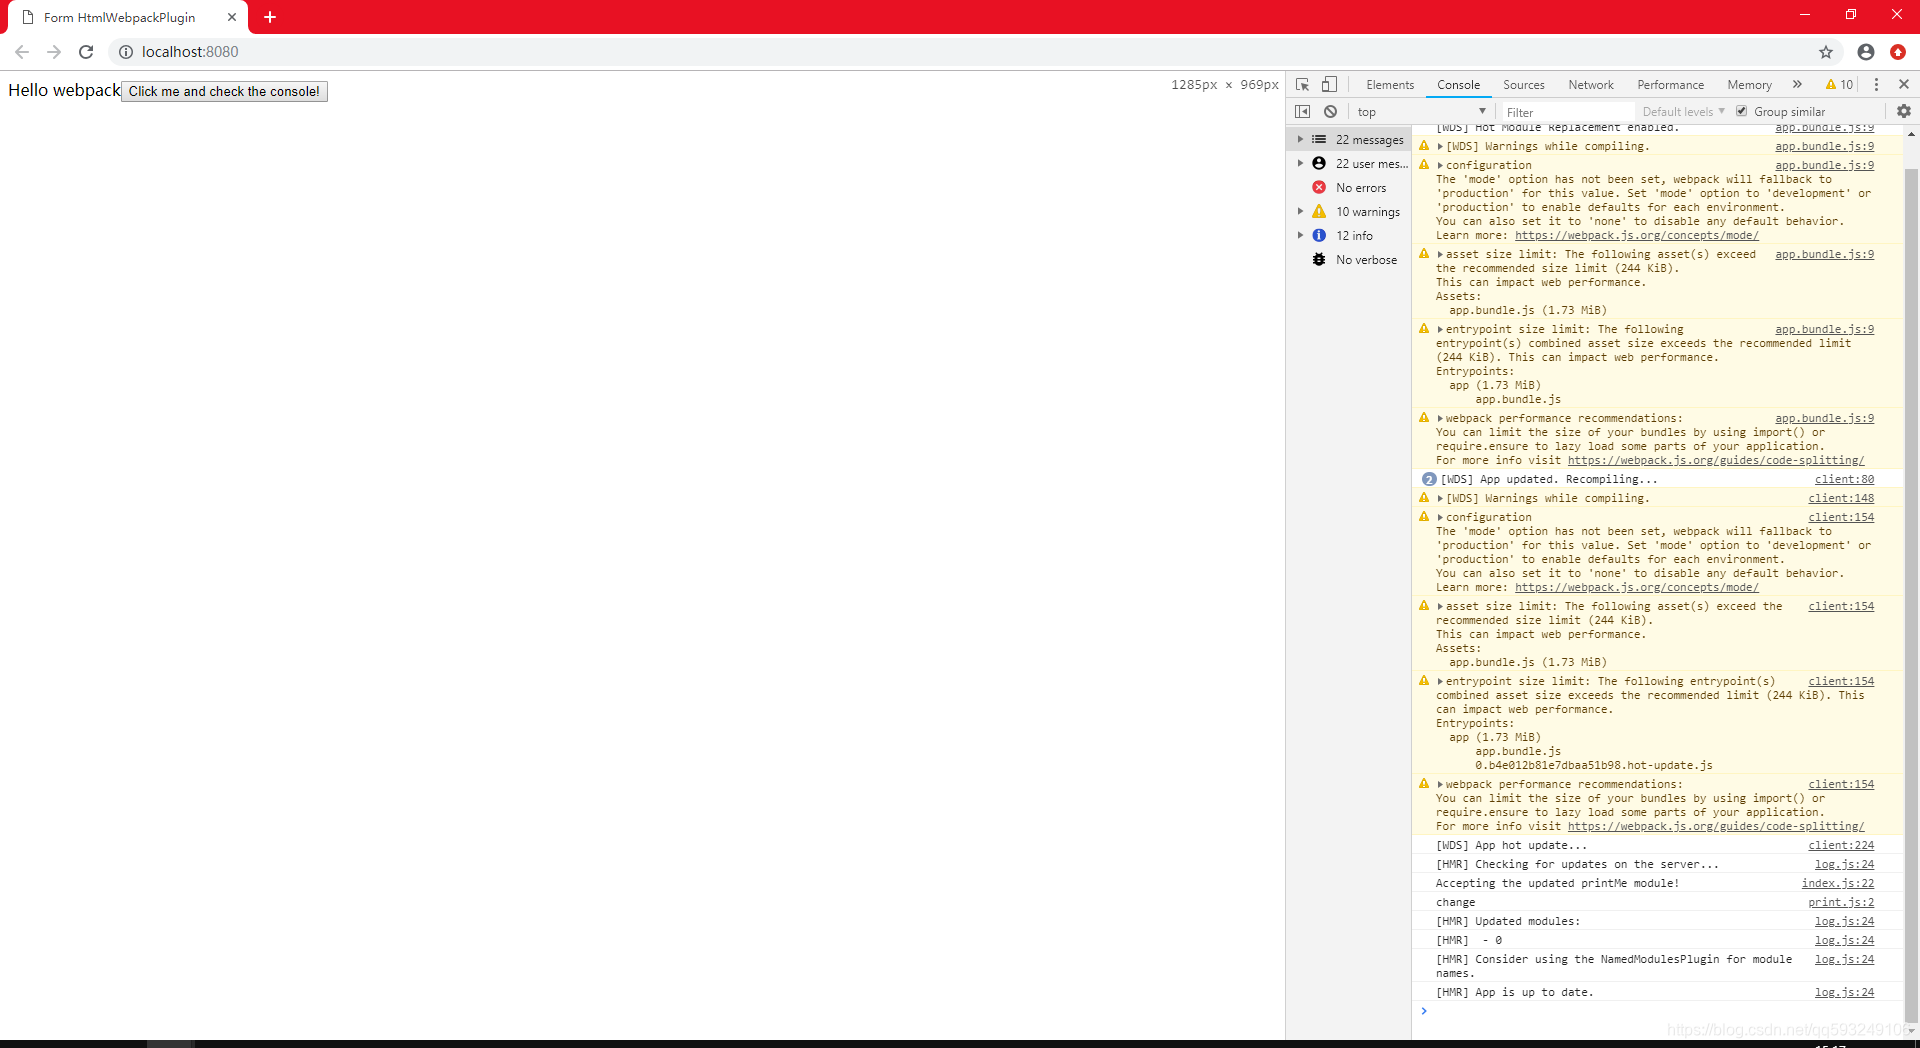
可以看到 HMR 的字眼, 并且看到了 index.js下的输出(‘Accepting the updated printMe module!’) 和 print.js 修改后的输出(‘change’), 说明服务器检测到了 print.js 的代码变化并且执行了 module.hot.accept 的回调函数,
但是现在只成功了50%, 因为点击 button 按钮, 会发现输出还是之前的(‘I get called from print.js!’), 说明 print.js 虽然被修改了, 但在 index.js 上还没有被修改之后的替换, 所以 button 绑定的还是之前的事件, 这里需要在检测到代码修改后, 用修改之后的js重新渲染页面:
index.js
import _ from 'lodash';
import printMe from './print.js';

function component() {
    var element = document.createElement('div');
    var btn = document.createElement('button'); //新建一个button对象

    element.innerHTML = _.join(['Hello', 'webpack'], ' '); //要用到lodash的语法

    btn.innerHTML = 'Click me and check the console!';
    btn.onclick = printMe; //button触发的事件是引用的print.js暴露的事件

    element.appendChild(btn); //把button对象插入div中

    return element;
}

var element = component(); //改用一个element保存一下
document.body.appendChild(element);

if (module.hot) { //告诉 webpack 接受热替换的模块
    module.hot.accept('./print.js', function() {
        console.log('Accepting the updated printMe module!');
        document.body.removeChild(element); //删掉旧的element
        element = component(); //获得一个修改后的element
        document.body.appendChild(element); //重新插入到网页中
    })
}
热重载
因为之前配置过热重载功能 , 所以修改了 index.js 之后会自动重载, 页面刷新说明重载完成, 这个时候再次修改 print.js 的输出, 热替换后再点击按钮, 发现输出的是修改后的代码:

实现了 HMR(模块热替换功能), 这样修改模块的代码就不用热重载重新加载整个文件了, 它只会更新修改的模块部分, 对于开发来说很方便
HMR 修改样式表(CSS)
借助于 style-loader 的帮助, CSS 的模块热替换实际上是相当简单的, 当更新 CSS 依赖模块时, 此 loader 在后台使用 module.hot.accept 来修补(patch) < style> 标签
安装
npm install style-loader css-loader --save-dev
配置 webpack.config.js
相关 style-loader 配置教程可以看 https://blog.csdn.net/qq593249106/article/details/84894989
webpack.config.js
const path = require('path');
const HtmlWebpackPlugin = require('html-webpack-plugin');
const CleanWebpackPlugin = require('clean-webpack-plugin');
const webpack = require('webpack'); //引入 webpack


module.exports = {
    entry: {
        app: './src/index.js'
        // print: './src/print.js'
    },
    devtool: 'inline-source-map', // 不同选项适用于不同环境
    devServer: {
        contentBase: './dist', //将dist目录下的文件(index.html)作为可访问文件, 如果不写这个参数则默认与webpack.cofig.js的同级目录
        port: 8080, //端口号设为8080, 默认也是8080,
        hot: true
    },
    module: {
        rules: [ //配置加载器, 用来处理源文件, 可以把es6, jsx等转换成js, sass, less等转换成css
            {
                test: /\.css$/, //配置要处理的文件格式,一般使用正则表达式匹配
                use: ['style-loader', 'css-loader'] //使用的加载器名称
            }
        ]
    },
    plugins: [ //webpack 通过 plugins 实现各种功能, 比如 html-webpack-plugin 使用模版生成 html 文件
        new CleanWebpackPlugin(['dist']), //设置清除的目录
        new HtmlWebpackPlugin({
            filename: 'index.html', //设置生成的HTML文件的名称, 支持指定子目录,如:assets/admin.html
            title: 'Form HtmlWebpackPlugin', //设置生成的HTML的title
        }),
        new webpack.HotModuleReplacementPlugin() //启用 webpack 内置的 HMR插件
    ],
    output: {
        filename: '[name].bundle.js', //根据入口文件输出不同出口文件
        path: path.resolve(__dirname, 'dist')
    }
};
现在新建一个 style.css 在 src 文件夹下用来做本次测试:
|- /dist //用于放打包后文件的文件夹
  |- app.bundle.js //出口文件
  |- print.bundle.js //出口文件
  |- index.html //模板文件
|- /node_modules
|- /src //用于放源文件的文件夹
  |- index.js //入口文件
  |- print.js
  |- style.css //样式文件
|- package.json
|- webpack.config.js //webpack配置文件
style.css
body {
    background-color: red;
}
别忘了在 index.js 引入 style.css:
index.js
import _ from 'lodash';
import printMe from './print.js';
import './style.css'

function component() {
    var element = document.createElement('div');
    var btn = document.createElement('button'); //新建一个button对象

    element.innerHTML = _.join(['Hello', 'webpack'], ' '); //要用到lodash的语法

    btn.innerHTML = 'Click me and check the console!';
    btn.onclick = printMe; //button触发的事件是引用的print.js暴露的事件

    element.appendChild(btn); //把button对象插入div中

    return element;
}

var element = component(); //改用一个element保存一下
document.body.appendChild(element);

if (module.hot) { //告诉 webpack 接受热替换的模块
    module.hot.accept('./print.js', function() {
        console.log('Accepting the updated printMe module!');
        document.body.removeChild(element); //删掉旧的element
        element = component(); //获得一个修改后的element
        document.body.appendChild(element); //重新插入到网页中
    })
}
启动服务器
终端输入 npm run dev, 打开网页:

style.css 文件生效了, 现在修改一下在 style.css 中修改一下, 将颜色改为绿色:
style.css
body {
    /*background-color: red;*/
    background-color: green;
}
这时, 网页没有重载直接变成了绿色, 实现了 css 的 HMR(热替换)
