效果地址http://121.40.36.198:9080/web/
本文从建站开始,就不跟别的顺序一样要怎么开始开始的,懂java就行 我会尽量讲的详细,
首先肯定是工具的选择 ,俗话说工欲善其事,必先利其器,Eclipse 和IDEA 都可以集成Spring 插件,不过最好还是用Spring Tool suite ,它有三个版本,看个人喜好,我比较偏向eclipse
安装完后 第一步 记得把maven 改成阿里云的
软件安装完后New - Spring start Project 然后填写 一些东西 ,进入next, 选择插件


有很多选项 不了解的也不用管 , 我们这里先eureka-server 主要是服务注册 ,点创建后可能会报错 版本的原理 ,阿里云的仓库可能没有全部版本
POM中哪个包有红线可以自己上阿里云仓库看看有没有存在 不存在当前版本可以自己更换成现有的 http://maven.aliyun.com/mvn/view
POM如下


<?xml version="1.0" encoding="UTF-8"?>
<project xmlns="http://maven.apache.org/POM/4.0.0" xmlns:xsi="http://www.w3.org/2001/XMLSchema-instance"
    xsi:schemaLocation="http://maven.apache.org/POM/4.0.0 http://maven.apache.org/xsd/maven-4.0.0.xsd">
    <modelVersion>4.0.0</modelVersion>

    <groupId>tsearch_web</groupId>
    <artifactId>springtest</artifactId>
    <version>0.0.1</version>
    <packaging>jar</packaging>

    <name>springtest</name>
    <description>Note Server catch</description>

    <parent>
        <groupId>org.springframework.boot</groupId>
        <artifactId>spring-boot-starter-parent</artifactId>
        <version>2.1.1.RELEASE</version>
        <relativePath/> <!-- lookup parent from repository -->
    </parent>

    <properties>
        <project.build.sourceEncoding>UTF-8</project.build.sourceEncoding>
        <project.reporting.outputEncoding>UTF-8</project.reporting.outputEncoding>
        <java.version>1.8</java.version>
        <spring-cloud.version>Greenwich.M3</spring-cloud.version>
    </properties>

    <dependencies>
        <dependency>
            <groupId>org.springframework.cloud</groupId>
            <artifactId>spring-cloud-starter-netflix-eureka-server</artifactId>
        </dependency>

        <dependency>
            <groupId>org.springframework.boot</groupId>
            <artifactId>spring-boot-starter-test</artifactId>
            <scope>test</scope>
        </dependency>
    </dependencies>

    <dependencyManagement>
        <dependencies>
            <dependency>
                <groupId>org.springframework.cloud</groupId>
                <artifactId>spring-cloud-dependencies</artifactId>
                <version>Finchley.RELEASE</version>
                <type>pom</type>
                <scope>import</scope>
            </dependency>
        </dependencies>
    </dependencyManagement>

    <build>
        <plugins>
            <plugin>
                <groupId>org.springframework.boot</groupId>
                <artifactId>spring-boot-maven-plugin</artifactId>
            </plugin>
        </plugins>
    </build>

    <repositories>
        <repository>
            <id>spring-milestones</id>
            <name>Spring Milestones</name>
            <url>https://repo.spring.io/milestone</url>
            <snapshots>
                <enabled>false</enabled>
            </snapshots>
        </repository>
    </repositories>


</project>
这里需要改下 main/resource里面的配置 , 一般有yml 和property两种格式,看自己喜好, 名字的话 application 和bootstrap , bootstrap启动优先级比较高,
下面是application.property配置
eureka.client.serviceUrl.defaultZone=http://localhost:8761/eureka/
spring.application.name=search-server
server.port=8761
eureka.client.register-with-eureka=false
eureka.client.fetch-registry=false
defaultZone Eureka-server的地址, 后面其它客户端注册全部需要这个地址
name 服务名称(Eureka会把名字全映射成大写,用到的时候需要注意)
server port 当前服务的端口 , 因为我们建的是server 下面2个参数的意思本身不需要注册
然后修改我们自己包名下的Application 添加@EnableEurekaServer 标注当前是一个EurekaServer服务端
@EnableEurekaServer
@SpringBootApplication
public class SpringtestApplication {

	public static void main(String[] args) {
		SpringApplication.run(SpringtestApplication.class, args);
	}
}

Spring 自带了一个强大的tomcat , 等你想发布到外部的tomcat的时候 就会发现, 创建项目后 会在这里显示, 右键启动 一个server端就创建好了
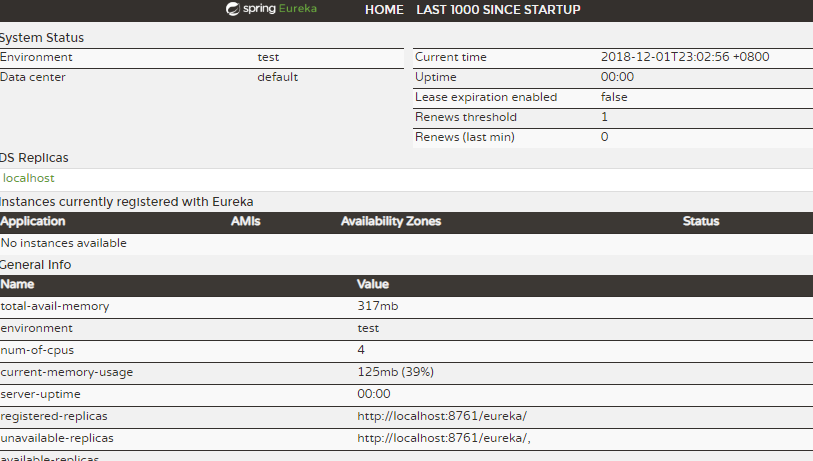
通过前面设置的 http://localhost:8761 进行访问
下面我们创建一个Client端, 创建的步骤都一样 , 这里主要选Eureka Server ,Web Freemarker (因为涉及到一些前端的页面)
同样先修改 ClientApplication @EnableEurekaClient 注册生成一个EurekaClient
@EnableEurekaClient
@SpringBootApplication
public class SpringtestClientApplication {

    public static void main(String[] args) {
        SpringApplication.run(SpringtestClientApplication.class, args);
    }
}
POM
<?xml version="1.0" encoding="UTF-8"?>
<project xmlns="http://maven.apache.org/POM/4.0.0" xmlns:xsi="http://www.w3.org/2001/XMLSchema-instance"
    xsi:schemaLocation="http://maven.apache.org/POM/4.0.0 http://maven.apache.org/xsd/maven-4.0.0.xsd">
    <modelVersion>4.0.0</modelVersion>

    <groupId>tsearch_web</groupId>
    <artifactId>springtest-client</artifactId>
    <version>0.0.1</version>
    <packaging>jar</packaging>

    <name>springtest-client</name>
    <description>Note Server catch</description>

    <parent>
        <groupId>org.springframework.boot</groupId>
        <artifactId>spring-boot-starter-parent</artifactId>
        <version>2.1.1.RELEASE</version>
        <relativePath/> <!-- lookup parent from repository -->
    </parent>

    <properties>
        <project.build.sourceEncoding>UTF-8</project.build.sourceEncoding>
        <project.reporting.outputEncoding>UTF-8</project.reporting.outputEncoding>
        <java.version>1.8</java.version>
        <spring-cloud.version>Greenwich.M3</spring-cloud.version>
    </properties>

    <dependencies>
        <dependency>
            <groupId>org.springframework.boot</groupId>
            <artifactId>spring-boot-starter-freemarker</artifactId>
        </dependency>
        <dependency>
            <groupId>org.springframework.boot</groupId>
            <artifactId>spring-boot-starter-web</artifactId>
        </dependency>
        <dependency>
            <groupId>org.springframework.cloud</groupId>
            <artifactId>spring-cloud-starter-netflix-eureka-server</artifactId>
        </dependency>

        <dependency>
            <groupId>org.springframework.boot</groupId>
            <artifactId>spring-boot-starter-test</artifactId>
            <scope>test</scope>
        </dependency>
    </dependencies>

    <dependencyManagement>
        <dependencies>
            <dependency>
                <groupId>org.springframework.cloud</groupId>
                <artifactId>spring-cloud-dependencies</artifactId>
                <version>Finchley.RELEASE</version>
                <type>pom</type>
                <scope>import</scope>
            </dependency>
        </dependencies>
    </dependencyManagement>

    <build>
        <plugins>
            <plugin>
                <groupId>org.springframework.boot</groupId>
                <artifactId>spring-boot-maven-plugin</artifactId>
            </plugin>
        </plugins>
    </build>

    <repositories>
        <repository>
            <id>spring-milestones</id>
            <name>Spring Milestones</name>
            <url>https://repo.spring.io/milestone</url>
            <snapshots>
                <enabled>false</enabled>
            </snapshots>
        </repository>
    </repositories>


</project>
Application.Properties
eureka.client.serviceUrl.defaultZone=http://localhost:8761/eureka/
spring.application.name=client
server.port=8881
在左下角点启动 然后点开 http://localhost:8761/ 会发现instance current 里面多了当前的eureka client
下面新建一个Controll ( Spring 默认扫描的是当前包下的)
Controll有两种 一种是Controll 能跳转到页面 一种ResController 直接返回数据
@RestController
public class ClientController {

      @RequestMapping(value ="/hello")
        public String openSearch() {

         return "hello";
     }
}
这里 @RequestMapping(value ="/hello") 表示的是URI 问好前面的地址 这里直接打开http://localhost:8881/hello 能看到返回的字符串
如果想添加参数 可以直接加 @PathVariable long barid 或者@RequestParam("name") String name
都需要写 要嫌麻烦直接暴力点 拿request
      @RequestMapping(value ="/hello")
        public String openSearch(HttpServletRequest request) {

         return "hello";
     }
下面要弄一个前端页面 先建一个Controller 不是ResController
@Controller
public class WebController {
      @RequestMapping(value ="/")
        public String home() {
            return "index";
        }
}
我们这里用的是freemaker,可以直接在resource/temple 下面新建一个后缀为ftl 或者html都行 名字对应上面的index 我这里叫index.ftl
编辑HTML 推荐用Hbuider 可以编改变看 直接附上前台代码
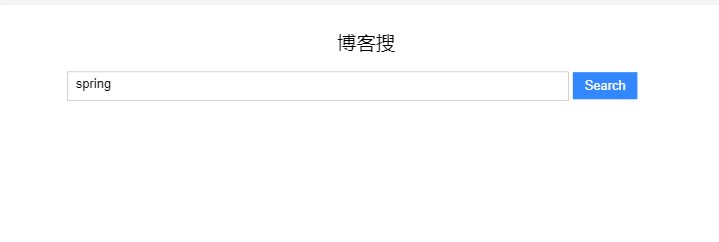
<!DOCTYPE html>
<html>
    <head>
        <meta charset="UTF-8">
        <title></title>
        <style>
            .searchBtn{
                background-color:#38f;
                color:#fff;
                font-size: 16px;
                padding-top: 0px;
                width: 80px;
                height: 34px;
                vertical-align: middle;
                padding: 0;
                border: 0;
            }
        .searchBtn:hover {
            background-color: #3171f3;
        }
        .searchBtn:active {
            background-color: #2964bb;
        }
            .searchSpan{
                padding-left: 10px;
                padding-right: 10px;
                margin-top: 0px;
                margin-bottom: 0px;
                border-color: #b8b8b8;
                width: 40%;
                vertical-align: middle;
                display: inline-block;
                height: 34px;
                border: 1px solid #b6b6b6;
            }
                .searchText{
                font-size: 16px;
                width: 100%;
                margin-top: 5px;
                    outline: 0;
                border: 0;
            }

        dt{
            margin: 0px;
            padding: 0px;
            font-size: 16px;
            color: #303030;
            line-height: 24px;
            margin-top: 20px;
        }
        dd{
            margin: 0px;
            padding: 0px;
            font-size: 14px;
            line-height: 22px;
            color: #999999;

        }
        a{
            text-decoration: none;
        }
    .contentDiv{
            width: 800px;
            text-align: left;
            padding-bottom: 30px;

        }
        .contentDiv em{
            color: #CA0C16;
            font-style:normal;
        }
        .nextdiv{
      width: 50px;
      height: 50px;
          position: relative;
  }
 .next a:visited {
    text-decoration: none;
    color: #9B8878;
}
        </style>
        <script src="http://ajax.aspnetcdn.com/ajax/jQuery/jquery-1.8.0.js"></script>
<script >
String.prototype.replaceAll = function(s1,s2){
    return this.replace(new RegExp(s1,"gm"),s2);
}
$(document).ready(function(){
    var width =$(window).width();
    if(width<900){
        $(".searchSpan").css("width","50%")
        $(".searchBtn").css("width","20%")
        $("#contentDiv").css("width","80%")

    }
    else{
        $(".searchSpan").css("width","600px")
        $("#contentDiv").css("width","800px")
        $(".searchBtn").css("width","80px")
        $(".searchSpan").css("margin-left","-85px")
    }

    $('.searchText').bind('keydown',function(event){
        if(event.keyCode == "13") {
            openSearch(0);
        }
    });
});

    function openSearch(state){
        if(state!=null){
               $("#contentDiv").html("");
        }
        isLoad = true;
        $.ajax({
             type: "GET",
             url: "hello",
             data: {"key":$("#searchText").val()},
             dataType: "text",
             success: function(data){
                    alert(data);
             }

         });
    }


</script>
    </head>
    <body >
    <div align="center" style="margin-top: 30px;font-size: 24px;margin-left: -50px;"  >博客搜</div>
        <div align="center" style="margin-top: 20px;"  >
            <span class="searchSpan">
                <input type="text" id="searchText"
                 value="spring"
                class="searchText" /></span>

        <input type="submit" value="Search" id="su" class="searchBtn"
            onclick="openSearch(0)"
            ></input>
    </div>
    <div align="center">
    <div id="contentDiv" class="contentDiv" ></div>
    </div>

    </body>
</html>
别看只有一个简单的搜索框 弄了好久 好了 在浏览器 再次输入http://localhost:8881/ 可以看到一个类似某某搜索的
修改下Controller
@RestController
public class ClientController {
@RequestMapping(value ="/hello")
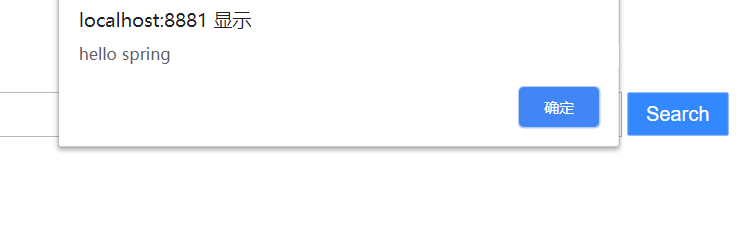
public String openSearch(@RequestParam("key") String key) {
return "hello "+key;
}
}