准备材料:
1.Micro SD卡
2.读卡器
3.网线
步骤:
1.下载Ubuntu Core: 到树莓派的官方下载地址进行下载。https://developer.ubuntu.com/core/get-started/raspberry-pi-2-3
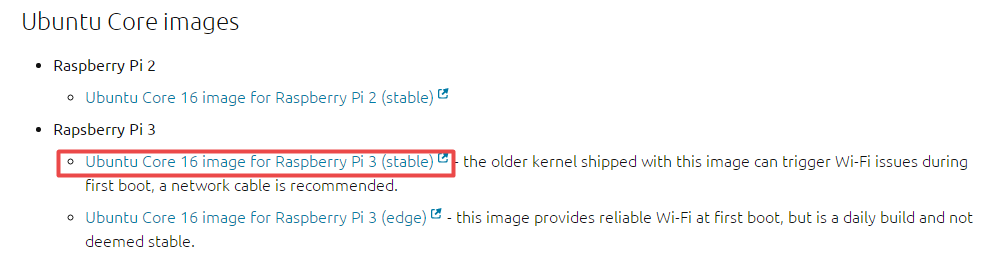
这里选择的是Ubuntu Core 16 image for Raspberry Pi3 (stable)版本;
2.下载完成之后,进行解压,生成img文件;


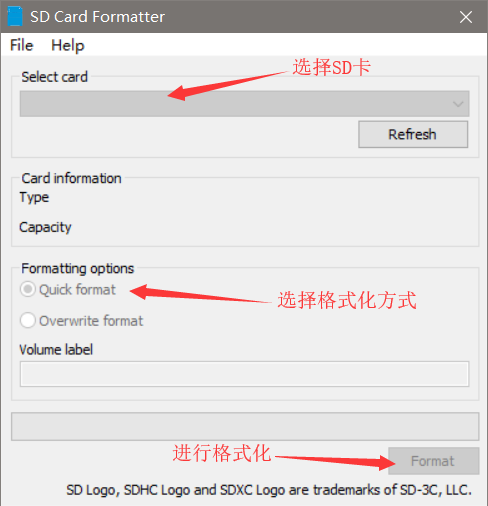
3.对MicroSD 卡进行格式化,使用SD Card Formatter软件;
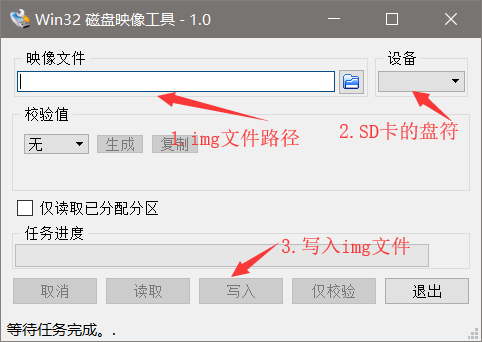
4.将img文件烧录到SD卡中,使用到Win32DiskImager软件;
5.烧录完成之后,退出SD卡,然后放到插入树莓派SD卡的卡座上,接上鼠标、键盘、网线和显示器,最后将树莓派通电,会自动进行初始化安装;
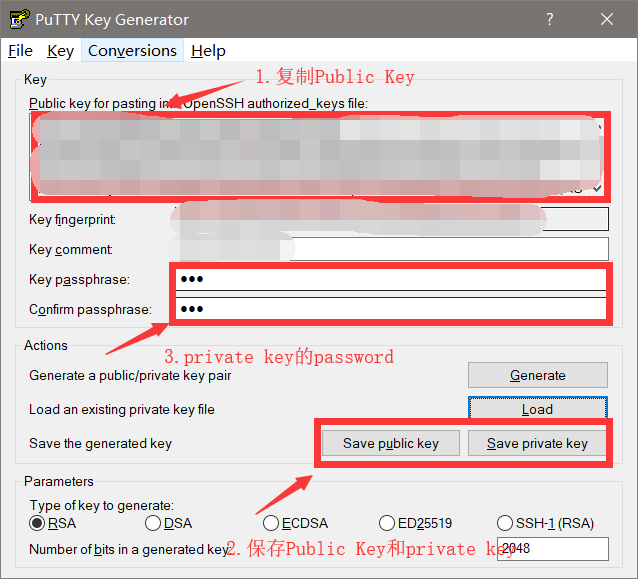
6.注册或登录Ubuntu One的账号,设置ssh key,登录网站为:https://login.ubuntu.com/:

7.设置SSH Key的方法:https://help.launchpad.net/YourAccount/CreatingAnSSHKeyPair,复制Public Key到第6步中打开的网页中,并点击”Import SSH Key"
8.在树莓派的显示界面输入第6步中注册的ubuntu one的邮箱账号,等待验证ssh key的设置是否正确;
验证成功之后会提示
“ To login:
ssh 用户名@树莓派的物理地址
Personalizer your account at https://login.ubuntu.com "
这样就完成对Ubuntu Core的安装。
9. 通过putty来登录,登录树莓派;


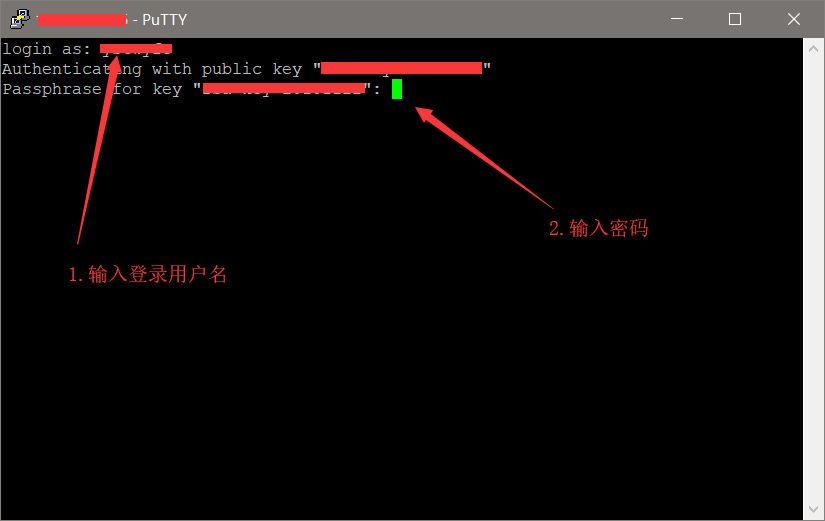
10.远程成功登录树莓派。

附录:
1.snapd学习网站:https://docs.snapcraft.io/getting-started/3876
2.launchpad官方网页:https://launchpad.net/
3.Ubuntu登录页面:https://login.ubuntu.com/