3.1 网络爬虫概述
3.1.1 网络爬虫及其应用
分类:通用,聚焦,增量,深层
搜索引擎:通用网咯爬虫
定向抓取相关网页中资源:聚焦爬虫
增量式爬虫:针对已经更新的网页资源
深层网络爬虫:隐藏在表层链接后面的web页面
网络爬虫实际运用场景:BT网站;云盘搜索;
3.1.2 网络爬虫结构

3.2 HTTP请求python实现
三种方式:urllib2/urllib,httplib/urllib以及Requests
3.2.1 urllib2/urllib实现
1.向指定的url发出请求:
import urlliib2
response = urllib2.urlopen('http://www.zhihu.com')
html = response.read()
print(html)
分解为请求和响应:
import urllib2
#请求
request = urllib2.Request('http://www.zhihu.com')
#响应
response = urllib2.urlopen(request)
html = response.read()
print(html)
POST请求,添加请求数据
import urllib
import urllib2
url = 'http://www.zhihu.com'
postdata = {'username','qiye','passward','qiye-pass'}
data = urllib.urlcode(poatdata)
req = urllib2.Request(url,data)
response = urllib2.urlopen(req)
html = response.read()
2.请求头headers处理
import urllib
import urllib2
url = 'http://www.zhihu.com'
user_agent = '...'
referer = '...'
postdata = {...}
#将user-agent和referer写入头信息
headers = {'User-Agent':user-agent,'Referer:referer}
data = urllib.urlcode(poatdata)
req = urllib2.Request(url,data,headers)
response = urllib2.urlopen(req)
html = response.read()
3.cookie处理
得到某个cookie项的值
import urllib2
import cookielib
cookie = cookielib.CookieJar()
#设置打开方式
opener = urllib2.build_opener(urllib2.HTTPCookieProcessor(cookie))
response = opener.open('...')
for item in cookie:
    print item.name+':'+item.value
#自己添加cookie内容
import urllib2
opener = urllib2.build_opener()
opener.addheaders.append(('Cookie','email='+"..."))
req = urllib2.Request("...")
response = opener.open(req)
print(response.headers)
retdata = response.read()
4.设置超时信息Timeout
import urllib2
request = urllib2.Request('...')
response = urllib2.urlopen(request,timeout=2)
html = response.read()
print(html)
5.获取HTTP响应码
import urllib2
try:
    response = urllib2.urlopen('...')
    print(response)
except urllib2.HTTPError as e:
    if hasattr(e,'code'):
        print('Error code:',e.code)
6.重定向
7.Proxy的设置

import urllib2
proxy = urllib2.ProxyHandler({'http': '127.0.0.1:8087'})
opener = urllib2.build_opener([proxy,])
urllib2.install_operner(opener)
response = urllib2.urlopen('...')
print(response.read())
3.2.2 http/urllib实现
httplib模块式一个底层模块,可以看到HTTP请求的每一步,在爬虫开发过程基本用不到,这里进行知识普及:

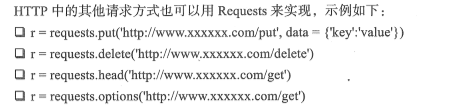
3.2.3 更人性化的Requests
1.完整请求响应模型
GET:
import requests
r = requests.get('...')
print(r.content)
POST:
import requests
postdata = {...}
r = requests.post('...',data=postdata)
print(r.content)
2.响应与编码
import requests
r = resquests.get('...')
print('content-->>'+r.content)
print('text-->>'+r.text)
print('encoding-->>'+r.encoding)
r.encoding = 'utf-8'
print('new text -->>'+r.text)
字符串/文件编码检测模块chardet
直接将chardet检测到的编码,赋值给r.encoding实现编码,r.text输出就不会有乱码
import requests
r = request.get('...')
print(chardet.detect(r.content))
r.encoding = chardet.detect(r.content)['encoding']
print(r.text)
3.请求头headers处理
import requests
user_agent = '...'
headers = {'User-Agent':user_agent}
r = requests.get('...',headers = headers)
print(r.content)
4.响应码code和响应头headers的处理
获取响应码:status_code字段
获取响应头:headers字段
import requests
r = requests.get('...')
if r.status_code == requests.codes.OK:
    print(r.status_code)#获取响应码
    print(r.headers)#获取响应头
    print(r.headers.get('content-type'))#获取其中字段
else:
    r.raise_for_status()#主动抛出异常
5.cookie处理
获取cookie字段
import requests
user_agent = '...'
headers = {'User-Agent':user-agent}
r = requests.get('...',headers = headers)
for cookie in r.cookie.keys():
    print(cookie+':'+r.cookie.get(cookie))
添加自定义cookie
import requests
user_agent = '...'
headers = {'User-Agent':user-agent}
cookies = dict(name='qiye',age='10')
r = requests.get('...',headers = headers,cookies = cookies)
print(r,text)
Requests提供session概念自动给程序添加cookies
import requests
loginurl = '...'
s = requests.Session()
#首先访问登陆界面作为游客,服务器会分配一个cookie
r = s.get(loginurl,allow_redirects=True)
datas = {'name':'qiye',apsswd':'qiye'}
#向登录链接发送post请求,验证成功,游客权限转为会员权限
r = s.post(loginurl,data,allow+True)
print(r,text)
6.重定向与历史信息
处理重定向:allow_redirects
查看历史信息:r.history
import requests
r = requests.get('...')
print(r.url)
print(r.status_code)
print(r.history)
7.超时设置
requests.get('...',timeout=2)
8.代理设置
import requests
proxies = {"....","......"}
requests.get("...",proxies = proxies)