个人程序如下:
链接: https://pan.baidu.com/s/1Yy0Dg9AOGntDIdb4VGle4A 提取码: zwv4
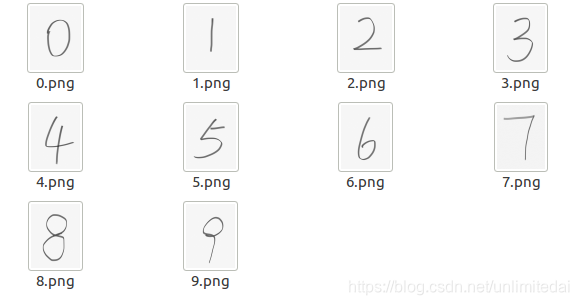
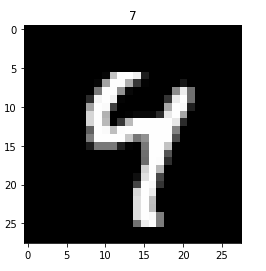
北大人工智能网课考试一是手写数字体识别,与常见的入门题目唯一的区别是我们需要再读入老师手写的图片进行识别。编写一下读取普通图片的程序带入模型即可。
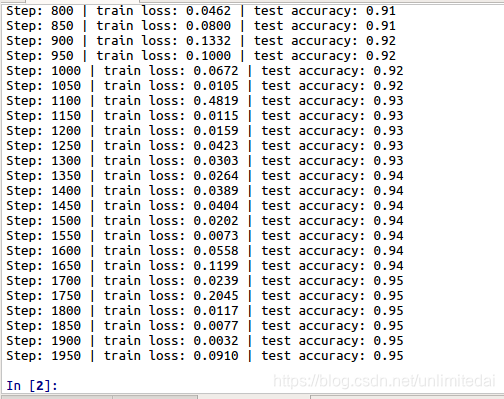
由于老师的程序学习率给的很低,所以运行老师的程序你会发现速度非常慢。我将学习率提高了十倍,也能在几分钟内达到94%识别率,所以我认为这类简单识别可以使用千分之一的学习率,当然变学习率也是可行的。
之后把模型从一般的CNN变成lenet5准确度下降到了83%,果然卷积核个数与大小确实对系统影响很大。
使用储存模型加调用模型编写程序。
程序如下:
import tensorflow as tf
from tensorflow.examples.tutorials.mnist import input_data
import numpy as np
import matplotlib.pyplot as plt
import os
from PIL import Image

BATCH_SIZE = 50
learning_rate = 0.001

def get_real_test():
    file_dir = '/home/emin/Temp/Tensorflow/num1'
    image_list = []
    label_list = []
    for file in os.listdir(file_dir):
        image_list.append(file_dir + '/' +file)
        label_list.append(int(file[0]))
    for i in range(0,10):
        image1 = Image.open(image_list[i])
        image1 = image1.resize([28, 28])
        plt.imshow(image1)
        images1 = np.array(image1)[:,:,0]
        images1=images1.astype(float)
        img = images1.reshape(1,784)
        if i==0:
            img_last=img
        else:
            img_last=np.vstack((img_last,img))
    print(label_list, 'real number')
    return img_last

def train():
    mnist = input_data.read_data_sets('/home/emin/Temp/Tensorflow/Me/lenet5/data', one_hot=True)  # they has been normalized to range (0,1)

    test_x = mnist.test.images[:2000]
    test_y = mnist.test.labels[:2000]
    tf_x = tf.placeholder(tf.float32, [None, 28*28]) / 255.
    image = tf.reshape(tf_x, [-1, 28, 28, 1])
    tf_y = tf.placeholder(tf.int32, [None, 10])

    conv1 = tf.layers.conv2d(image, 32, 5, 1, 'same', activation=tf.nn.relu)
    pool1 = tf.layers.max_pooling2d(conv1, 2, 2)
    conv2 = tf.layers.conv2d(pool1, 64, 5, 1, 'same', activation=tf.nn.relu)
    pool2 = tf.layers.max_pooling2d(conv2, 2, 2)
    flat = tf.reshape(pool2, [-1, 7*7*64])
    output = tf.layers.dense(flat, 10)

    loss = tf.losses.softmax_cross_entropy(onehot_labels=tf_y, logits=output)           # compute cost
    train_op = tf.train.AdamOptimizer(learning_rate).minimize(loss)

    accuracy = tf.metrics.accuracy(          # return (acc, update_op), and create 2 local variables
        labels=tf.argmax(tf_y, axis=1), predictions=tf.argmax(output, axis=1),)[1]

    sess = tf.Session()
    init_op = tf.group(tf.global_variables_initializer(), tf.local_variables_initializer()) # the local var is for accuracy_op
    sess.run(init_op)     # initialize var in graph
    saver = tf.train.Saver()
    for step in range(1000):
        b_x, b_y = mnist.train.next_batch(BATCH_SIZE)
        _, loss_ = sess.run([train_op, loss], {tf_x: b_x, tf_y: b_y})
        if step % 50 == 0:
            accuracy_, flat_representation = sess.run([accuracy, flat], {tf_x: test_x, tf_y: test_y})
            print('Step:', step, '| train loss: %.4f' % loss_, '| test accuracy: %.2f' % accuracy_)
    saver.save(sess, "my_net/save_net.ckpt")

def test():
    tf_x = tf.placeholder(tf.float32, [None, 28*28]) / 255.
    image = tf.reshape(tf_x, [-1, 28, 28, 1])
    conv1 = tf.layers.conv2d(image, 32, 5, 1, 'same', activation=tf.nn.relu)
    pool1 = tf.layers.max_pooling2d(conv1, 2, 2)
    conv2 = tf.layers.conv2d(pool1, 64, 5, 1, 'same', activation=tf.nn.relu)
    pool2 = tf.layers.max_pooling2d(conv2, 2, 2)
    flat = tf.reshape(pool2, [-1, 7*7*64])
    output = tf.layers.dense(flat, 10)
    sess = tf.Session()
    saver = tf.train.Saver()
    saver.restore(sess, "my_net/save_net.ckpt")
    test_output = sess.run(output, {tf_x: get_real_test()})
    pred_y = np.argmax(test_output, 1)
    print(pred_y, 'prediction number')

def main():                         # first train then restart your program and test
    train()
#    test()

if __name__ == '__main__':
    main()
主要就是三个方面,一是提取老师手写图片的子函数,二是使用训练和测试集进行训练,并将网络结构储存的函数,三是调用储存的网络结构,进行老师的手写体识别。
然而对于老师的手写体识别准确度极低:
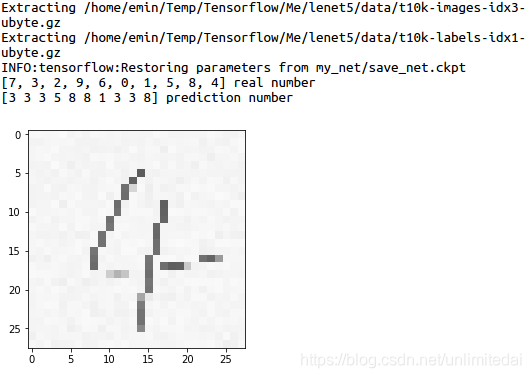
就对了两个,然而对于手写体自己的训练集和测试集,准确度倒是非常高。
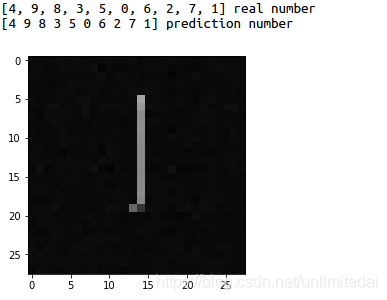
所以我决定自己写一些相对字体较粗的数字进行测试。

稍微好一点。但是这个准确度还是太惨了。所以问题出在程序呢?还是图像压缩的处理呢?
我决定先从图像压缩的处理开始。使用了各种滤波方法:
https://blog.csdn.net/guduruyu/article/details/71404941
加上以前经验,决定还是中值滤波好。然而对准确率没有什么用。
然后我进行了在测试集准确度为90%时的实验,很遗憾,我手写的数字识别准确度也只有10%,很神奇,测试集准确度差了5%,我手写数字识别的准确度竟然从50%下降到10%。
同时如果图像集中只有3, 2, 5, 3, 1这五张及其复制,无论如何准确度都是百分之百,说明影响准确度的变量是图片本身问题。
之后我看了一下训练集的图像(把一组784个元素提出来,之后reshape一下),我恍然大悟。
我们的字体色黑和背景色白,而训练和测试集刚好相反!
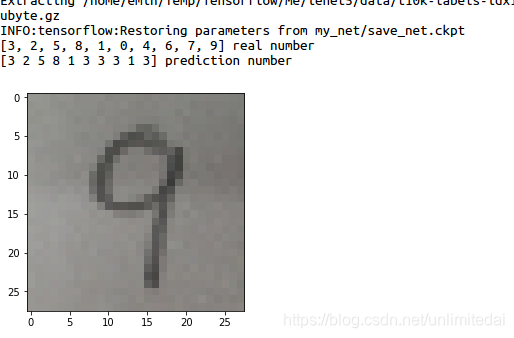
好的,我们反色一下。由于老师的图像是四通道的png图像,所以无法直接用PIL.ImageOps反色,要先储存成jpg然后反色。
import os
from PIL import Image
import PIL.ImageOps
file_dir = '/home/emin/Temp/Tensorflow/num'
image_list = []
label_list = []
for file in os.listdir(file_dir):
    image_list.append(file_dir + '/' +file)
    label_list.append((file[0]))
for i in range(0,10):
    image1 = Image.open(image_list[i])
    image1.save('/home/emin/Temp/Tensorflow/num1/' + label_list[i]+ '.jpg')
file_dir1 = '/home/emin/Temp/Tensorflow/num1'
image_list1 = []
label_list1 = []
for file in os.listdir(file_dir1):
    image_list1.append(file_dir1 + '/' +file)
    label_list1.append((file[0]))
for i in range(0,10):
    image1 = Image.open(image_list1[i])
    inverted_image = PIL.ImageOps.invert(image1)
    inverted_image.save('/home/emin/Temp/Tensorflow/num1/' + label_list1[i]+ '.jpg')
先实我的手写体。

我手写的准确度还是那样。
再看老师的。
老师手写的反色后,准确度百分之百,这验证了对于简单的图像识别,神经网络任然是靠颜色对图片进行识别,相反的颜色同样的形状可能是0%与100%准确度的差距。