编写Eureka Server
1.创建一个ArtifactId是microservice-descovery-eureka的Maven工程,并为项目添加以下依赖。
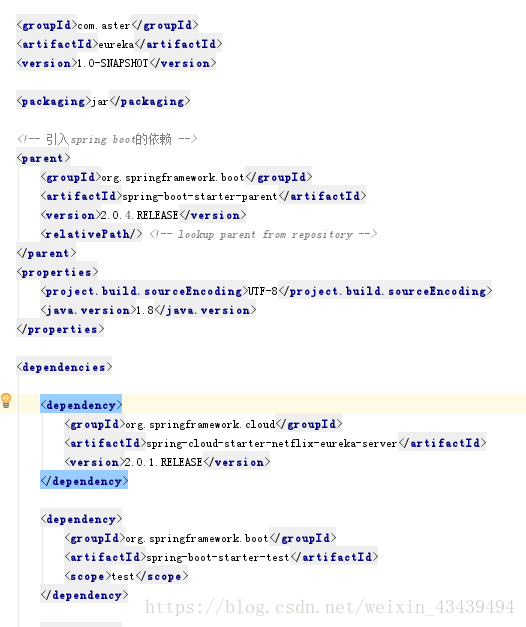
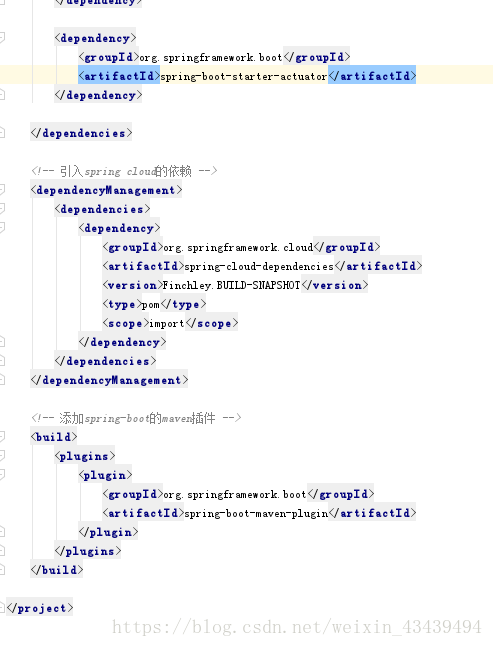
并且在之前的项目内pom.xml添加
org.springframework.cloud
spring-cloud-starter-netflix-eureka-client
2.0.1.RELEASE
2.在配置文件application.yml中添加以下内容。
server:
    port: 8761          #指定该Eureka实例的端口
spring:
    application:
        name: microservice-provider-user
    cloud:
        inetutils:
            ignored-interfaces:  #对于服务发现注册,忽略某些命名的网络接口是非常有用的,比如使用Docker容器的时候。可以通过一些规则设置来忽略这些网络接口 https://springcloud.cc/spring-cloud-dalston.html
            - docker0 #忽略“docker0”的入口
            - veth.* #忽略所有的入口以“veth.*”

eureka:
    server:
        enableSelfPreservation: false #关闭自我保护
        eviction-interval-timer-in-ms: 10000 #剔除已关停服务间隔(单位毫秒,默认是60*1000)
    instance:
        lease-expiration-duration-in-seconds: 30 #1
        lease-renewal-interval-in-seconds: 10 #2
        prefer-ip-address: true #3
        #ip-address: 192.168.0.xxx //4
        hostname: localhost
    client:
        register-with-eureka: false
        fetch-registry: false
        service-url:
            defaultZone: http://127.0.0.1:8761/eureka/
还要在application.yml内添加client.defaultZone
注意是http不用加s
spring.application.name是Application的名字
3.编写启动类,在启动类商添加@EnableDiscoveryClient注解,声明这是一个Eureka Client。也可以使用@EnableEurekaClient注解代替@EnableDiscoveryClient。
@EnableEurekaServer
@SpringBootApplication
public class EurekaApplication {
    public static void main(String[] args){
        SpringApplication.run( EurekaApplication.class, args);
    }
}
4.测试
5.1 启动microservice-discovery-eureka
5.2 启动microservice-provider-user
5.3 启动microservice-consumer-movie
5.4 访问http://localhost:8761/

microservice-provider-user:https://blog.csdn.net/weixin_43439494/article/details/83213744
microservice-consumer-movie: https://blog.csdn.net/weixin_43439494/article/details/83268572
本文大部分内容转载自周立的《Spring Cloud与Docker微服务架构实战》