OpenLayers + 天地图矢量地图 + 天地图矢量注记 + Geoserver WMS服务
1:代码
<!DOCTYPE html
>
<
html
lang=
"en"
>
<
head
>
<
meta
charset=
"UTF-8"
>
<
meta
name=
"viewport"
content=
"width=device-width, initial-scale=1.0"
>
<
meta
http-equiv=
"X-UA-Compatible"
content=
"ie=edge"
>
<
title
>openlayers
</
title
>
<
link
rel=
"stylesheet"
href=
"https://openlayers.org/en/v4.6.5/css/ol.css"
type=
"text/css"
>
<
script
src=
"https://openlayers.org/en/v4.6.5/build/ol.js"
type=
"text/javascript"
>
<
/
script
>
<
style
>
.map {
position:
absolute;
width:
100%;
height:
100%;
}
<
/
style
>
<
script
>
function
onLoad() {
var
layers = [
new
ol.
layer.
Tile({
title:
"天地图矢量经纬度底图",
source:
new
ol.
source.
XYZ({
url:
"http://t0.tianditu.com/DataServer?T=vec_c&x={x}&y={y}&l={z}"
})
})
];
var
map =
new
ol.
Map({
layers:
layers,
target:
'map',
view:
new
ol.
View({
projection:
'EPSG:4326',
center: [
116.38,
39.93],
zoom:
5
}),
controls:
ol.
control.
defaults({
attributionOptions: {
collapsible:
false
}
})
});
var
tianditu_cva_c =
new
ol.
layer.
Tile({
title:
"天地图经纬度矢量注记",
source:
new
ol.
source.
XYZ({
url:
'http://t0.tianditu.com/DataServer?T=cva_c&x={x}&y={y}&l={z}'
})
});
map.
addLayer(
tianditu_cva_c);
var
geoserver_wms =
new
ol.
layer.
Tile({
source:
new
ol.
source.
TileWMS({
url:
'http://192.9.104.68:8080/geoserver/test/wms',
params: {
'LAYERS'
:
'test:shengjie',
//此处可以是单个图层名称,也可以是图层组名称,或多个图层名称
'TILED'
:
false
},
serverType:
'geoserver'
//服务器类型
})
});
map.
addLayer(
geoserver_wms);
}
<
/
script
>
</
head
>
<
body
onload=
'onLoad()'
>
<
div
id=
'map'
></
div
>
</
body
>
</
html
>
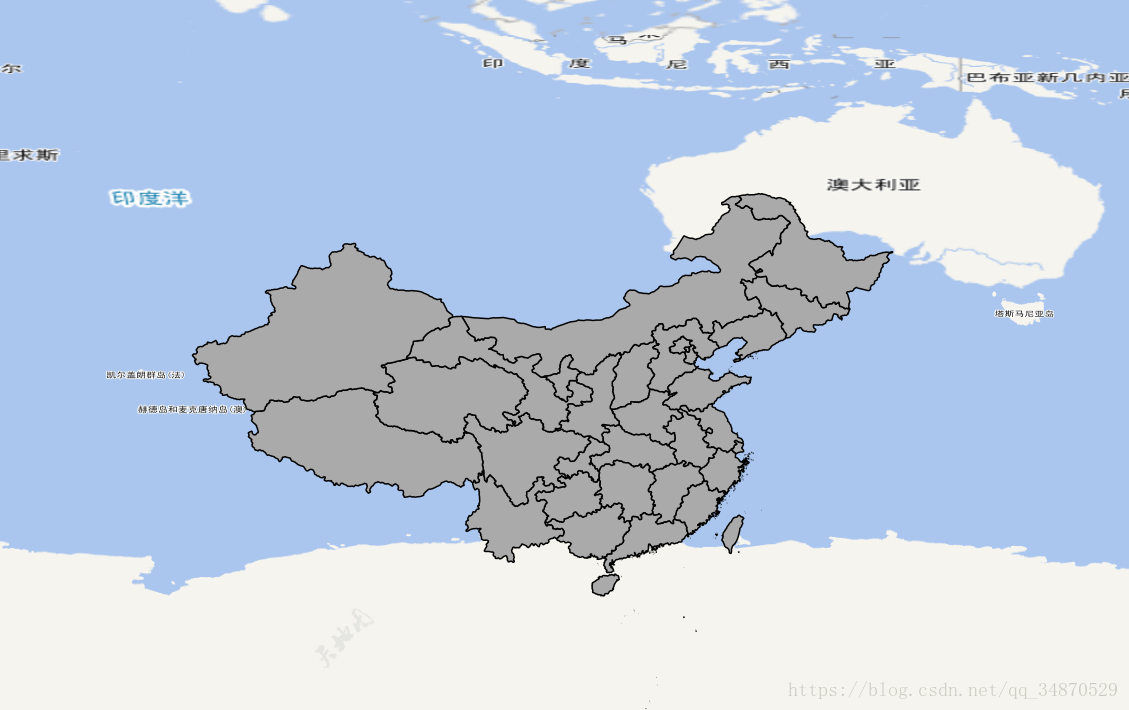
2:效果展示
3:备注
1).基于OpenLayers前端框架,首先添加天地图矢量地图及矢量注记,然后再叠加geoserverWMS服务
2).考虑到图层的覆盖问题,应注意图层的叠加顺序,天地图矢量地图-天地图矢量注记-geoserverWMS服务
3).此处天地图瓦片及geoserverWMS服务坐标系为EPSG:4326与openlayers不同,所以此处效果图位置有偏移。