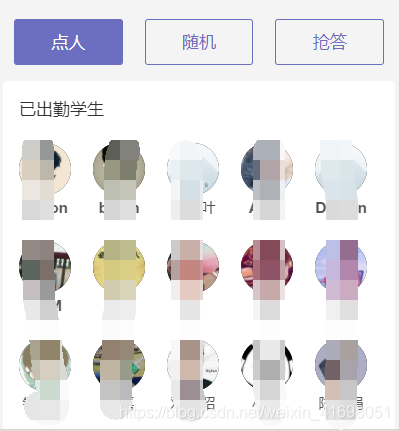
如图所示一个,具体步骤如下:
一、wxml部分
<view class="swiper-tab">
  <view class="swiper-tab-item {{currentTab==0?'active':''}}" data-current="0" bindtap="clickTab">点人</view>
  <view class="swiper-tab-item {{currentTab==1?'active':''}}" data-current="1" bindtap="clickTab">随机</view>
  <view class="swiper-tab-item {{currentTab==2?'active':''}}" data-current="2" bindtap="clickTab">抢答</view>
</view>

<swiper class='swiper-box' current="{{currentTab}}" duration="300" bindchange="swiperTab" style="height:{{aheight}}rpx">
  <swiper-item>
    <view class='box1'>
      <view class='box1-title'>
        <text>已出勤学生</text>
      </view>
      <view class='box1-content'>
        <view class='box1-list' wx:for="{{students}}" wx:key="index" wx:for-item="item" data-studentId="{{item.Id}}" bindtap='askAnswer'>
          <image src='{{item.src}}'></image>
          <text>{{item.name}}</text>
        </view>
      </view>
    </view>
  </swiper-item>
  <swiper-item>
    <view class='box2' bindtap='random'>随机点人</view>
  </swiper-item>
  <swiper-item>
    <view class='box3' bindtap='rushAnswer'>{{btnRush}}</view>
  </swiper-item>
</swiper>
二、js部分
const app = getApp().globalData;
Page({
  data: {
    currentTab: 0,
    students: [{   //假数据
      url: '1.jpg',
      name: '老王'
    }, {
        url: '1.jpg',
        name: '老王'
      }, {
        url: '1.jpg',
        name: '老王'
      }, {
        url: '1.jpg',
        name: '老王'
      }, {
        url: '1.jpg',
        name: '老王'
      }, {
        url: '1.jpg',
        name: '老王'
      }, {
        url: '1.jpg',
        name: '老王'
      }, {
        url: '1.jpg',
        name: '老王'
      }, {
        url: '1.jpg',
        name: '老王'
      }, {
        url: '1.jpg',
        name: '老王'
      }]
  },

  //滑动切换
  swiperTab: function (e) {
    var that = this;
    that.setData({
      currentTab: e.detail.current
    });
  },
  //点击切换模式
  clickTab: function (e) {
    var that = this;
    if (that.data.currentTab === e.target.dataset.current) {
      return false;
    } else {
      app.zzcx.PointRemoteMode({ //发送模式切换指令
        data: {
          ClassroomId: that.data.rId,
          mode: e.currentTarget.dataset.current
        },
        success: (res) => {
          that.setData({
            currentTab: e.currentTarget.dataset.current
          })
        }
      });
    }
  },
  loadData: function () {
  },
  onLoad: function (options) {
  },
})
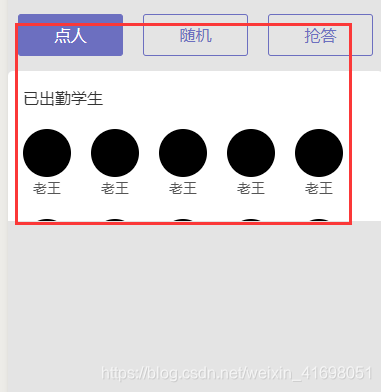
现在呈现的效果就是如上图所示,但是高度是swiper组件的默认150px,无法撑开高度,这个时候就要去计算高度并赋值给swiper。
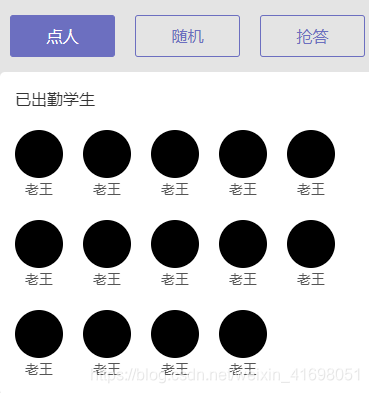
三、swiper自适应高度
在js部分添加:
  onLoad: function(options) {
    var line = Math.ceil(this.data.students.length / 5.0);
    this.setData({
      aheight: 105 + 180 * line
    });
  },
顺便附上wxss样式
.swiper-tab {
  display: flex;
  margin-top: 60rpx;
}

.swiper-tab-item {
  flex: 1;
  height: 80rpx;
  line-height: 80rpx;
  text-align: center;
  border: 1px solid #6c6fc0;
  border-radius: 3px;
  color: #6c6fc0;
  font-size: 32rpx;
  margin: 0 20rpx;
}

.active {
  color: #fff;
  background: #6c6fc0;
}

.swiper-box {
  margin: 30rpx 0;
  box-sizing: border-box;
}