Nginx运维之二 简单安装和环境配置
安装环境
gcc 安装
安装 nginx 需要先将官网下载的源码进行编译,编译依赖 gcc 环境,如果没有 gcc 环境,则需要安装。
yum install gcc-c++
PCRE pcre-devel 安装
PCRE(Perl Compatible Regular Expressions) 是一个Perl库,包括 perl 兼容的正则表达式库。nginx 的 http 模块使用 pcre 来解析正则表达式,所以需要在 linux 上安装 pcre 库,pcre-devel 是使用 pcre 开发的一个二次开发库。nginx也需要此库。命令:
yum install -y pcre pcre-devel
zlib 安装
zlib 库提供了很多种压缩和解压缩的方式, nginx 使用 zlib 对 http 包的内容进行 gzip ,所以需要在 Centos 上安装 zlib 库。
yum install -y zlib zlib-devel
OpenSSL 安装
OpenSSL 是一个强大的安全套接字层密码库,囊括主要的密码算法、常用的密钥和证书封装管理功能及 SSL 协议,并提供丰富的应用程序供测试或其它目的使用。
nginx 不仅支持 http 协议,还支持 https(即在ssl协议上传输http),所以需要在 Centos 安装 OpenSSL 库。
yum install -y openssl openssl-devel
下载安装
创建安装目录
mkdir -p /usr/local/nginx && cd /usr/local/nginx
下载Nginx稳定版下载地址
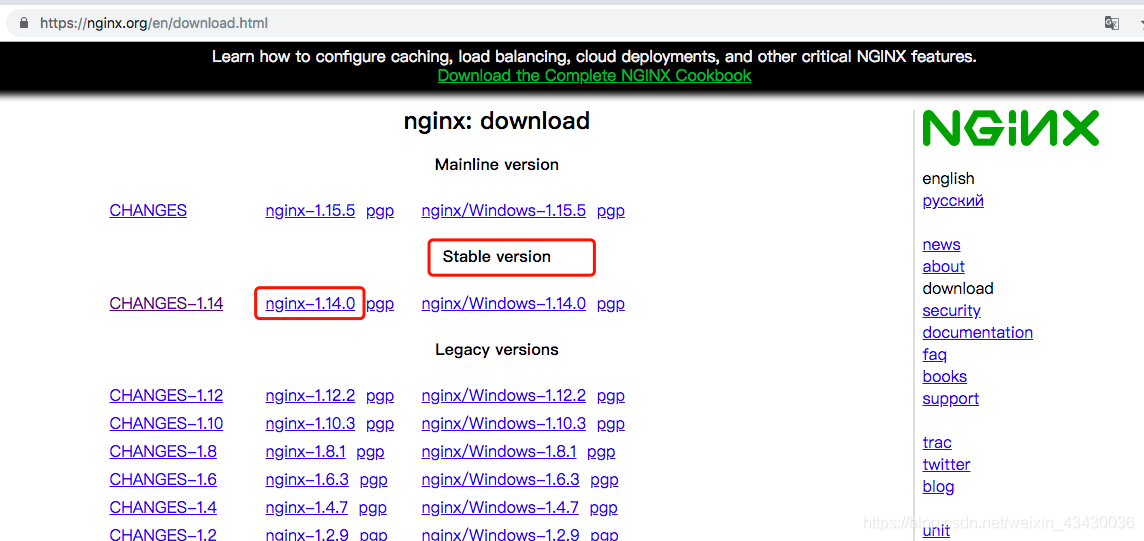
wget -c https://nginx.org/download/nginx-1.14.0.tar.gz
解压
tar -zxvf nginx-1.14.0.tar.gz
移动到安装目录
cd nginx-1.14.0 && mv * .. && cd .. && rm -rf nginx-1.14.0
配置安装
其实在 nginx-1.10.1 及以后的版本中你就不需要去配置相关东西,默认就可以了。当然,如果你要自己配置目录也是可以的。
1.使用默认配置
./configure
2.自定义配置(不推荐)
创建相关目录
mkdir -p /var/log/nginx && mkdir -p /var/temp/nginx
配置
./configure \
--prefix=/usr/local/nginx \
--conf-path=/usr/local/nginx/conf/nginx.conf \
--pid-path=/usr/local/nginx/conf/nginx.pid \
--lock-path=/var/lock/nginx.lock \
--error-log-path=/var/log/nginx/error.log \
--http-log-path=/var/log/nginx/access.log \
--with-http_gzip_static_module \
--http-client-body-temp-path=/var/temp/nginx/client \
--http-proxy-temp-path=/var/temp/nginx/proxy \
--http-fastcgi-temp-path=/var/temp/nginx/fastcgi \
--http-uwsgi-temp-path=/var/temp/nginx/uwsgi \
--http-scgi-temp-path=/var/temp/nginx/scgi
此时都可以看到系统最终配置信息如下:
Configuration summary
  + using system PCRE library
  + OpenSSL library is not used
  + using system zlib library

  nginx path prefix: "/usr/local/nginx"
  nginx binary file: "/usr/local/nginx/sbin/nginx"
  nginx modules path: "/usr/local/nginx/modules"
  nginx configuration prefix: "/usr/local/nginx/conf"
  nginx configuration file: "/usr/local/nginx/conf/nginx.conf"
  nginx pid file: "/usr/local/nginx/conf/nginx.pid"
  nginx error log file: "/var/log/nginx/error.log"
  nginx http access log file: "/var/log/nginx/access.log"
  nginx http client request body temporary files: "/var/temp/nginx/client"
  nginx http proxy temporary files: "/var/temp/nginx/proxy"
  nginx http fastcgi temporary files: "/var/temp/nginx/fastcgi"
  nginx http uwsgi temporary files: "/var/temp/nginx/uwsgi"
  nginx http scgi temporary files: "/var/temp/nginx/scgi"
编译安装
make && make install
此时,可能遇到下面的配置错误信息
test -d '/usr/local/nginx' || mkdir -p '/usr/local/nginx'
test -d '/usr/local/nginx/sbin' \
	|| mkdir -p '/usr/local/nginx/sbin'
test ! -f '/usr/local/nginx/sbin/nginx' \
	|| mv '/usr/local/nginx/sbin/nginx' \
		'/usr/local/nginx/sbin/nginx.old'
cp objs/nginx '/usr/local/nginx/sbin/nginx'
test -d '/usr/local/nginx/conf' \
	|| mkdir -p '/usr/local/nginx/conf'
cp conf/koi-win '/usr/local/nginx/conf'
cp: ‘conf/koi-win’ and ‘/usr/local/nginx/conf/koi-win’ are the same file
make[1]: *** [install] Error 1
make[1]: Leaving directory `/usr/local/nginx'
make: *** [install] Error 2
如果遇到了,可以改一下默认conf文件的路径来解决
./configure \
--prefix=/usr/local/nginx \
--conf-path=/usr/local/nginx/nginx.conf \
--pid-path=/usr/local/nginx/conf/nginx.pid \
--lock-path=/var/lock/nginx.lock \
--error-log-path=/var/log/nginx/error.log \
--http-log-path=/var/log/nginx/access.log \
--with-http_gzip_static_module \
--http-client-body-temp-path=/var/temp/nginx/client \
--http-proxy-temp-path=/var/temp/nginx/proxy \
--http-fastcgi-temp-path=/var/temp/nginx/fastcgi \
--http-uwsgi-temp-path=/var/temp/nginx/uwsgi \
--http-scgi-temp-path=/var/temp/nginx/scgi
然后重新编译安装
make && make install
配置编辑(案例)
vim /usr/local/nginx/conf/nginx.conf
参考以下配置,具体配置信息后续说明
user  nobody;
worker_processes 2; #依据系统核心数
worker_rlimit_nofile 65536;
pid        /usr/local/nginx/conf/nginx.pid;
error_log  /var/log/nginx/error.log  info;

events
{
        use epoll;
        worker_connections 65536;
}

http
{
       log_format main '$http_x_real_ip - $remote_addr - $remote_user [$time_local] "$request" '
                               '$status $body_bytes_sent "$http_referer" '
                               '"$http_user_agent" $http_x_forwarded_for'
                               ' "$request_time"';

        include       mime.types;
        default_type  application/octet-stream;

        server_names_hash_bucket_size 128;
        client_header_buffer_size 128k;
        large_client_header_buffers 4 128k;
        client_max_body_size 100m;

        sendfile on;
        tcp_nopush     on;

        keepalive_timeout 600s;

        tcp_nodelay on;

        fastcgi_connect_timeout 600s;
        fastcgi_send_timeout 600s;
        fastcgi_read_timeout 600s;
        fastcgi_buffer_size 128k;
        fastcgi_buffers 8 128k;
        fastcgi_busy_buffers_size 256k;
        fastcgi_temp_file_write_size 256k;

        gzip on;
        gzip_min_length  1k;
        gzip_buffers     4 16k;
        gzip_http_version 1.0;
        gzip_comp_level 2;
        gzip_types       text/plain application/x-javascript text/css application/xml application/json;
        gzip_vary on;

        # 加载sites-enabled下所有的站点配置
        include /usr/local/nginx/sites-enabled/*.conf;

}
新建站点配置
mkdir -p /usr/local/nginx/sites-enabled
新建默认站点
vim /usr/local/nginx/sites-enabled/default.conf
假设你想将所有的静态文件防止到/static目录下
新建静态资源目录
mkdir /static
配置信息如下:
upstream apiexample {
     server 103.1.248.230:8080;
     server 104.25.253.107:8080;
}

    server {
        listen       80;
        server_name 118.1118.118.118  localhost www.example.cn examle.cn;

        charset utf-8;
        access_log  /var/logs/nginx/access_example.log  main;

       #定义静态资源位置
        location / {
            root   /static;
            index  index.html index.htm;
        }

        location ^~ /example/ {
            proxy_set_header   Host    $host;
            proxy_set_header   X-Real-IP   $remote_addr;
            proxy_set_header   REMOTE-HOST $remote_addr;
            proxy_set_header   X-Forwarded-For $proxy_add_x_forwarded_for;
            proxy_pass   http://apiexample;
            client_max_body_size    10m;
        }
        error_page  404              /404.html;

        # redirect server error pages to the static page /50x.html
        error_page   500 502 503 504  /50x.html;
        location = /50x.html {
            root   /static;
        }
}
启动与停止
配置并启动
#-c 指定使用的配置文件
/usr/local/nginx/sbin/nginx -c /usr/local/nginx/conf/nginx.conf
# -t 检查配置信息是否有误
/usr/local/nginx/sbin/nginx -t
# -s 启动Nginx
/usr/local/nginx/sbin/nginx -s reload
停止
#此方式停止步骤是待nginx进程处理任务完毕进行停止。
/usr/local/nginx/sbin/nginx -s quit
#此方式相当于先查出nginx进程id再使用kill命令强制杀掉进程。
/usr/local/nginx/sbin/nginx -s stop
其他支持参数
# nginx version: nginx/1.14.0(版本查看)
/usr/local/nginx/sbin/nginx -v
# configure arguments: --prefix=/usr/local/nginx ...查看配置参数
/usr/local/nginx/sbin/nginx -V
nginx控制信号
可以使用信号系统来控制主进程。默认,nginx 将其主进程的 pid 写入到 /usr/local/nginx/nginx.pid 文件中。通过传递参数给 ./configure 或使用 pid 指令,来改变该文件的位置。
主进程可以处理以下的信号:
| 信号 | 说明 |
|---|---|
| TERM, INT | 快速关闭 |
| QUIT | 从容关闭 |
| HUP | 重载配置,用新的配置开始新的工作进程,从容关闭旧的工作进程 |
| USR1 | 重新打开日志文件 |
| USR2 | 平滑升级可执行程序。 |
| WINCH | 从容关闭工作进程 |
例如:
nginx从容停止命令,等所有请求结束后关闭服务
#查看进程
ps -ef |grep nginx

kill -QUIT  nginx主进程号
nginx 快速停止命令,立刻关闭nginx进程
#查看进程
ps -ef |grep nginx

kill -TERM nginx主进程号
开机自启动
即在rc.local增加启动代码就可以了。
vi /etc/rc.local
增加一行
/usr/local/nginx/sbin/nginx
设置执行权限:
chmod 755 rc.local