版权声明:未经本人允许严禁转载 https://blog.csdn.net/WanJiaBaoBao/article/details/83181567
搭建环境
- 关闭防火墙、selinux
- 所需包下载地址:
mysql下载地址 https://downloads.mysql.com/archives/get/file/mysql-5.7.22-linux-glibc2.12-x86_64.tar.gz
php下载地址:http://cn2.php.net/distributions/php-7.2.10.tar.xz
nginx下载地址:http://nginx.org/download/nginx-1.12.2.tar.gz - 服务器地址:192.168.92.128,所用域名:www.baibai.com
搭建步骤
- 下载网络源,下载架构所需安装包
[root@localhost mysql]# curl -o /etc/yum.repos.d/CentOS-Base.repo http://mirrors.aliyun.com/repo/Centos-7.repo
  % Total    % Received % Xferd  Average Speed   Time    Time     Time  Current
                                 Dload  Upload   Total   Spent    Left  Speed
100  2523  100  2523    0     0   1102      0  0:00:02  0:00:02 --:--:--  1103
[root@localhost mysql]# sed -i 's/$releasever/7/g' /etc/yum.repos.d/CentOS-Base.repo
[root@localhost ~]# wget https://downloads.mysql.com/archives/get/file/mysql-5.7.22-linux-glibc2.12-x86_64.tar.gz
[root@localhost ~]# wget http://cn2.php.net/distributions/php-7.2.10.tar.xz
[root@localhost ~]# wget http://nginx.org/download/nginx-1.12.2.tar.gz
- 解压包,将mysql二进制包解压到/usr/local/目录下
[root@localhost ~]# tar -zxf mysql-5.7.22-linux-glibc2.12-x86_64.tar.gz -C /usr/local
[root@localhost ~]# tar -Jxf php-7.2.10.tar.xz
[root@localhost ~]# tar -zxf nginx-1.12.2.tar.gz
安装mysql
- 创建mysql用户和组
[root@localhost local]# groupadd -r -g 306 mysql
[root@localhost local]# useradd -r -M -s /sbin/nologin -g 306 mysql
- 进入/usr/local/目录,给mysql-5.7.22-linux-glibc2.12-x86_64做软链接,将mysql软链接的属主和属组改为mysql
[root@localhost local]# ln -s mysql-5.7.22-linux-glibc2.12-x86_64/ mysql
[root@localhost local]# chown -R mysql.mysql mysql
- 进入mysql链接目录,将环境变量写入/etc/profile.d/目录下
[root@localhost mysql]# echo "export PATH=/usr/local/mysql/bin:$PATH" > /etc/profile.d/mysql.sh
[root@localhost mysql]# . /etc/profile.d/mysql.sh
[root@localhost mysql]# echo $PATH
/usr/local/mysql/bin:/usr/local/sbin:/usr/local/bin:/usr/sbin:/usr/bin:/root/bin
- 将lib目录中的库文件写入/etc/ld.so.conf.d/目录下,并读取库文件
[root@localhost mysql]# echo "/usr/local/mysql/lib/" > /etc/ld.so.conf.d/mysql.conf
[root@localhost mysql]# ldconfig -v
- 建立数据存放目录并修改属主和属组
[root@localhost mysql]# mkdir /opt/data
[root@localhost mysql]# chown -R mysql.mysql /opt/data
- 数据库初始化,密码为 “pdU4+tG3imEL”(初始密码,密码在最后一行)
[root@localhost mysql]# mysqld --initialize --user=mysql --datadir=/opt/data
2018-10-19T11:27:42.038474Z 1 [Note] A temporary password is generated for root@localhost: pdU4+tG3imEL
- 修改/etc/my.cnf配置文件
[root@localhost mysql]# cat > /etc/my.cnf <<EOF

> [mysqld]
> basedir = /usr/local/mysql
> datadir = /opt/data
> socket = /tmp/mysql.sock
> port = 3306
> pid-file = /opt/data/mysql.pid
> user = mysql
> skip-name-resolve
> EOF
- 配置服务启动文件
[root@localhost mysql]# cp -a support-files/mysql.server /etc/init.d/mysqld
[root@localhost mysql]# sed -ri 's#^(basedir=).*#\1/usr/local/mysql#g' /etc/init.d/mysqld
[root@localhost mysql]# sed -ri 's#^(datadir=).*#\1/opt/data#g' /etc/init.d/mysqld
- 启动mysqld服务
[root@localhost mysql]# service mysqld start
Starting MySQL.Logging to '/opt/data/localhost.localdomain.err'.
 SUCCESS!
 [root@localhost mysql]# ss -ntlp
State       Recv-Q Send-Q   Local Address:Port    Peer Address:Port
LISTEN      0      80                  :::3306              :::*      users:(("mysqld",10157,20)
安装php
- 安装依赖
[root@localhost ~]# yum -y install libxml2 libxml2-devel openssl openssl-devel bzip2 bzip2-devel libcurl libcurl-devel libjpeg libjpeg-devel libpng libpng-devel freetype freetype-devel gmp gmp-devel libmcrypt libmcrypt-devel readline readline-devel libxslt libxslt-devel mhash mhash-devel gcc gcc-c++
- 进入目录进行编译安装php
[root@localhost ~]# cd php-7.2.10
[root@localhost php-7.2.10]# ./configure --prefix=/usr/local/php7 \
--with-curl \
--with-freetype-dir \
--with-gd \
--with-gettext \
--with-iconv-dir \
--with-kerberos \
--with-libdir=lib64 \
--with-libxml-dir=/usr \
--with-mysqli=/usr/local/mysql/bin/mysql_config \
--with-openssl \
--with-pcre-regex \
--with-pdo-mysql \
--with-pdo-sqlite \
--with-pear \
--with-jpeg-dir \
--with-png-dir \
--with-xmlrpc \
--with-xsl \
--with-zlib \
--with-config-file-path=/etc \
--with-config-file-scan-dir=/etc/php.d \
--with-bz2 \
--enable-fpm \
--enable-bcmath \
--enable-libxml \
--enable-inline-optimization \
--enable-mbregex \
--enable-mbstring \
--enable-opcache \
--enable-pcntl \
--enable-shmop \
--enable-soap \
--enable-sockets \
--enable-sysvsem \
--enable-xml \
--enable-zip
[root@localhost php-7.2.10]# make -j 2 && make install
- 配置环境变量
[root@localhost php-7.2.10]# echo "export PATH=/usr/local/php7/bin:$PATH" > /etc/profile.d/php7.sh
[root@localhost php-7.2.10]# . /etc/profile.d/php7.sh
[root@localhost php-7.2.10]# echo $PATH
/usr/local/php7/bin:/usr/local/mysql/bin:/usr/local/sbin:/usr/local/bin:/usr/sbin:/usr/bin:/root/bin
- 配置php-fpm文件
[root@localhost php-7.2.10]# cp php.ini-production /etc/php.ini
[root@localhost php-7.2.10]# cp sapi/fpm/init.d.php-fpm /etc/init.d/php-fpm
[root@localhost php-7.2.10]# chmod +x /etc/init.d/php-fpm
[root@localhost php-7.2.10]# cp /usr/local/php7/etc/php-fpm.conf.default /usr/local/php7/etc/php-fpm.conf
[root@localhost php-7.2.10]# cp /usr/local/php7/etc/php-fpm.d/www.conf.default /usr/local/php7/etc/php-fpm.d/www.conf
[root@localhost php-7.2.10]# cat >> /usr/local/php7/etc/php-fpm.conf <<EOF
pm.max_children = 50
pm.start_servers = 5
pm.min_spare_servers = 2
pm.max_spare_servers = 8
EOF
- 启动php-fpm,并查看端口
[root@localhost php-7.2.10]# service php-fpm start
Starting php-fpm  done
[root@localhost php-7.2.10]# ss -ntl
State       Recv-Q Send-Q   Local Address:Port      Peer Address:Port
LISTEN      0      128          127.0.0.1:9000                 *:*
安装nginx
- 安装依赖
[root@localhost ~]# yum -y install pcre-devel gd-devel
- 创建nginx用户和组
[root@localhost ~]# groupadd -r nginx
[root@localhost ~]# useradd -r -M -s /sbin/nologin -g nginx nginx
- 编译安装nginx
[root@localhost ~]# cd nginx-1.12.2
[root@localhost nginx-1.12.2]# ./configure --prefix=/usr/local/nginx \
--user=nginx \
--group=nginx \
--with-debug \
--with-http_ssl_module \
--with-http_realip_module \
--with-http_image_filter_module \
--with-http_gunzip_module \
--with-http_gzip_static_module \
--with-http_stub_status_module \
--http-log-path=/var/log/nginx/access.log \
--error-log-path=/var/log/nginx/error.log
[root@localhost nginx-1.12.2]# make -j 2 && make install
- 设置环境变量
[root@localhost nginx-1.12.2]# cd /usr/local/nginx
[root@localhost nginx]# echo "export PATH=/usr/local/nginx/sbin:$PATH" > /etc/profile.d/nginx.sh
[root@localhost nginx]# . /etc/profile.d/nginx.sh
- 配置nginx.conf配置文件,将nginx.conf文件中的下面内容的#取消,将"/scripts"修改为页面访问的路径,并在“location / {”中的“index”行中添加“index.php”
[root@localhost nginx]# cd conf/
[root@localhost conf]# vim nginx.conf
        location / {
            root   html;
            index  index.php index.html index.htm;
        }
        location ~ \.php$ {
            root           html;
            fastcgi_pass   127.0.0.1:9000;
            fastcgi_index  index.php;
            fastcgi_param  SCRIPT_FILENAME  /usr/local/nginx$fastcgi_script_name;
            include        fastcgi_params;
        }
- 在/usr/local/nginx/html/目录下创建index.php文件
[root@localhost html]# cat > index.php << EOF
<? php
    phpinfo();
?>
EOF
- 启动nginx服务
[root@localhost html]# nginx
[root@localhost html]# ss -ntl
State       Recv-Q Send-Q               Local Address:Port                 Peer Address:Port
LISTEN      0      128                              *:80                              *:*
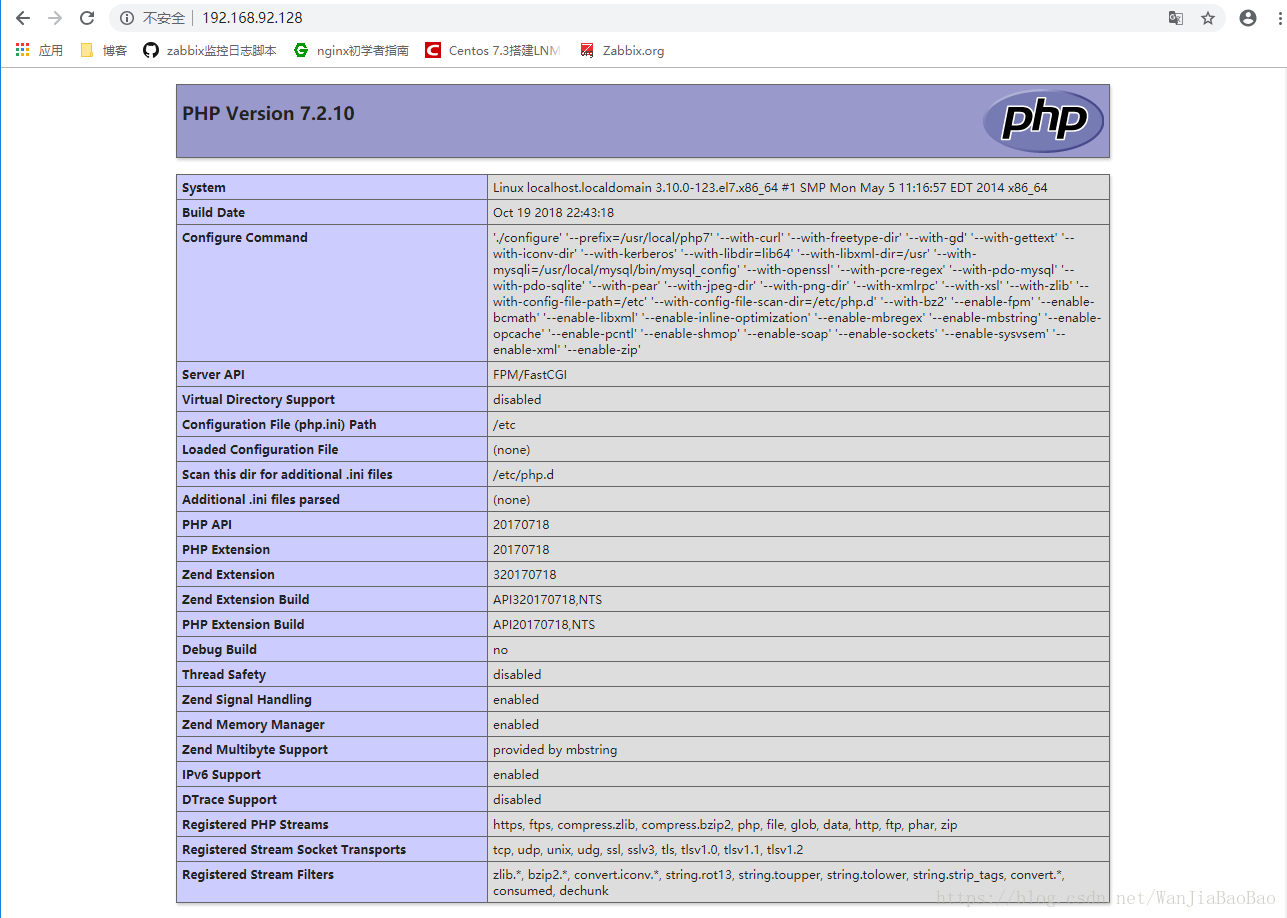
- 打开浏览器,用服务器IP地址进行访问查看
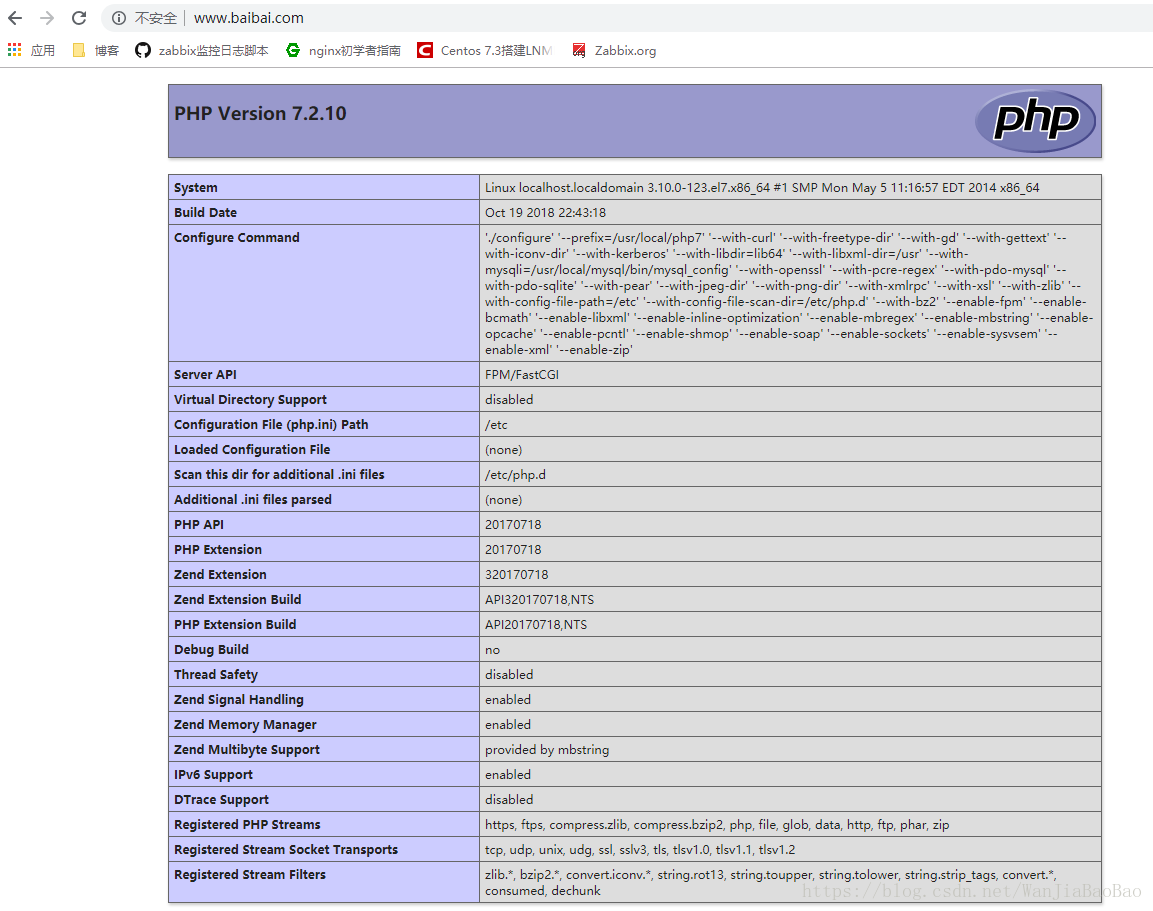
- 如若想用域名访问,则需要“server {”中“server_name”行,然后重新加载配置文件
[root@localhost html]# vim ../conf/nginx.conf
        server_name  www.baibai.com;
[root@localhost html]# nginx -s reload
- 在访问端修改hosts文件
- 在浏览器中用域名访问

错误
- 初始化数据库中遇到的错误:mysqld: error while loading shared libraries: libaio.so.1: cannot open shared object file: No such file or directory
[root@localhost mysql]# yum -y install libaio