版权声明:本文为博主原创文章,转载请注明出处。 https://blog.csdn.net/u013046597/article/details/77447614
上篇博客的代码使用的是shiro自带的IniRealm,IniRealm从ini配置文件中读取用户的信息,大部分情况下需要从系统的数据库中读取用户信息,所以需要自定义realm。
shiro提供的realm
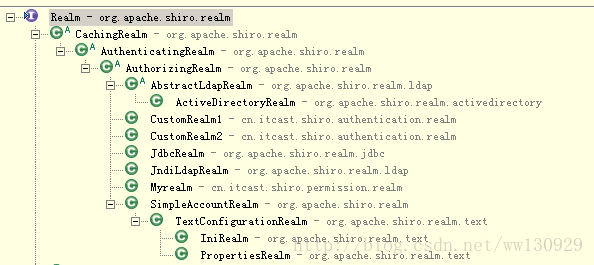
最基础的是Realm接口,CachingRealm负责缓存处理,AuthenticationReal负责认证,AuthorizingRealm负责授权,通常自定义的realm继承AuthorizingRealm。
自定义realm代码:
public class CustomRealm1 extends AuthorizingRealm {

    @Override
    public String getName() {
        return "customRealm1";
    }

    //支持UsernamePasswordToken
    @Override
    public boolean supports(AuthenticationToken token) {
        return token instanceof UsernamePasswordToken;
    }

    //认证
    @Override
    protected AuthenticationInfo doGetAuthenticationInfo(
            AuthenticationToken token) throws AuthenticationException {

        //从token中 获取用户身份信息
        String username = (String) token.getPrincipal();
        //拿username从数据库中查询
        //....
        //如果查询不到则返回null
        if(!username.equals("zhang")){//这里模拟查询不到
            return null;
        }

        //获取从数据库查询出来的用户密码
        String password = "123";//这里使用静态数据模拟。。

        //返回认证信息由父类AuthenticatingRealm进行认证
        SimpleAuthenticationInfo simpleAuthenticationInfo = new SimpleAuthenticationInfo(
                username, password, getName());

        return simpleAuthenticationInfo;
    }

}
shiro-realm.ini
[main]
#自定义 realm
customRealm=cn.itcast.shiro.authentication.realm.CustomRealm1
#将realm设置到securityManager
securityManager.realms=$customRealm