小编最近在忙着找工作,忽略了博客的更新,实在不应该,现在咱么就补上!(*^__^*) 嘻嘻……
在以前的代码示例中,realm都是自己在shiro.ini中写的,但是实际应用肯定不会如此,哪些权限,角色,用户肯定是在数据库中定义好,然后我们通过自己写realm,从数据库中获得的角色和权限,赋给当前登录的用户,就可以达到和再shiro.ini中写死的效果。
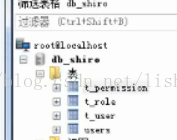
第一步:建库
第二步:在前面Pom的基础上,加上MySQL驱动的jar包
第三步:定义dao,操作数据库
| public class UserDao { //通过用户名得到用户信息 public User getByUserName(Connection con, String userName) throws Exception{ User resultUser=null; String sql="select * from t_user where userName=?"; PreparedStatement pstmt =con.prepareStatement(sql); pstmt.setString(1, userName);//给sql赋参数值 ResultSet rs=pstmt.executeQuery(); if (rs.next()) { resultUser=new User(); resultUser.setId(rs.getInt("id")); resultUser.setUserName(rs.getString("userName")); resultUser.setPassword(rs.getString("password")); } return resultUser; }
/** * 获取角色 * @param connection * @param userName * @return * @throws Exception */ public Set<String> getRoles(Connection connection, String userName)throws Exception { Set<String> roles=new HashSet<String>(); String sql="select * from t_user u,t_role r where u.roleId=r.id and u.userName=?"; PreparedStatement pstmt =connection.prepareStatement(sql); pstmt.setString(1, userName);//给sql赋参数值 ResultSet rs=pstmt.executeQuery(); while (rs.next()) { roles.add(rs.getString("roleName")); } return roles; }
/** * 获取权限 * @param connection * @param userName * @return */ public Set<String> getPermissions(Connection connection, String userName) throws Exception{ Set<String> permissions=new HashSet<String>(); String sql="select * from t_user u,t_role r ,t_permission p where u.roleId=r.id and p.roleId=r.id and u.userName=?"; PreparedStatement pstmt =connection.prepareStatement(sql); pstmt.setString(1, userName);//给sql赋参数值 ResultSet rs=pstmt.executeQuery(); while (rs.next()) { permissions.add(rs.getString("permissionName")); } return permissions; }
} |
第四步:自定义realm,给用户赋角色,权限
| public class MyRealm extends AuthorizingRealm{ private UserDao userDao=new UserDao(); private DbUtil dbUtil=new DbUtil();
/** * 为当前登录的用户授予角色和权限 */ @Override protected AuthorizationInfo doGetAuthorizationInfo(PrincipalCollection principals) { String userName=(String)principals.getPrimaryPrincipal();//得到当前的用户名 SimpleAuthorizationInfo authorizationInfo=new SimpleAuthorizationInfo(); Connection connection=null; try { connection=dbUtil.getCon(); authorizationInfo.setRoles(userDao.getRoles(connection,userName)); authorizationInfo.setStringPermissions(userDao.getPermissions(connection,userName)); } catch (Exception e) { e.printStackTrace(); }finally{ try { dbUtil.closeCon(connection); } catch (Exception e) { // TODO Auto-generated catch block e.printStackTrace(); } }
return null; }
/** * 验证当前登录的用户 */ @Override protected AuthenticationInfo doGetAuthenticationInfo( AuthenticationToken token) throws AuthenticationException { String userName=(String)token.getPrincipal();//通过token获取用户名 Connection con =null; try { con=dbUtil.getCon(); User user=userDao.getByUserName(con, userName); if (user!=null) { //将从数据库获得的用户名和密码传入,将来方便和前台用户传过来的用户名和密码做比对 AuthenticationInfo auInfo =new SimpleAuthenticationInfo(user.getUserName(),user.getPassword(),"xx"); return auInfo; }else{ return null; } } catch (Exception e) { e.printStackTrace(); }finally{ try { dbUtil.closeCon(con);
} catch (Exception e) { e.printStackTrace(); } } return null; }
} |
第五步:登录拦截器的代码和上一篇博客的一样。
第六步:shiro.ini的内容:
| [main] authc.loginUrl=/login roles.unauthorizedUrl=/unauthorized.jsp perms.unauthorizedUrl=/unauthorizedUrl.jsp
myRealm=com.java1234.realm.MyRealm securityManager.realms=$myRealm
[urls] /login=anon /admin=authc /student=roles[teacher] /teacher=perms["user:create"] |
这样就可以完成自定义realm。