引言
我在一个WordPress项目中使用了WooCommerce插件,该插件提供了REST API的功能,要使用该功能一个很重要的部分就是授权机制。其中官方文章中关于关于HTTPS的授权说明如下:
Over HTTPS
You may use HTTP Basic Auth by providing the API Consumer Key as the username and the API Consumer Secret as the password.
因此,我就按照WooCommerce官方Step-by-Step文章创建了Consumer Key和Consumer Secret,然后通过REST API也完成了数据的获取、创建、修改等等。
但是,一个要非常注意的地方就是:WooCommerce生成的Key和Secret是无法再次获取到的,如下图红圈中的内容:
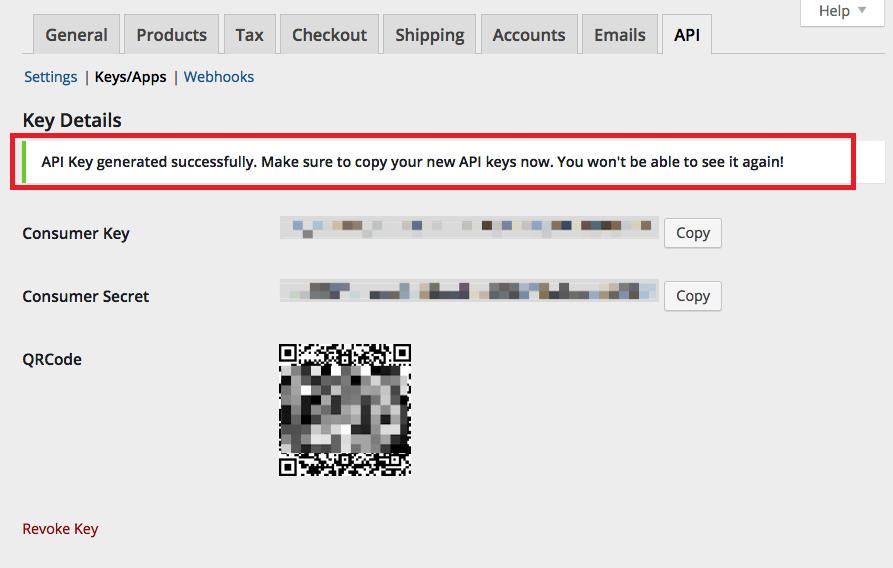
什么意思呢?就是说你要把Consumer Key和Consumer Secret自己记录下来,什么时候你需要的时候自己填入进去,我是不会再提供接口让你获取它们了!!!
WTK!现在我既要记住我在WordPress上的登陆账号密码,还要在记住WooCommerce的REST API的Key和Secret。
那么如何通过登录账号密码授权或者在已经登陆授权的情况下获取到该用户的Key和Secret。
要实现上面的功能需求,那么首要的步骤就是了解WooCommerce是如何产生和保存REST API的Key和Secret的。下面我们就从页面开始入手一层层的深入进去。
页面流程
class-wc-settings-api.php页面
WooCommerce插件的REST API设置界面包括以下三个子部分:
代码文件:woocommerce\includes\admin\settings\class-wc-settings-api.php
    /**
     * Output the settings
     */
    public function output() {
        global $current_section;

        if ( 'webhooks' == $current_section ) {
            WC_Admin_Webhooks::page_output();
        } else if ( 'keys' == $current_section ) {
            WC_Admin_API_Keys::page_output();
        } else {
            $settings = $this->get_settings( $current_section );
            WC_Admin_Settings::output_fields( $settings );
        }
}- Settings: 对应woocommerce\includes\admin\class-wc-admin-settings.php文件
- API_Keys: 对应woocommerce\includes\admin\class-wc-admin-api-keys.php文件
- Webhooks: 对应woocommerce\includes\admin\class-wc-admin-webhooks.php文件
class-wc-admin-api-keys.php页面
在这篇文章中我们主要关注API_Keys部分,也就是class-wc-admin-api-keys.php文件
WC_Admin_API_Keys::page_output()函数的具体实现如下:
    public static function page_output() {
        // Hide the save button
        $GLOBALS['hide_save_button'] = true;

        if ( isset( $_GET['create-key'] ) || isset( $_GET['edit-key'] ) ) {
            error_log('create-key or edit-key');
            $key_id   = isset( $_GET['edit-key'] ) ? absint( $_GET['edit-key'] ) : 0;
            $key_data = self::get_key_data( $key_id );

            include( 'settings/views/html-keys-edit.php' );
        } else {
            error_log('table_list_output');
            self::table_list_output();
        }
    }
从上的代码来看,创建/修改是走一个流程,显示所有的Keys列表时另外一个流程。而对于创建和修改的区分是通过参数中edit-key是否为空来判断。
html-keys-edit.php页面
该页面主要分为两个大块:id为key-fields的div和id为tmpl-api-keys-template的script(type为text/template),其中div部分是设置和生成的时候会用到,而script部分是使用模板来显示生成后的Key、Secret以及二维码。
id为key-fields的div部分包括:
- 标题
- 隐藏的key_id字段
- 具体的key选项字段表格
- 生成/保存按钮
而key选项字段表格中包括以下几个子项:描述、用户和权限,如果是修改key的页面,还有Consumer Key 末几位以及最后使用时间字段。
这些关于UI的部分,代码不算复杂,此处不再展开。我们重点关注点击生成按钮时的处理。
        if ( 0 == $key_id ) {
            submit_button( __( 'Generate API Key', 'woocommerce' ), 'primary', 'update_api_key' );
        }
处理逻辑
创建Key和Secret的具体处理逻辑在woocommerce\includes\class-wc-ajax.php文件的update_api_key()函数,该函数主要包括以下几个部分:
- 初始化
- 运行环境检查
- 输入参数检查
- 如果key_id不为空,则是更新key信息的处理
- 如果key_id为空,则是创建key信息的处理
在这里我们重点关注如何创建Key和保存到数据库的部分。
if ( 0 < $key_id ) {
// update api key
} else {
$status = 2;
$consumer_key = 'ck_' . wc_rand_hash();
$consumer_secret = 'cs_' . wc_rand_hash();
$data = array(
'user_id' => $user_id,
'description' => $description,
'permissions' => $permissions,
'consumer_key' => wc_api_hash( $consumer_key ),
'consumer_secret' => $consumer_secret,
'truncated_key' => substr( $consumer_key, -7 )
);
$wpdb->insert(
$wpdb->prefix . 'woocommerce_api_keys',
$data,
array(
'%d',
'%s',
'%s',
'%s',
'%s',
'%s'
)
);
$key_id = $wpdb->insert_id;
$data['consumer_key'] = $consumer_key;
$data['consumer_secret'] = $consumer_secret;
$data['message'] = __( 'API Key generated successfully. Make sure to copy your new API keys now. You won\'t be able to see it again!', 'woocommerce' );
$data['revoke_url'] = '<a style="color: #a00; text-decoration: none;" href="' . esc_url( wp_nonce_url( add_query_arg( array( 'revoke-key' => $key_id ), admin_url( 'admin.php?page=wc-settings&tab=api§ion=keys' ) ), 'revoke' ) ). '">' . __( 'Revoke Key', 'woocommerce' ) . '</a>';
}通过上面的代码,我们了解到:
1. consumer_key和consumer_secret是通过wc_rand_hash()函数生成一个随机数再加上固定前缀构成的
2. 存储到数据库中的consumer_key是经过wc_api_hash()函数进行加密的内容,而consumer_secret则是直接进行存储
3. 在数据库中添加了一个truncated_key字段,用来保存consumer_key的末尾7位
wp_woocommerce_api_keys数据表的结构如下:
| Field | Type | Null | Key | Default | Extra |
|---|---|---|---|---|---|
| key_id | bigint(20) | NO | PRI | NULL | auto_increment |
| user_id | bigint(20) | NO | NULL | ||
| description | longtext | YES | NULL | ||
| permissions | varchar(10) | NO | NULL | ||
| consumer_key | char(64) | NO | MUL | NULL | |
| consumer_secret | char(43) | NO | MUL | NULL | |
| nonces | longtext | YES | NULL | ||
| truncated_key | char(7 ) | NO | NULL | ||
| last_access | datetime | YES | NULL |
通过代码和表结构的对比,我们发现在创建Key后写入了6个字段的值,而key_id会自动增长后赋值,nonces字段并没有使用到,而last_access字段是用来保存最后一次访问的时间。
总结
分析到这里,我们了解了一个WooCommerce API Keys是如何生成并保存到数据库中的。在下一篇文章中,我们接着分析WooCommerce API接口是如何验证授权信息的。