1.Envirment:
1.VM-Envriment:windown 7, vmware(ubuntu-18.04.1-live-server-amd64.iso), SecureCRT(ssh remote ubuntu), samba-server(see Appendix 1 samba-server create),gcc-32bit(see Appendix 2 gcc-32bit install , but maybe not need nessesary).
2.Destnation-machine: BOCHS(lastest version form official site), QEMU(lastest version form official site).
Bochs can debug assembly, but can't debug using gdb before recompile. Qemu can using gdb, but can't debug in assembly. So need to install both.
3.Debug-method: TDMGCC(Using its GDB in command line debug).
2.source
; 文件名 boot.asm
org 7c00h ; BIOS读入MBR后,从0x7c00h处开始执行
; 下面部分和10h有关中断,10h中断用来显示字符
mov ax, cs
mov es, ax
mov ax, msg
mov bp, ax ; ES:BP表示显示字符串的地址
mov cx, msgLen ; CX存字符长度
mov ax, 1301h ; AH=13h表示向TTY显示字符,AL=01h表示显示方式(字符串是否包含显示属性,01h表示不包含)
mov bx, 000fh ; BH=00h表示页号,BL=0fh表示颜色
mov dl, 0 ; 列
int 10h
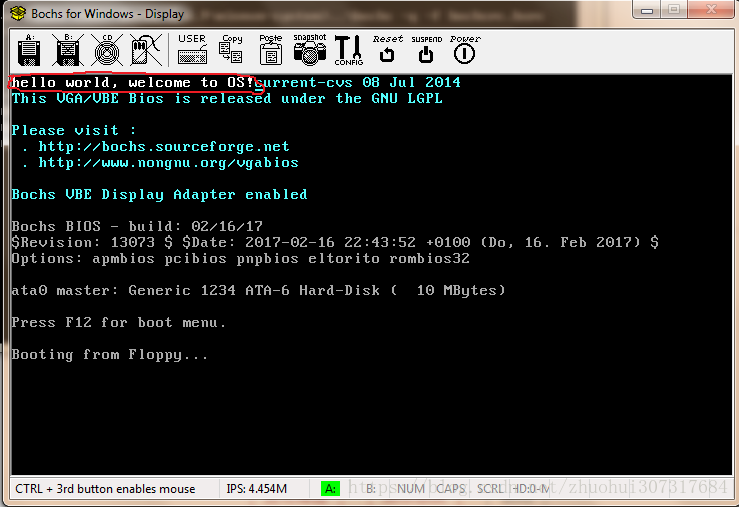
msg: db "hello world, welcome to OS!"
msgLen: equ $ - msg ; 字符串长度
times 510 - ($ - $$) db 0 ; 填充剩余部分
dw 0aa55h ; 魔数,必须有这两个字节BIOS才确认是MBR
3.Compile
If till not install nasm, should install first.
nasm install on ubuntu
1.Download source code: https://www.nasm.us/pub/nasm/releasebuilds/
2.tar zxvf nasm-2.10.07.tar.gz
进入刚解压的目录
然后执行命令:./configure
make
sudo make install
NOTE: Using "apt install nasm" to install is failled.
nasm usage
# nasm boot.asm -o boot.bin4.Debug
1.First step, copy the Example and rename it.
Bochs Example: click C:\Program Files (x86)\Bochs-2.6.9\dlxlinux\bochsrc.bxrc will run the dlxlinux, exist after installed.
or goto official site download example.
2.Modify run.bat.
change the current folder name.
and change "bochs" to "bochsdbg"(of couse, if only run without debug, you don't need do this).
3.Modify bochsrc.bxrc.
# what disk images will be used
floppya: 1_44=boot.bin, status=inserted
# choose the boot disk.
boot: a
4.copy boot.bin to current directory. Then will run secced (run mode without debug) as bellow.
5.If in debug mode, can input command.
b 0x7c00
s
n
c
6. "Ctrl+c" or "q" to exit.
5.linux 0.11
source link: https://github.com/yuanxinyu/Linux-0.11 (If you searching in bing.com, this is the NO. 1 result.)
Compile:The source could compile directly successful without modify anything in ubuntu-18.04-server.
Using bochs to debug assembly:
1.Copy run.bat from C:\Program Files (x86)\Bochs-2.6.9\dlxlinux , then modify as:
cd "F:\Linux-0.11-master"
"C:\Program Files (x86)\Bochs-2.6.9\bochs" -q -f tools/bochs/bochsrc/bochsrc-hd-win.bxrc
Of cause, if want to debug, modify "bochs" to "bochsdbg".
2. Copy F:\Linux-0.11-master\tools\bochs\bochsrc\*.bxrc, then modify:
a. all "../" modify to bochs install path.


b.

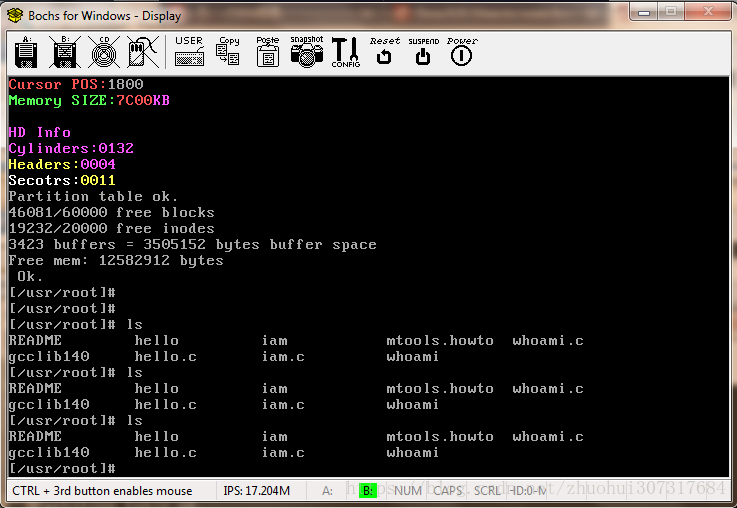
Then, it can run seccussful as bellow.
3. suggest click the "power" button to exit(will auto delete *.lock file). Or not you need to remove F:\Linux-0.11-master\hdc-0.11.img.lock, to let it run successful in second time.

Debug assembly:
b 0x7c00
s
n
c
Using qemu to debug kerner:
using qemu(download latest from official site). Because bochs must recompile.
Input command: (Cmd copy from source code Makefile,of cause you have to change a little.)
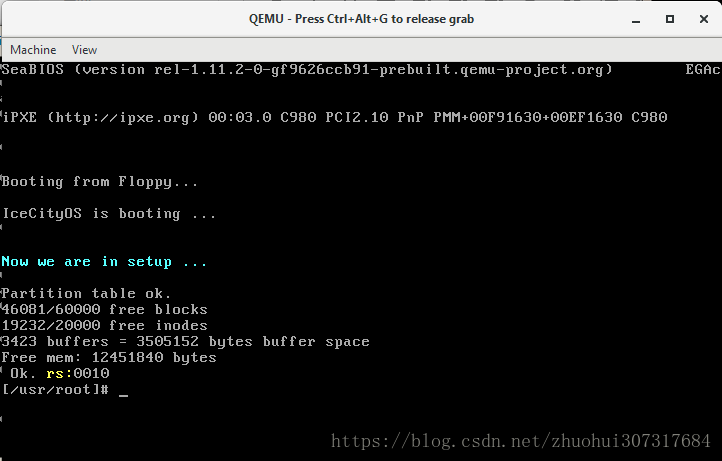
"C:\Program Files\qemu\qemu-system-i386.exe" -m 16M -boot a -fda Image -hda hdc-0.11.imgAfter input the command, the linux 0.11 would be running successfully.
If you want to debug step by step, just add -S , like following: (Note: qemu will be stop on starting, need more cmd.)
"C:\Program Files\qemu\qemu-system-i386.exe" -m 16M -boot a -fda Image -hda hdc-0.11.img -s -SMust be "qemu-system-i386", even "qemu-system-x86_64.exe" will be failed.
Open other cmd windows, then input:
F:\Linux-0.11-master>gdb tools/system
(gdb) target remote localhost:1234
(gdb) b main
(gdb) c
(gdb) n
(gdb) s
Then you would see the linux 0.11 is running successfully.

Using eclipse to debug
Eclipse Edition:
download link: https://stackoverflow.com/questions/27418096/where-can-i-download-eclipse-android-bundle
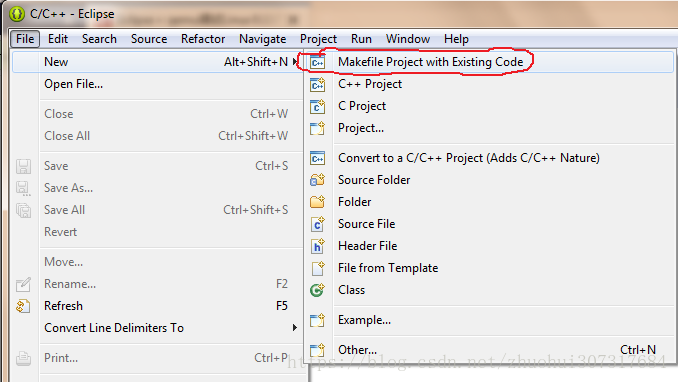
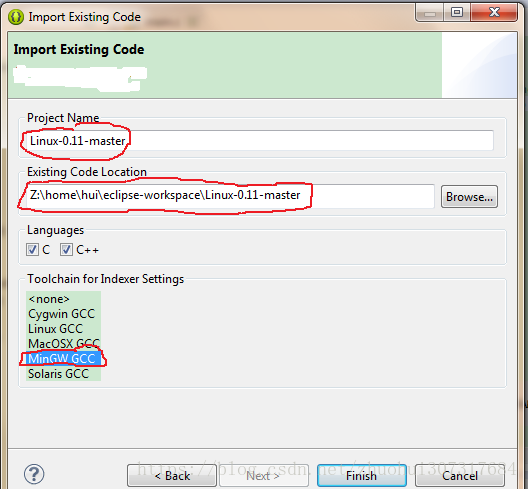
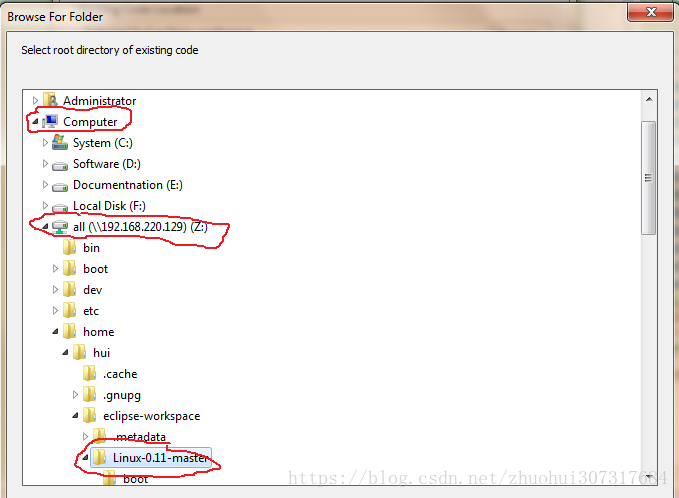
1.New a C project.

NOTE: If linux 0.11 project store in vmware samba server. Couldn't use "\\192.168.220.129\all\home\hui\eclipse-workspace\Linux-0.11-master" as path. Must using "Browse the floder" to setting the path, as below: (Destiation path is "Z:\home\hui\eclipse-workspace").
2. First launch qemu. Command as bellow:
"C:\Program Files\qemu\qemu-system-i386.exe" -m 16M -boot a -fda Image -hda hdc-0.11.img -s -S
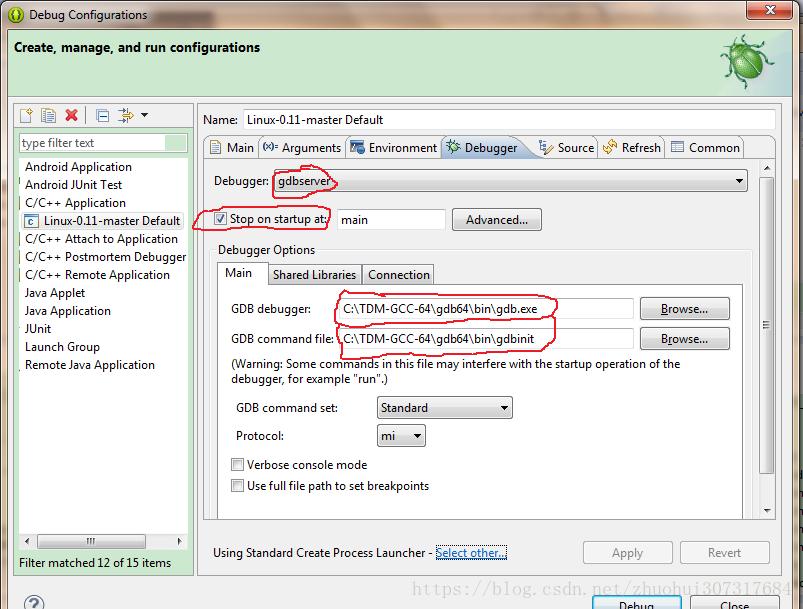
3.Confiure the Eclipse.
Refrerence from: https://blog.csdn.net/asdfdypro/article/details/44680813

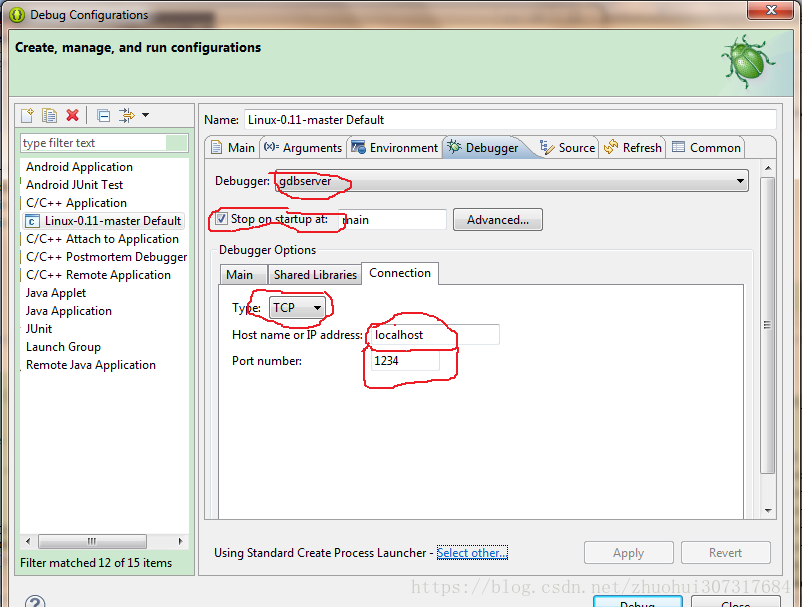
3. Then debug as bellow:

Analyze kerner code
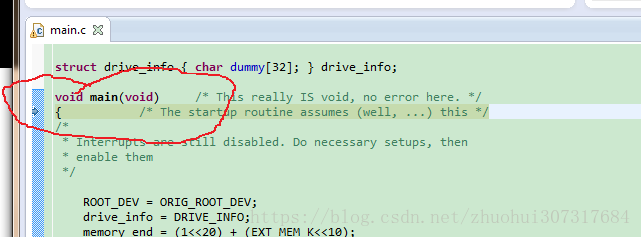
main() is the first C language function. So everything is analyze from here.
Appendix 1 samba-server create
1 首先确认网络可以相互ping通。
2 终端输入:apt-get install samba
3 先备份 smb.conf 编辑配置,终端输入:
cd /etc/samba/
ls
cp smb.conf smb.conf-201x-xx-xx
4 nano /etc/samba/smb.conf 编辑配置文件
- 找到[homes]下 browseable = no, 把no 改成 yes, 因为只有这样,windows下才能通 过“计算机”看到“homes”共享目录。----至此,您已经能看到samba共享的目录了。
- 当然,以方便调试为目的,所以我们不需要共享homes文件,而是要共享整个根目录。 所以在[homes]这一段下加入一段,不要在[homes]这一段改,否则出错,一定要在下面加,如下:
[all]
comment = /
path = /
read only = no
接着在终端输入:testparm 此命令不但能检查参数是否正确,还能使配置立即生效, 不需要重启。
5 还要创建用户,不然只能看到有共享却无法登录。在终端输入:
smbpasswd -a root 然后就会提示输入密码,其实这个名字可以任意,这里用root是为 了方便记忆,因为我会用最高权限。----到这一步,你就可以登录到samba共享文件里 了。
6 (可以不要这一步)重启samba,终端输入: /etc/init.d/samba restart
Appendix 2 gcc-32bit install
If you system is 64-bit, you should add 32-bit lib support.
sudo apt-get install g++-multilib libc6-dev-i386
then
# gcc boot.o -o boot -m32