接上篇文章,搭建环境,创建项目:https://blog.csdn.net/weixin_42127613/article/details/81838217
项目创建完毕,现在开始引入Xposed库,使Xposed框架能发现我们的模块。
1、引入Xposed框架。
Xposed框架如何使用,其实最好的指引文档,就是官方的文档。
官网指引文档:https://github.com/rovo89/XposedBridge/wiki/Development-tutorial,可以看看如何初步使用Xposed,不过都是英文的。不看也不要紧,我们的操作步骤都会走一遍,一样的。
首先引入Xposed的API库。在Android视图模式下,打开build.gradle文件(注意是Module.app)。在dependencies中添加Xposed的库引用,如下图所示。
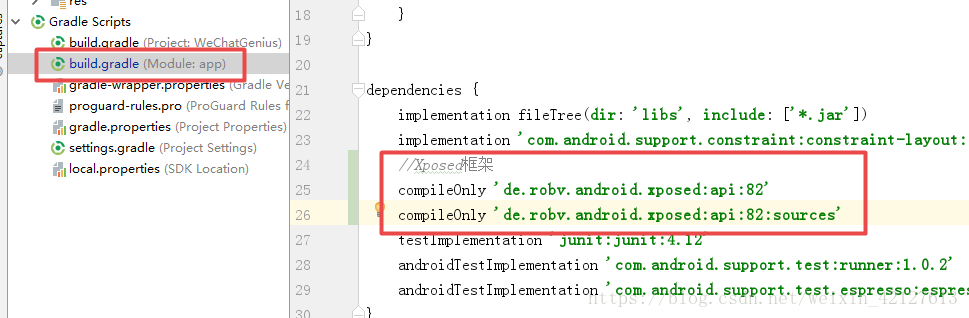
至于Xposed的API库,最新版本是多少,可以通过官网的指引文档找到。打开上面指示的指引文档,在页面中找到如图所示的地方,打开链接进入。
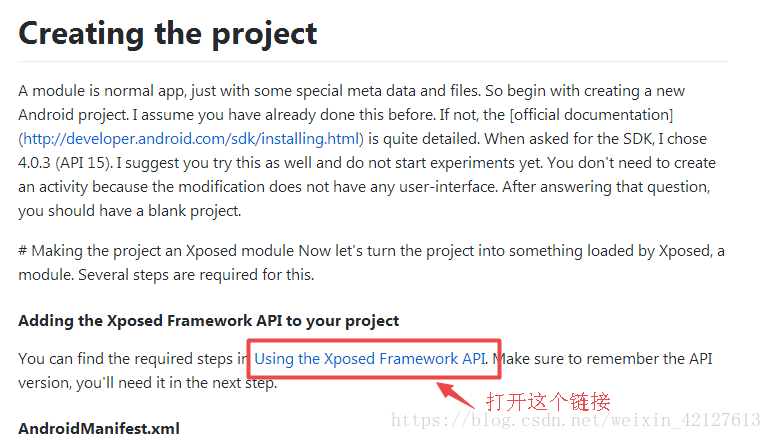
就可以看到最新版啦,是82。

2、在AndroidManifest.xml文件中加入Xposed模块说明。如下图所示,加入红方框部分。

修改后的AndroidManifest.xml文件内容如下。加入后,在Xposed的模块管理中,就能找到我们的APP了。
<?xml version="1.0" encoding="utf-8"?>
<manifest xmlns:android="http://schemas.android.com/apk/res/android"
    package="net.dalu2048.wechatgenius">

    <application
        android:allowBackup="true"
        android:icon="@mipmap/ic_launcher"
        android:label="@string/app_name"
        android:roundIcon="@mipmap/ic_launcher_round"
        android:supportsRtl="true"
        android:theme="@style/AppTheme">
        <meta-data
            android:name="xposedmodule"
            android:value="true" />
        <meta-data
            android:name="xposeddescription"
            android:value="@string/xposed_description" />
        <meta-data
            android:name="xposedminversion"
            android:value="82" />

        <activity android:name=".MainActivity">
            <intent-filter>
                <action android:name="android.intent.action.MAIN" />

                <category android:name="android.intent.category.LAUNCHER" />
            </intent-filter>
        </activity>
    </application>

</manifest>
同步修改res里面values文件夹的strings.xml文件。加入Xposed描述。
<resources>
    <string name="app_name">微信聊天精灵</string>
    <string name="xposed_description">微信聊天精灵,按关键词匹配实现微信自动回复。</string>
</resources>
3、运行项目。编译后,在模拟器上运行,打开Xposed installer,进入模块菜单。就能看到我们的模块了。

勾上我们的模块,那我们的模块就生效了,虽然现在没有任何功能。
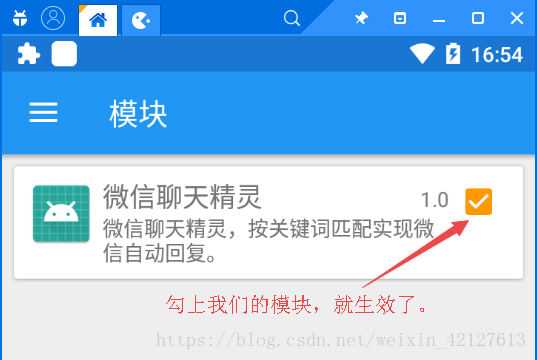
好了,我们的微信聊天精灵,已经能在Xposed框架中识别了。勾上后,重启模拟器,就能生效。
本次先到这。源码已提交到:https://github.com/dalu2048/WeChatGenius.git
接下来,下篇文章。使用Xposed来hook微信,找到微信进程:https://blog.csdn.net/weixin_42127613/article/details/81839537