IOC—Inversion of Control,控制反转,它是一种设计思想,它能指导程序员如何设计出松耦合、更优良的程序代码。
如果不用IOC,创建、销毁对象、对象之间的依赖关系,都需要程序员自己在代码里面体现,各种new。
而有了IOC容器后,代码里只需要定义对象的基本信息,并将它注册到IOC容器中,让IOC管理它的生命周期(创建和销毁)以及它们之间的依赖关系。
第一章:将组件(对象)添加到ioc容器的四种方式
第一节:bean方式(注解和xml两种方式)
第二节:bean工厂方式(静态工厂、实例化工厂两种)
第三节:包扫描+@controller、@Service、@Repository、@Component(注解和xml两种方式)
第四节:@Import注解快速注册
第五节(拓展):@Conditional 根据条件判断bean是否可以添加到容器中,Spring底层经常使用
第六节(拓展):@profile 根据当前环境,动态的激活和切换一系列组件
第二章:自动装配实现方式(即DI 依赖注入实现属性赋值)
第七节:@Autowired 自动装配
第八节:JSR-250(java规范)的注解@Resource
第九节:xml配置实现装配的多种方式
第十节(拓展):自定义组件实现xxxAware接口,使用spring底层的一些组件(BeanFactory、ApplictionContext等)
Action one:创建maven项目,添加spring和junit依赖:
<dependency>
	<groupId>org.springframework</groupId>
	<artifactId>spring-context</artifactId>
	<version>4.3.12.RELEASE</version>
</dependency>

<dependency>
	<groupId>junit</groupId>
	<artifactId>junit</artifactId>
	<version>4.12</version>
	<scope>test</scope>
</dependency>第一节:bean方式注册组件
>定义User对象
public class User {
	public User() {
		super();
	}
	public User(String name, Integer age) {
		super();
		this.name = name;
		this.age = age;
	}
	private String name;
	private Integer age;
	public String getName() {
		return name;
	}
	public void setName(String name) {
		this.name = name;
	}
	public Integer getAge() {
		return age;
	}
	public void setAge(Integer age) {
		this.age = age;
	}
}
>xml方式实现注册
<bean id="user" class="com.mote.pojo.User">
     <property name="name" value="zhangsan"></property>
     <property name="age" value="22"></property>
</bean>
>注解方式实现注册
import org.springframework.context.annotation.Bean;
import org.springframework.context.annotation.Configuration;
import com.mote.pojo.User;

//@Configuration 标注这是一个注解配置类,该类就相当于spring的配置文件applictionContext.xml
@Configuration
public class MainConfig {
	/**
	 * @Bean表示向IOC容器中注册bean,value指定bean名称,如果不指定,默认使用方法名
	 */
	@Bean(value="user")
	public User user(){
		return new User("lisi",25);
	}
}
>测试类
import org.junit.Test;
import org.springframework.context.annotation.AnnotationConfigApplicationContext;
import org.springframework.context.support.ClassPathXmlApplicationContext;
import com.mote.config.MainConfig;
import com.mote.pojo.User;

public class MainTest {

	@Test //注解测试
	public void testAnnotation(){

		//加载Spring注解配置类
		AnnotationConfigApplicationContext application = new AnnotationConfigApplicationContext(MainConfig.class);
		//从容器中获取bean
		User user = application.getBean(User.class);
		System.out.println(user);
	}

	@Test //xml测试
	public void testXml(){
		//加载Spring-xml配置文件
		ClassPathXmlApplicationContext application = new ClassPathXmlApplicationContext("beans.xml");
	    //从容器中获取bean
		User user = application.getBean(User.class);
		System.out.println(user);
	}
}
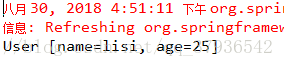
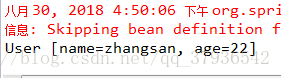
>打印结果:
第二节:bean工厂方式(静态工厂、实例化工厂两种)
1:静态工厂模式:工厂类本身不需要实例化, 通过工厂类直接调用其中的静态方法生成bean对象。
定义对象Car:
public class Car {
	private String name;
	private double money;
	public Car() {
		super();
	}
	public Car(String name, double money) {
		super();
		this.name = name;
		this.money = money;
	}
	public String getName() {
		return name;
	}
	public void setName(String name) {
		this.name = name;
	}
	public double getMoney() {
		return money;
	}
	public void setMoney(double money) {
		this.money = money;
	}
	@Override
	public String toString() {
		return "Car [name=" + name + ", money=" + money + "]";
	}

}
定义生产Car的静态工厂:
public class CarFactory {
	/**
	 * 静态方法,返回Car实例
	 * @return
	 */
	public static Car getCar(){
		return new Car("宝马",10000000.00);
	}

}
配置xml:
<!-- 配置Car工厂,调用getCar(),返回Car实例 -->
<bean id="car" class="com.mote.pojo.CarFactory" factory-method="getCar"></bean>
测试打印:
public class MainTest {
	@Test //注解测试
	public void testAnnotation(){
		ClassPathXmlApplicationContext application = new ClassPathXmlApplicationContext("beans.xml");
		Car car = application.getBean(Car.class);
		//Car car1 = (Car) application.getBean("car");
		System.out.println(car);
	}
}
2:实例工厂模式:因为getCar方法不是静态的,需要先实例化CarFactory工厂,在通过carFactory调用getCar生产bean对象
定义对象Car:(和静态工厂模式的测试一致)
定义Car的实例化工厂:
public class CarFactory {

	public Car getCar(){
		return Car("宝马",10000000.00);
	}

}
配置xml:
<!-- 配置Car工厂-->
<bean id="carFactory" class="com.mote.pojo.CarFactory"></bean>

<!-- 调用carFactory的getCar,配置car的实例  -->
<bean id="car" factory-bean="carFactory" factory-method="getCar"></bean>
测试打印:(和静态工厂模式的测试一致)
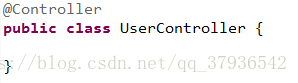
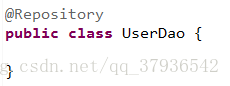
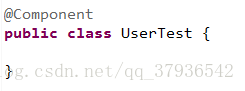
第三节:包扫描+@controller、@Service、@Repository、@Component(注解和xml两种方式)
>定义UserController,UserService,UserDao,UserTest,分别加上述注解

>项目目录结构:

>xml方式实现包扫描注册
<!-- 开启包扫描 ,指定的包以及子包下 只要标注了@Controller、@Service、@Repositoy、@Component
     的类都会被添加到spring容器中-->
<context:component-scan base-package="com.mote"/>
>注解方式实现包扫描注册
@Configuration
//@ComponentScan 开启包扫描,value指定包名
@ComponentScan(value = "com.mote")
public class MainConfig {

}
>测试类
import org.junit.Test;
import org.springframework.context.annotation.AnnotationConfigApplicationContext;
import org.springframework.context.support.ClassPathXmlApplicationContext;
import com.mote.config.MainConfig;
public class MainTest {
@Test //注解测试
public void testAnnotation(){
//加载Spring注解配置类
AnnotationConfigApplicationContext application = new AnnotationConfigApplicationContext(MainConfig.class);
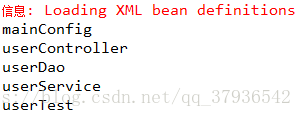
//获取注册到容器中的组件name集合,遍历打印
String[] names = application.getBeanDefinitionNames();
for (String name : names) {
System.out.println(name);
}
}
@Test //xml测试
public void testXml(){
//加载Spring-xml配置文件
ClassPathXmlApplicationContext application = new ClassPathXmlApplicationContext("beans.xml");
String[] names = application.getBeanDefinitionNames();
for (String name : names) {
System.out.println(name);
}
}
}>打印结果
第四节:@Import注解快速注册
Import注解实现注册有三种实现方式
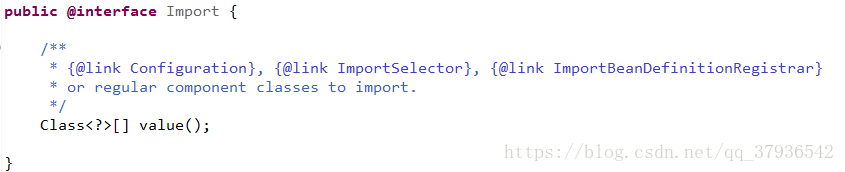
1:@Import(要添加的组件)
import org.springframework.context.annotation.Configuration;
import org.springframework.context.annotation.Import;
import com.mote.dao.UserDao;
import com.mote.service.UserService;

@Configuration
//@Import 快速给容器中导入一个组件,默认id是全类名
//@Import(UserController.class)     //注册一个
@Import({UserService.class,UserDao.class})   //注册多个
public class MainConfig {

}
2:实现ImportSelector接口,自定义返回要注册的组件
import org.springframework.context.annotation.ImportSelector;
import org.springframework.core.type.AnnotationMetadata;

public class MyImport implements ImportSelector {

	public String[] selectImports(AnnotationMetadata importingClassMetadata) {
		return new String[] { "com.mote.controller.UserService","com.mote.dao.UserDao" };
	}

}
import org.springframework.context.annotation.Configuration;
import org.springframework.context.annotation.Import;

@Configuration
@Import(MyImport.class)
public class MainConfig {

}
3:实现ImportBeanDefinitionRegistrar接口,实现手动注册
import org.springframework.beans.factory.config.BeanDefinition;
import org.springframework.beans.factory.support.BeanDefinitionRegistry;
import org.springframework.beans.factory.support.RootBeanDefinition;
import org.springframework.context.annotation.ImportBeanDefinitionRegistrar;
import org.springframework.core.type.AnnotationMetadata;
import com.mote.dao.UserDao;

public class MyImport implements ImportBeanDefinitionRegistrar {

	/**
	 * AnnotationMetadata:当前类的注解信息
	 * BeanDefinitionRegistry:BeanDefinition注册类
	 */
	public void registerBeanDefinitions(
			AnnotationMetadata importingClassMetadata,
			BeanDefinitionRegistry registry) {
		//判断容器中是否注册userDao
		boolean flag = registry.containsBeanDefinition("userDao");

		//向容器中注册bean,并指定bean_name为userDao
		BeanDefinition beanDefinition = new RootBeanDefinition(UserDao.class);
		registry.registerBeanDefinition("userDao", beanDefinition );
	}

}
import org.springframework.context.annotation.Configuration;
import org.springframework.context.annotation.Import;

@Configuration
@Import(MyImport.class)
public class MainConfig {

}
>测试类
import org.junit.Test;
import org.springframework.context.annotation.AnnotationConfigApplicationContext;

import com.mote.config.MainConfig;

public class MainTest {
	@Test //注解测试
	public void testAnnotation(){
		//加载Spring注解配置类
		AnnotationConfigApplicationContext application = new AnnotationConfigApplicationContext(MainConfig.class);

		//获取注册到容器中的组件name集合,遍历打印
		String[] names = application.getBeanDefinitionNames();
		for (String name : names) {
			System.out.println(name);
		}
	}
}
>打印结果
方式一:
方式二:
方式三:
第五节(拓展):@Conditional 根据条件判断bean是否可以添加到容器中,Spring底层经常使用
需求描述:如果当前系统是Windows,注册User(“bier”,30),反之不注册
1:实现Condition接口,书写判断逻辑
import org.springframework.beans.factory.config.ConfigurableListableBeanFactory;
import org.springframework.context.annotation.Condition;
import org.springframework.context.annotation.ConditionContext;
import org.springframework.core.env.Environment;
import org.springframework.core.type.AnnotatedTypeMetadata;

public class MyConditional implements Condition{
	/**
	 * ConditionContext:判断条件使用的上下文
	 * AnnotatedTypeMetadata:注释信息
	 */
	public boolean matches(ConditionContext context,
			AnnotatedTypeMetadata metadata) {
		//获取当前运行环境信息
		Environment environment = context.getEnvironment();
		//获取当前系统类型,判断是否是Windows
		String type = environment.getProperty("os.name");
	    return type.contains("Windows")?true:false;

	}

}
2:使用@Conditional注解进行判断
import com.mote.pojo.User;

@Configuration
public class MainConfig {

	@Bean
	@Conditional({MyConditional.class})
	public User bier(){
		return new User("bier",30);
	}

}
小技巧:eclipse模拟linux环境
测试类中点击鼠标右键,Run AS > RunConfigurations
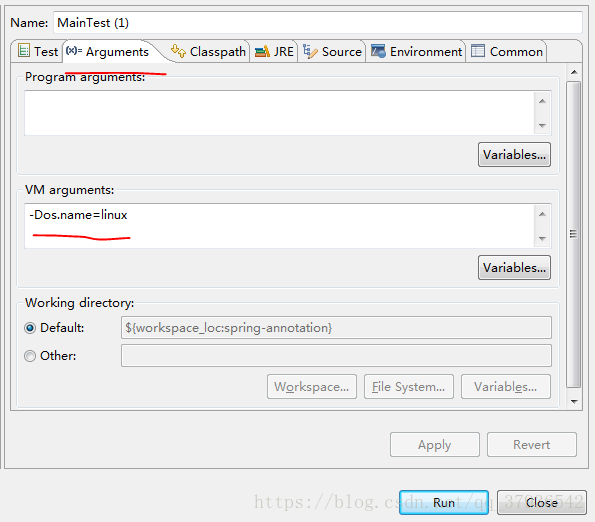
测试:
public class MainTest {
@Test //注解测试
public void test(){
AnnotationConfigApplicationContext context = new AnnotationConfigApplicationContext(MainConfig.class);
String[] names = context.getBeanDefinitionNames(); //打印spring容器注册的bean名称
for (String name : names) {
System.out.println(name);
}
}
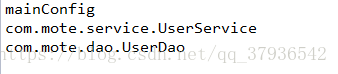
}windows环境运行结果打印:
linux系统运行结果打印:
第六节(拓展):@profile 根据当前环境,动态的激活和切换一系列组件
案例功能描述:根据当前环境决定使用相应的数据库
* 默认情况下:数据库A
* 测试环境下:数据库B
* 开发环境下:数据库C
导入maven:dhcp连接池和mysql驱动
<dependency>
	<groupId>commons-dbcp</groupId>
	<artifactId>commons-dbcp</artifactId>
	<version>1.4</version>
</dependency>

<dependency>
	<groupId>mysql</groupId>
	<artifactId>mysql-connector-java</artifactId>
	<version>6.0.6</version>
</dependency>
案例代码:
import org.apache.commons.dbcp.BasicDataSource;
import org.springframework.context.annotation.Bean;
import org.springframework.context.annotation.Configuration;
import org.springframework.context.annotation.Profile;

/**
 * @Profile:加了该环境标识的bean,只有这个环境被激活后后才能注册到容器
 */
@Configuration
public class MainConfig {

	@Bean
	@Profile("default")   //不指定的情况下,默认使用的数据库
	public BasicDataSource dataSourceDefault() {
		BasicDataSource dataSource = new BasicDataSource();
		dataSource.setUrl("jdbc:mysql://localhost:3306/A");
		dataSource.setDriverClassName("com.mysql.jdbc.Driver");
		dataSource.setUsername("root");
		dataSource.setPassword("123456");
		return dataSource;
	}

	@Bean
	@Profile("test")   //测试环境
	public BasicDataSource dataSourceTest() {
		BasicDataSource dataSource = new BasicDataSource();
		dataSource.setUrl("jdbc:mysql://localhost:3306/B");
		dataSource.setDriverClassName("com.mysql.jdbc.Driver");
		dataSource.setUsername("root");
		dataSource.setPassword("123456");
		return dataSource;
	}

	@Bean
	@Profile("devlop")   //开发环境
	public BasicDataSource dataSourceDev() {
		BasicDataSource dataSource = new BasicDataSource();
		dataSource.setUrl("jdbc:mysql://localhost:3306/C");
		dataSource.setDriverClassName("com.mysql.jdbc.Driver");
		dataSource.setUsername("root");
		dataSource.setPassword("123456");
		return dataSource;
	}

}
测试代码:
public class MainTest {
	@Test //注解测试
	public void test(){
		AnnotationConfigApplicationContext context = new AnnotationConfigApplicationContext(MainConfig.class);
		String[] names = context.getBeanDefinitionNames();
		for (String name : names) {
			System.out.println(name);
		}
	}
}
测试一:不指定环境变量,直接运行,打印如下
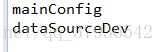
测试二:指定环境为test,运行打印
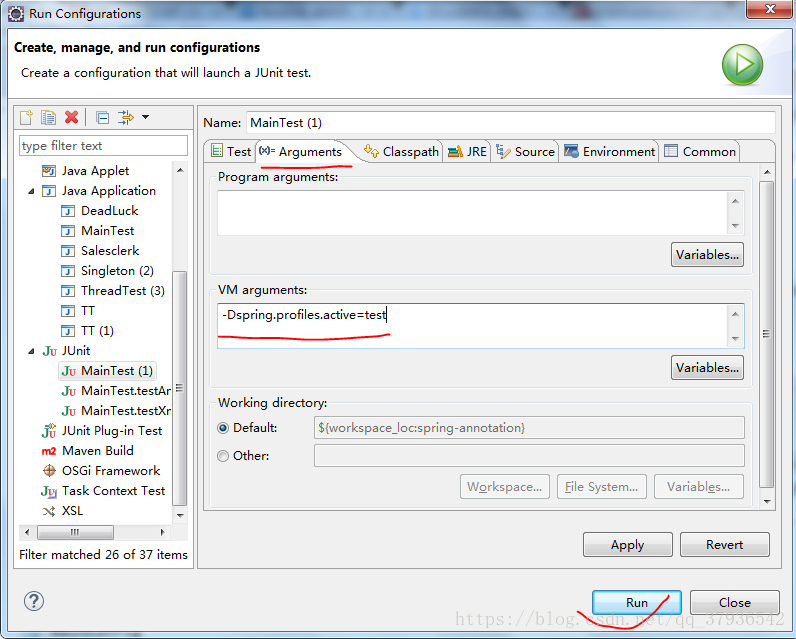
打印结果:
第七节:@Autowired 自动装配
@Autowired使用前提,userService已经注册到spring容器中
@Autowired实现装配的三种操作方式
1)标注在属性上
/**
	 * @Autowired 首先根据UserService类型去容器寻找Bean,
	 * 如果这个类型有多个Bean,比如userService/userService1
	 * 那么@Autowired就会根据属性名称userService去匹配.
	 *
	 * 另外,可以使用注解@Qualifier配合@Autowired使用,用于指定容器中特定id的Bean
	 */
	//@Qualifier("userService")
	@Autowired
	private UserService userService;
2)标注在set方法上
private UserService userService;

@Autowired
public void setUserService(UserService userService) {
	this.userService = userService;
}
3)标注在构造器上
private UserService userService;

/**
* 如果该类只有这一个构造器,那么这个@Autowired注解可以省略不写
* 因为spring容器生成的时候,就必须根据这个构造器去创建对象
*/
@Autowired
public UserController(UserService userService) {
	super();
	this.userService = userService;
}
第八节:JSR-250(java规范)的注解@Resource
@Resource使用前提,userService已经注册到spring容器中
/**
* @Resource JSR-250注解,用来激活资源,通过name属性,指定容器中特定id的bean
*/
@Resource(name="userService")
private UserService userService;
第九节:xml配置实现装配的多种方式
1)set方法注入依赖
xml:
<bean id="userService" class="com.mote.service.UserService"/>

<bean class="com.mote.controller.UserController">
   <property name="userService" ref="userService"/>
</bean>
代码:
private UserService userService;

public void setUserService(UserService userService) {
	this.userService = userService;
}
2)构造器注入依赖
xml:
<bean id="userService" class="com.mote.service.UserService"></bean>

<bean class="com.mote.controller.UserController">
     <constructor-arg name="userService" ref="userService"></constructor-arg>
</bean>
代码:
private UserService userService;

public UserController(UserService userService) {
	this.userService = userService;
}
3)静态工厂注入依赖和实例化工厂注入依赖
这两种方式其实就是通过set方法注入依赖,只是向容器中添加bean的方式不同。
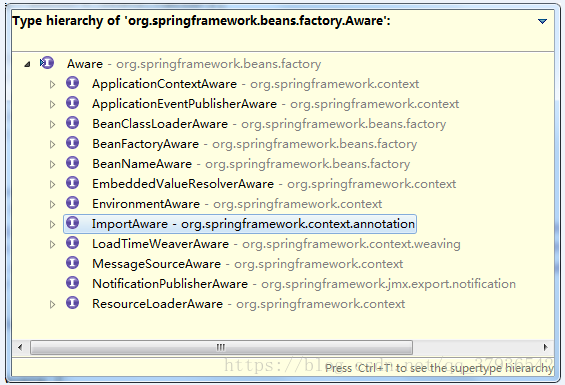
第十节(拓展):自定义组件实现xxxAware接口,使用spring底层的一些组件
import org.springframework.beans.BeansException;
import org.springframework.beans.factory.BeanFactory;
import org.springframework.beans.factory.BeanFactoryAware;
import org.springframework.context.ApplicationContext;
import org.springframework.context.ApplicationContextAware;

public class MyAware implements ApplicationContextAware,BeanFactoryAware {

	private ApplicationContext applicationContext; //设置成员变量

	private BeanFactory beanFactory;  //设置成员变量

	public void setApplicationContext(ApplicationContext applicationContext)
			throws BeansException {
		this.applicationContext = applicationContext; //赋值
	}

	public void setBeanFactory(BeanFactory beanFactory) throws BeansException {
		this.beanFactory = beanFactory;  //赋值

	}

	public void test(){
		//使用 applicationContext、beanFactory

	}
}