1、ambassador是datawire开源的服务网关,很好的支持kubernetes。具体详细介绍参考官网:https://www.getambassador.io/about/why-ambassador
本节主要讲述整个部署过程和简单实用,具体详细的资料抢参考官网。
2、部署
本次主要介绍将ambassador部署到自己的kubernetes集群里面,根据官网介绍部署方式有几种:
1)yaml部署,即定义yaml文件,使用kubectl 直接部署
2) helm部署,如果用helm部署则需要在kubernetes中现安装tiller(helm的server端)
yaml部署:
新版本的k8s集群都开启了rbac认证,所以需要提前创建rbac文件,进行授权:
wget https://getambassador.io/yaml/ambassador/ambassador-rbac.yaml
# cat ambassador-rbac.yaml
---
apiVersion: v1
kind: Service
metadata:
  labels:
    service: ambassador-admin
  name: ambassador-admin
spec:
  type: NodePort
  ports:
  - name: ambassador-admin
    port: 8877
    targetPort: 8877
  selector:
    service: ambassador
---
apiVersion: rbac.authorization.k8s.io/v1beta1
kind: ClusterRole
metadata:
  name: ambassador
rules:
- apiGroups: [""]
  resources:
  - services
  verbs: ["get", "list", "watch"]
- apiGroups: [""]
  resources:
  - configmaps
  verbs: ["create", "update", "patch", "get", "list", "watch"]
- apiGroups: [""]
  resources:
  - secrets
  verbs: ["get", "list", "watch"]
---
apiVersion: v1
kind: ServiceAccount
metadata:
  name: ambassador
---
apiVersion: rbac.authorization.k8s.io/v1beta1
kind: ClusterRoleBinding
metadata:
  name: ambassador
roleRef:
  apiGroup: rbac.authorization.k8s.io
  kind: ClusterRole
  name: ambassador
subjects:
- kind: ServiceAccount
  name: ambassador
  namespace: tiller-world
---
apiVersion: extensions/v1beta1
kind: Deployment
metadata:
  name: ambassador
spec:
  replicas: 3
  template:
    metadata:
      annotations:
        sidecar.istio.io/inject: "false"
      labels:
        service: ambassador
    spec:
      serviceAccountName: ambassador
      containers:
      - name: ambassador
        image: quay.io/datawire/ambassador:0.40.0
        resources:
          limits:
            cpu: 1
            memory: 400Mi
          requests:
            cpu: 200m
            memory: 100Mi
        env:
        - name: AMBASSADOR_NAMESPACE
          valueFrom:
            fieldRef:
              fieldPath: metadata.namespace
        ports:
        - name: http
          containerPort: 80
        - name: https
          containerPort: 443
        - name: admin
          containerPort: 8877
        livenessProbe:
          httpGet:
            path: /ambassador/v0/check_alive
            port: 8877
          initialDelaySeconds: 30
          periodSeconds: 3
        readinessProbe:
          httpGet:
            path: /ambassador/v0/check_ready
            port: 8877
          initialDelaySeconds: 30
          periodSeconds: 3
      restartPolicy: Always
我只修改了部署的namespace,tiller-world这个namespace是创建用helm部署程序用的。
创建角色及权限

kubectl  apply -f  ambassador-rbac.yaml
接下来创建ambassador的service:
暴漏服务有多种方式:LoadBalancer、NodePort、Ingress
这里我们使用NodePort暴漏服务,k8s默认的服务暴漏端口范围是30000~32767,当然这个端口的范围可以在启动apiserver的时候进行修改,指定--service-node-port-range=1-65535,修改为需要的端口范围,最好是不要将常见服务的端口包含在内,否则容易冲突。
# cat ambassador-svc.yaml
---
apiVersion: v1
kind: Service
metadata:
  labels:
    service: ambassador
  name: ambssador
spec:
  type: NodePort
  ports:
  - port: 80
    targetPort: 80
    nodePort: 30009
  selector:
    service: ambassador
这里采用NodePort方式暴漏到服务器的30009端口。可以根据需要自己制定。
创建一个测试route:
# cat httpbin.yaml
---
apiVersion: v1
kind: Service
metadata:
  name: httpbin
  annotations:
    getambassador.io/config: |
       ---
       apiVersion: ambassador/v0
       kind: Mapping
       name: httpbin_mapping
       prefix: /httpbin/
       service: httpbin.org:80
       host_rewrite: httpbin.org
spec:
  ports:
  - name: httpbin
    port: 80
# kubectl apply -f httpbin.yaml
查看部署:
# kubectl get pods -n tiller-world
NAME                             READY   STATUS    RESTARTS   AGE
ambassador-5f66f5fd89-b2tqh      1/1     Running   0          138m
ambassador-5f66f5fd89-nbrgj      1/1     Running   0          138m
ambassador-5f66f5fd89-qxz55      1/1     Running   0          138m
# kubectl get  svc -n tiller-world
NAME               TYPE        CLUSTER-IP       EXTERNAL-IP   PORT(S)          AGE
ambassador-admin   NodePort    10.108.245.217   <none>        8877:30051/TCP   138m
ambssador          NodePort    10.105.112.156   <none>        80:30009/TCP     104m
httpbin            ClusterIP   10.103.94.31     <none>        80/TCP           104m
测试访问:
访问的url:http://ip:30009/httpbin/,ip为kubernetes服务器的ip

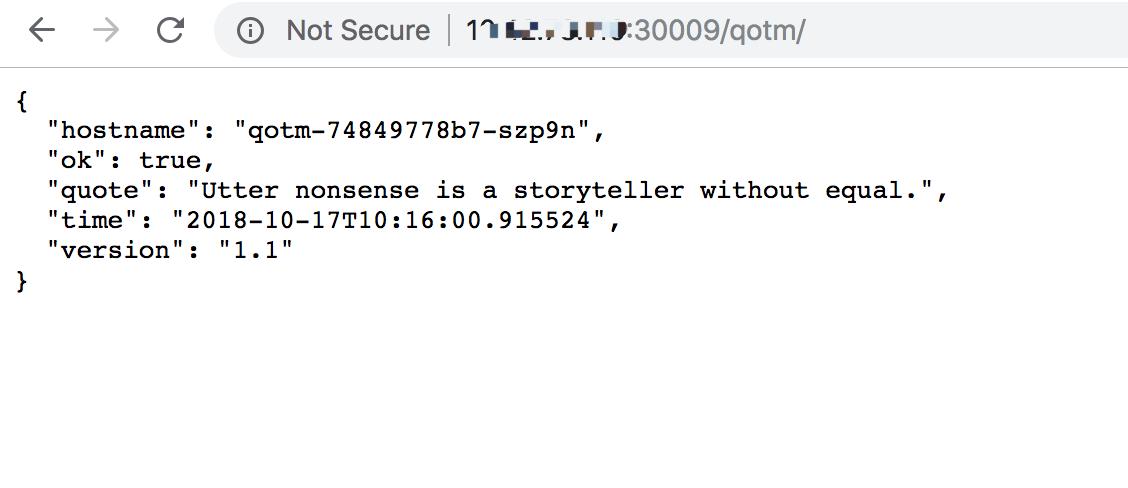
部署一个service测试,部署qotm服务:
# cat qotm.yaml
---
apiVersion: v1
kind: Service
metadata:
  name: qotm
  annotations:
    getambassador.io/config: |
      ---
      apiVersion: ambassador/v0
      kind: Mapping
      name: qot_mapping
      prefix: /qotm/
      service: qotm
spec:
  selector:
    app: qotm
  ports:
  - port: 80
    name: http-qotm
    targetPort: http-api
---
apiVersion: extensions/v1beta1
kind: Deployment
metadata:
  name: qotm
spec:
  replicas: 1
  strategy:
    type: RollingUpdate
  template:
    metadata:
      labels:
        app: qotm
    spec:
      containers:
      - name: qotm
        image: datawire/qotm:1.1
        ports:
        - name: http-api
          containerPort: 5000
        resources:
          limits:
            cpu: "0.1"
            memory: 100Mi
kubectl apply -f qotm.yaml
service使用ambassador,只需要在service的定义里面添加注解就可以自动识别:
 annotations:
    getambassador.io/config: |
      ---
      apiVersion: ambassador/v0
      kind: Mapping
      name: qot_mapping
      prefix: /qotm/
      service: qotm
这里使用的是Mapping,uri前缀是/qotm/。详细的配置参考官网:https://www.getambassador.io/reference/mappings
先查看一下部署的服务:
# kubectl get svc  -n tiller-world
NAME               TYPE        CLUSTER-IP       EXTERNAL-IP   PORT(S)          AGE
ambassador-admin   NodePort    10.108.245.217   <none>        8877:30051/TCP   147m
ambssador          NodePort    10.105.112.156   <none>        80:30009/TCP     113m
httpbin            ClusterIP   10.103.94.31     <none>        80/TCP           113m
qotm               ClusterIP   10.108.253.202   <none>        80/TCP           72m
tiller-deploy      ClusterIP   10.102.176.214   <none>        44134/TCP        4h47m

访问地址:http://ip:30009/qotm/
helm部署:
helm repo add datawire https://www.getambassador.io

helm upgrade --install --wait ambassador datawire/ambassador
当然也可以直接将chart fetch到本地,自己根据需求进行定制:
helm fetch --name ambassador datawire/ambassador