大方向参考了 https://blog.csdn.net/u014659656/article/details/53348851 遇到具体的问题再搜索解决。
1、首先安装显卡驱动。
查看自己显卡 检查自己的显卡 NVIDIA VGA card model
sudo lshw -numeric -C display然而我第一步就出现了问题,找不到nvidia卡,我的ubuntu只识别了intel的集成显卡,没有识别N卡,然后查百度,发现ubuntu把N卡当作3D渲染的controller http://tieba.baidu.com/p/2660498151 这个帖子给了我启发。
于是按照这个博客 https://blog.csdn.net/qq_37935670/article/details/80377196
第一步:(最重要)禁用自己的secure boot,也就是设置为disable,具体的进入自己bios中找一下,一般在security或者boot里面。(我的惠普,本来就是禁用的,具体可以搜一下百度——XX电脑如何禁用安全启动)
第二步:进入终端输入两条命令
$ ubuntu-drivers devices
$ sudo ubuntu-drivers autoinstall
解释一下:第一条命令是查看显卡设备和显卡驱动,第二条命令是自动安装合适显卡驱动。
第三步:重启ubuntu,搜索里面搜nvidia,有了nvidia X server settings

成功安装N卡的驱动,而且ubuntu也默认使用N卡了。
检查你的NVIDIA VGA card model
sudo lshw -numeric -C display
lspci | grep -i vga
lspci | grep -i nvidia
然后看显卡驱动
lsmod | grep -i nvidia

(ps:在这里直接在终端安装了适合自己显卡的nvidia 驱动,但是和我在NVDIA driver search pa 搜到的版本不一样,本来担心会出错,但是其实没有这么敏感,是可以使用的。)


检测驱动是否安装好 nvidia-smi,我的是这样的

恭喜你完成了第一步:nvidia驱动安装
2、接下来安装cuda8.0
我是在官网直接下载的。 cuda toolkit 8.0
具体安装cuda参考了这里 https://www.cnblogs.com/xuliangxing/p/7575586.html
和 https://www.linuxidc.com/Linux/2016-11/137561.htm
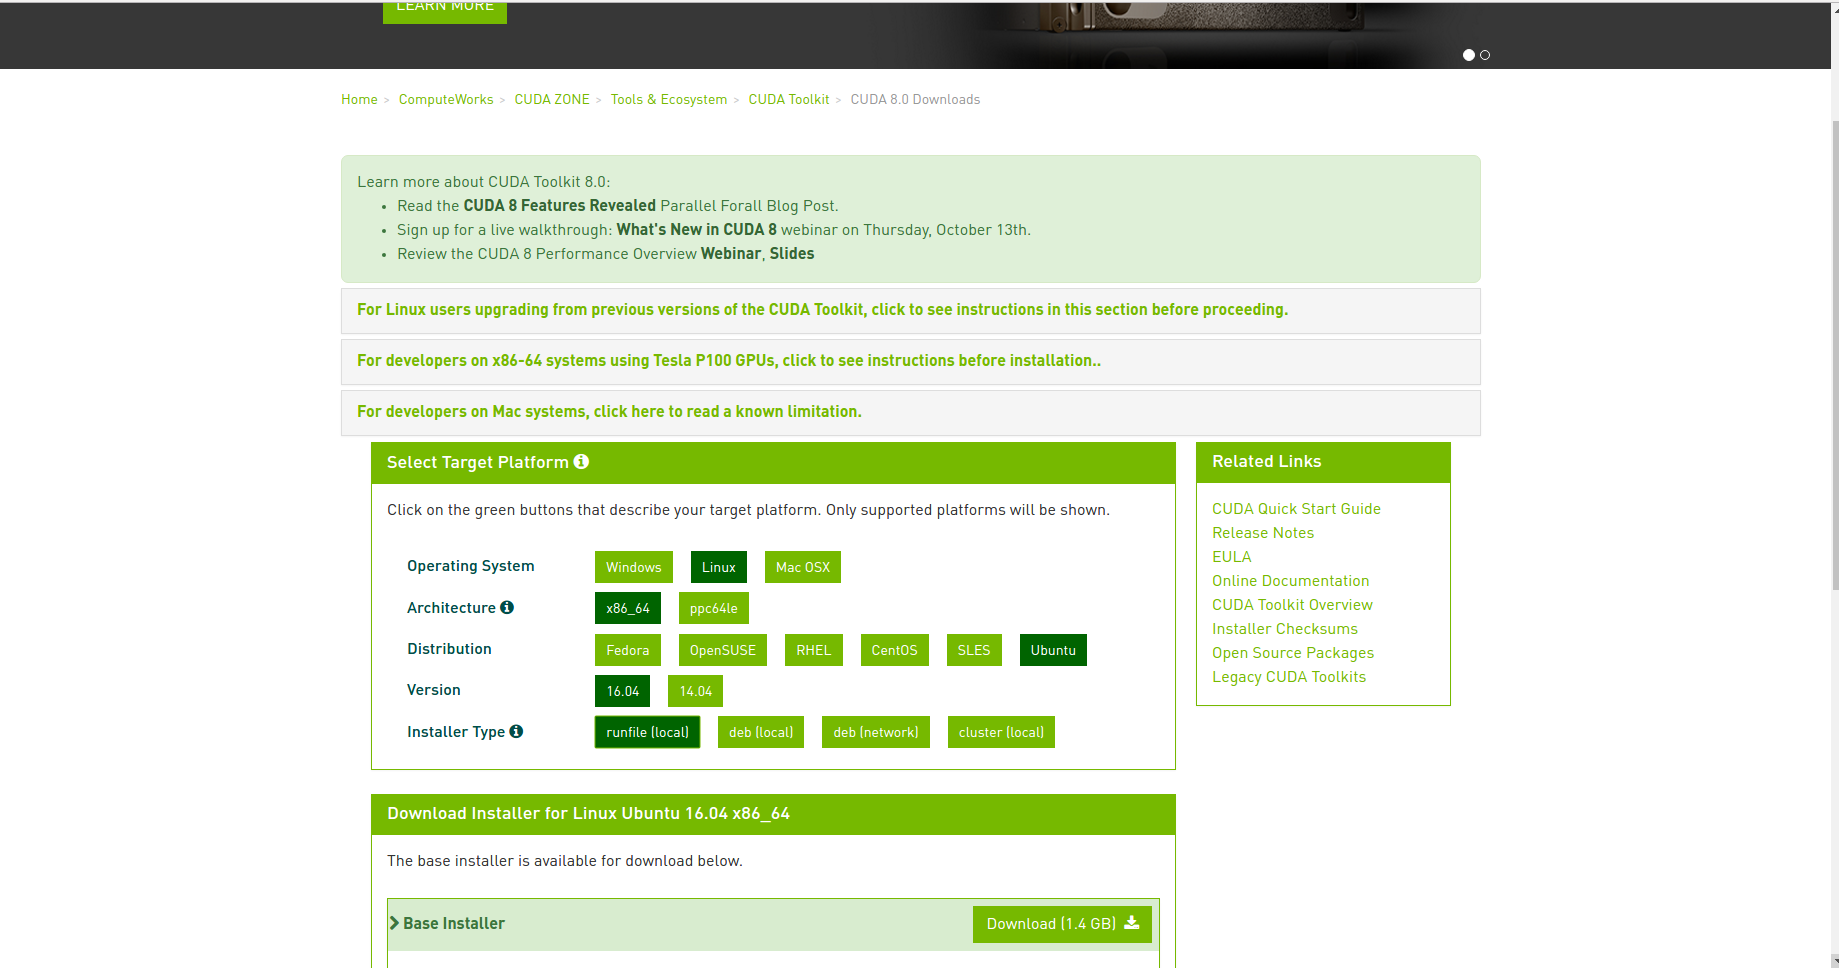
一定要选择runfile.下载完成之后,执行
sudo sh cuda_8.0.44_linux.run --override然后就进入安装过程,开始都是End User License Agreement,你可以CTRL +C 跳过,然后accept。
下面就是安装的交互界面,开始的Install NVIDIA Accelerated Graphics Driver for Linux-x86_64 367.48?选择n,因为你已经安装驱动了。(画重点!!就这个要选N,其他都选Y)
Using more to view the EULA.
End User License Agreement
--------------------------


Preface
-------

The following contains specific license terms and conditions
for four separate NVIDIA products. By accepting this
agreement, you agree to comply with all the terms and
conditions applicable to the specific product(s) included
herein.


NVIDIA CUDA Toolkit


Description

The NVIDIA CUDA Toolkit provides command-line and graphical
tools for building, debugging and optimizing the performance
of applications accelerated by NVIDIA GPUs, runtime and math
libraries, and documentation including programming guides,
user manuals, and API references. The NVIDIA CUDA Toolkit
License Agreement is available in Chapter 1.


Default Install Location of CUDA Toolkit

Windows platform:

Do you accept the previously read EULA?
accept/decline/quit: accept

Install NVIDIA Accelerated Graphics Driver for Linux-x86_64 367.48?
(y)es/(n)o/(q)uit: n

Install the CUDA 8.0 Toolkit?
(y)es/(n)o/(q)uit: y

Enter Toolkit Location
 [ default is /usr/local/cuda-8.0 ]:

Do you want to install a symbolic link at /usr/local/cuda?
(y)es/(n)o/(q)uit: y

Install the CUDA 8.0 Samples?
(y)es/(n)o/(q)uit: y

Enter CUDA Samples Location
 [ default is /home/kinny ]:

Installing the CUDA Toolkit in /usr/local/cuda-8.0 ...
Missing recommended library: libXmu.so

Installing the CUDA Samples in /home/kinny ...
Copying samples to /home/kinny/NVIDIA_CUDA-8.0_Samples now...
Finished copying samples.

===========
= Summary =
===========

Driver:   Not Selected
Toolkit:  Installed in /usr/local/cuda-8.0
Samples:  Installed in /home/kinny, but missing recommended libraries

Please make sure that
 -   PATH includes /usr/local/cuda-8.0/bin
 -   LD_LIBRARY_PATH includes /usr/local/cuda-8.0/lib64, or, add /usr/local/cuda-8.0/lib64 to /etc/ld.so.conf and run ldconfig as root

To uninstall the CUDA Toolkit, run the uninstall script in /usr/local/cuda-8.0/bin

Please see CUDA_Installation_Guide_Linux.pdf in /usr/local/cuda-8.0/doc/pdf for detailed information on setting up CUDA.

***WARNING: Incomplete installation! This installation did not install the CUDA Driver. A driver of version at least 361.00 is required for CUDA 8.0 functionality to work.
To install the driver using this installer, run the following command, replacing <CudaInstaller> with the name of this run file:
    sudo <CudaInstaller>.run -silent -driver

Logfile is /tmp/cuda_install_17494.log
我们需要去配置环境变量,我们输入:sudo vim ~/.bashrc (你的电脑要有vim,这又是一个大boss,里面涉及很多内容,我也正在学习中,强大的vim)在里面输入:
保存并退出。

最后:
我们输入nvcc --version来检测是否安装成功。
我在这里刚开始就识别不了nvcc -V,然后就直接在终端下载了,检查nvcc -V时是7.几的版本,可以正常安装cudnn,但是到了import tensorflow时就出问题了,报错 libcusolver.so.8.0: cannot open shared object file: No such file or directory(写到这里后悔自己没有实时记录博客,全部忘记了)
所以这里必须要配好环境变量,直到

环境变量必须弄好!否则到了import tensorflow会出错 https://www.cnblogs.com/king-lps/p/8521310.html
cuda 版本
cat /usr/local/cuda/version.txt
3、接下来是cudnn啦
在这儿下载 https://developer.nvidia.com/rdp/cudnn-download 选择自己对应的版本(忘记我选了哪个了)
需要注册帐号
按照这个 https://blog.csdn.net/weixin_42287851/article/details/80421821
就是复制几个文件:库文件和头文件。将cudnn的头文件复制到cuda安装路径的include路径下,将cudnn的库文件复制到cuda安装路径的lib64路径下。具体操作如下
 1 #解压文件
 2 tar -zxvf cudnn-8.0-linux-x64-v7.tgz
 3
 4 #切换到刚刚解压出来的文件夹路径
 5 cd cuda
 6 #复制include里的头文件(记得转到include文件里执行下面命令)
 7 sudo cp /include/cudnn.h  /usr/local/cuda/include/
 8
 9 #复制lib64下的lib文件到cuda安装路径下的lib64(记得转到lib64文件里执行下面命令)
10 sudo cp lib*  /usr/local/cuda/lib64/
11
12 #设置权限
13 sudo chmod a+r /usr/local/cuda/include/cudnn.h
14 sudo chmod a+r /usr/local/cuda/lib64/libcudnn*
15
16 #======更新软连接======
17 cd /usr/local/cuda/lib64/
18 sudo rm -rf libcudnn.so libcudnn.so.7   #删除原有动态文件,版本号注意变化,可在cudnn的lib64文件夹中查看
19 sudo ln -s libcudnn.so.7.0.2 libcudnn.so.7  #生成软衔接(注意这里要和自己下载的cudnn版本对应,可以在/usr/local/cuda/lib64下查看自己libcudnn的版本)
20 sudo ln -s libcudnn.so.7 libcudnn.so #生成软链接
21 sudo ldconfig -v #立刻生效
备注:上面的软连接的版本号要根据自己实际下载的cudnn的lib版本号
检查是否安装成功
cudnn 版本
cat /usr/local/cuda/include/cudnn.h | grep CUDNN_MAJOR -A 2

4、安装tensorflow啦
我没有安装anaconda,直接安装了pip3,吐槽一下,在ubuntu下好麻烦啊py2和py3,然后pip3安装各种库,中途也遇到了很多问题
用到了pip国内源 pip3 install numpy -i +源(写到simple),类似这样的,百度一下就好。
https://blog.csdn.net/juanjuan1314/article/details/78959558
https://blog.csdn.net/keith_bb/article/details/65435337
最后我应该是下载了

su
pip3 install 把文件拖进来,tensorflow库安装成功!!!

其他的目前想不到了,想到再更(以后一定要及做记录呀,第一次记录,有点乱,以后会进步的!)
5、查看cuda、cudnn方法:终端输入
cuda 版本
cat /usr/local/cuda/version.txt
cudnn 版本
cat /usr/local/cuda/include/cudnn.h | grep CUDNN_MAJOR -A 2
6、参考网址:
https://blog.csdn.net/icehui2012/article/details/62219008
http://www.mamicode.com/info-detail-1922278.html
https://blog.csdn.net/weili_/article/details/80952836
https://blog.csdn.net/weixin_42287851/article/details/80421821
https://blog.csdn.net/fdqw_sph/article/details/78745375
https://www.cnblogs.com/xia-Autumn/p/6228911.html
https://blog.csdn.net/cs_hnu_scw/article/details/79695347
https://www.cnblogs.com/wmr95/p/7500960.html
https://blog.csdn.net/ezhchai/article/details/78788564
https://zhuanlan.zhihu.com/p/24767059?utm_source=qq&utm_medium=social&utm_oi=640623399672614912