1. 安装Anaconda3
1.1 下载安装包
wget -P /tmp https://repo.anaconda.com/archive/Anaconda3-2020.02-Linux-x86_64.sh1.2 安装
bash /tmp/Anaconda3-2020.02-Linux-x86_64.sh1.3 激活 Anaconda
source ~/.bashrc1.4 升级 Anaconda
conda update --all1.5 Anaconda换源
清华源:
conda config --add channels https://mirrors.tuna.tsinghua.edu.cn/anaconda/pkgs/free/
conda config --add channels https://mirrors.tuna.tsinghua.edu.cn/anaconda/pkgs/main
conda config --add channels https://mirrors.tuna.tsinghua.edu.cn/anaconda/pkgs/r
conda config --add channels https://mirrors.tuna.tsinghua.edu.cn/anaconda/pkgs/msys2
conda config --add channels https://mirrors.tuna.tsinghua.edu.cn/anaconda/cloud/conda-forge
conda config --add channels https://mirrors.tuna.tsinghua.edu.cn/anaconda/cloud/msys2
conda config --add channels https://mirrors.tuna.tsinghua.edu.cn/anaconda/cloud/bioconda
conda config --add channels https://mirrors.tuna.tsinghua.edu.cn/anaconda/cloud/menpo
conda config --add channels https://mirrors.tuna.tsinghua.edu.cn/anaconda/cloud/pytorch
conda config --add channels https://mirrors.tuna.tsinghua.edu.cn/anaconda/cloud/simpleitk
中科大源:
conda config --add channels https://mirrors.ustc.edu.cn/anaconda/pkgs/main/
conda config --add channels https://mirrors.ustc.edu.cn/anaconda/pkgs/free/
conda config --add channels https://mirrors.ustc.edu.cn/anaconda/cloud/conda-forge/
conda config --add channels https://mirrors.ustc.edu.cn/anaconda/cloud/msys2/
conda config --add channels https://mirrors.ustc.edu.cn/anaconda/cloud/bioconda/
conda config --add channels https://mirrors.ustc.edu.cn/anaconda/cloud/menpo/
conda config --add channels https://mirrors.ustc.edu.cn/anaconda/cloud/pytorch/
2. 安装tensorflow
2.1 安装NVIDIA显卡驱动
lshw -c video 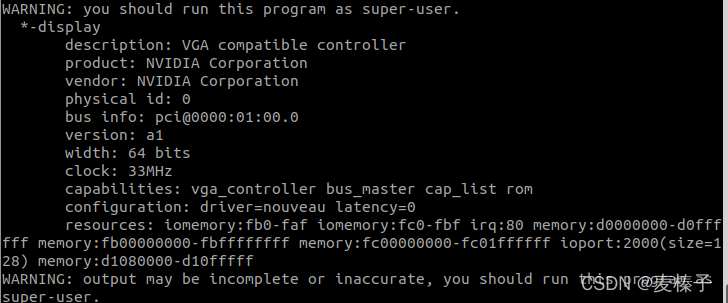
可以看到你的显卡信息,比如我的就是product: NVIDIA Corporation
环境搭建01——Ubuntu如何查看显卡信息及安装NVDIA显卡驱动_命名无能的博客-CSDN博客_ubuntu查看显卡驱动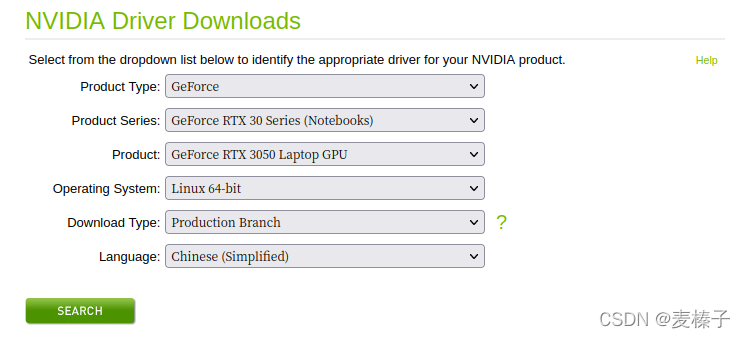
ubuntu-drivers devices
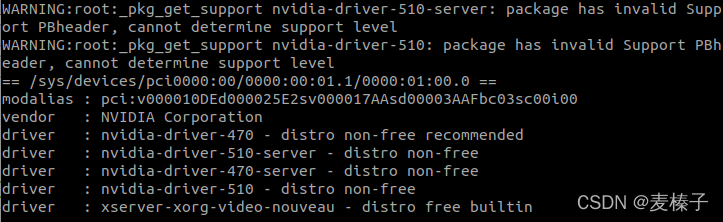
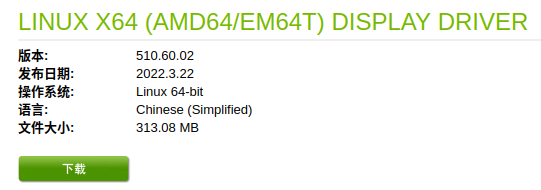
结果显示和搜索到的驱动版本一样,推荐也是510,那我们可以安心安装510.60.02版本。
2.2 安装CUDA
CUDA Toolkit 11.2 Downloads | NVIDIA Developer
wget https://developer.download.nvidia.com/compute/cuda/11.2.0/local_installers/cuda_11.2.0_460.27.04_linux.run
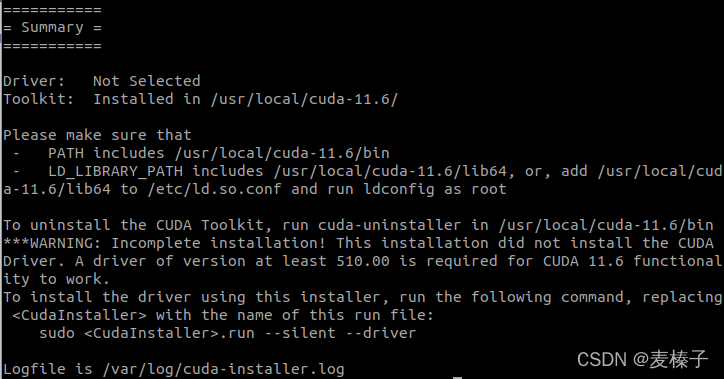
sudo sh cuda_11.2.0_460.27.04_linux.run按上图最下方两行代码安装。
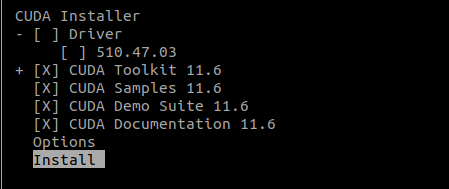
由于双系统win11装过CUDA了,所以取消勾选Driver,否则会报错
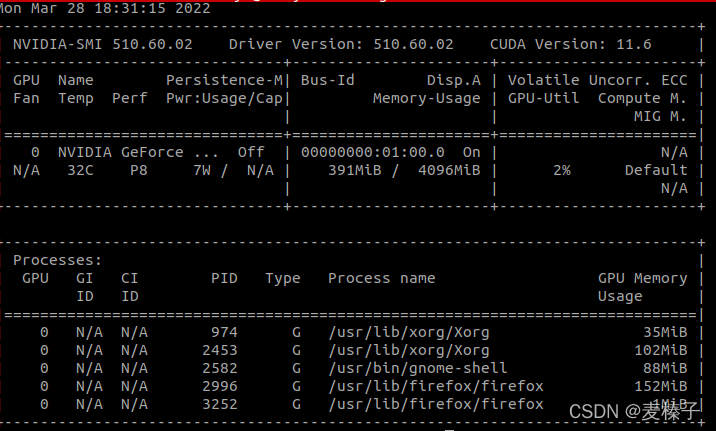
查看CUDA是否安装成功:

2.3 安装cuDNN
首先到官网下载cuDNN( NVIDIA cuDNN | NVIDIA Developer ),需要注册为开发者才能下载。
参考大佬的文章:
环境搭建02——Ubuntu安装cuda和cudnn_命名无能的博客-CSDN博客成功解决--查看cudnn版本无反应的问题_石头儿啊的博客-CSDN博客_查看cudnn版本没反应
2.4 安装tensorflow
conda create -n tensorflow python=3.6conda activate tensorflowWin11 下通过Anaconda安装tensorflow_麦榛子的博客-CSDN博客
测试:
python
import tensorflow as tf
tf.compat.v1.disable_eager_execution() #保证sess.run()能够正常运行
hello = tf.constant('hello,tensorflow')
sess= tf.compat.v1.Session()#版本2.0的函数
print(sess.run(hello))

安装完毕!
PS:
打开VS code,点击右下角python切换虚拟环境,终端输入conda activate tensorflow.