本文主要讲各主要linux发行版安装nginx的方法,以及通用的编译安装方法。
关于nginx的配置,将放在以后的文章中。
文章参考nginx官方网站安装教程,在翻译的基础上,添加个人的总结,以及一些常见问题的处理。
一、使用包管理器安装
RedHat,CentOS发行版,yum包管理器安装nginx
- 新建文件
/etc/yum.repos.d/nginx.repo,并写入以下内容:
[nginx]
name=nginx repo
baseurl=http://nginx.org/packages/OS/OSRELEASE/$basearch/
gpgcheck=0
enabled=1
- 根据你使用的操作系统情况,将内容中的“
OS” 替换为 “rhel” or “centos”,根据使用的系统版本,将 “OSRELEASE” 替换为 “6” or “7”。
Debian/Ubuntu发行版,apt包管理器安装nginx
-
下载nginx软件仓库的密钥文件
点此下载密钥文件 -
将密钥添加到系统中
sudo apt-key add nginx_signing.key
- 将仓库信息写入到
/etc/apt/sources.lish文件
deb http://nginx.org/packages/OS/CODENAME nginx
deb-src http://nginx.org/packages/OS/ CODENAME nginx
根据使用的发行版信息,将OS修改为ubuntu或者debian
查询文件下面的附录一,将命令中的CODENAME,替换为你使用的系统版本的codename。
- 安装nginx
sudo apt update
sudo apt install nginx
二、编译安装nginx
-
下载nginx源代码
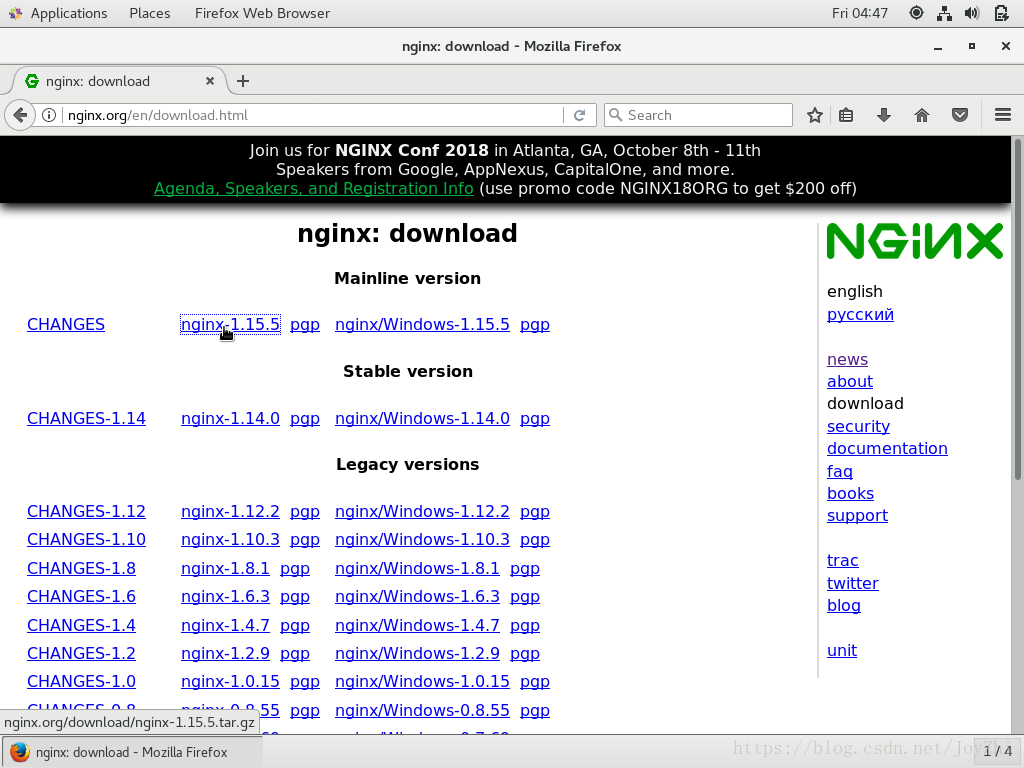
进入下面的地址,选择自己想要安装的版本即可,服务器请安装stable版本。
下载地址nginx官方网站
-
解压归档文件
- 在下载文件的保存位置,右键,选择“
在终端打开”,运行
tar -xvf nginx-1.15.5.tar.gz

- 切换到解压出来的文件夹中
cd ./nginx-1.15.5
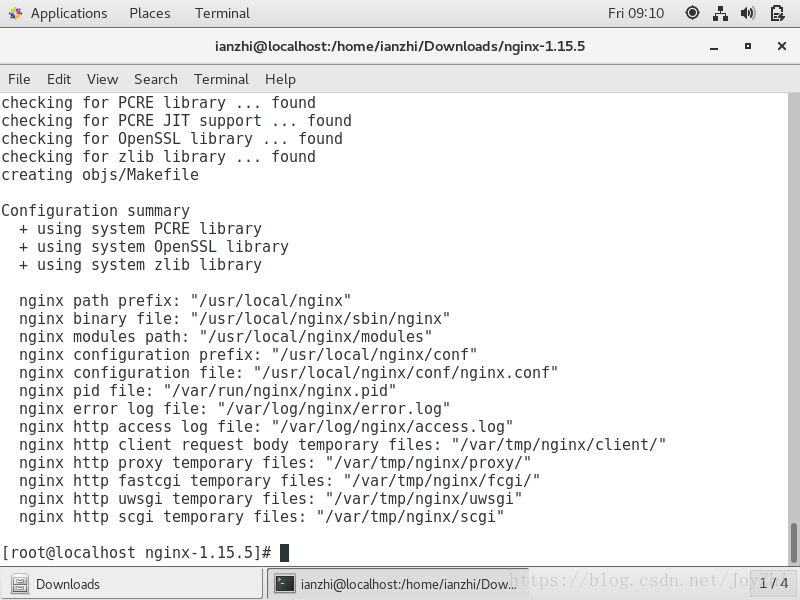
- configure
configure的作用主要是检查当前环境是否满足安装条件,并对即将安装的软件进行配置。
这里可以直接运行
./configure
但是,我们可能不只需要nginx的基础功能,或者需要对安装进行一些配置。这时,我们需要添加一些编译参数。具体的编译参数可以通过:
./configure --help
来查看,具体各配置项目的意义,请查看附录二。
一般可以这样配置:
./configure \
--prefix=/usr/local/nginx \
--sbin-path=/usr/local/nginx/sbin/nginx \
--conf-path=/usr/local/nginx/conf/nginx.conf \
--error-log-path=/var/log/nginx/error.log \
--http-log-path=/var/log/nginx/access.log \
--pid-path=/var/run/nginx/nginx.pid \
--lock-path=/var/lock/nginx.lock \
--user=nginx \
--group=nginx \
--with-http_ssl_module \
--with-http_stub_status_module \
--with-http_gzip_static_module \
--http-client-body-temp-path=/var/tmp/nginx/client/ \
--http-proxy-temp-path=/var/tmp/nginx/proxy/ \
--http-fastcgi-temp-path=/var/tmp/nginx/fcgi/ \
--http-uwsgi-temp-path=/var/tmp/nginx/uwsgi \
--http-scgi-temp-path=/var/tmp/nginx/scgi \
--with-pcre
configure过程中可能会遇到的一些问题请查看附录三。
- 安装软件
make && make install
只要上一步的configure通过,这里一般不会有问题。
- 运行nginx
/usr/local/nginx/sbin/nginx
运行成功无返回,如果运行失败报错,请查看文章底部。
三、附录
附录一 nginx二进制包支持的发行版
-
RHEL和CentOS
Version Supported Platforms
6.x x86_64, i386
7.4+ x86_64, ppc64le -
Debian
Version Codename Supported Platforms
8.x jessie x86_64, i386
9.x stretch x86_64, i386 -
Ubuntu
Version Codename Supported Platforms
14.04 trusty x86_64, i386, aarch64/arm64
16.04 xenial x86_64, i386, ppc64el, aarch64/arm64
17.10 artful x86_64, i386
18.04 bionic x86_64
附录二 nginx编译参数含义
  --help 显示帮助信息
  --prefix=PATH 设置安装路径
  --sbin-path=PATH 启动服务可执行文件路径
  --modules-path=PATH  模块路径
  --conf-path=PATH 设置配置文件的路径
  --error-log-path=PATH 错误日志的路径
  --pid-path=PATH 进程号文件保存路径
  --lock-path=PATH 锁文件保存路径

  --user=USER 设置用来启动nginx进程的用户名
  --group=GROUP 设置用来启动nginx进程的用户所属的用户组
  --build=NAME 设置构建名称
  --builddir=DIR 设置构建目录

  --with-select_module 安装指定模块
  --without-select_module 禁用指定模块
  --with-poll_module 安装连接池模块
  --without-poll_module禁用连接池模块
  --with-threads 安装线程池模块
  --with-file-aio 安装AIO模块,允许nginx异步操作文件
  --with-http_ssl_module 安装ssl模块
  --with-http_v2_module 安装http v2模块
  --with-http_realip_module 将客户端地址更改为在指定的头字段中发送的地址
  --with-http_addition_module 附加模块
  --with-http_xslt_module
  --with-http_xslt_module=dynamic 可以构建使用一个或多个XSLT样式表转换XML响应
  --with-http_image_filter_module
  --with-http_image_filter_module=dynamic 用于转换JPEG,GIF,PNG和WebP的图像的格式
  --with-http_geoip_module
  --with-http_geoip_module=dynamic 创建基于与MaxMind GeoIP二进制文件相配的客户端IP地址的ngx_http_geoip_module变量
  --with-http_sub_module 允许用一些其他文本替换nginx响应中的一些文本
  --with-http_dav_module 增加PUT,DELETE,MKCOL:创建集合,COPY和MOVE方法
  --with-http_flv_module 寻求内存使用基于时间的偏移量文件
  --with-http_mp4_module
  --with-http_gunzip_module          enable ngx_http_gunzip_module
  --with-http_gzip_static_module     enable ngx_http_gzip_static_module
  --with-http_auth_request_module    enable ngx_http_auth_request_module
  --with-http_random_index_module 随机选择该目录下的一个文件显示出来
  --with-http_secure_link_module 防盗链模块
  --with-http_degradation_module 在内存不足的情况下返回204或444码
  --with-http_slice_module CDN系统中,向父层回源时,如果文件过大,使用slice可以让用户快速得到响应
  --with-http_stub_status_module 查看Nginx的一些状态信息

  --without-http_charset_module 取消安装charset模块,该模块添加特定字符集设置到客户端相应的 “Content-Type”域中
  --without-http_gzip_module 禁用gzip模块,该模块用来减轻服务器的带宽问题
  --without-http_ssi_module 禁用ssi模块,该模块可以使静态网页实现像动态网页一样 include 的功能
  --without-http_userid_module 禁用userid模块,该模块可以标示客户端设置合适的cookies
  --without-http_access_module 禁用access模块,该模块可以实现基于IP的访问控制
  --without-http_auth_basic_module 禁用auth_basic模块,该模块可以实现基础http认证
  --without-http_mirror_module 把真实请求引流到测试环境
  --without-http_autoindex_module 禁用autoindex模块,该模块允许列出目录内容
  --without-http_geo_module 禁用geo模块,该模块可以实现限速白名单的作用
  --without-http_map_module 禁用模块,该模块可以创建变量,这些变量的值与另外的变量值相关联
  --without-http_split_clients_module 禁用split_clients模块,该模块可以实现负载均衡
  --without-http_referer_module 禁用referer模块,该模块可根据header中的referer信息屏蔽某些请求对网站或应用的访问
  --without-http_rewrite_module 禁用rewrite模块,该模块可以实现url重写
  --without-http_proxy_module 禁用proxy模块,该模块可以实现代理
  --without-http_fastcgi_module 禁用fastcgi模块,该模块允许将请求传递给另一台服务器。
  --without-http_uwsgi_module 禁用uwsgi模块,该模块允许将请求传递到uwsgi服务器
  --without-http_scgi_module 禁用scgi模块,该模块允许nginx同Scgi协同工作
  --without-http_grpc_module  禁用grpc模块,该模块可以代理gRPC TCP连接
  --without-http_memcached_module  禁用memcached模块,该模块允许nginx直接操作memcached缓存
  --without-http_limit_conn_module 禁用limit_conn模块,该模块用来限制连接数
  --without-http_limit_req_module 禁用limit_req模块,该模块用来限制请求数
  --without-http_empty_gif_module 禁用empty_gif模块,该模块可以返回一个保存在内存中的透明像素的GIF图片
  --without-http_browser_module 禁用browser模块,该模块创建变量,它们的值取决于 请求头中“User-Agent”的值
  --without-http_upstream_hash_module 禁用upstream_hash模块,该模块可以用来定义后端负载集群
  --without-http_upstream_ip_hash_module 禁用upstream_ip_hash模块,该模块可以根据请求所属的客户端IP计算得到一个数值,然后把请求发往该数值对应的后端
  --without-http_upstream_least_conn_module 禁用upstream_least_conn
  --without-http_upstream_random_module 禁用upstream_random模块
  --without-http_upstream_keepalive_module 禁用upstream_keepalive模块
  --without-http_upstream_zone_module 禁用upstream_zone模块

  --with-http_perl_module 开启perl模块
  --with-http_perl_module=dynamic 允许动态perl模块
  --with-perl_modules_path=PATH 指定perl模块目录位置
  --with-perl=PATH 指定perl可执行文件位置

  --http-log-path=PATH 指定日志文件路径
  --http-client-body-temp-path=PATH 指定客户端请求体临时文件路径
  --http-proxy-temp-path=PATH 指定代理临时文件路径
  --http-fastcgi-temp-path=PATH 指定fastcgi临时文件路径
  --http-uwsgi-temp-path=PATH 指定uwsgi临时文件路径
  --http-scgi-temp-path=PATH 指定http_scgi临时文件路径

  --without-http 禁用http服务
  --without-http-cache 禁用http缓存

邮件模块
  --with-mail 开启POP3/IMAP4/SMTP模块
  --with-mail=dynamic 开启动态POP3/IMAP4/SMTP模块
  --with-mail_ssl_module 开始加密mail模块
  --without-mail_pop3_module 禁用pop3模块
  --without-mail_imap_module 禁用imap模块
  --without-mail_smtp_module 禁用smtp模块

stream模块
  --with-stream 开启TCP/UDP策略模块
  --with-stream=dynamic 开启动态TCP/UDP策略
  --with-stream_ssl_module 为代理流服务器提供必要的SSL/TLS协议支持
以下为负载均衡各种算法的支持, 作用与http基本相同
  --with-stream_realip_module
  --with-stream_geoip_module
  --with-stream_geoip_module=dynamic
  --with-stream_ssl_preread_module
  --without-stream_limit_conn_module
  --without-stream_access_module
  --without-stream_geo_module
  --without-stream_map_module
  --without-stream_split_clients_module
  --without-stream_return_module
  --without-stream_upstream_hash_module
  --without-stream_upstream_least_conn_module
  --without-stream_upstream_random_module
  --without-stream_upstream_zone_module

  --with-google_perftools_module 开启google_perftools模块,可以优化Nginx和MySQL的内存管
  --with-cpp_test_module  添加cpp测试模块

  --add-module=PATH 允许扩展模块
  --add-dynamic-module=PATH 允许加载动态模块的路径

  --with-compat 动态加载模块

  --with-cc=PATH 指定C编译器的备用位置
  --with-cpp=PATH 指定C预处理器的备用位置
  --with-cc-opt=OPTIONS 要传递到C编译器命令行的其他选项
  --with-ld-opt=OPTIONS 要传递到C链接器命令行的其他选项
  --with-cpu-opt=CPU 指定cpu体系结构,有效值:pentium, pentiumpro, pentium3, pentium4,athlon, opteron, sparc32, sparc64, ppc64

  --without-pcre 禁用pcre库
  --with-pcre 强制使用pcre库
  --with-pcre=DIR pcre源文件路径
  --with-pcre-opt=OPTIONS 设置pcre安装配置
  --with-pcre-jit 构建带有JIT编译器的PCRE

  --with-zlib=DIR 制定使用的zlib库路径
  --with-zlib-opt=OPTIONS 为zlib安装制定附加配置
  --with-zlib-asm=CPU                为zlib库指定汇编器源,有效的值:pentium, pentiumpro

  --with-libatomic 使用系统默认libatomic库
  --with-libatomic=DIR 制定使用的libatomic库路径

  --with-openssl=DIR 指定使用的openssl库路径
  --with-openssl-opt=OPTIONS  设置openssl构建选项

  --with-debug 开启debug日志
附录三 nginx编译过程中可能遇到的问题及解决方案
- ./configure: error: C compiler cc is not found.
这是没有安装c的编译器,执行
yum install gcc
安装gcc,中间交互一路y即可。
- ./configure: error: the HTTP rewrite module requires the PCRE library.
You can either disable the module by using --without-http_rewrite_module
option, or install the PCRE library into the system, or build the PCRE library
statically from the source with nginx by using --with-pcre=option.
缺少pcre库,执行
# 64位
yum install pcre-devel.x86_64
# 32位
yum install pcre-devel.i686
来安装pcre库
- ./configure: error: SSL modules require the OpenSSL library.
You can either do not enable the modules, or install the OpenSSL library
into the system, or build the OpenSSL library statically from the source
with nginx by using --with-openssl=option.
缺少openssl库,执行
# 64位
yum install openssl.x86_64
# 32位
yum install openssl.i686
- nginx: [emerg] getpwnam(“nginx”) failed
你指定了运行用户,但是还没有在系统中创建该用户,执行
useradd nginx
- nginx: [emerg] mkdir() “/var/tmp/nginx/client/” failed (2: No such file or directory)
未创建该目录,执行
mkdir -p /var/tmp/nginx/client/
如果大家还遇到了其他的问题,请在文章后面留言,持续更新,以帮助大家解决安装上的问题。
原文地址linux主要发行版安装nginx教程。
文章由ian有话说(https://iian.xyz)原创发表,转载请注明出处。