版权声明:有问题欢迎留言,转载请声明出处 https://blog.csdn.net/larger5/article/details/82826047
一、前言
之前动手写一个功能类似 JPA 的框架:
[自己造轮子] 动手设计实现数据库访问层框架 JPA
功能类似,相当有成就感。
参考了网上很多文章,试着写个 SpringMVC,遇到很多瓶颈,主要问题是 @Autowired 注解,笔者使用了反射赋值,但总是赋值失败(null),就写到这里就结束了。
二、小框架
重点在于 DispatcherServlet ,贴一下代码,其他的,看GitHub。
代码放到了 GitHub 上:https://github.com/larger5/MySpringMVC.git

package servlet;

import annotation.CunAutowired;
import annotation.CunController;
import annotation.CunRequestMapping;
import annotation.CunService;

import javax.servlet.ServletConfig;
import javax.servlet.ServletException;
import javax.servlet.annotation.WebServlet;
import javax.servlet.http.HttpServlet;
import javax.servlet.http.HttpServletRequest;
import javax.servlet.http.HttpServletResponse;
import java.io.File;
import java.io.IOException;
import java.io.InputStream;
import java.lang.reflect.Field;
import java.lang.reflect.Method;
import java.net.URL;
import java.util.*;


/*
覆盖反射常规操作
 */
@WebServlet(urlPatterns = "/",loadOnStartup = 0)
public class CunDispatcherServlet extends HttpServlet {

    // properties 配置
    private Properties contextConfig = new Properties();
    // 存储全类名,备反射加载到 ioc 中
    private List<String> classNames = new ArrayList<String>();
    // ioc 容器
    private Map<String, Object> ioc = new HashMap<String, Object>();
    // 保存所有 url 和方法的映射关系
    private Map<String, Method> handlerMapping = new HashMap<String, Method>();
    // method.invoke 时用到
    private Map<String, Object> controllerMap = new HashMap<>();

    @Override
    protected void doGet(HttpServletRequest req, HttpServletResponse resp) throws ServletException, IOException {
        this.doPost(req, resp);
    }

    @Override
    protected void doPost(HttpServletRequest req, HttpServletResponse resp) throws ServletException, IOException {
        try {
            //处理请求
            doDispatcher(req, resp);
        } catch (Exception e) {
            resp.getWriter().write("<h1>500!! Server Exception</h1>");
        }
    }

    // 对 RequestMapping 做出响应
    private void doDispatcher(HttpServletRequest req, HttpServletResponse resp) {
        // ①request.getRequestURL() 返回全路径、②request.getRequestURI() 返回除去host(域名或者ip)部分的路径
        String url = req.getRequestURI();
        String contextPath = req.getContextPath();
        // 去掉多个 /
        url = url.replace(contextPath, "").replaceAll("/+", "/");
        if (!this.handlerMapping.containsKey(url)) {
            try {
                resp.getWriter().write("<h1>url:" + url + " --> 404" + "</h1>");
            } catch (IOException e) {
                e.printStackTrace();
            }
            return;
        }
        try {
            Method method = this.handlerMapping.get(url);
            resp.getWriter().write("<h1>" + url + "</h1");
            Object o = this.controllerMap.get(url);
            System.out.println(o.getClass().getName());
            try {
                // 反射调用方法格式:方法名.invoke(类名,参数)
                method.invoke(this.controllerMap.get(url));
                System.out.println(ioc);
            } catch (Exception e) {
                e.printStackTrace();
            }
        } catch (IOException e) {
            e.printStackTrace();
        }
    }

    @Override
    public void init(ServletConfig config) throws ServletException {
        // 1、加载配置文件
        doLoadConfig(config.getInitParameter("contextConfigLocation"));
        // 2、扫描配置文件
        doSCanner((String) contextConfig.get("scanPackage"));
        // 3、实例化
        doInstance();
        // 4、自动赋值
        doAutowired();
        // 5、初始化 initHandlerMapping,SpringMVC
        initHandlerMapping();
    }

    // 5、把 @RequestMapping 产生的 url 保存
    private void initHandlerMapping() {
        if (ioc.isEmpty()) {
            return;
        }
        for (Map.Entry<String, Object> entry : ioc.entrySet()) {
            Class<?> clazz = entry.getValue().getClass();
            if (!clazz.isAnnotationPresent(CunController.class)) {
                continue;
            }
            String baseUrl = null;
            // 先获取类上的 @RequestMapping
            if (clazz.isAnnotationPresent(CunRequestMapping.class)) {
                CunRequestMapping cunRequestMapping = clazz.getAnnotation(CunRequestMapping.class);
                baseUrl = cunRequestMapping.value();
            }
            Method[] methods = clazz.getMethods();
            for (Method method : methods) {
                if (!method.isAnnotationPresent(CunRequestMapping.class)) {
                    return;
                }
                CunRequestMapping cunRequestMapping = method.getAnnotation(CunRequestMapping.class);
                String url = cunRequestMapping.value();
                // 防止用户设置 url 多个 /
                url = (baseUrl + "/" + url).replaceAll("/+", "/");
                this.handlerMapping.put(url, method);
                try {
                    this.controllerMap.put(url, clazz.newInstance());
                } catch (Exception e) {
                    e.printStackTrace();
                }
            }
        }
    }

    // 4、对@Autowired 的对象,赋予 IOC 容器中的对象
    private void doAutowired() {
        System.out.println(ioc);
        if (ioc.isEmpty()) {
            return;
        }
        for (Map.Entry<String, Object> entry : ioc.entrySet()) {
            /*
            getFields()只能获取public的字段,包括父类中的字段
            getDeclaredFields()只能获取自己声明的各种字段,包括public,protected,private,但是不包括父类的申明字段
            返回的都是Field对象:获取名称直接field.getName()、属性值则是field.get(Object)、field.set(obj,value)
            field.getModifiers() 获取字段的修饰符
             */
            Field[] fields = entry.getValue().getClass().getDeclaredFields();
            for (Field field : fields) {
                // 加了 @Autowired 的
                if (!field.isAnnotationPresent(CunAutowired.class)) {
                    continue;
                }
                CunAutowired autowired = field.getAnnotation(CunAutowired.class);
                String beanName = autowired.value().trim();
                // 是否 @Autowired 里边 value 有自定义值,即 bean 名
                if (beanName.equals("")) {
                    beanName = field.getType().getName();
                }
                // 授权访问,就是当字段修饰符为private时,我们需要加上
                field.setAccessible(true);
                try {
                    System.out.println("field.getName():" + field.getName());
                    System.out.println("ioc:" + ioc);
                    System.out.println("beanName:" + beanName);
                    System.out.println("entry.getValue():" + entry.getValue());
                    System.out.println("ioc.get(beanName):" + ioc.get(beanName));

                    // 属性.set(类,值)
                    field.set(entry.getValue(), ioc.get(beanName));
                    System.out.println("success");
                } catch (Exception e) {
                    e.printStackTrace();
                }
            }
        }
    }

    // 3.1、只对 @Controller、@Service 类进行实例化对象,放到 IOC 容器中
    private void doInstance() {
        if (classNames.isEmpty()) {
            return;
        }
        for (String className : classNames) {
            try {
                Class<?> clazz = Class.forName(className);
                // @Controller
                if (clazz.isAnnotationPresent(CunController.class)) {
                    Object instance = clazz.newInstance();
                    // key 在 Spring 中默认是首字母小写的类名
                    String beanName = instance.getClass().getSimpleName();
//                    String beanName = LowerFirstCase(instance.getClass().getSimpleName());
                    ioc.put(beanName, instance);
                }
                // @Service
                if (clazz.isAnnotationPresent(CunService.class)) {
                    CunService cunService = clazz.getAnnotation(CunService.class);
                    String beanName = cunService.value();
                    // 该注解的默认值是 空
                    if ("".equals(beanName.trim())) {
                        beanName = clazz.getSimpleName();
//                        beanName = LowerFirstCase(clazz.getSimpleName());
                    }
                    Object instance = clazz.newInstance();
                    ioc.put(beanName, instance);
                    // 这里选择同名覆盖,而 Spring 则是报错
                    Class<?>[] interfaces = clazz.getInterfaces();
                    for (Class<?> i : interfaces) {
                        // key 为接口名,而 value 为实现类对象
                        ioc.put(i.getName(), instance);
                    }
                }
                continue;
            } catch (Exception e) {
                e.printStackTrace();
            }
        }
    }

    // 3.2、首字母小写
    private String LowerFirstCase(String simpleName) {
//        return simpleName.toLowerCase().substring(0, 1) + simpleName.substring(1);
        char[] chars = simpleName.toCharArray();
        chars[0] += 32;
        return String.valueOf(chars);
    }

    // 2、扫描包下的所有类,并将全类名保存
    private void doSCanner(String scanPackage) {
        // 递归、替换包名中的".",将包结构转换为目录结构
        URL url = this.getClass().getClassLoader().getResource("/" + scanPackage.replaceAll("\\.", "/"));
        File classDir = new File(url.getFile());
        for (File file : classDir.listFiles()) {
            if (file.isDirectory()) {
                doSCanner(scanPackage + "." + file.getName());
                continue;
            }
            // 注意去掉后缀 .class
            String className = scanPackage + "." + file.getName().replace(".class", "");
            classNames.add(className);
        }
    }

    // 1、加载配置文件
    private void doLoadConfig(String contextConfigLocation) {
        InputStream is = this.getClass().getClassLoader().getResourceAsStream(contextConfigLocation);
        try {
            contextConfig.load(is);
        } catch (IOException e) {
            e.printStackTrace();
        } finally {
            // 关闭输入流
            if (is != null) {
                try {
                    is.close();
                } catch (IOException e) {
                    e.printStackTrace();
                }
            }
        }
    }
}
三、测试小框架的 demo
代码已经放到 GitHub 上了:https://github.com/larger5/TestMySpringMVC.git
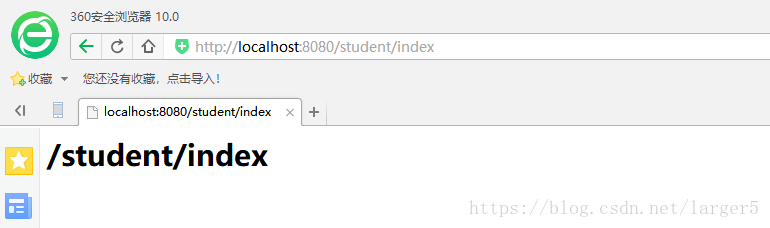
测试效果:

package com.cun.controller;

import annotation.CunAutowired;
import annotation.CunController;
import annotation.CunRequestMapping;
import com.cun.service.StudentService;

@CunController
@CunRequestMapping("/student")
public class StudentController {

    @CunAutowired
    private StudentService studentService;

    @CunRequestMapping("/index")
    public void index() {
        System.out.println("using " + this.getClass().getSimpleName() + " now");
    }
}
① 浏览器访问 url
② console 输出

四、小结
1、通过模仿 SpringMVC 的过程,提高了 Java 反射 API 的熟练度:
一年前只是知道 Java 有反射这回事,而且在众多大咖的赞叹下,略知其挺有逼格的。
现在才真切体会到,反射确实挺有作为,名副其实。
2、看了很多关于 SpringMVC 处理流程文章,还不如自己写个 Hello World 级别 SpringMVC 有印象。