可能大家经常使用Spring系列框架,使用Spring的注解进行开发,但是仅限于使用,对框架底层的原理并不是很清晰,今天就来实现一个简单的SpringMVC框架,在此之前需要先了解下java的几个元注解,Spring中的注解基本上都是基于这些元注解进行开发的,大家可以看下我的这篇博客,里面详细介绍了java的几种元注解,以及各自的含义。https://blog.csdn.net/qq_37113604/article/details/81974482
好了,下面我们开始写一个简单的SpringMVC框架吧,让他可以根据@RequestMapping中映射的路径进行跳转,可以识别@Controller注解标识的控制类,可以进行参数的传递!
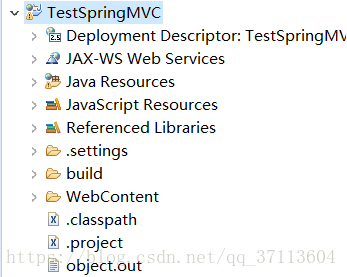
从头开始首先建一个web项目,就叫TestSpringMVC吧!
第二步,我们去建两个注解类,分别起名为Controller和RequestMapping,选择文件类型为aoontation注解类
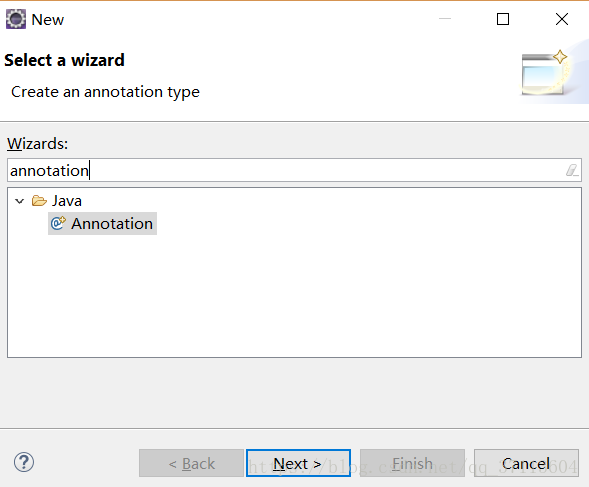
然后我们定义两个注解类:
@Target(ElementType.TYPE)
@Retention(RetentionPolicy.RUNTIME)
public @interface Controller{

}
@Target({ElementType.TYPE,ElementType.METHOD})
@Retention(RetentionPolicy.RUNTIME)
@Inherited
public @interface RequestMapping {
public String value(); //存放传入的路径
}
如果不清楚里面的注解是什么意思的话,可以看我的https://blog.csdn.net/qq_37113604/article/details/81974482这个博客,里面有详细介绍
定义完了这两个注解后,我们就可以在类中使用啦!但是这两个注解仅是可以使用,还没有什么实际的意义,我们编写一个class作为Controller测试类:
@Controller
@RequestMapping("/IndexController")
public class IndexController{
@RequestMapping("/index")
public void index() {
System.out.println("index运行");
}
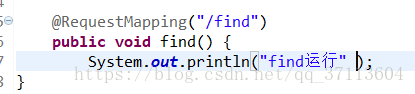
@RequestMapping("/find")
public void find() {
System.out.println("find运行");
}
}我们再想下,基于注解开发的情况下,SpringMVC之所以能够起作用,是不是因为在SpringMVC的配置文件中,配置了注解扫描器呢? 答案是肯定的,我们来编写一个SpringMVC的注解扫描器ClassScanner!下面会用到大量的反射,如果对java反射机制不是很了解的,可以先去查查反射相关的知识。
贴一下,ClassScanner的代码吧,里面都有解释:
public class ClassScanner {
	//为什么是Map<String,Class<?>>类型呢?  因为String存储类名,Class对象存储反射生成的类对象
	 //basePackage为传入的包名
	public static Map<String,Class<?>> scannerClass(String basePackage) {
		Map<String,Class<?>> results = new HashMap<>();
		//通过包将 . 替换成/
		String filePath = basePackage.replace(".","/");
		try {
			//返回当前正在执行的线程对象的引用   Thread.currentThread()
			Thread currentThread = Thread.currentThread();
			//返回当前对象上的类装载器
			ClassLoader contextClassLoader = currentThread.getContextClassLoader();
			//拿到资源
			URL resource = contextClassLoader.getResource(filePath);
			//拿到资源的路径   /E:/TestSpringMVC/build/classes/com/bzy
			String rootPath = resource.getPath();
			if(rootPath != null){
				//filePath为com/bzy rootPath为/E:/TestSpringMVC/build/classes/com/bzy 为什么不直接将filePath赋值给rootPath呢?
				//这里是为了确保传入的路径存在      得到rootPath = com/bzy
				rootPath = rootPath.substring(rootPath.lastIndexOf(filePath));
			}
			//查找具有给定名称的所有资源
			Enumeration<URL> dirs = contextClassLoader.getResources(rootPath);
			while(dirs.hasMoreElements()){
				URL url = dirs.nextElement(); // url: file:/E:/TestSpringMVC/build/classes/com/bzy
				//根据url 判定是否是文件对象
				if(url.getProtocol().equals("file")){
					File file = new File(url.getPath().substring(1));   //把头上的   /  去掉
					scannerFile(file, rootPath, results);	 // 将文件传入文件扫描器
				}
			}
		} catch (Exception e) {
			// TODO Auto-generated catch block
			e.printStackTrace();
		}
		return results;
	}

	private static void scannerFile(File folder,String rootPath,Map<String,Class<?>> classes) throws Exception{
		//拿到这个folder下的所有文件对象
		File[] files = folder.listFiles();
		for(int i=0;files!=null && i<files.length;i++){
			File file = files[i];
			//如果是文件夹,进行递归
			if(file.isDirectory()){
				scannerFile(file, rootPath+file.getName()+"/",classes);
			}else{
				//拿到文件的绝对路径  E:\Tomcat01\apache-tomee-plume-7.0.1\apache-tomee-plume-7.0.1\webapps\TestSpringMVC\WEB-INF\classes\com\bzy\servlet\DispacherServlet.class
				String path = file.getAbsolutePath();
				//判断文件是不是一个类文件
				if(path.endsWith(".class")){
					 // 将windows中的 \ 替换掉   E:/Tomcat01/apache-tomee-plume-7.0.1/apache-tomee-plume-7.0.1/webapps/TestSpringMVC/WEB-INF/classes/com/bzy/servlet/DispacherServlet.class
					path = path.replace("\\","/");
					String className = rootPath+path.substring(path.lastIndexOf("/")+1,path.indexOf(".class"));   // com/bzy/servlet/DispacherServlet
					className = className.replace("/","."); 			// com.bzy.servlet.DispacherServlet
					classes.put(className,Class.forName(className));    //  最后通过反射生成Class对象,添加到集合中
				}
			}
		}
	}
}
最终这个扫描器返回一个Map<String,Class<?>>的一个集合,这个集合中就包含了,传入的路径下所有的class名称与Class对象,这样路径下所有的class就都被扫描到了。
然后我们再想下,现在已经拿到了所有的类对象,这些类对象中可能有的使用了注解,有的没有使用注解,现在是不是应该再遍历下这些类与类中的方法,判断下是否存在注解呢? 答案是肯定的,那么应该在哪里进行遍历呢? 我们想下,SpringMVC实现了前后台逻辑的跳转,并且在web.xml中配置了一个DispatcherServlet并设置servlet的启动优先级为1,即容器启动时就初始化这个servlet,那么我们就也写一个DispatcherServlet,然后既可以将他设置为容器启动时加载,也可以写成在访问这个servlet时加载然后写在servlet的init方法中,这两种方法是等效的,我们采用第二种吧,写在init方法中。
然后在类中再定义两个全局的集合来存储得到的类与方法。
我们再想下,init方法只是对servlet进行初始化,当你敲入url时,访问的实际是service方法,所以serlvet的service方法也是需要的!
再贴下自己写的DispacherServlet方法吧:
//配置映射路径与初始化参数
@WebServlet(urlPatterns={"*.do"},initParams={@WebInitParam(name="basePackage",value="com.bzy")})
public class DispacherServlet extends HttpServlet {
private Map<String,Object> controllers = new HashMap<>(); //存储含有RequestMapping注解与Controller注解的controller实例
private Map<String,Method> methods = new HashMap<>(); //存储含有RequestMapping注解的方法
public void init(){
ServletConfig servletConfig = this.getServletConfig();
String basePackage = servletConfig.getInitParameter("basePackage");
try {
Map<String,Class<?>> cons = ClassScanner.scannerClass(basePackage); //将com.bzy传入,得到其下面的所有类的集合
Iterator<String> itor = cons.keySet().iterator(); // 迭代器遍历集合
while (itor.hasNext()) {
String className = itor.next(); //拿到每一个的类名与类对象
Class clazz = cons.get(className);
String path = "";
//判断是否包含requestMapping注解与Controller注解
if(clazz.isAnnotationPresent(RequestMapping.class) && clazz.isAnnotationPresent(Controller.class)){
RequestMapping reqAnno = (RequestMapping)clazz.getAnnotation(RequestMapping.class); //反射拿到注解类
path = reqAnno.value(); //拿到注解类中的路径
controllers.put(className,clazz.newInstance()); // 添加到新的集合中 object is not an instance of declaring class
Method[] ms = clazz.getDeclaredMethods(); //拿到Controller类中所有的方法
for (Method method : ms) {
if(!method.isAnnotationPresent(RequestMapping.class)){ //如果方法上没有RequestMapping注解则continue
continue;
}
methods.put(path+method.getAnnotation(RequestMapping.class).value(),method); //将方法的路径与方法对象添加到methods中
}
}
}
} catch (Exception e) {
e.printStackTrace();
}
}
protected void service(HttpServletRequest req, HttpServletResponse resp) {
String uri = req.getRequestURI();
String contextPath = req.getContextPath();
int value = uri.indexOf(contextPath)+contextPath.length();
String mappingPath = uri.substring(value,uri.indexOf(".do"));
Method method = methods.get(mappingPath);
try {
if(method == null){ //传入的路径不存在
resp.getWriter().println("<font style='size:100px'>404 404 404 404 404 </font>");
return;
}
String name = method.getDeclaringClass().getName(); //反射得到类名
Object invoke = method.invoke(controllers.get(name)); //调用得到的类中的method
} catch (Exception e) {
// TODO Auto-generated catch block
e.printStackTrace();
}
}
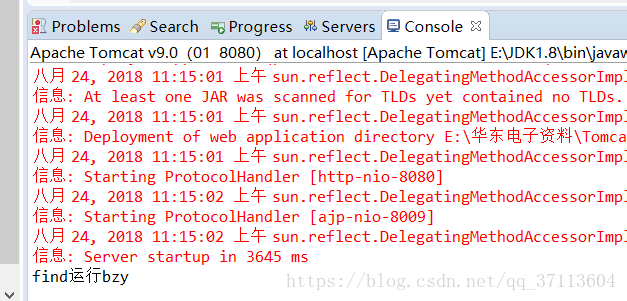
}上面的这5个类,就可以构成一个简单的SpringMVC框架啦,可以进行前后台的访问了,我们来测试下!

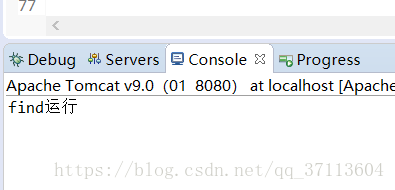
可以看到访问到了,find方法被访问到了!
然后我们再思考下,怎么能够让url传入一个参数,在find方法除打印这个参数呢??
其实就是将service方法中的request与response对象传递到find方法就好了。
首先我们定义一个req与resp的工具类:
public class BaseController {
protected HttpServletRequest req;
protected HttpServletResponse resp;
public HttpServletRequest getReq() {
	return req;
}
public void setReq(HttpServletRequest req) {
	this.req = req;
}
public HttpServletResponse getResp() {
	return resp;
}
public void setResp(HttpServletResponse resp) {
	this.resp = resp;
}
public void init(HttpServletRequest req,HttpServletResponse resp){
	this.req = req;
	this.resp = resp;
}
}
然后呢,我们让IndexController继承这个类,这样indexController就可以直接调用父类中的req与resp对象了!
@Controller
@RequestMapping("/IndexController")
public class IndexController extends BaseController{
	@RequestMapping("/index")
	public void index() {
		System.out.println("index运行  "+req.getParameter("userName"));
}

	@RequestMapping("/find")
	public void find() {
		System.out.println("find运行"+req.getParameter("userName"));
}
}
最后我们再改下servlet中的service方法:
protected void service(HttpServletRequest req, HttpServletResponse resp) {
			String uri = req.getRequestURI();
			String contextPath = req.getContextPath();
			int value = uri.indexOf(contextPath)+contextPath.length();
			String mappingPath = uri.substring(value,uri.indexOf(".do"));
			Method method = methods.get(mappingPath);
			try {
			if(method == null){  //传入的路径不存在
				resp.getWriter().println("<font style='size:100px'>404 404 404 404 404 </font>");
				return;
			}
			    Class<?> declaringClass = method.getDeclaringClass(); //反射得到Class<?>对象
				BaseController controller =
                (BaseController)controllers.get(declaringClass.getName());
				controller.init(req, resp); //将req,resp对象传入
				Object invoke = method.invoke(controller); //反射调用controller中的method
			} catch (Exception e) {
				// TODO Auto-generated catch block
				e.printStackTrace();
			}
	}
这样就完成啦!
测试下结果:

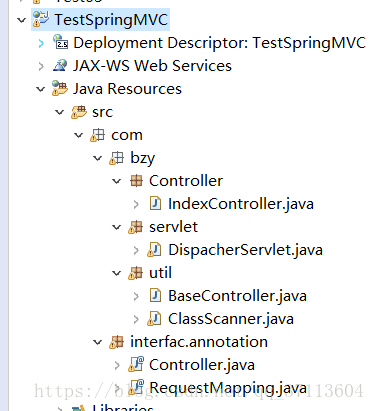
最后贴下文件目录:
到现在可能大家对SpringMVC运行原理有了新的认识,这里只是模拟了一下SpringMVC的功能,如果去仔细看SpringMVC的源码,单是一个dispatchServlet类就是一个极为复杂的过程,最后再说下,对框架的理解不要死记硬背,我记得之前为了应付面试背的SpringMVC的运行原理,什么前端控制器,视图解析器,处理映射器乱七八糟,背过了也只是背过了,一点帮助都没有。对于框架的理解还是应该真正去看下底层的代码,然后会发现,能够学到很多的东西,对java会有更深入的了解。
贴一下我的github地址,有需要的可以去下载源码:
https://github.com/bizy123/TestSpringMVC.git
最后送大家一段苹果的广告语,至疯狂的人
他们特立独行。他们桀骜不驯。他们惹是生非。他们格格不入。他们用与众不同的眼光看待事物。他们不喜欢墨守成规。他们也不愿安于现状。你可以认同他们,反对他们,颂扬或是诋毁他们。但唯独不能漠视他们。因为他们改变了寻常事物。他们推动人类向前迈进。或许他们是别人眼里的疯子,但他们却是我们眼中的天才。因为只有那些疯狂到以为自己能够改变世界的人,才能真正改变世界。