Tomcat介绍
Tomcat就是用来解析jsp程序的一个软件
Tomcat是一个轻量级应用服务器,在中小型系统和并发访问用户不是很多的场合下被普遍使用,是开发和调试JSP程序的首选,一般不会选择web服务器来用,更多的用于中间件.
首先安装JDK
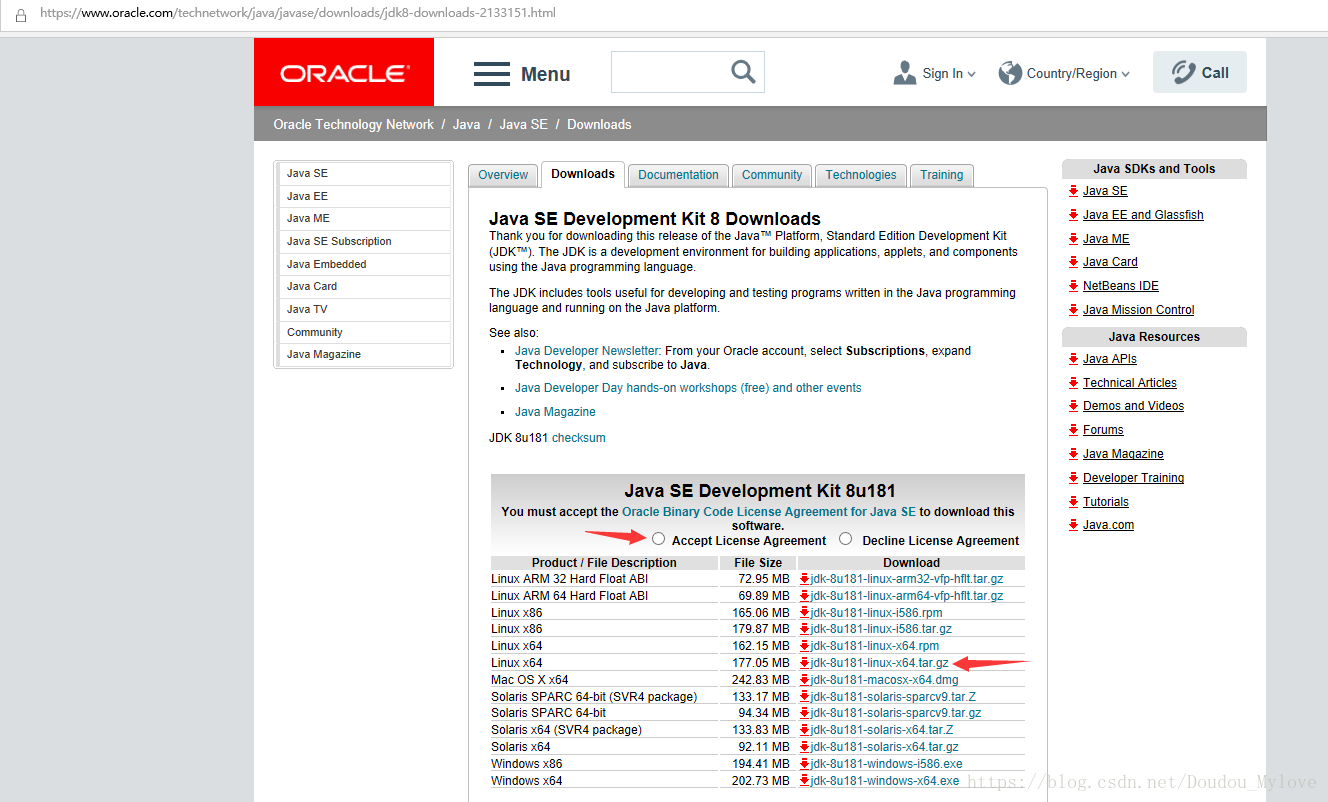
Jdk下载:
https://www.oracle.com/technetwork/java/javase/downloads/jdk8-downloads-2133151.html
JDK和tomcat解压就能用
tar xf jdk-8u181-linux-x64.tar.gz -C /usr/local/src/
添加环境变量
vim /etc/profile //插入以下三行
export JAVA_HOME=/usr/local/src/jdk1.8.0_181
export PATH=$JAVA_HOME/bin:$PATH
export CLASSPATH=.:$JAVA_HOME/lib/dt.jar:$JAVA_HOME/lib/tools.jar
重新加载:
source /etc/profile
java -version

再安装tomcat
下载:https://tomcat.apache.org/download-70.cgi

tar xf apache-tomcat-7.0.91.tar.gz -C /usr/local/src/
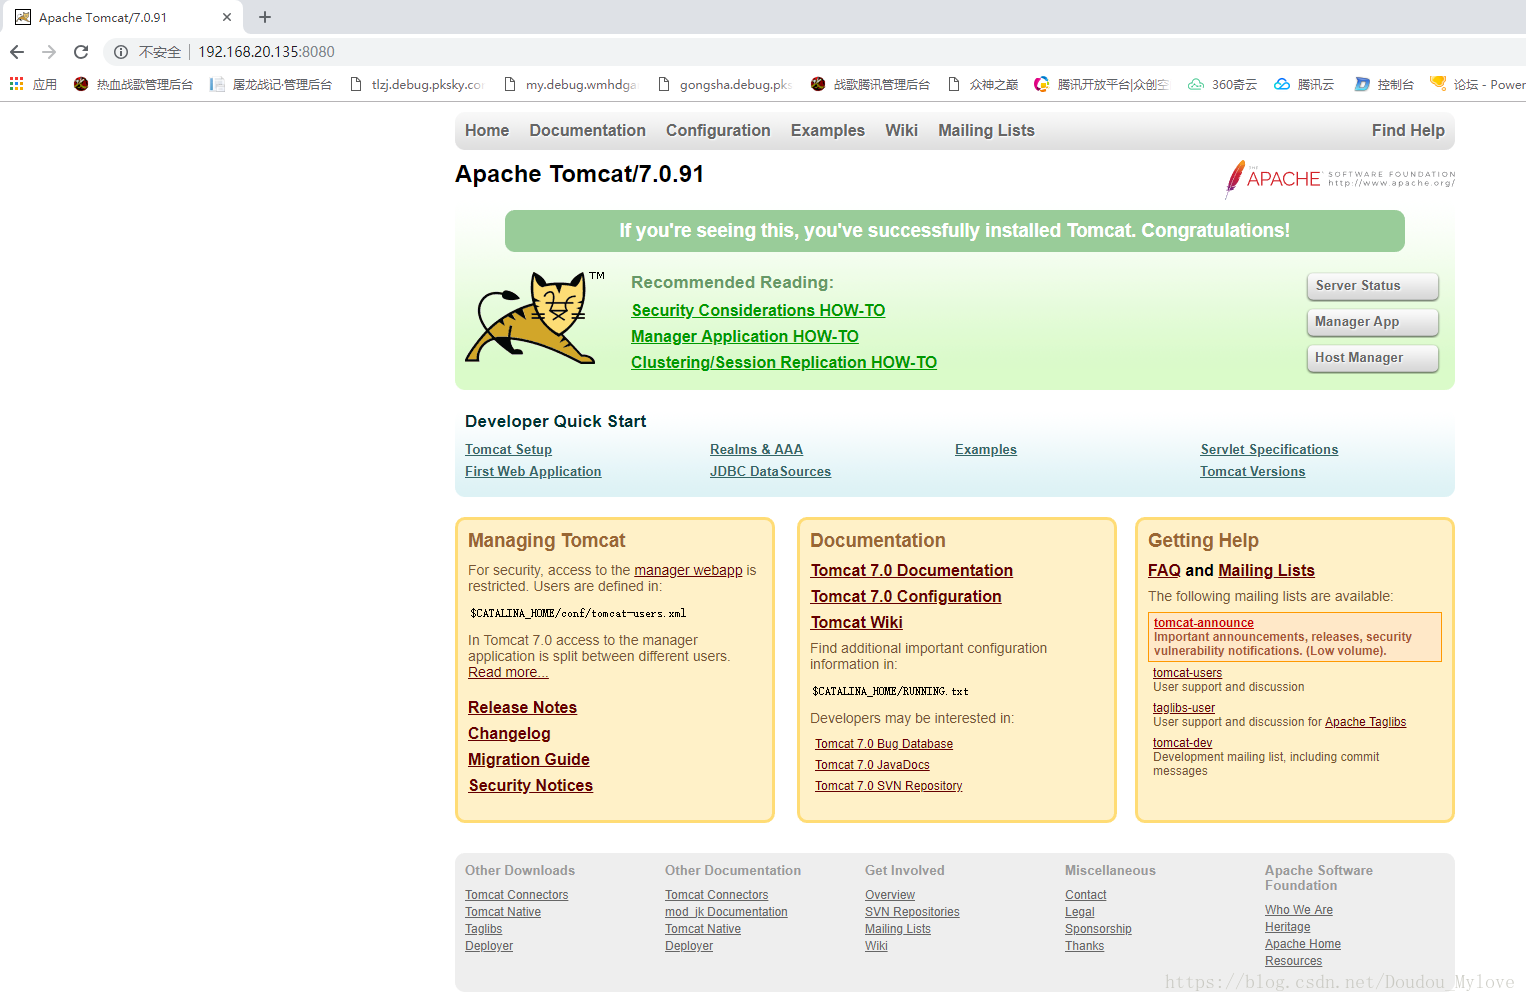
启动tomcat
cd /usr/local/src/apache-tomcat-7.0.91/bin/
./startup.sh

浏览器输入服务器IP访问tomcat:
注意:虚拟机测试要关闭防火墙
配置tomcat
更改默认启动端口:
vim /usr/local/tomcat/conf/service.xml
Connector port="8080" 改为 Connector port="80"
配置一个虚拟主机:
在Engine节点内添加 Host节点:
<Host name="www.lijunmin.cn" appBase="/data/tomcatweb" unpackWARs="false" autoDeploy="true" xmlValidation="false" xmlNamespaceAware="false">
<Context path="" docBase="./" debug="0" reloadable="true" crossContext="true"/>
</Host>

浏览器访问: http://www.lijunmin.cn:8080/

注意:
域名www.lijunmin.cn需要加到Linux/etc/hosts和本地Windows的hosts中做映射才能访问.
重启tomcat:
Cd /usr/local/src/apache-tomcat-7.0.91/bin/
./shutdown.sh
./startup.sh
//必须是先关再开,如果用restart需要编写启动脚本.
虚拟主机下测试页面访问:
echo "hahaha" >/data/tomcatweb/1.txt
浏览器输入www.lijunmin.cn:8080/1.txt

创建tomcat启动脚本:
[root@localhost ~]# vim /etc/init.d/tomcat
#!/bin/bash
# description: Tomcat7 Start Stop Restart
# processname: tomcat7
# chkconfig: 234 20 80
CATALINA_HOME=/usr/local/src/apache-tomcat-7.0.91
case $1 in
start)
sh $CATALINA_HOME/bin/startup.sh
;;
stop)
sh $CATALINA_HOME/bin/shutdown.sh
;;
restart)
sh $CATALINA_HOME/bin/shutdown.sh
sh $CATALINA_HOME/bin/startup.sh
;;
*)
echo 'please use : tomcat {start | stop | restart}'
;;
esac
exit 0
:wq 保存脚本。
chmod +x /etc/init.d/tomcat
这样就可以可用/etc/init.d/tomcat start启动,如果要用server tomcat start方式启动还需要在tomcat的bin目录下的setclasspath.sh脚本开头添加下面两行.
export JAVA_HOME=/usr/local/src/jdk1.8.0_181/
export JRE_HOME=/usr/local/src/jdk1.8.0_181/jre

启动:service tomcat start
停止:service tomcat stop
重启:service tomcat restart
Tomcat添加开机自启动
chkconfig --add tomcat
chkconfig tomcat on
chkconfig --list | grep tomcat
修改tomcat默认访问页面
一.打开tomcat\webapps:
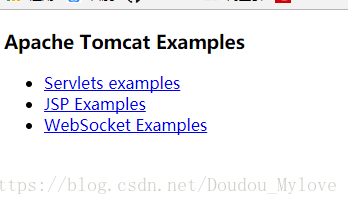
新建一个example目录,在example下新建test.html,添加如下内容:
| 1 2 3 4 5 6 7 8 9 10 11 12 13 14 |
|
<!DOCTYPE HTML><html lang="en"><head> <meta charset="UTF-8"> <title>Apache Tomcat Examples</title> </head> <body> <p> <h3>Apache Tomcat Examples</H3> <p></p> <ul> <li><a href="servlets">Servlets examples</a></li> <li><a href="jsp">JSP Examples</a></li> <li><a href="websocket/index.xhtml">WebSocket Examples</a></li> </ul> </body></html> |
二、打开tomcat\conf下的server.xml文件:
找到如下标签<Host></Host>:
| 1 2 3 4 5 6 7 8 9 10 11 12 13 14 15 16 17 18 |
<Host name="localhost" appBase="webapps" unpackWARs="true" autoDeploy="true">
<!-- SingleSignOn valve, share authentication between web applications Documentation at: /docs/config/valve.html --> <!-- <Valve className="org.apache.catalina.authenticator.SingleSignOn" /> -->
<!-- Access log processes all example. Documentation at: /docs/config/valve.html Note: The pattern used is equivalent to using pattern="common" --> <Valve className="org.apache.catalina.valves.AccessLogValve" directory="logs" prefix="localhost_access_log" suffix=".txt" pattern="%h %l %u %t "%r" %s %b" />
</Host> |
修改成如下,添加了(<Context path="" docBase="example" reloadable="true"/>),docBase=刚刚新建的项目名example:
| 1 2 3 4 5 6 7 8 9 10 11 12 13 14 15 16 17 18 |
<Host name="localhost" appBase="webapps" unpackWARs="true" autoDeploy="true">
<!-- SingleSignOn valve, share authentication between web applications Documentation at: /docs/config/valve.html --> <!-- <Valve className="org.apache.catalina.authenticator.SingleSignOn" /> -->
<!-- Access log processes all example. Documentation at: /docs/config/valve.html Note: The pattern used is equivalent to using pattern="common" --> <Valve className="org.apache.catalina.valves.AccessLogValve" directory="logs" prefix="localhost_access_log" suffix=".txt" pattern="%h %l %u %t "%r" %s %b" /> <Context path="" docBase="example" reloadable="true"/>
</Host> |
三、打开tomcat-1.7\conf下的web.xml文件:
| 1 2 3 4 5 6 |
<welcome-file-list>
<welcome-file>index.html</welcome-file> <welcome-file>index.htm</welcome-file> <welcome-file>index.jsp</welcome-file> </welcome-file-list> |
修改为,添加刚刚新建的test.html:
| 1 2 3 4 5 6 |
<welcome-file-list> <welcome-file>test.html</welcome-file> <welcome-file>index.html</welcome-file> <welcome-file>index.htm</welcome-file> <welcome-file>index.jsp</welcome-file> </welcome-file-list> |
四、打开tomcat\bin,双击startup.bat启动tomcat:
在浏览器输入ip:8080: