现在JWT代替session来做访问控制已经成为大部分webapi的做法,今天我们也来尝试一下
WebAPI使用NetCore2.1创建,无身份认证信息

nuget安装包
IdentityModel 选择稳定版3.9.0

Microsoft.AspNetCore.Authorization 版本2.1.1

Microsoft.AspNetCore.Authentication.JwtBearer 版本2.1.1

Startup注入服务
 public void ConfigureServices(IServiceCollection services)
        {
            services.AddMvc().SetCompatibilityVersion(CompatibilityVersion.Version_2_1);
            #region Auth
            services.AddAuthentication(x =>
            {
                x.DefaultAuthenticateScheme = JwtBearerDefaults.AuthenticationScheme;
                x.DefaultChallengeScheme = JwtBearerDefaults.AuthenticationScheme;
            })
               .AddJwtBearer(o =>
               {
                   o.TokenValidationParameters = new TokenValidationParameters
                   {
                       NameClaimType = JwtClaimTypes.Name,
                       RoleClaimType = JwtClaimTypes.Role,

                       ValidIssuer = "http://localhost:44319",
                       ValidAudience = "api",
                       IssuerSigningKey = new SymmetricSecurityKey(Encoding.ASCII.GetBytes("this is a security key"))

                       /***********************************TokenValidationParameters的参数默认值***********************************/
                       // RequireSignedTokens = true,
                       // SaveSigninToken = false,
                       // ValidateActor = false,
                       // 将下面两个参数设置为false,可以不验证Issuer和Audience,但是不建议这样做。
                       // ValidateAudience = true,
                       // ValidateIssuer = true,
                       // ValidateIssuerSigningKey = false,
                       // 是否要求Token的Claims中必须包含Expires
                       // RequireExpirationTime = true,
                       // 允许的服务器时间偏移量
                       // ClockSkew = TimeSpan.FromSeconds(300),
                       // 是否验证Token有效期,使用当前时间与Token的Claims中的NotBefore和Expires对比
                       // ValidateLifetime = true
                   };
               });
            #endregion

        }

        // This method gets called by the runtime. Use this method to configure the HTTP request pipeline.
        public void Configure(IApplicationBuilder app, IHostingEnvironment env)
        {
            if (env.IsDevelopment())
            {
                app.UseDeveloperExceptionPage();
            }
            else
            {
                app.UseHsts();
            }
            app.UseAuthentication();
            app.UseHttpsRedirection();
            app.UseMvc();
        }
之后验证用户返回token信息
新建TokenController的WebAPI控制器
根据用户post的用户账号和密码从数据库查询数据
这里我们加入根据账号密码从db匹配到了数据
然后返回token数据
上下代码标红部分需要保持一致,这个是token需要用来做校验的,如果不一致可能出现token无效 签名无效等问题
   // private MainDBContext _context;
        [HttpPost]
        public async Task<IActionResult> GenToken(UserModel model)
        {
            //get username and pwd from this model ,then get data from db
            //var user = _context.Users.FirstOrDefault(l => l.Name == model.Name && l.Pwd == model.PassWord);
            //If there is data in the database
            var user = new UserModel() { ID = 1, Email = "[email protected]", Name = "tester", PassWord = "123456" };
            //if user null ,return
            if (user == null) return Unauthorized();
            var tokenHandler = new JwtSecurityTokenHandler();
            var key = Encoding.ASCII.GetBytes("this is a security key");
            var authTime = DateTime.UtcNow;
            var expiresAt = authTime.AddDays(7);
            var tokenDescriptor = new SecurityTokenDescriptor
            {
                Subject = new ClaimsIdentity(new Claim[]
                {
                    new Claim(JwtClaimTypes.Audience,"api"),
                    new Claim(JwtClaimTypes.Issuer,"http://localhost:44319"),
                    new Claim(JwtClaimTypes.Id, user.ID.ToString()),
                    new Claim(JwtClaimTypes.Name, user.Name)
                }),
                Expires = expiresAt,
                SigningCredentials = new SigningCredentials(new SymmetricSecurityKey(key), SecurityAlgorithms.HmacSha256Signature)
            };
            var token = tokenHandler.CreateToken(tokenDescriptor);
            var tokenString = tokenHandler.WriteToken(token);
            return Ok(new
            {
                access_token = tokenString,
                token_type = "Bearer",
                profile = new
                {
                    sid = user.ID,
                    name = user.Name,
                    auth_time = new DateTimeOffset(authTime).ToUnixTimeSeconds(),
                    expires_at = new DateTimeOffset(expiresAt).ToUnixTimeSeconds()
                }
            });
        }
PostMan测试获取token
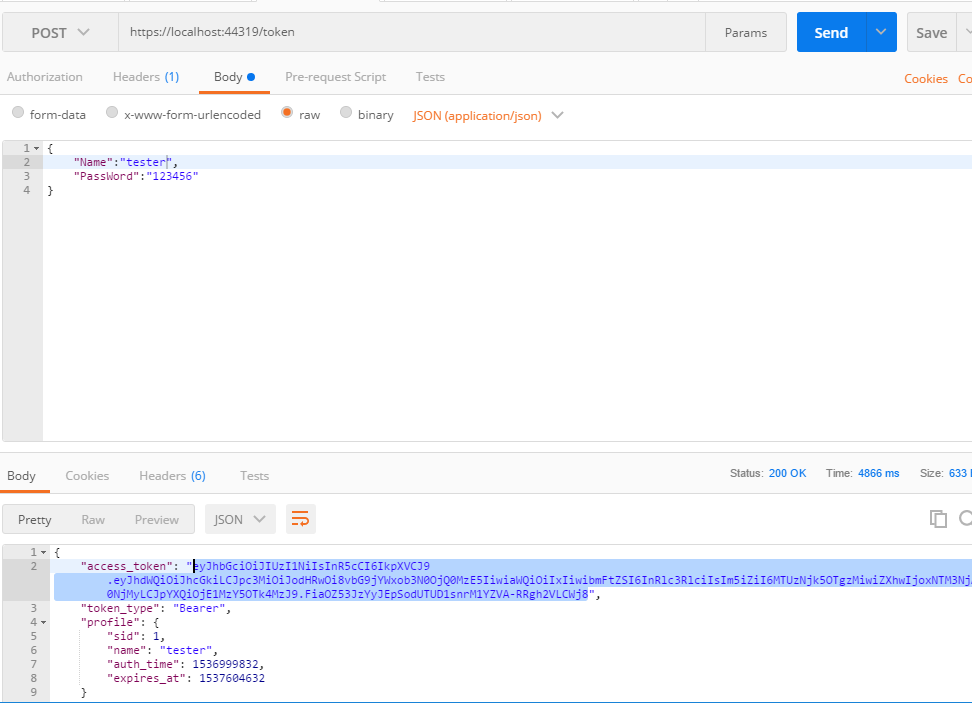
这样可以成功获取token,下面来做权限校验
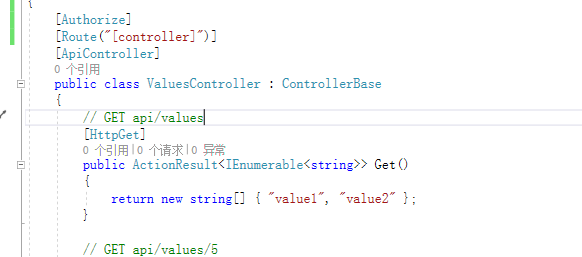
在需要授权的api上新增 [Authorize] 标记
比如万年values控制器
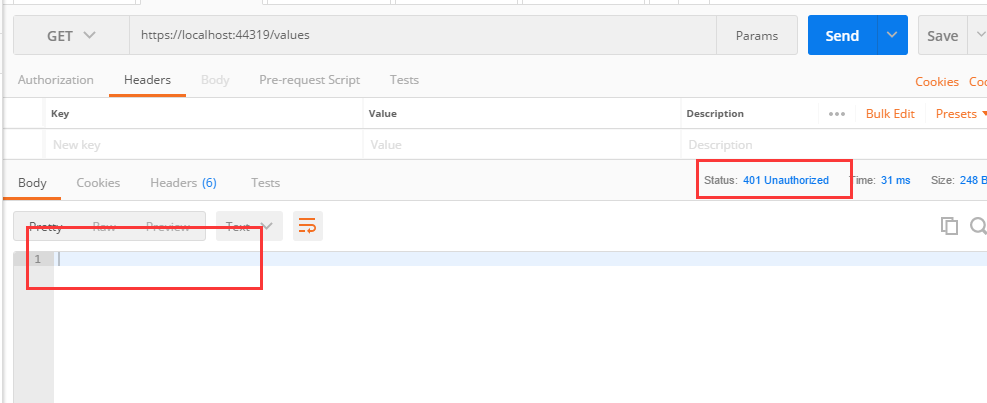
我们分别使用携带token和不携带token访问values接口
1 携带token访问,返回了想要的数据

2 未携带token,返回401
这样就达到了我们想要的效果,以上做个记录.
简单的demo
github:https://github.com/ermpark/authapidemo