一、准备工作
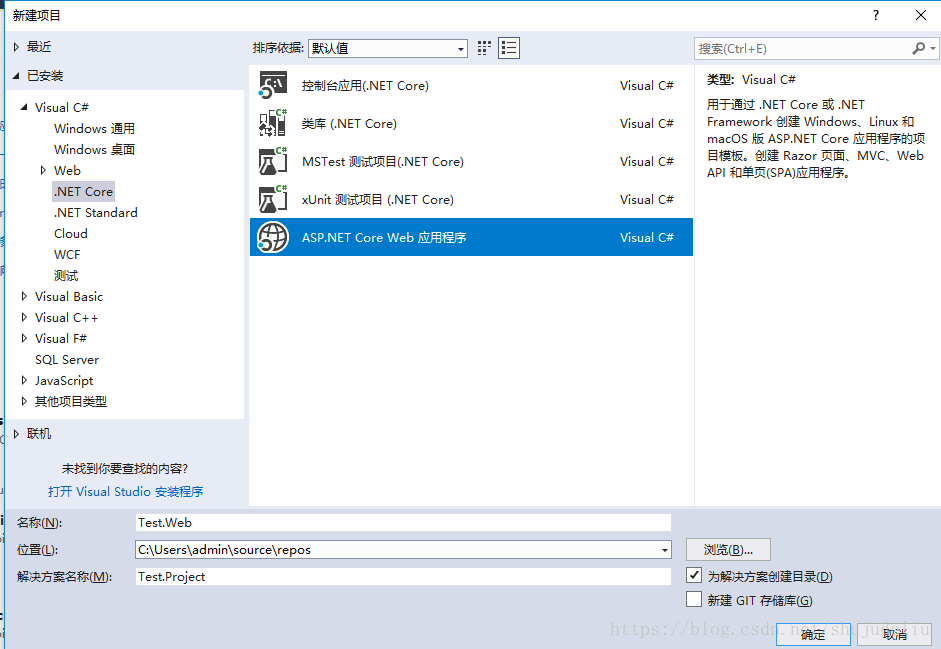
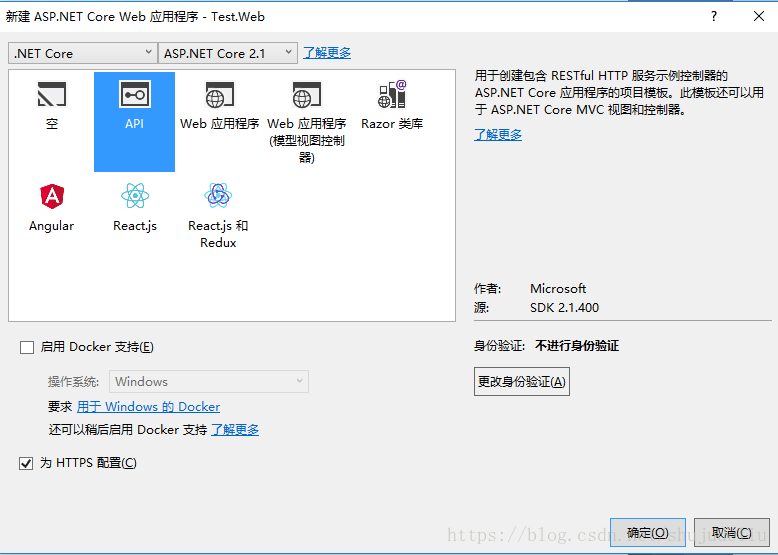
1.新建一个.netcore webapi项目
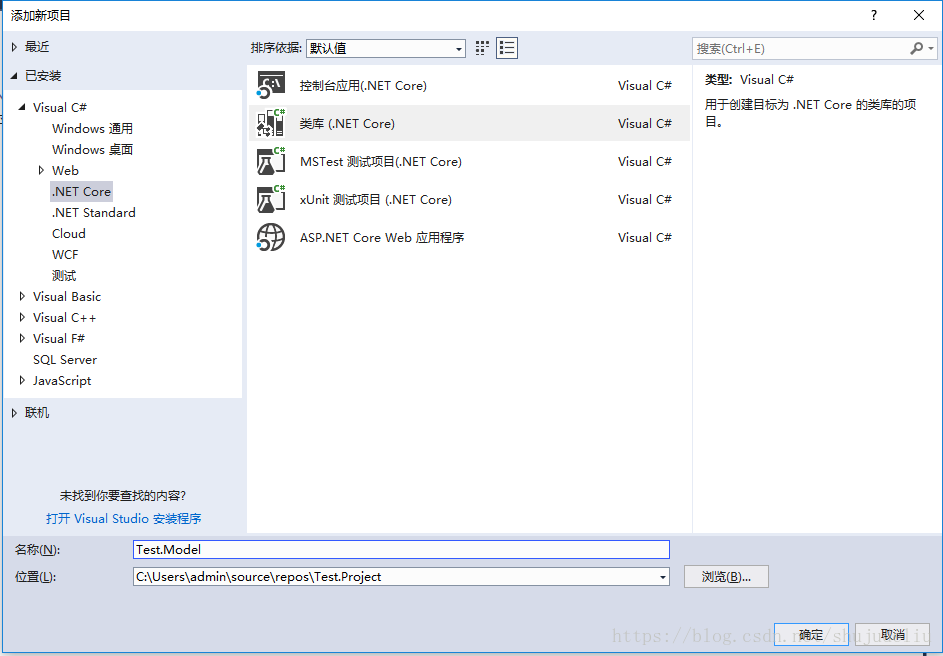
2.添加一个Model子项目用于存放输入输出类
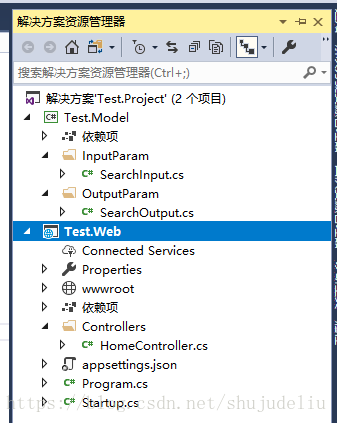
在解决方案中添加一个.netcore类库子项目,命名为Test.Model,用于存放API接口的输入输出参数类
3.在Test.Model子项目中新建两个输入输出类备用
using System;
using System.Collections.Generic;
using System.Text;

namespace Test.Model.InputParam
{
    public class SearchInput
    {
        /// <summary>
        /// 姓名
        /// </summary>
        public string name { get; set; }
        /// <summary>
        /// 性别
        /// </summary>
        public string sex { get; set; }
    }
}
using System;
using System.Collections.Generic;
using System.Text;

namespace Test.Model.OutputParam
{
    public class SearchOutput
    {
        /// <summary>
        /// 用户ID
        /// </summary>
        public int UserId { get; set; }
        /// <summary>
        /// 姓名
        /// </summary>
        public string UserName { get; set; }
        /// <summary>
        /// 性别
        /// </summary>
        public string Sex { get; set; }
        /// <summary>
        /// 年龄
        /// </summary>
        public int Age { get; set; }
        /// <summary>
        /// 注册时间
        /// </summary>
        public DateTime CreateTime { get; set; }
    }
}
4.在Test.Web中添加对Test.Model子项目的引用
5.在Test.Web中新建一个控制器,并创建方法
using System;
using System.Collections.Generic;
using System.Linq;
using System.Threading.Tasks;
using Microsoft.AspNetCore.Mvc;
using Test.Model.InputParam;
using Test.Model.OutputParam;

namespace Test.Web.Controllers
{
    [Route("api/[controller]/[action]")]
    [ApiController]
    public class HomeController : ControllerBase
    {
        /// <summary>
        /// 查询用户
        /// </summary>
        /// <param name="input"></param>
        /// <returns></returns>
        [HttpGet]
        public List<SearchOutput> UserSearch(SearchInput input)
        {
            //逻辑暂空,这里主要看生成的输入输出
            return null;
        }

    }
}
至此,准备工作已经差不多了,项目结构如下:
二.安装并配置Swagger
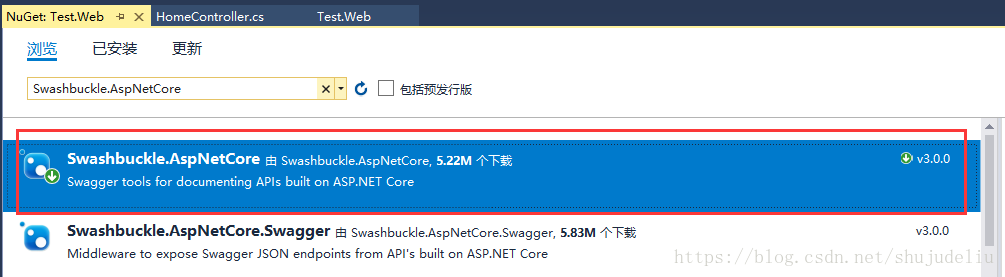
1.在Test.Web子项目中使用nuget安装Swashbuckle.AspNetCore包
2.添加帮助文档页面
这里不使用自动生成的/swagger/,而是自己添加方便定制
右键wwwroot,添加一个html页面,内容如下:
<!DOCTYPE html>
<html>
<head>
<meta charset="utf-8" />
<title>swagger</title>
<style type="text/css">
html, body {
padding: 0;
margin: 0;
width: 100%;
height: 96%;
}
iframe {
padding: 0;
margin: 0;
width: 100%;
height: 100%;
border: 0;
}
</style>
</head>
<body>
<iframe src="/swagger/index.html" id="iframe_swagger" name="iframe_swagger"></iframe>
</body>
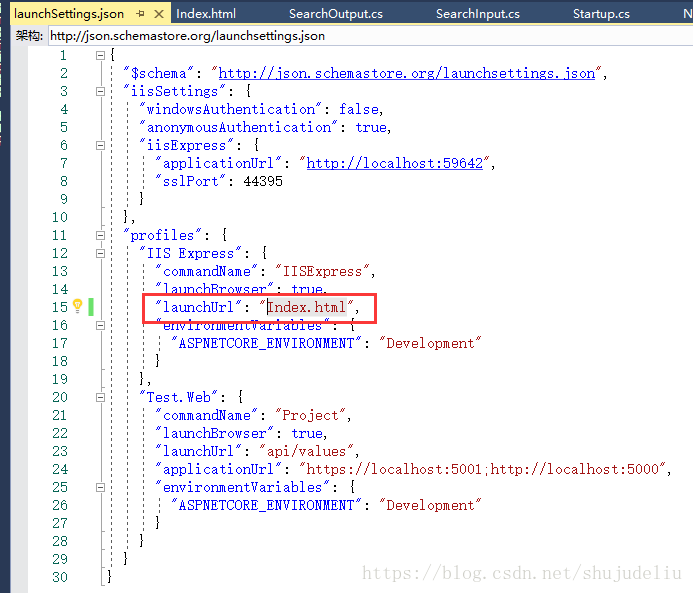
</html>3.设置Index.html为启动页
打开Test.Web项目下的Properties/launchSettings.json文件,launchUrl属性值配置为:Index.html
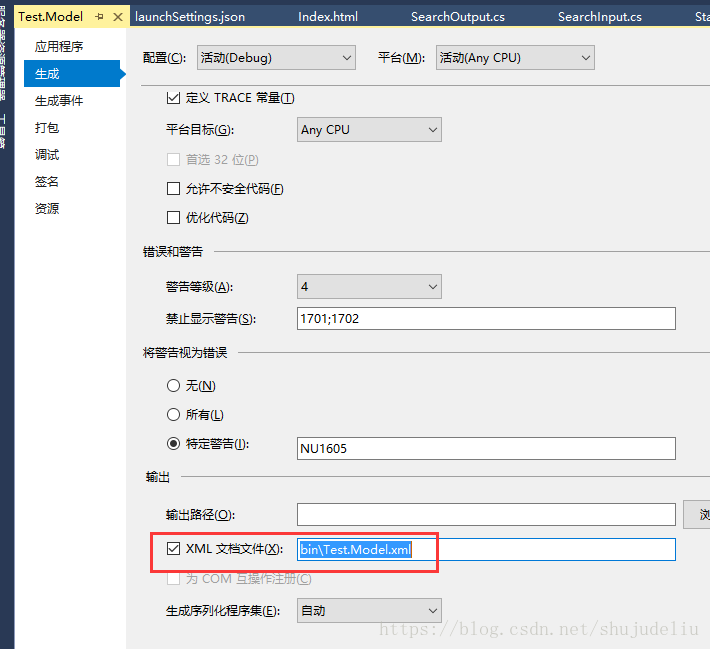
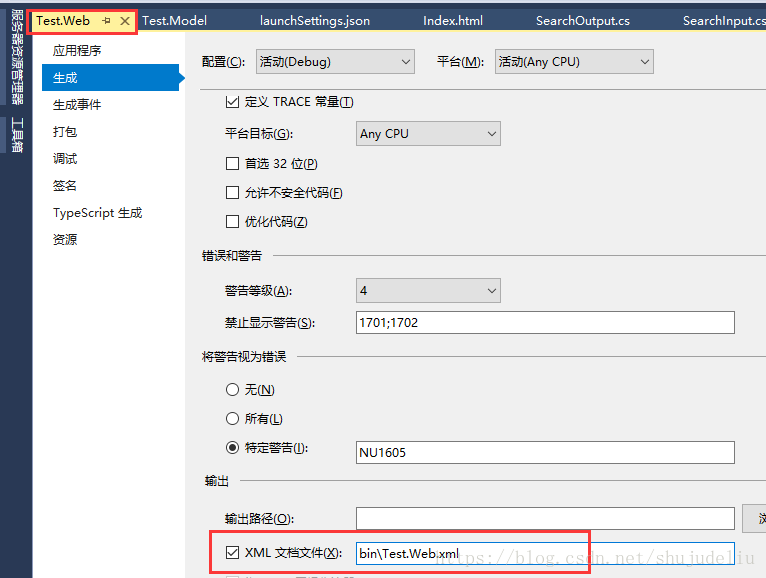
4.设置项目生成输出xml文件
5.StartUp.cs文件配置
(1)ConfigureServices方法下增加配置
            services.AddSwaggerGen(options =>
            {
                options.SwaggerDoc("v1", new Info
                {
                    Version = "v1",
                    Title = "API",
                    Description = "api文档",
                    TermsOfService = "None"
                });
                var basePath = AppContext.BaseDirectory;
                var xmlPath = Path.Combine(basePath, "Test.Web.xml");
                var xmlPathByModel = Path.Combine(basePath, "Test.Model.xml");
                options.IncludeXmlComments(xmlPathByModel);
                //true表示生成控制器描述,包含true的IncludeXmlComments重载应放在最后,或者两句都使用true
                options.IncludeXmlComments(xmlPath,true);
            });
(2)Configure方法下增加配置
            app.UseStaticFiles();//启用默认文件夹wwwroot
            app.UseSwagger();
            app.UseSwaggerUI(action =>
            {
                action.ShowExtensions();
                action.SwaggerEndpoint("/swagger/v1/swagger.json", "V1 Docs");
            });
到此,文档已经生成了,如图:
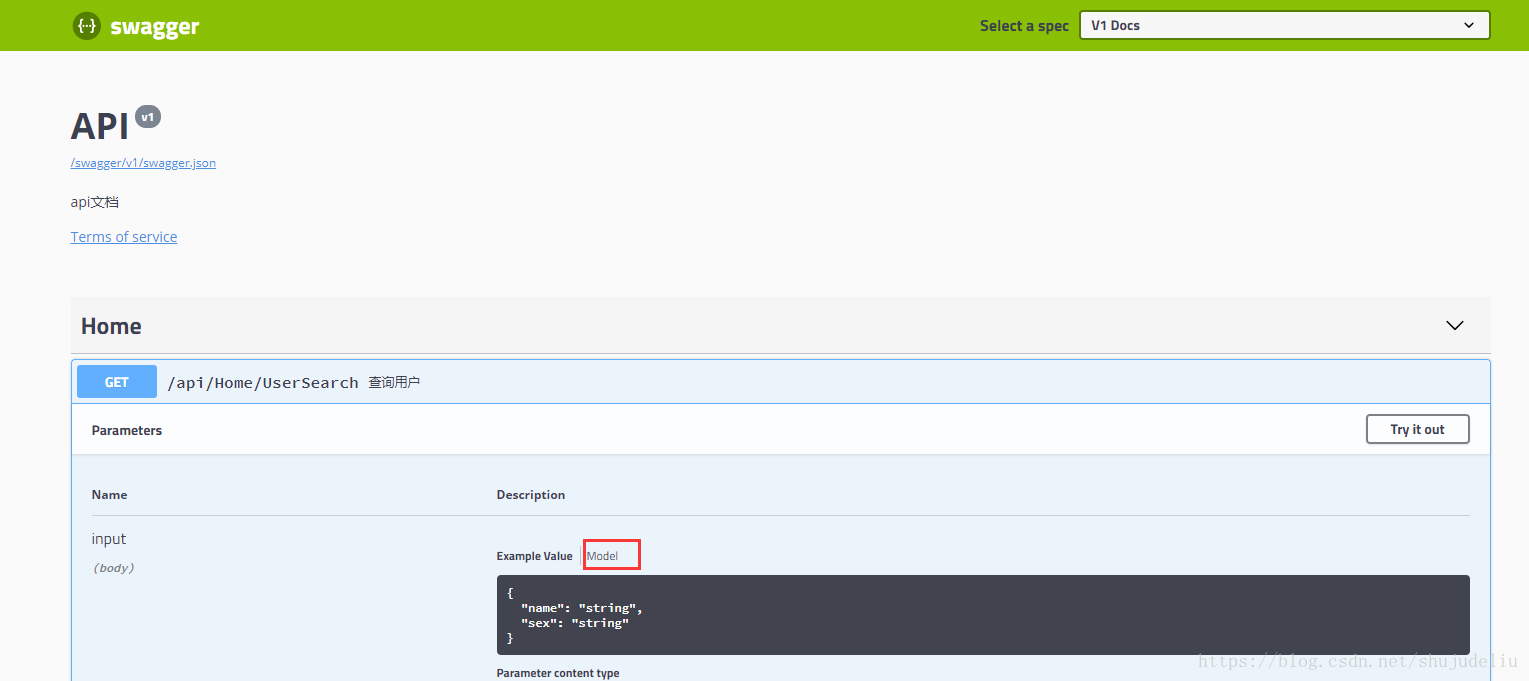
点击对应的Model即可查看输入输出参数注释说明。

三、扩展(请求参数附带Token)
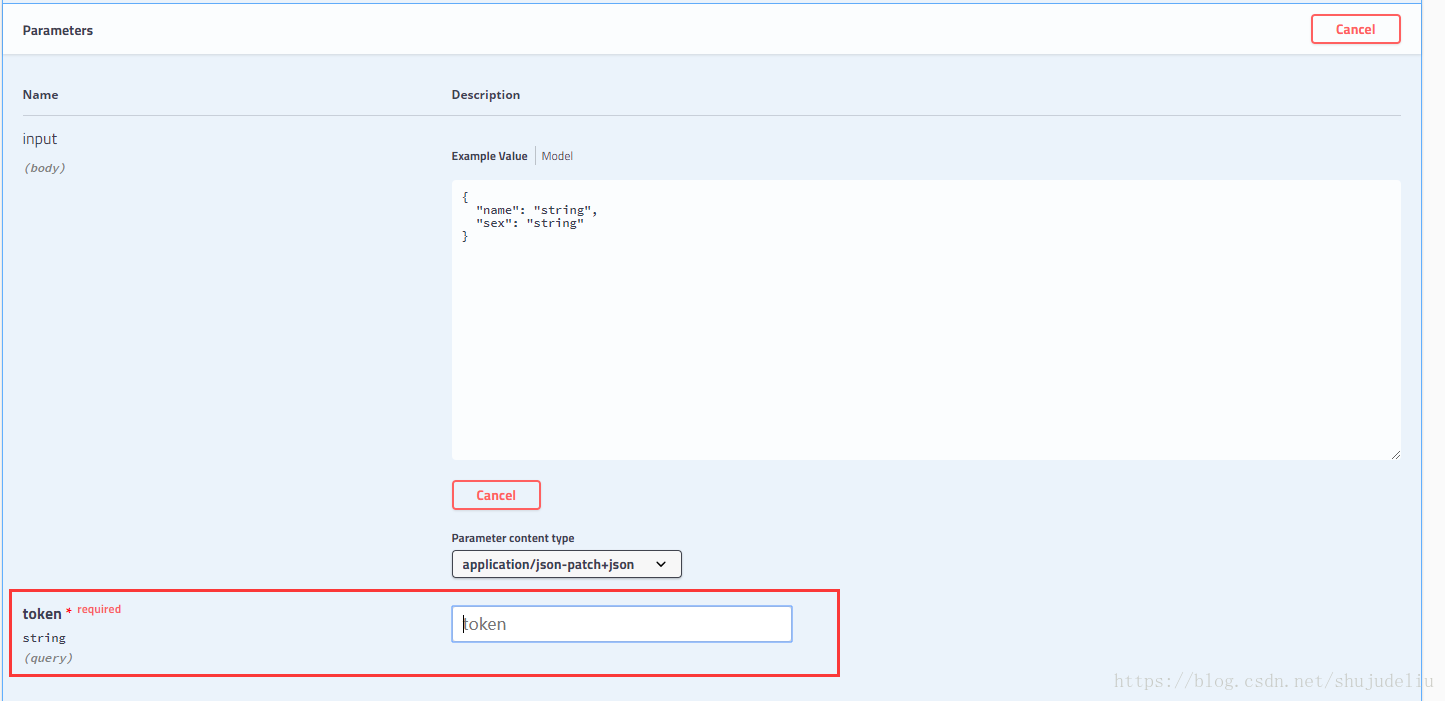
webapi经常碰到接口需要验证token的情况,使用Try it out测试时候怎么提交Token呢
1.在StartUp.cs中新建一个类
    public class AddAuthTokenHeaderParameter : IOperationFilter
    {
        public void Apply(Operation operation, OperationFilterContext context)
        {
            if (operation.Parameters == null)
            {
                operation.Parameters = new List<IParameter>();
            }
            var attrs = context.ApiDescription.ActionDescriptor.AttributeRouteInfo;

            //先判断是否是匿名访问,
            var descriptor = context.ApiDescription.ActionDescriptor as ControllerActionDescriptor;
            if (descriptor != null)
            {
                var actionAttributes = descriptor.MethodInfo.GetCustomAttributes(inherit: true);
                bool isAnonymous = actionAttributes.Any(a => a is AllowAnonymousAttribute);
                //非匿名的方法,链接中添加accesstoken值
                if (!isAnonymous)
                {
                    operation.Parameters.Add(new NonBodyParameter()
                    {
                        Name = "token",
                        In = "query",//query header body path formData
                        Type = "string",
                        Required = true //是否必选
                    });
                }
            }
        }
    }
2.在上文的ConfigureServices的AddSwaggerGen中注册添加的类:
options.OperationFilter<AddAuthTokenHeaderParameter>();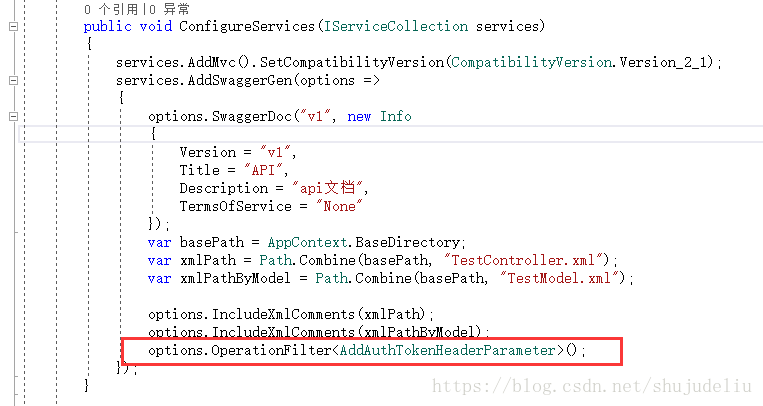
完整的StartUp.cs文件如下:
using System;
using System.Collections.Generic;
using System.IO;
using System.Linq;
using System.Threading.Tasks;
using Microsoft.AspNetCore.Authorization;
using Microsoft.AspNetCore.Builder;
using Microsoft.AspNetCore.Hosting;
using Microsoft.AspNetCore.HttpsPolicy;
using Microsoft.AspNetCore.Mvc;
using Microsoft.AspNetCore.Mvc.Controllers;
using Microsoft.Extensions.Configuration;
using Microsoft.Extensions.DependencyInjection;
using Microsoft.Extensions.Logging;
using Microsoft.Extensions.Options;
using Swashbuckle.AspNetCore.Swagger;
using Swashbuckle.AspNetCore.SwaggerGen;

namespace Test.Web
{
    public class Startup
    {
        public Startup(IConfiguration configuration)
        {
            Configuration = configuration;
        }

        public IConfiguration Configuration { get; }

        // This method gets called by the runtime. Use this method to add services to the container.
        public void ConfigureServices(IServiceCollection services)
        {
            services.AddMvc().SetCompatibilityVersion(CompatibilityVersion.Version_2_1);
            services.AddSwaggerGen(options =>
            {
                options.SwaggerDoc("v1", new Info
                {
                    Version = "v1",
                    Title = "API",
                    Description = "api文档",
                    TermsOfService = "None"
                });
                var basePath = AppContext.BaseDirectory;
                var xmlPath = Path.Combine(basePath, "Test.Web.xml");
                var xmlPathByModel = Path.Combine(basePath, "Test.Model.xml");

                options.IncludeXmlComments(xmlPathByModel);
                //true表示生成控制器描述,包含true的IncludeXmlComments重载应放在最后,或者两句都使用true
                options.IncludeXmlComments(xmlPath,true);
                options.OperationFilter<AddAuthTokenHeaderParameter>();
            });
        }

        // This method gets called by the runtime. Use this method to configure the HTTP request pipeline.
        public void Configure(IApplicationBuilder app, IHostingEnvironment env)
        {
            if (env.IsDevelopment())
            {
                app.UseDeveloperExceptionPage();
            }
            else
            {
                app.UseHsts();
            }

            app.UseHttpsRedirection();
            app.UseMvc();
            app.UseStaticFiles();//启用默认文件夹wwwroot
            app.UseSwagger();
            app.UseSwaggerUI(action =>
            {
                action.ShowExtensions();
                action.SwaggerEndpoint("/swagger/v1/swagger.json", "V1 Docs");
            });
        }
    }
    /// <summary>
    /// 添加Token参数
    /// </summary>
    public class AddAuthTokenHeaderParameter : IOperationFilter
    {
        /// <summary>
        /// 非匿名方法添加Token参数
        /// </summary>
        /// <param name="operation"></param>
        /// <param name="context"></param>
        public void Apply(Operation operation, OperationFilterContext context)
        {
            if (operation.Parameters == null)
            {
                operation.Parameters = new List<IParameter>();
            }
            var attrs = context.ApiDescription.ActionDescriptor.AttributeRouteInfo;

            //先判断是否是匿名访问,
            var descriptor = context.ApiDescription.ActionDescriptor as ControllerActionDescriptor;
            if (descriptor != null)
            {
                var actionAttributes = descriptor.MethodInfo.GetCustomAttributes(inherit: true);
                bool isAnonymous = actionAttributes.Any(a => a is AllowAnonymousAttribute);
                //非匿名的方法,链接中添加accesstoken值
                if (!isAnonymous)
                {
                    operation.Parameters.Add(new NonBodyParameter()
                    {
                        Name = "token",
                        In = "query",//query header body path formData
                        Type = "string",
                        Required = true //是否必选
                    });
                }
            }
        }
    }
}
生成的文档最终效果,点击Try it out 以后会生成一个填写Token的输入框: